Have requested some pricing from Anchor Room for a tint kit for front and rear lenses. Looking to do red rear lights and 20% smoke on everything else (excluding headlights). Trying to see if they can adapt a kit they do rather than having to buy multiple items and get duplicates I won't use.
You are using an out of date browser. It may not display this or other websites correctly.
You should upgrade or use an alternative browser.
You should upgrade or use an alternative browser.
NEARLY 2 YEARS WAITING: New Mustang GT PP is finally mine!
- Thread starter Gibbo
- Start date
More options
Thread starter's postsHave requested some pricing from Anchor Room for a tint kit for front and rear lenses. Looking to do red rear lights and 20% smoke on everything else (excluding headlights). Trying to see if they can adapt a kit they do rather than having to buy multiple items and get duplicates I won't use.
I have a full tint kit, I have only used the rear fog and rear side reflector tints. The rear lights, fogs, headlights blah blah are all still there, if you want it?
You mentioned you had tints for rear lights rather than red? Do you have the front indicator tints? Don't want full headlight but just the indicator ones?
Let me know what you have and I'll price up the bits I need to fill gaps etc. What did you want for what is left?
Let me know what you have and I'll price up the bits I need to fill gaps etc. What did you want for what is left?
You mentioned you had tints for rear lights rather than red? Do you have the front indicator tints? Don't want full headlight but just the indicator ones?
Let me know what you have and I'll price up the bits I need to fill gaps etc. What did you want for what is left?
Tints not red! They are smoked medium tint kit.
Left in kit is:
Headlight tints
foglight tints
front parking/front indicator tints
Rear top brake light tint
Rear reflector tints
Rear light tints
Kit does not seem to just have front headlight indicator tints. If it is of use to you let me know, say £20 posted or something.

Associate
- Joined
- 29 Jun 2004
- Posts
- 2,282
- Location
- Rainham, Kent
Does anyone know what the current waiting time is for these if you place an order ?
Does anyone know what the current waiting time is for these if you place an order ?
3 months to get a build date and another 6 months to get built and delivered from the US.
Autotrader has some but prices are more than the new price.
MW
Tints not red! They are smoked medium tint kit.
Left in kit is:
Headlight tints
foglight tints
front parking/front indicator tints
Rear top brake light tint
Rear reflector tints
Rear light tints
Kit does not seem to just have front headlight indicator tints. If it is of use to you let me know, say £20 posted or something.
Thanks Gibbo but having to order red rear lights, headlight indicators and replacement rear markers means it actually works out cheaper on the deal from anchor room for a full kit as they are replacing bits in their standard kit with the bits I need free of charge rather than $60 on their and £20 on yours. Appreciate the offer and nice price too!
Have you put them up on 6G? I'm sure someone will find a use.
Last edited:
Yes there are two greys:
Magnetic: Dark grey which sparkles in sunlight due to heavy metallic flick in the paint.
Guard: Dark grey that turns almost dark green from certain angles in certain lights.
Which colour is yours?
Hi there
So today was a very early start, the plan was to fit:
FRPP Dampers
Steeda Ultralite linear springs
FRPP toe knuckle bushes
FRPP air-oil seperator
Set car allignment up to my own settings.
So I arrived at XJK Jaguar early morning to crack on, put the Steeda Ultralite springs on the FRPP front dampers which look a little wonkey but was advised by Steeda and others this is indeed correct. The install went quite smoothly for the front being a typical McPherson setup, took around 1hr and with the cars weight on the front the springs/dampers as adviced by Steeda and other users did indeed straighten.
Next we moved onto rear, removing rear dampers is so easy, talking 5 minutes per side, but getting the rear springs out what an absolute nightmare, most of the rear suspension needed to be dismantled and giant pri-bar to give the clearance required to get those springs out, achieving it in my driveway would have bring near impossible. This took at least 2hr.
The FRPP bushes although simple in practice, the original ones were a little stubborn to get out and the new ones always wanted to go in at an angle so took several attempts, so again more time taken because we were being perfectionist and ensuring everything was done carefully and nothing just cowboyed in with force. Eventually it all went together.
Then put the car back together and tighten and torque all bolts to specification with the suspension loaded.
Next stop the allignment, the next nightmare was about to begin.
Ford factory specification is:
Front camber: -1.03
Front total toe: 0.00
Rear camber: -1.50
Rear total toe: +0.23
Ford Racing/Handling specification for circuit / auto X is:
Front camber: -1.55
Front total toe: 0.00
Rear camber: -1.98
Rear total toe: +0.23
As most of you know I've being researching parts for a year and settings so I knew the Ford Racing specification was truly only for track and not ideal for road as a few users had reports using such settings on the road impeded the cars performance, did not improve it.
So I went with following settings:
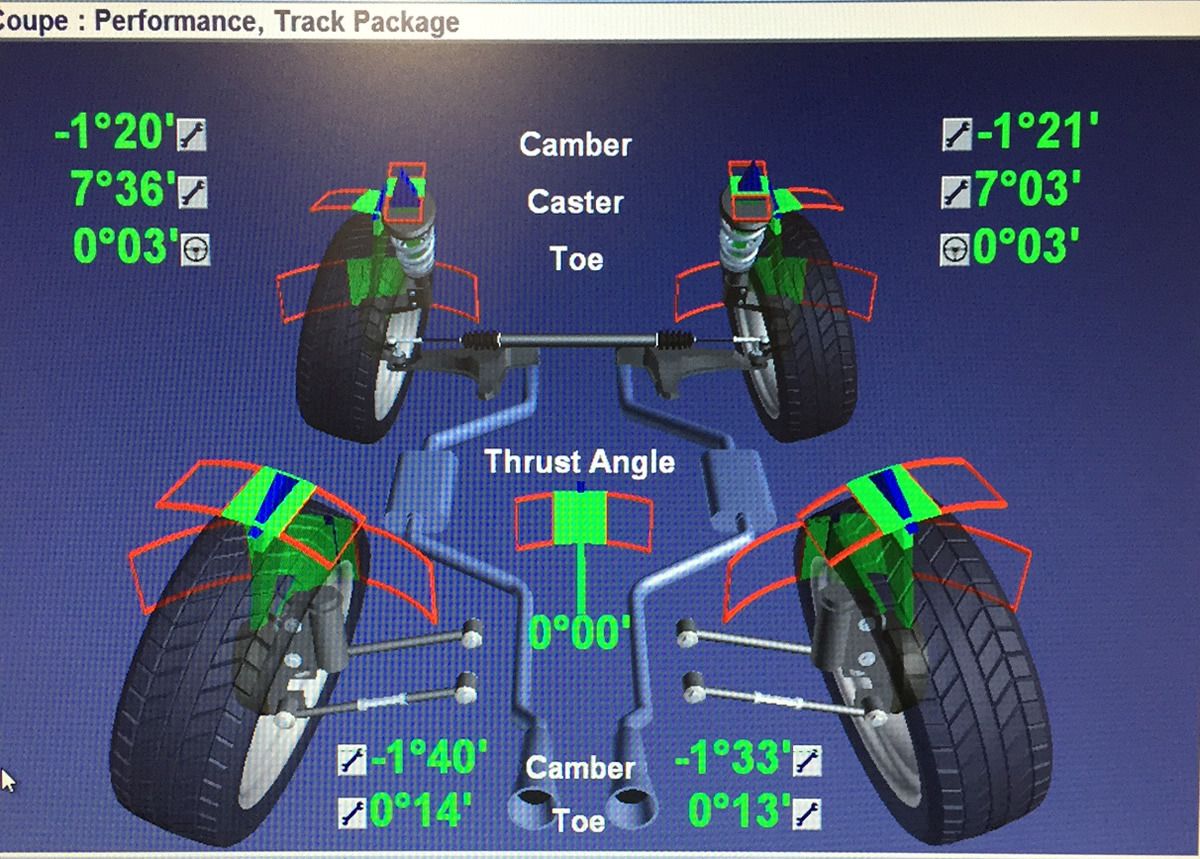
To translate that into American it reads as following:
Gibbo's recommended settings for UK roads:
Front camber: -1.33
Front total toe: +0.05
Rear camber: -1.55to1.65
Rear total toe: +0.26
So a little more aggressive than the Ford Performance Pack settings from the factory, this will give a great balance of wet handling on roads along with good sporty driving in the dry.
Now onto what the stock suspension adjustments offer:
Toe front and rear, you can dial in easily with stock components.
Rear camber: IT IS ADJUSTABLE, once lowered you can get -1.00 upto -2.50, just undo the upper camber arm bolt, it is slotted, and has a good 2-3 degrees of adjustment available.
Front camber: Camber bolts are an absolute must, there is practically zero adjustment available for front camber, so bolts or top mounts an absolute must. I used BMR camber bolts, they work very well and cost £20.
Some pictures from the install, starting with the giant Brembo brakes, my are they a work of art and the calipers for how big they are are so light.

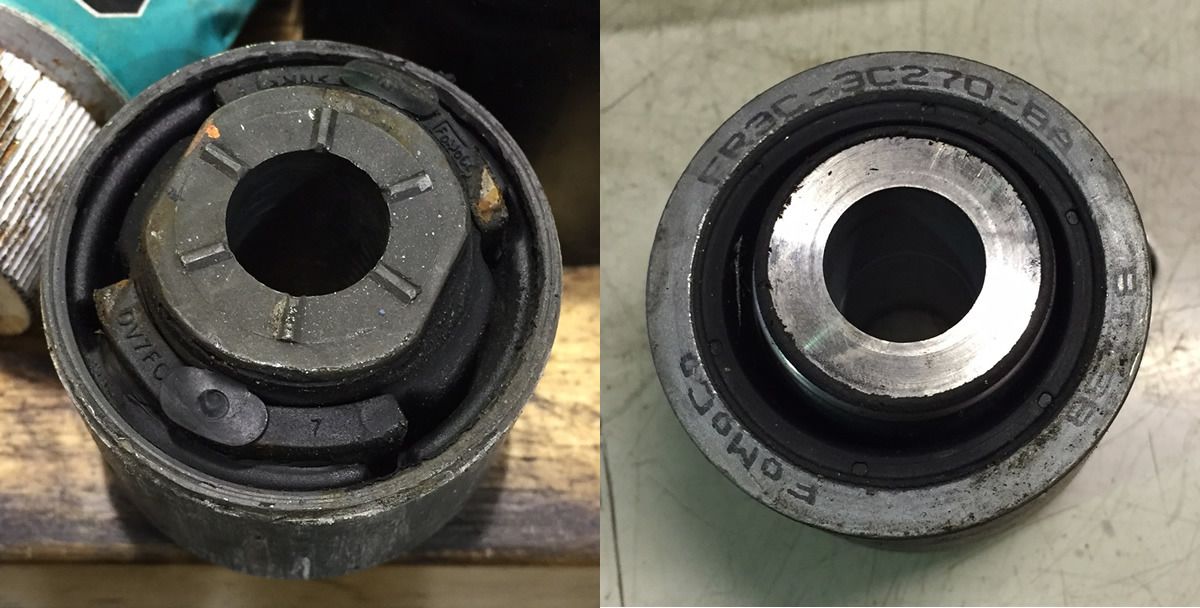
The stock toe knucle bushing on the left and on the right is the FRPP bushing a clear difference and a spherical bearing.
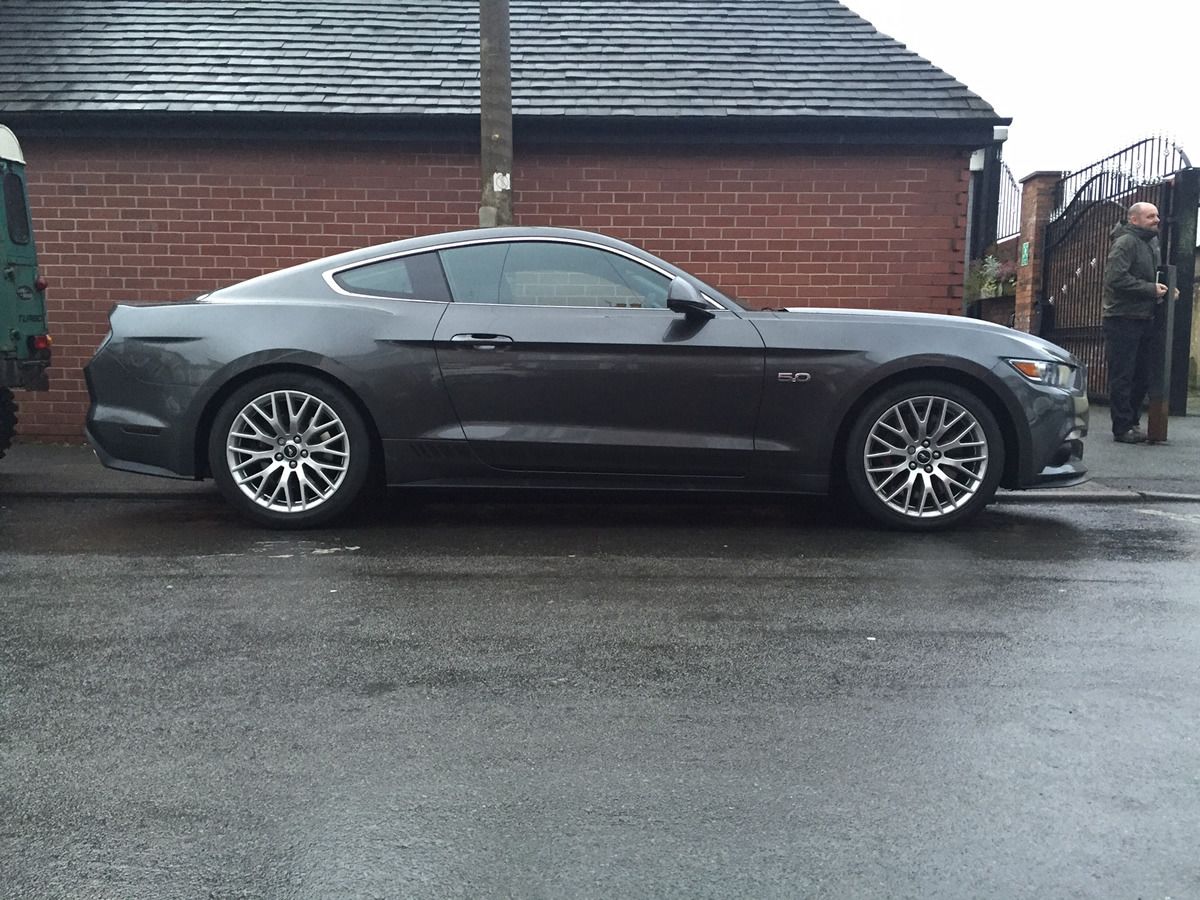
Ride height before we started, with nearly 80-100kg of suspension and tools in the boot:
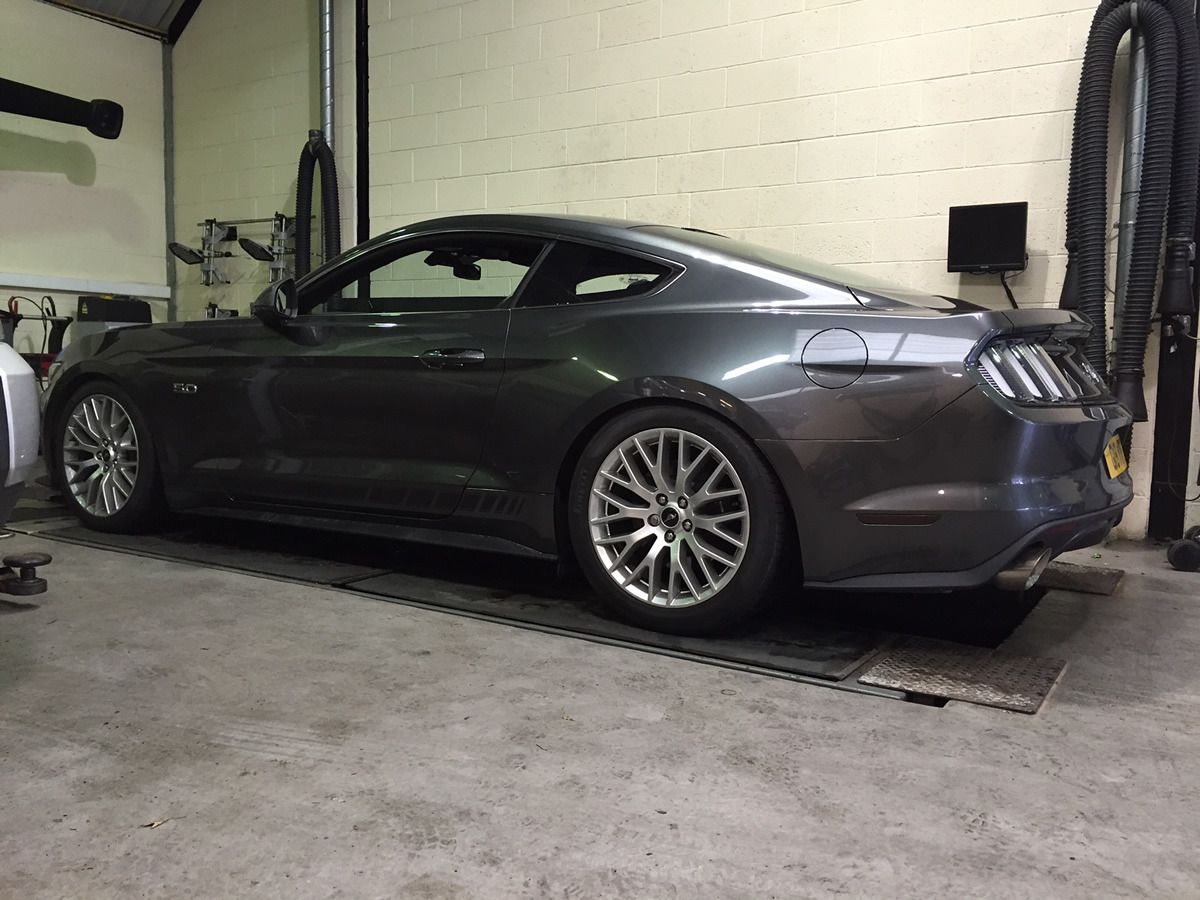
Now the results with no tools/suspension in the boot:
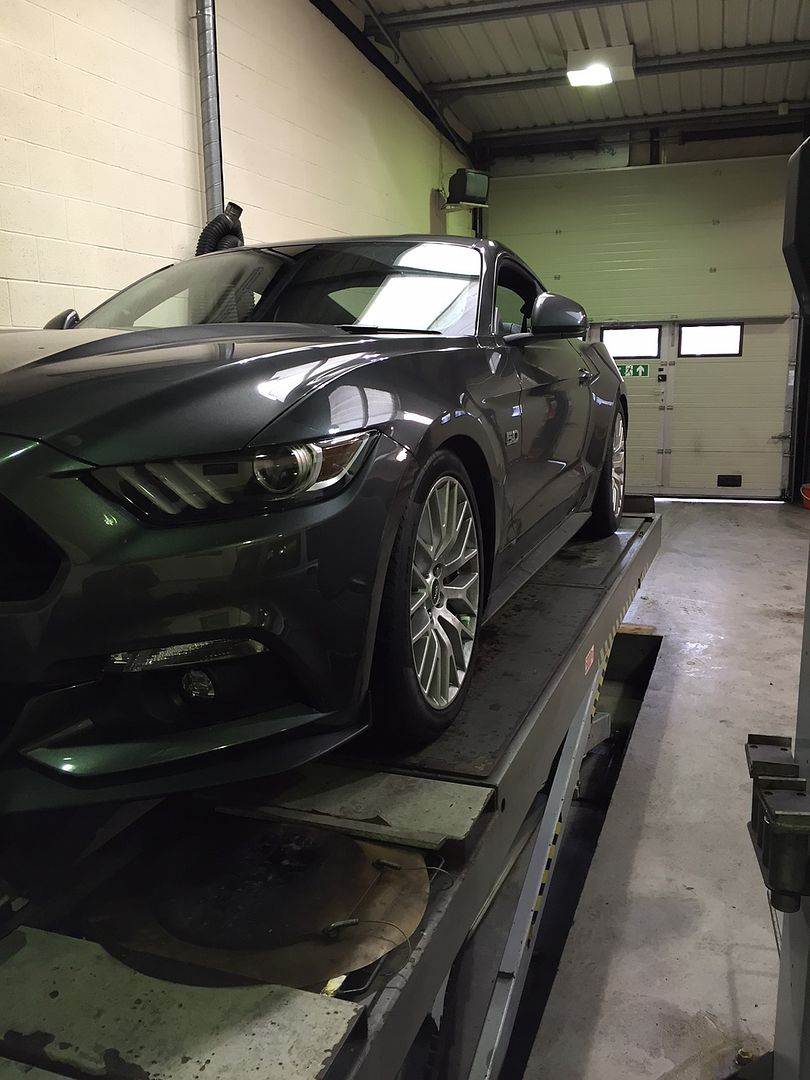
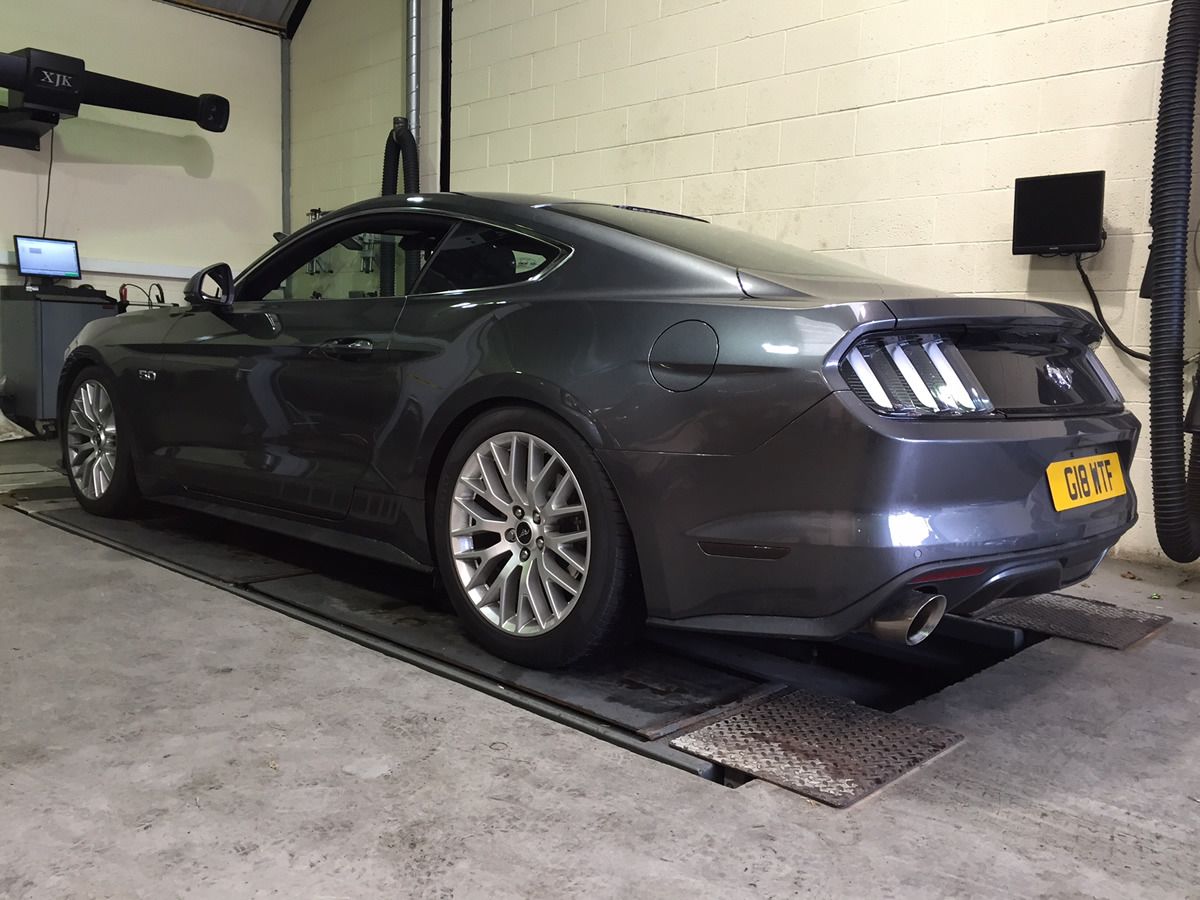
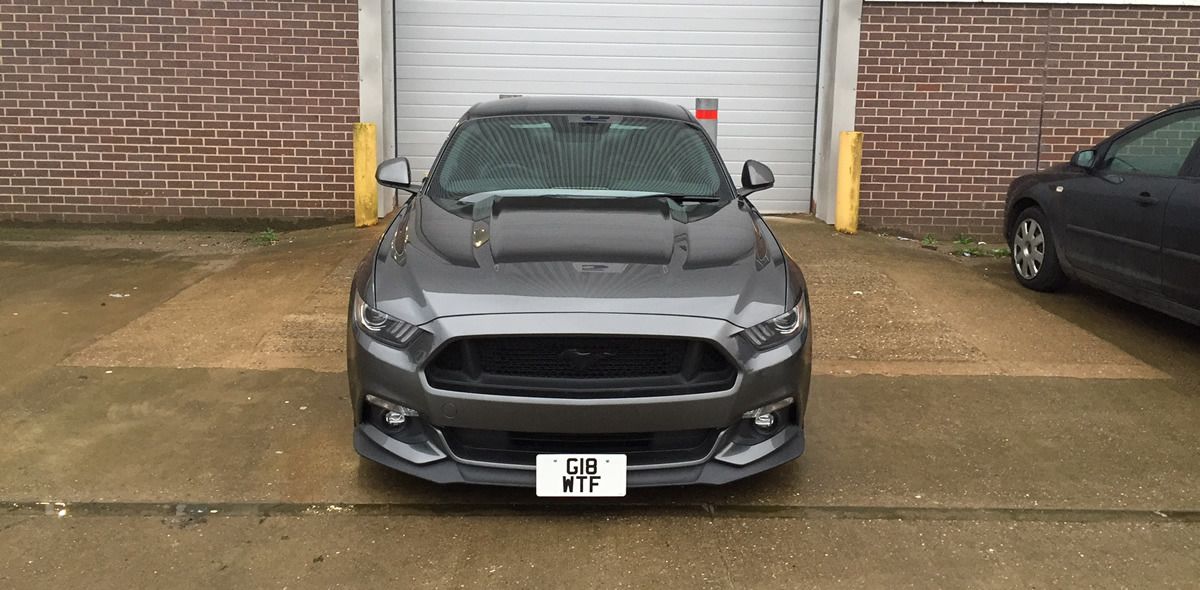
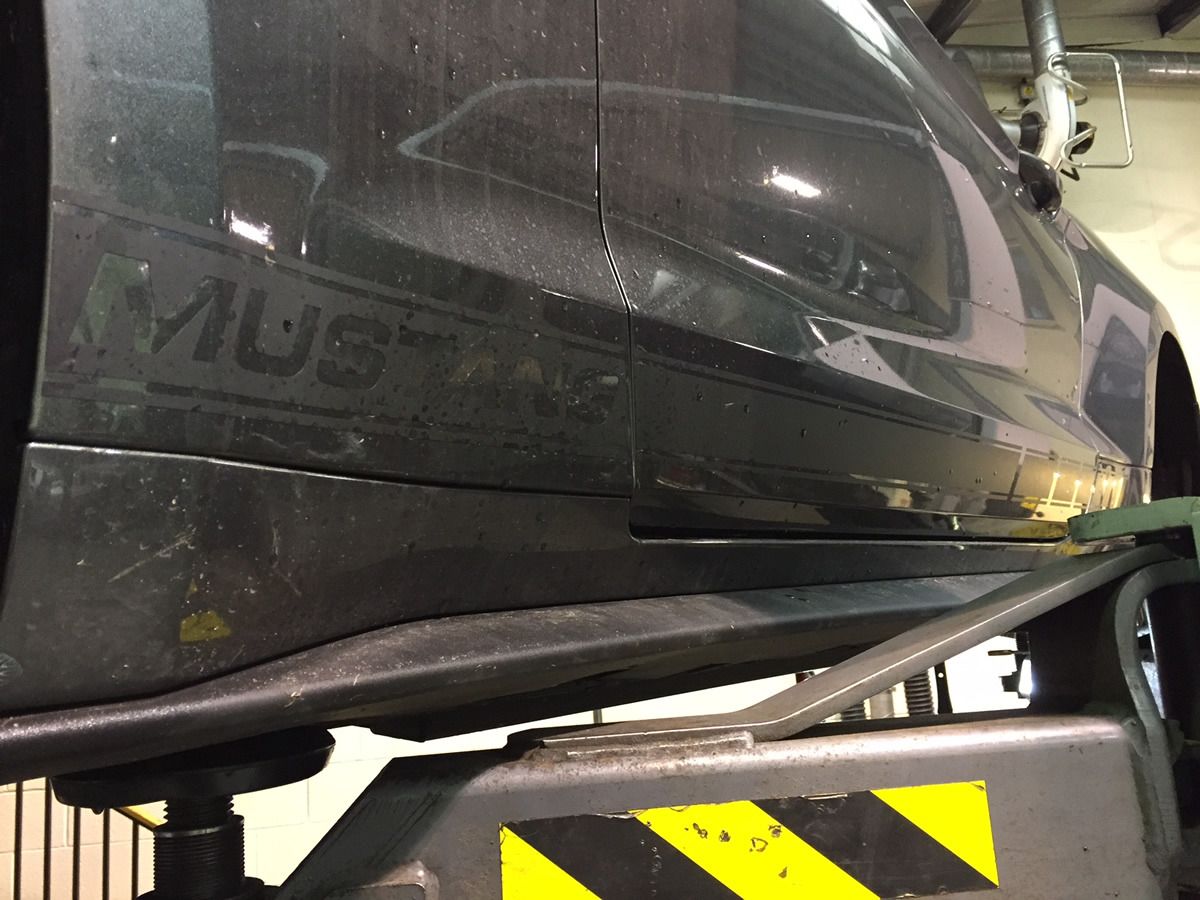
Here is a picture of the decals I fitted, sorry the car is so dirty, but oh well snow, grit and rain with daily usage makes it hard to keep clean always:
I also fitted the FRPP air-oil separator, an incredibly easy install taking about two minutes and looks completely stock because it is an OEM part:
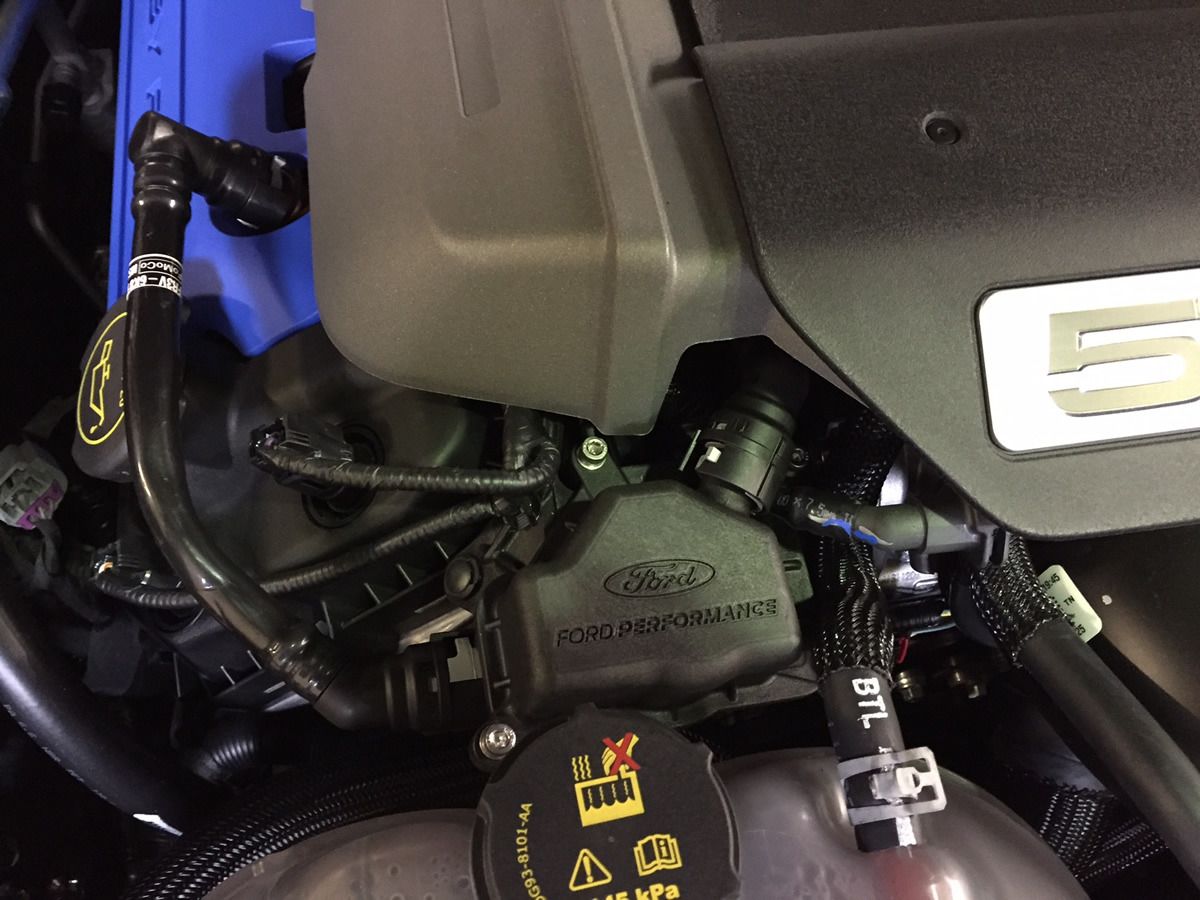
I cannot give you any driving feedback until maybe later or a few days, that will follow!
So what is left?
1. Fit spacers & mud flaps to prevent paint from stone rash.
2. Fit tubular FRPP anti-roll bars.
3. Change colour of wheels to a shade of grey, un-decided.
4. Maybe de-chrome car.
5. POWER!
6. New wheels/tyres once these tyres are shot.
So what I had planned is very nearly completed.
P.S. Car has 6" ground clearance to front splitter.
P.S.1 I trial fitted the 23mm rear spacers, they took the rear of wheels meaning about 1-2mm needs removing from studs, 25mm fit fine.
So today was a very early start, the plan was to fit:
FRPP Dampers
Steeda Ultralite linear springs
FRPP toe knuckle bushes
FRPP air-oil seperator
Set car allignment up to my own settings.
So I arrived at XJK Jaguar early morning to crack on, put the Steeda Ultralite springs on the FRPP front dampers which look a little wonkey but was advised by Steeda and others this is indeed correct. The install went quite smoothly for the front being a typical McPherson setup, took around 1hr and with the cars weight on the front the springs/dampers as adviced by Steeda and other users did indeed straighten.
Next we moved onto rear, removing rear dampers is so easy, talking 5 minutes per side, but getting the rear springs out what an absolute nightmare, most of the rear suspension needed to be dismantled and giant pri-bar to give the clearance required to get those springs out, achieving it in my driveway would have bring near impossible. This took at least 2hr.
The FRPP bushes although simple in practice, the original ones were a little stubborn to get out and the new ones always wanted to go in at an angle so took several attempts, so again more time taken because we were being perfectionist and ensuring everything was done carefully and nothing just cowboyed in with force. Eventually it all went together.
Then put the car back together and tighten and torque all bolts to specification with the suspension loaded.

Next stop the allignment, the next nightmare was about to begin.
Ford factory specification is:
Front camber: -1.03
Front total toe: 0.00
Rear camber: -1.50
Rear total toe: +0.23
Ford Racing/Handling specification for circuit / auto X is:
Front camber: -1.55
Front total toe: 0.00
Rear camber: -1.98
Rear total toe: +0.23
As most of you know I've being researching parts for a year and settings so I knew the Ford Racing specification was truly only for track and not ideal for road as a few users had reports using such settings on the road impeded the cars performance, did not improve it.
So I went with following settings:

To translate that into American it reads as following:
Gibbo's recommended settings for UK roads:
Front camber: -1.33
Front total toe: +0.05
Rear camber: -1.55to1.65
Rear total toe: +0.26
So a little more aggressive than the Ford Performance Pack settings from the factory, this will give a great balance of wet handling on roads along with good sporty driving in the dry.
Now onto what the stock suspension adjustments offer:
Toe front and rear, you can dial in easily with stock components.
Rear camber: IT IS ADJUSTABLE, once lowered you can get -1.00 upto -2.50, just undo the upper camber arm bolt, it is slotted, and has a good 2-3 degrees of adjustment available.
Front camber: Camber bolts are an absolute must, there is practically zero adjustment available for front camber, so bolts or top mounts an absolute must. I used BMR camber bolts, they work very well and cost £20.

Some pictures from the install, starting with the giant Brembo brakes, my are they a work of art and the calipers for how big they are are so light.


The stock toe knucle bushing on the left and on the right is the FRPP bushing a clear difference and a spherical bearing.


Ride height before we started, with nearly 80-100kg of suspension and tools in the boot:

Now the results with no tools/suspension in the boot:


Here is a picture of the decals I fitted, sorry the car is so dirty, but oh well snow, grit and rain with daily usage makes it hard to keep clean always:

I also fitted the FRPP air-oil separator, an incredibly easy install taking about two minutes and looks completely stock because it is an OEM part:

I cannot give you any driving feedback until maybe later or a few days, that will follow!
So what is left?
1. Fit spacers & mud flaps to prevent paint from stone rash.
2. Fit tubular FRPP anti-roll bars.
3. Change colour of wheels to a shade of grey, un-decided.
4. Maybe de-chrome car.
5. POWER!
6. New wheels/tyres once these tyres are shot.
So what I had planned is very nearly completed.

P.S. Car has 6" ground clearance to front splitter.
P.S.1 I trial fitted the 23mm rear spacers, they took the rear of wheels meaning about 1-2mm needs removing from studs, 25mm fit fine.
Soldato
- Joined
- 18 Oct 2002
- Posts
- 2,612
- Location
- Florida/UK
Looks a lot better, will look fantastic once you have the spacers on and the wheels painted.
I should have your mudflaps sometime next week with any luck.
I should have your mudflaps sometime next week with any luck.
Looks a lot better.
Thanks research paid off, the new ride height is exactly what I wanted, there is still an arch gap but its spot on just like what you'd see on a GT3/GT4, any lower would have being too low, aka slammed like this:
FRPP/Steeda with body in boot and park on slope for added effect:
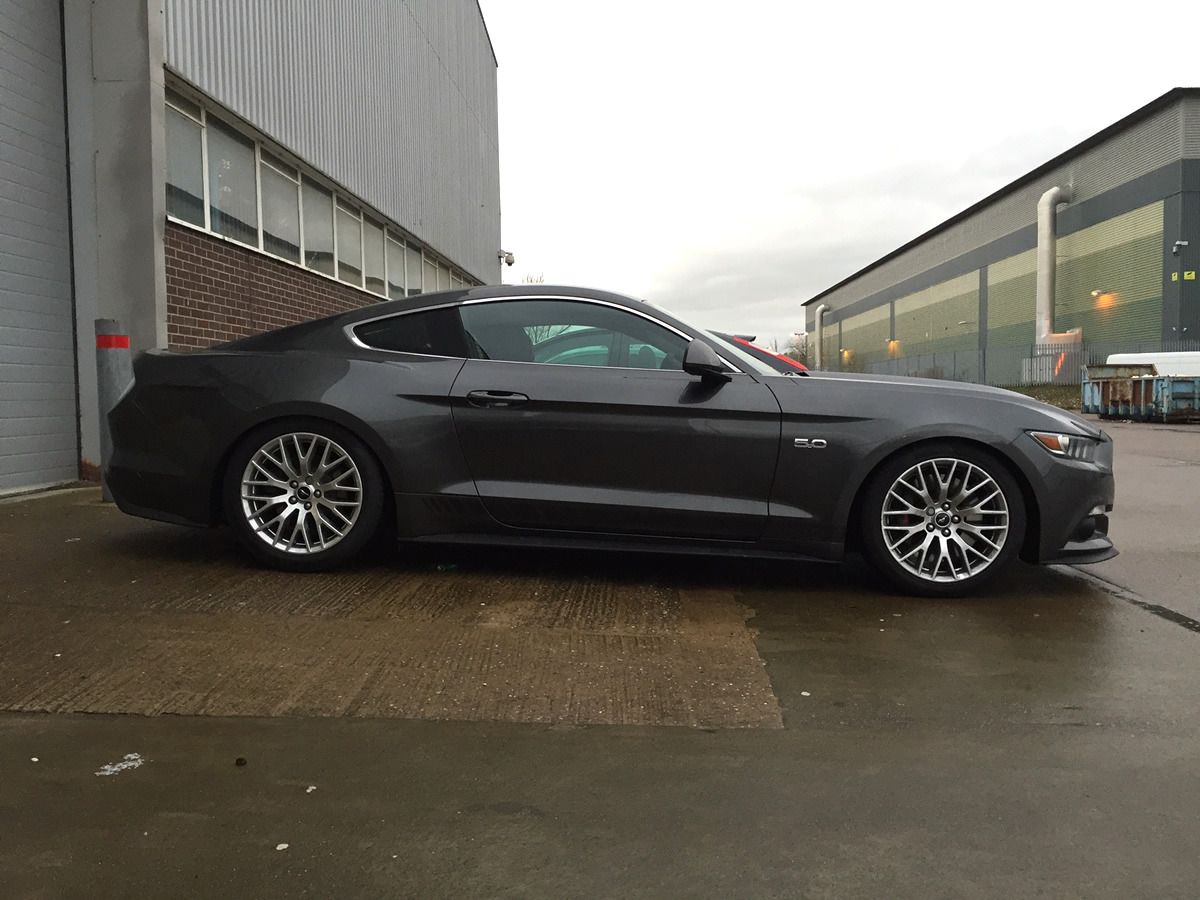
Stock with body in boot:

Just so I don't get arrested tonight there is no body in the boot, I took it out now and the body was a set of 4 dampers, 8 sets of springs, wheel spacers and a couple of tool kits, so very heavy, hence why the rear looks slammed in the two above pictures. With nothing in the boot the ride height looks spot on with a slight gap between tyre and arch.

Again no update on handling, blah blah however the miracle is the car seems to ride better, driving home, admittedly with the weight in the boot what I can notice just driving at normal pace is ride quality/control is better, hitting holes or harsh dips are a tad firmer, broken dual carriage ways and dual carriage ways in general the car rides far better, no bounce/floatyness at all and when braking front-end dive is eliminated.
I am really quite shock how if anything lowering the car has actually improved its comfort, very happy indeed!

When time/weather permits I shall get some better photos taken.
Oh and I recorded when the car was taken for road test, unfortunately he never gave it any so the exhaust volume/tune your hearing is only moderate throttle upto around 3000rpm, but its still loud in a good way.


Looking forward to my drive to work tomorrow without having to worry about destroying my subwoofer or boot, now its all empty. I would go for a drive tonight but I am so tired, sleep is required.

[ui]ICEMAN;29137864 said:Looks a lot better, will look fantastic once you have the spacers on and the wheels painted.
I should have your mudflaps sometime next week with any luck.
Cheers Dave, yep not gonna fit spacers until got mud flaps to prevent paint from any potential stone rash, but no rush, I want to fit anti-roll bars before I mess with spacers.

Soldato
- Joined
- 18 Oct 2002
- Posts
- 2,612
- Location
- Florida/UK
Cheers Dave, yep not gonna fit spacers until got mud flaps to prevent paint from any potential stone rash, but no rush, I want to fit anti-roll bars before I mess with spacers.
Goes to show how different the front ends are between ours though, mine's 5" off the ground on the stock ride height. I'm not sure I'd get away with lowering mine, even if it was possible, with the magnetic dampers.
[ui]ICEMAN;29137885 said:Goes to show how different the front ends are between ours though, mine's 5" off the ground on the stock ride height. I'm not sure I'd get away with lowering mine, even if it was possible, with the magnetic dampers.
Depends where you measure from, if I measure from the actual belly pan that was close to 5" of the ground, be good to know where Ford actually take the measurement from as I shall go measure it and let you know. Of they take it from the splitter which I am guessing they do then that is why as the splitter artificially gives the front-end a look like it is much lower than it is, like a 911 Carrera with aero-kit, as front splitter is so much closer to actual ground.

Looks too low to me. I honestly think it looked better before!
I shall reserve judgement until you have fitted the spacers and painted the wheels, but even then I think it will look too low.
It would be perfect about 1cm higher, with wheels an inch larger in diameter!
I shall reserve judgement until you have fitted the spacers and painted the wheels, but even then I think it will look too low.

It would be perfect about 1cm higher, with wheels an inch larger in diameter!

Last edited:
Soldato
- Joined
- 18 Oct 2002
- Posts
- 2,612
- Location
- Florida/UK
Depends where you measure from, if I measure from the actual belly pan that was close to 5" of the ground, be good to know where Ford actually take the measurement from as I shall go measure it and let you know. Of they take it from the splitter which I am guessing they do then that is why as the splitter artificially gives the front-end a look like it is much lower than it is, like a 911 Carrera with aero-kit, as front splitter is so much closer to actual ground.
Could be, I measured it myself at just under 5" before I fitted the splitter. It doesn't make the 350 any lower actually as the plate is already at the same height. I suspect it's due to the lower hoodline and completely different subframe they put in the front.
It's a shame as I'd love to take about an inch out of the arches but I think it will really compromise the drive, especially with the storm drains we have out here.

