PARVUM LIGHTNING

Associate
Joined
25 Aug 2011
Posts
407
Location
CLASSIFIED
Banner1.6.jpg


Hello OCUK! I'm extremely excited to be starting another personal project, as most of you will know since Chocolate Box I have been collaborating with Parvum Sytems on their rig building exploits. Over that time I've developed a wide array of new techniques and gained a huge insight into how Parvum design and manufacture their cases. Consequently rather than being a descendant of an existing case this will be a scratch build designed specifically to accommodate the hardware being used, while no doubt elegantly incorporating some custom watercooling epicness.


Case - Custom Parvum JR1.0
Motherboard - MSI X99A XPOWER AC
GPU - MSI GTX 780Ti LIGHTNING x4
CPU - Intel Haswell-E i7-5960X
RAM - HyperX Predator 3000MHz 8x4GB
SSD - HyperX Predator M.2 480GB
PSU - Silverstone Strider ST1500-GS x2

GPU Block - EK-FC780 GTX Lightning - Acetal+Nickel x4
CPU Block - EK-Supremacy EVO - Acetal+Nickel
VRM Block - EK-MOSFET MSI X99 XPower - Acetal+Nickel
Pump - EK-XTOP D5 Vario - Acetal (incl. pump) x2
Reservoir - EK-RES X3 250 x2
Radiator - EK-CoolStream XE 480 (Quad) x3
Fittings - EK-HD Adapter 10/12mm - Black x54
Rotaries - EK-AF Angled 90° G1/4 Black x2
Tubing - Shakmods Crystal Clear rigid acrylic
Sleeving - Telios Yellow, Dark Grey and Black
Fan Controller - Aqua Computer Aquaero 6LT
Fans - Noctua iPPC 2000 PWM IP67 NF-A14 x3 and NF-F12 x12


I think the theme has probably been given away by the title at this point so I will leave the specs until a little later in the project. This is something i've been planning for quite a while now, long before I started working at Parvum. After expressing my love for MSI's Lightning series it has quickly snowballed into reality, I suppose we better take a look at what arrived in the mail last week...


As those of your familiar with Lightnings will know the packaging and accessories are on another level to just about every GPU in existence. It's great to see an extended LN2 heatsink for the power circuitry and a slick black SLI bridge although I doubt that I will be needing either of those.


Here comes the main event...


...the classic Lightning Tri-Frozr


But wait, wots that m9's...


...lets take a closer look


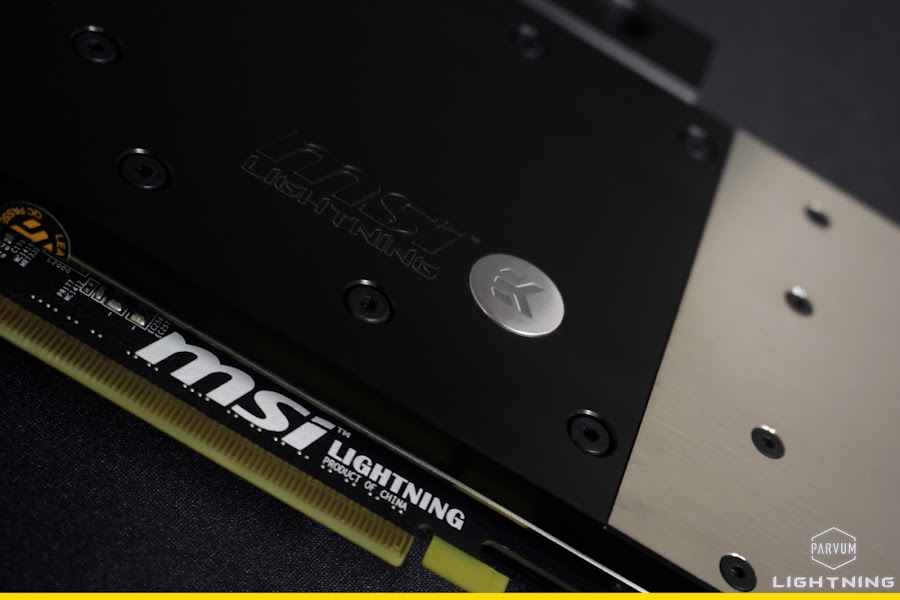
GTX 780Ti LIGHTNING confirmed. One of only 12 engineering samples produced before MSI cancelled their plans to retail the card.


But as they say Lightning doesn't strike twice...


...it hits 4 times!


So much Power circuitry, (14+3)x4.


What else could follow up that monumental show of prowess from MSI, nothing less their flagship overclocking board the X99A XPOWER AC.


Tease much?


The shear amount of accessories was overwhelming, even a pen drive in there somewhere.


I suppose we ought to take a look at the board then.


Should be plenty of PCIe to go around.


MSI's 2011-3 socket, now with added pins.


Black and yellow, black and yellow, black and yellow...


Massive thanks to MSI for making this happen and releasing some of the coolest Lightning cards ever built into the wild, let alone 1/3 of them.

Perhaps its now obvious why I will be designing a case from scratch, as a Parvum of the required magnitude doesn't yet exist. A substantial amount of progress has already been made on that front and i'm looking forward to presenting some renders very soon.

JR
 
Last edited:
Associate
OP
Joined
25 Aug 2011
Posts
407
Location
CLASSIFIED
Thanks for all the comments and subs guys! Case renders incoming shortly.


epic, would have thought a card called lightning would be blue coloured

MSI's Overclocking/Extreme branding has been yellow since Z77/Keplar but these are adorned with many blue LED's among the power circuitry.

So you are going to be ripping off those lovely gpu coolers? Can't wait to see the case that's going to house this lot :D

With the 'reactor' in place on the backplate, which does actually house some voltage stabilization components, even 3 cards won't fit on an X99 board... so much water will have to be the way. All of the coolers and packaging will of course be kept together and treasured in the giant pieces of furniture MSI supply them in.

its a shame OCUK dont have any Yellow SKUs on DDR4 Ram for this build .

the avexir blitz black/yellow would look awesome in this build

I'm sure two banks of Acetal blocked DDR4 with yellow coolant will be a satisfactory compromise :)

JR
 
Associate
OP
Joined
25 Aug 2011
Posts
407
Location
CLASSIFIED
xncLEr04QVXNg5AZOvoXDnXKQw2eqMxii4F3cFw_024Y=w900


Well it's been a long day of refinements and rendering but I can now present the case to be used for PARVUM LIGHTNING, codename 'JR1.0'


While it may seem very similar to the ATX case used for PARVUM KRAIT beyond the initial aesthetic similarities they don't have much in common. This is quite a lot bigger weighing in at 606mm (L) x 540mm (H) x 360mm (W)


The interior has been kept very clean by implementing several techniques tried and tested on SENESCENTIS. The motherboard will be set into the midwall without the use of standoffs and similarly the GPU's will have their IO plate removed entirely.


This ethos continues onto the exterior where through the use of a triple layer rear panel most of the graphics card IO will be hidden and the majority of screws will be covered. Leaving just 4 displayports and the motherboard IO on display.


Seeing as the space is available and the quad Lightnings have potential to be exceptionally power hungry room has been made for two ATX PSU's.


JR1.0 is currently being graced with MSI's OC logo however there are some blank spaces scattered around begging for some inlay details.


To complement the substantial power delivery it's only fitting that the case accommodate some serious cooling hardware. There is room for 3 60mm thick 480mm radiators, 3 140mm intake fans and a pair of D5's.


I've no idea what this blanking plate in the floor is in aid of, you'll have to stay tuned and see ;)


Just to give a sense of scale here is JR1.0 alongside an R1.0, VEER1.0, X1.0 and S2.0.


I think now your all up to speed with where I am at with the case, further refinements will be made as the hardware is finalized but it's nearing it's final form after several iterations and tweaks. Thanks for all of your support so far, I really appreciate all your views and comments at this early stage.

JR
 
Last edited:
Associate
OP
Joined
25 Aug 2011
Posts
407
Location
CLASSIFIED
xncLEr04QVXNg5AZOvoXDnXKQw2eqMxii4F3cFw_024Y=w900


Today i've been busy modelling how the pass through floor panel could work, although as of yet I don't know the exact position of many of the ports, I was just trying to make sure that I could fit in all of the hardware i've been thinking about. A little extra width in the case may well make things easier but it looks like there will be room for dual loops.


Having experimented at Parvum layering up different types of acrylic I was disappointed with the contrast of having frosted clear over black acetal and yellow coolant. It looked rather washed out against the harsh contrast of black and yellow acrylic.

Laying polished clear acrylic over coolant looked phenomenal but was rather too revealing of what else lay beneath. Also the inherent reflections and dust of having an entire polished acrylic floor I just didn't want to think about. So it was time to break out some creativity to retain the harsh black and yellow contrast while adding some showy custom watercooling.


For now at least i'm planning to have two sheets of 10mm clear, the lower with coolant channels and o-ring grooves cut into it and the upper with a positive version of the channel left behind.


These two pieces will be screwed together firmly sandwiching an o-ring to seal the channels. Following that another negative cut from 5mm black acrylic will be inlayed over the top sitting flush with the raised channels.


Finally the fittings can be threaded into the 10mm middle layer of acrylic. This must have enlarged raised ends so the fittings can seal against that rather than the black.


I don't know exactly what style of run i'll make with the coolant however it will most likely be too dense to achieve a straight line between every fitting. That still leaves a lot of options to have varying width channels with 90° or 45° bends, that will have to wait until all of the ports can be accurately positioned.

I really must add some drain ports to the underside too.


Although barely visible in this render that is really what I was aiming for with this part. It isn't a mad crazy water thing screaming for attention and visual hierarchy but just a slick implementation to allow for some very clean tubing to each of the components. There is plenty of time for showing off on imersa's builds :D.


Having said that, when it catches the hypothetical digital light...


JR
 
Last edited:
Associate
OP
Joined
25 Aug 2011
Posts
407
Location
CLASSIFIED
Thanks for all your comments and subs, plenty more updates to come!

Interesting idea to just expose the GPU display ports and attach them to the inner back plate. I can see this being something that will catch on for water-cooled builds. Looking forward to seeing how this turns out.

Even for an air cooled build it would be a lot slicker, hopefully securing all four of the DVI screws on each card it should brace them quite nicely.

Nice design and its good to see it scaled against the other cases. Will you have some form of dust filter for the intakes?

All of the vents will be left open and the case has been designed without a window. Even with dust filters there is always cleaning to be done, may as well just make it easy to keep clean rather than cluttering the aesthetic with filters and windows that will just get dirty ;)

That base is insanely complex, insanely expensive (probably) but insanely cool....!

Are you in fact insane ? :eek:

On a serious note, where do you get or make those rather complex o-ring seals from? Are you making them yourself?

Maaaaaaybe. :eek:

They are just rubber cord, generally 2mm OD cut to length and glued together. The machining is the clever and difficult part. Getting the tolerances right on the grooves.

This is going to be an interesting build but seeing the designs it's also going to look amazing. :)

Just wondering how you would go about getting the acrylic sheets manufactured and fitting them to allow coolant to pass through and to fit G1/4 fittings. :confused:

They will be drawn and cut in just the same way as the case aside the use of much thicker acrylic allowing channels and grooves to be cut into the surface. Adding fittings is surprisingly easy just using the appropriate size holes they can then be tapped out with 1/4" BSP taps to accept fittings. You can get a good insight to the process by taking a look at the recent updates on PARVUM MATE.

Holy crap i got lost half way reading through that update.

Would 100% buy a bottom for my upcoming Parvum case if it was already made to the case specs. Looks amazing.

It would be great to offer such a pass through plate for standard Parvums but there are so many different configurations of hardware and watercooling components it would be impossible to produce a general component that was useful for everyone. Particularly with the growing trend to use rigid tubing. It's a great touch to reserve for the custom projects too ;)

JR
 
Associate
OP
Joined
25 Aug 2011
Posts
407
Location
CLASSIFIED
Thanks for all the comments and subs guys, Keplar FTW!

You are clearly drunk with power at this point. I can't wait to see where it goes from here.

I have ALL OF THE POWER!

RLaSPgm9Mdqloez3Q8NXeYF9iOFkFBEwDECaoozxsLMw=w900


that screw count is amazing :D

Even though I know I am definitely going to be the one tapping all of the holes by hand, I still add MOAR SCREWS!

Sweet baby Jesus.

This is incredible.

Massive respect for you and your design skills dude

Thank you!

For the love of God man, three days and no updates?!!!!

Yep... yep... yep... Your right, blame PARVUM SHEEDY for that! I need to get the rest of the parts list straightened out, that's top priority for the coming week.

JR
 
Associate
OP
Joined
25 Aug 2011
Posts
407
Location
CLASSIFIED
I'd come and sweep the floors at Parvum workshop just to get a sneek peek ;)

Access will only be granted to fangirls who bring Maccy D's

Epic build and design, looking forward to progress.

TY

I have a technical question, because I was thinking about making a Parvum case mod myself.
How did you approach them and are they actually willing to make custom parts?
What sort of documentation you need to give them to get those?

Thanks

ps. It is an awesome build and in my favorite colours too ;)

I just turned up one day and told them I wanted it, guess it helps that I work for Parvum ;)


I see a lot of requests for custom parts and cases come through, quite a lot do get made especially themed cases and adjustments to accommodate specific hardware like radiators or motherboards. As they become more complex and start including techniques that would be used in Parvum's personal projects (like this one) then things become a lot more difficult. And to make them happen realistically we would either need to deal with someone who is extremely competent at measuring and drawing. Or alternatively someone who was willing to send over all of the hardware, but that would be very time consuming for us so it would have to come at a time when we weren't too busy. We are happy to make custom parts though (within the limitations of our equipment) it all depends on if enough information can be exchanged to make something that will realistically work. Making a case to fit X, Y and Z with a layout drawing from paint and some pictures that embrace the theme is fine but that doesn't quite work for dimension critical watercooling parts. Email [email protected] when your at the stage to start something/get quotes or PM JR23/parvumsystems if you want to casually discuss any ideas.

JR
 
Associate
OP
Joined
25 Aug 2011
Posts
407
Location
CLASSIFIED
Banner1.4.jpg


I couldn't be more excited to tell you guys that EKWB are on board with PARVUM LIGHTNING. When i've figured out which door the mail man will be coming to I will set up camp right behind it, awaiting a huge shipment of clean CSQ acetal epicness.

Currently I have a pair of FC-780 LIGHTNING blocks which I found at OCUK and hopefully two more are incoming from a completely 110% legit looking Italian eBay store as they were discontinued by EK. I cannot wait for the next update, if I don't get rinsed by the Italians!

EK_incoming.jpg


JR
 
Associate
OP
Joined
25 Aug 2011
Posts
407
Location
CLASSIFIED
Banner1.4.jpg


Finally I have managed to scrape together 4 GTX780 Lightning blocks! from retailers that I never knew existed in various corners of Europe. ...yes I do know this is only 3, I may have got impatient and installed one already ^_^

61.jpg


Also just a couple of other things from EK.

62.jpg


63.jpg


Quite possibly not enough fittings, because, you can't have enough fittings!

64.jpg


65.jpg


Impatience struck for a second time and I may have unboxed everything without taking any pictures along the way.

66.jpg


...because Acetal.

67.jpg


68.jpg


69.jpg


EK, how did you know, all of my favourites <3

70.jpg


71.jpg


72.jpg


Just because they weren't quite black enough already I also got some cover kits for the D5's to make them extra clean.

73.jpg


74.jpg


75.jpg


76.jpg


I was really torn whether to use a power delivery block on the motherboard or not. On the one hand I wanted it to be as extreme as possible but retaining the XPOWER identity was also really important to me.

77.jpg


Luckily this revision allowed half of the stock heatsink to be refitted. Although it doesn't make contact with any components visually it completes the board for me.

78.jpg


79.jpg


80.jpg


81.jpg


I'm really pleased with how balanced the board looks with the blocks fitted, it will be orientated in the build as it is here inverted. I've consciously kept the EK logo's upside down so the board as a whole looks right. I won't invert every logo in the build, but to me this just seems right.

82.jpg


83.jpg


84.jpg


Huge thanks to EKWB! I can't wait to get all 4 Lightnings blocked up.

JR
 
Last edited:
Associate
OP
Joined
25 Aug 2011
Posts
407
Location
CLASSIFIED
Banner1.5.jpg


It's awesome to have Noctua on board with Parvum Lightning, their logo looks right at home on the banner. Since experiencing the iPPC on project Chocolate Box I have been totally in love with their no-compromise way of doing things. I can't wait!

The time has come for the Lightnings to part ways with their Tri-Frozr coolers, i've finally found 4 blocks from far away corners of the world... Italy, Germany and Stoke-o.. Newcastle-under-Lyme. :p I was impatient and already blocked one card which is just as well as they are enormous.

85.jpg


86.jpg


87.jpg


88.jpg


89.jpg


With them all stripped back it's time to reflect on the epicness of a GK110-425-B1 on a Lightning PCB.

90.jpg


91.jpg


92.jpg


93.jpg


Each of the backplates had to have the holes opened out to fit EK's larger 3mm screws, I had contemplated switching backplates, they aren't as clean looking as I would typically like. However the Lightning identity was something that can't be taken away, the blue LED's scattered through the power delivery are an awesome touch. I can't wait to see how they illuminate between each block, especially as they are right over the nickel plate.

94.jpg


95.jpg


Now there are four again, all dat power!

96.jpg


97.jpg


Hey XPOWER, I see you down there.

98.jpg


99.jpg


100.jpg


101.jpg


102.jpg


103.jpg


Suddenly the motherboard doesn't look very significant in magnitude!

104.jpg


105.jpg


106.jpg


107.jpg


108.jpg


Loved this update, there is something crazy and overkill about Quad-SLI that can't be equaled. Seeing all of the EK parts married together in such proximity is phenomenal, their fittings really stand out being consistent in diameter and knurling across the entire selection I have.

Just a few more parts to find and it will be time to make progress on the case :)

JR
 
Associate
OP
Joined
25 Aug 2011
Posts
407
Location
CLASSIFIED
Looking great. On the CPU and pump tops is that 20mm M-F and 8mm M-F extenders up to the 90 degree?

So in the CPU block it's a 20mm M-F then a 90° rotary and then finally a push-in 10/12mm fitting. The knurling on all of the parts is identical and they are all the same OD. EKWB fittings are unparalleled IMO, no other range looks so consistent and sleek. I have a selection of extenders and plan to space out each run as required so they can drop straight down to a pass through plate in the floor.

Nice update, loving the cards and water blocks :)

Wow those cards look immense!

This looks great can see a lot of thought has gone into it! Can't wait to see it progress subbed

Thanks guys! Not long until the case design is finalised, I just need to hunt down a few more parts :)

JR
 
Last edited:
Associate
OP
Joined
25 Aug 2011
Posts
407
Location
CLASSIFIED
Banner1.6.jpg


I don't think this update is going to need many words, some hardware just speaks for itself!

1.jpg


2.jpg


3.jpg


4.jpg


5.jpg


Come on, you didn't think there was just one F12 now did you :p

6.jpg


7.jpg


8.jpg


9.jpg


10.jpg


11.jpg


Some matching iPPC's that are just a little bigger and a little more airflow orientated too...

12.jpg


13.jpg


14.jpg


15.jpg


16.jpg


17.jpg


18.jpg


19.jpg


20.jpg


21.jpg


22.jpg


24.jpg


23.jpg


Huge thanks to Noctua for making this update so epic! I know their support is rather uncommon for a project of this nature, which makes it even more special. I'm sure a few of you are already thinking that yellow and brown, might not be the best combination of colours, well me too. Despite my love of Noctua brown this will be addressed, you'll just have to stay tuned!

JR
 
Associate
OP
Joined
25 Aug 2011
Posts
407
Location
CLASSIFIED
Wut up j-dawg :):p
I'd disagree, I think the hint of brown from the fans will give it a sense of individuality. Black and yellow can be garish, whereas the brown will help balance it out.

Install the fans and post some pics.

Black and yellow is definitely too harsh but seeing brown against gloss yellow isn't the most forgiving sight either. I intend to use a dark grey to break up the black and yellow, both in the case and the sleeving. I have some smoked frosted grey acrylic waiting to be used on this and a huge piece of opaque yellow should be on the way shortly.

The case design is still being finalized, I need to make some further measurements of the motherboard with the active MOSFET backplate fitted and get the radiators sorted!

This is going to be epic! I hope you can deliver. I love Yellow and Black mmmm

Just like black and brown it's a little offensive and forces an opinion which is always good. I'm sure that it will all come through just epicly, I have a re-assuring amount of parts now, just the struggle for a CPU remains, 5960X y u so expensive!

I have always wondered at the choice of brown by Noctua, I guess it makes them stand out in a build, but how many people discount them in the first place due to cosmetics despite their reputed performance...

Well, that's a heck of a lot of corners to paint if that's the plan lol Good luck with that ;) look forward to seeing the end results!

You definitely have to experience the brown and learn to love it, not many products can carry off an offensive colour and put it across so exquisitely. It will almost certainly never be imitated and seeing it against black and grey is phenomenal. Yellow not so much! After so many years of standing by it they know it isn't the most popular choice but i'm sure it will continue to be present in their branding for a long time! iPPC and REDUX make a refreshing change, still maintaining that unique contrast it's a nice step forwards.

JR
 
Associate
OP
Joined
25 Aug 2011
Posts
407
Location
CLASSIFIED
On a sidenote, do the EK predator AIO's fit the Parvum 2.0?

I've only installed one in an inverted S2.0 personally so far and it fitted beautifully. We actually made a roof for a customer so they could fit it neatly into a VEER1.0 last week with a hole for the reservoir fillport allowing them to easily fit another radiator and GPU block and bleed the loop. It worked really well and we are looking at making it a standard replacement part for the VEER1.0 and possibly the S2.0 also.

JR
 
Last edited:
Associate
OP
Joined
25 Aug 2011
Posts
407
Location
CLASSIFIED
Banner1.6.jpg


Another piece of the enourmous E-ATX puzzle that is Lightning arrived this week and oh boy does it fit in with the uncompromised overkill ethos that has been going on so far. POWER!

1.jpg


2.jpg


MOAR POWER!

3.jpg


Yep, you saw that right, 3000 watts of Strider.

4.jpg


5.jpg


I was quite surprised to see a cheeky little 140mm fan filter which actually might come in handy for daily use.

6.jpg


This is how you know when some serious current is being discussed, C19 FTW!

7.jpg


8.jpg


Hmmmm..... Silverstone pinout <3

9.jpg


10.jpg


I was also shocked to see they didn't have the traditional black Strider paint, instead a far more textured durable anthracite. The feels are epic. It's also pretty small for a 1500W PSU, Silverstone must have learned a lot from their mighty SFX endeavors.

11.jpg


12.jpg


Neat little covers too, this thing was just littered with lovely and yet very practical surprises.

13.jpg


14.jpg


15.jpg


Should be enough connectors. I can't wait to populate ALL of the PCIe blocks.

16.jpg


17.jpg


18.jpg


Big thanks to Silverstone Technology for providing these epic new Striders and keeping the overkill train rolling!

I'm sorry if you feel like this has been yet another unboxing post, but when the hardware is this awesome I can't help it! Digital work will be finalized very soon once i've decided on which 480mm radiators I will be using. And after that cutting will start, I just wanted everything to hand so no space is wasted in the final revision of the case and everything can flow together neatly. Although the monstrous difference in size and shear number of components may make it appear otherwise i'm actually taking a very similar approach to Chocolate Box. There is a full sheet of 5mm yellow and a small piece of 3mm frosted slate grey perspex standing by at Parvum HQ, once i'm ready the custom fun and games will begin.

JR
 
Associate
OP
Joined
25 Aug 2011
Posts
407
Location
CLASSIFIED
Any updates?

Lots of updates inbound! The black and grey panels for the case have been cut and a few more parts have arrived, it will be completed for insomnia 56 so progress will be rapid now. I'm taking a few more pictures right now and should have an update ready tomorrow.

JR
 
Associate
OP
Joined
25 Aug 2011
Posts
407
Location
CLASSIFIED
Banner1.6.jpg


After several days of finalizing the 3d models now most of the parts are here it was time to start cutting the case!

1.jpg


Whats this? :p

2.jpg


You really can't have enough drain ports...

3.jpg


...or a big enough window.

4.jpg


5.jpg


We got very close to losing the edge of a panel trying to squeeze this huge irregular case onto a sheet of black.

6.jpg


No idea what this was about.

7.jpg


Aquaero mounting in the midwall taking shape.

8.jpg


9.jpg


Much power, much Lightning!

10.jpg


11.jpg


I guess it's difficult to tell, even if the photographs were in full colour that this is a frosted grey sheet, kinda like the Shade 19 of acrylic. Also trying out countersunk everything for the first time including all of the PSU mountings and rather unorthodox GPU mounting interface.

12.jpg


That's all of the acrylic cutting we found time for and we're now waiting on the 5mm yellow to arrive, luckily in the mean time some lovely toys arrived for me to play with!

13.jpg


14.jpg


I've been excited for a long time to get my hands on an M.2, the prospect of RAID0 speeds with no wires or extra things to mount is insane and thankfully we no longer have to suffer green PCB's.

15.jpg


16.jpg


17.jpg


No idea what these tiny chips do but they sure look like they mean business and the size really is astounding.

18.jpg


19.jpg


20.jpg


21.jpg


22.jpg


23.jpg


24.jpg


Very happy with how it looks on the board and I can't wait to see how it performs even though it will most likely be held back by the PCIe lanes. According to the motherboard manual the cards will be able to run at PCIe3.0 x16, x8, x8, x8 while the M.2 still has PCIe2.0 x2 directly from the chipset, which should still make it a decent amount faster than SATA III.

JR
 
Associate
OP
Joined
25 Aug 2011
Posts
407
Location
CLASSIFIED
Banner1.6.jpg


Just a baby update with some more kit from EKWB. Three of their recent CoolStream XE radiators, i've noticed them dominating a fair few performance charts and they certainly look the part too.

1.jpg


Quad rad for quad SLI, that's a thing right? Just incase it's not a thing the 4 Lightnings will have two XE 480's in their loop.

2.jpg


3.jpg


4.jpg


Loving a little more of the new packaging and definitely the detailing on the rads. The paint finish is more durable than i've seen on other CoolStreams, handling them without gloves is now a possibility, excellent.

5.jpg


6.jpg


7.jpg


I thought I would try the F12's on for size... 16 screws later....

8.jpg


Popped one on without the corners just for comparison too, still smart but a little incomplete without them, don't fear Noctua have a solution for this compromise between brown and acoustic performance and it's inbound!

9.jpg


10.jpg


Still a great classy look, if it wasn't for a yellow build I would be ecstatically pleased with that!

11.jpg


Tomorrow i'm going back to Parvum HQ to finish the rest of the case and collect another HyperX filled package! Can't wait to start putting this together.

JR
 
Associate
OP
Joined
25 Aug 2011
Posts
407
Location
CLASSIFIED
Banner1.6.jpg


Hey guys, something a little different in the form of a video update, rather than another series of machining pictures I decided to get some footage while the CNC was doing it's thing in Parvum HQ! My friend kindly edited them into an epic montage along with some pictures from the next update.


Right now I am flat out working on this project and as insomnia is so close (10th Dec) it's unlikely I will be making any big picture based updates until the weekend. So far all is going well despite running out of fittings and the immense amount of sleeving to get done.

JR
 
Back
Top Bottom