Project: Aquasidian (Corsair 800D)

  • Thread starter Thread starter Nem
  • Start date Start date
Looks great!

Only thing I noticed is that your graphics card seems quite bent down on the right hand side. This could be the full heatsink cover or the cables pulling it down.

It's the weight of the gpu block indeed. The cables are pretty loose actually, just the braiding making them look stiff.

I've got a thin metal rod I'm going to spray black and then use to prop the card up from where the power connectors fit to the card to solve the problem. Same time I'm going to spray the dvd drive cases black so they fit the theme when viewed from the case window.
 
Quick update... Good news and bad :(

I've now replaced:

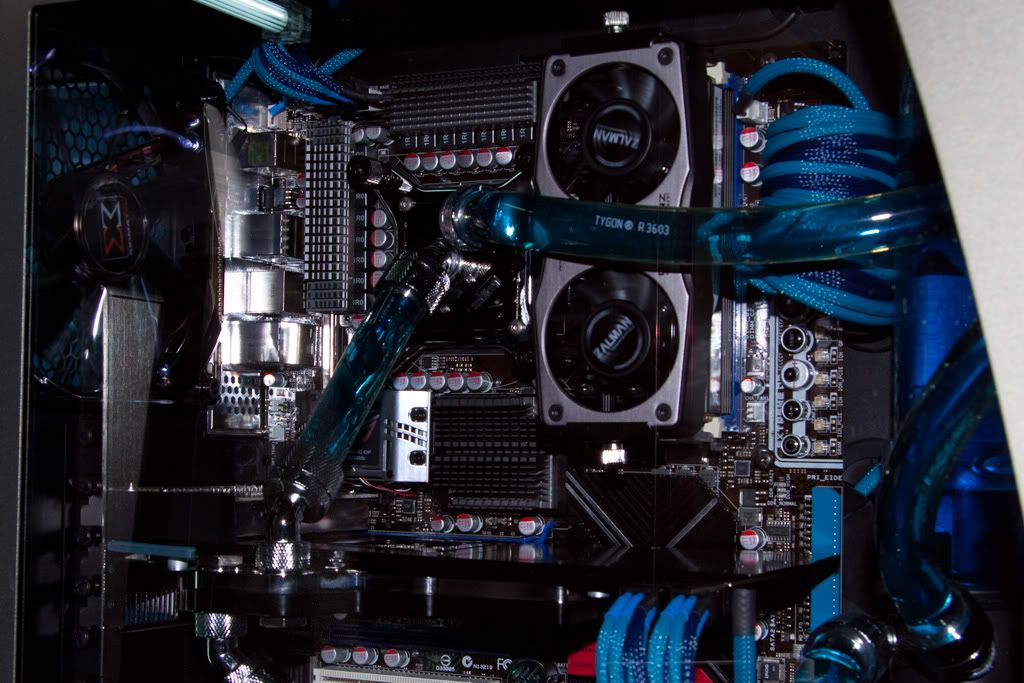
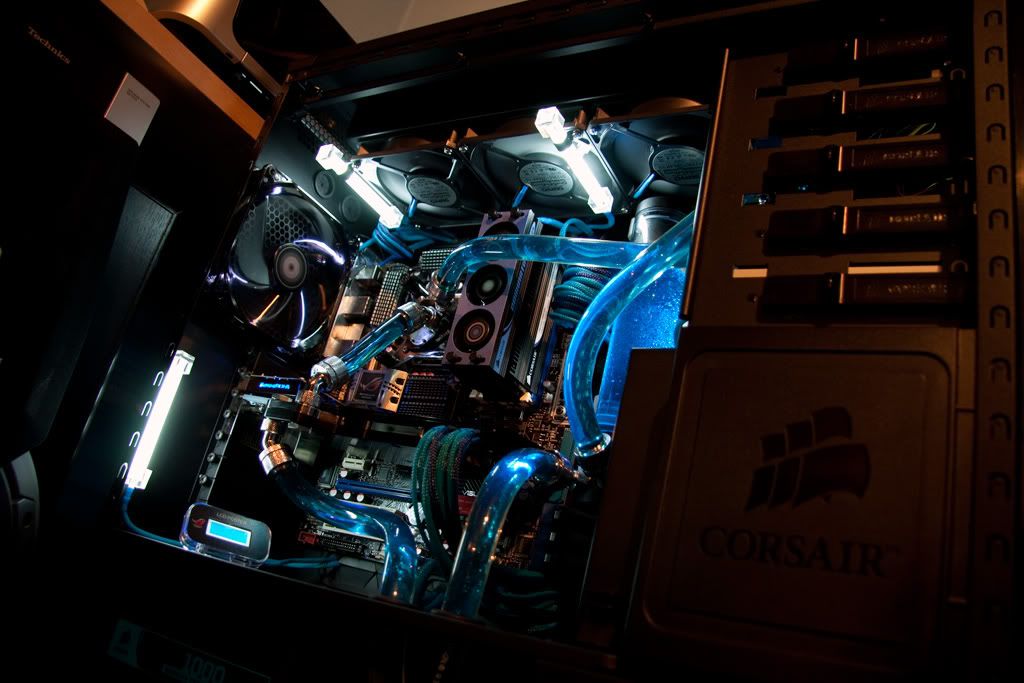
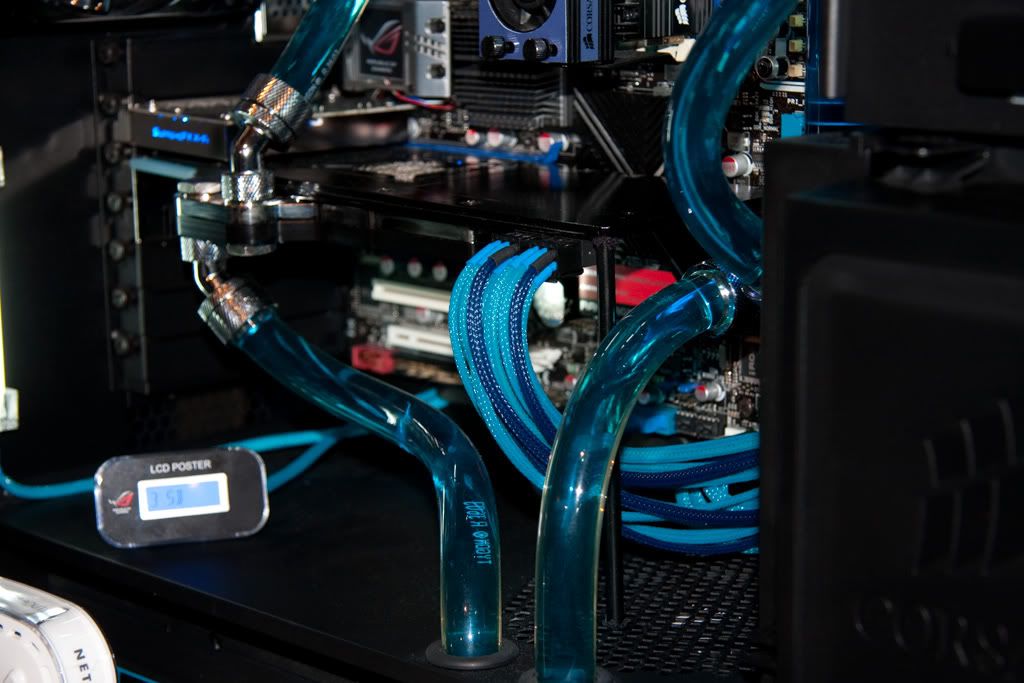
The 3 fans on the radiator from the 1200RPM Skythe Kaze Juni to the 1850RPM Skythe Gentle Typhoons. Also replaced the stock 140mm Corsair rear case fan for a Xigmatek Black smoke one with white LED's. I've now changed the direction of the airflow also, so it's now pulling air in through the radiator and out through the case rear.

Changed the Swiftech GTZ cpu block with the newer Swiftech XT, and also gone for the Arctic Cooling MX3 paste over the Arctic Ceramique

The combined effect is about an 8 degree reduction in temps at load and about 6 degree reduction at idle!

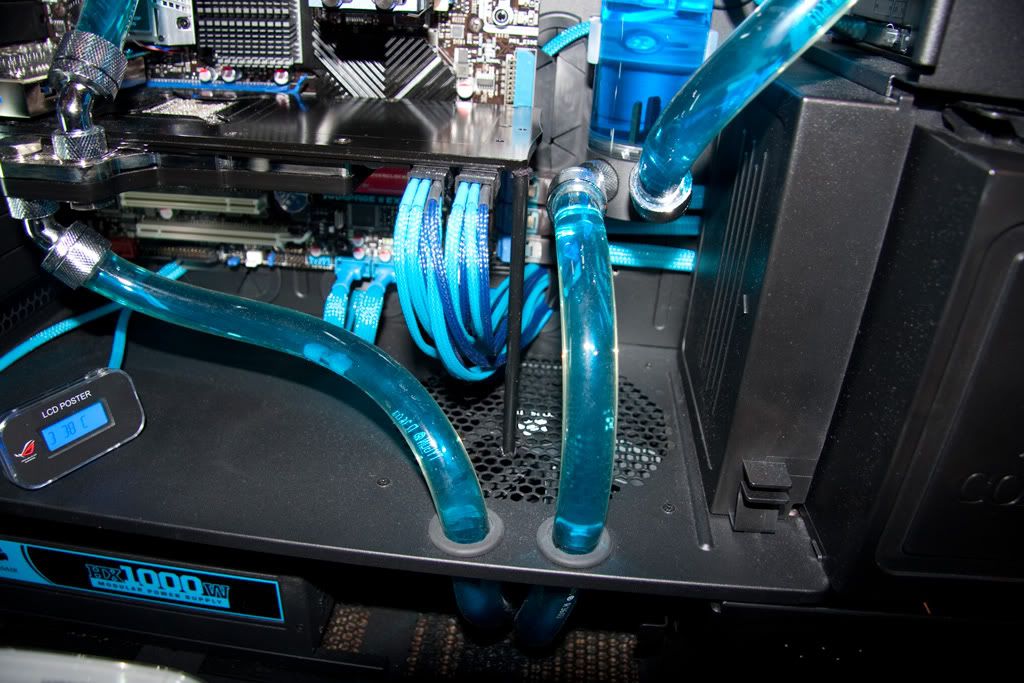
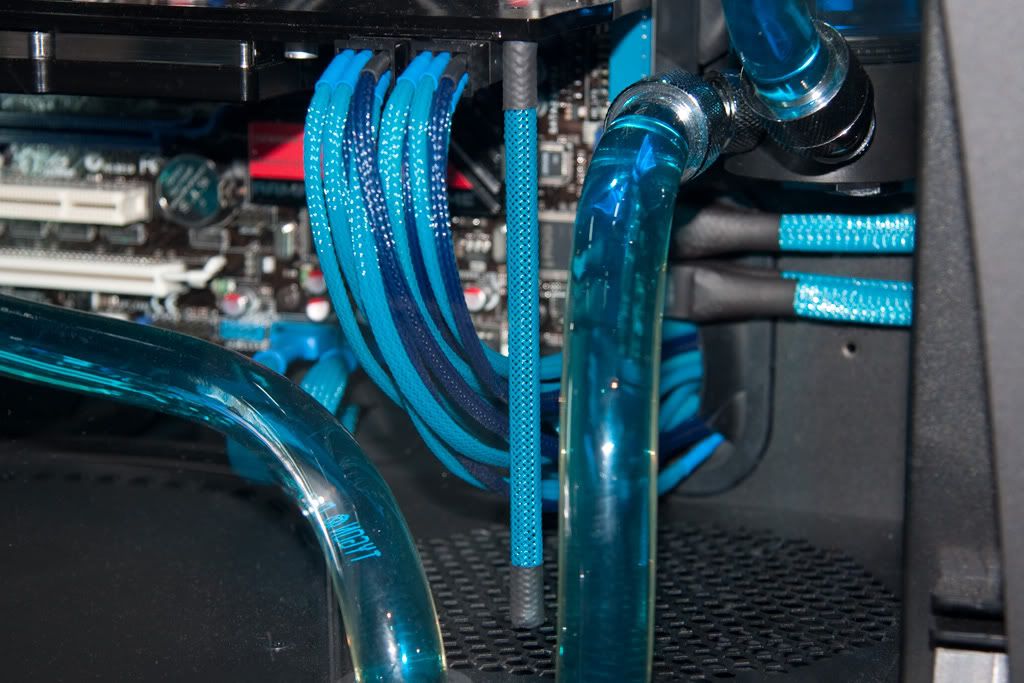
I've also replaced the pipe from the gfx to cpu block, as it was a little bit streatched and I didn't want it easing out of the compression fittings over time. Also chopped about 3cm off the pipe from the cpu up to the radiator to make it more level looking rather than dipping down.

Have cable sleeved all of the new fans, and re-sleeved the cable from the ram cooler as it's all in sight now being plugged into on of the motherboard headders.

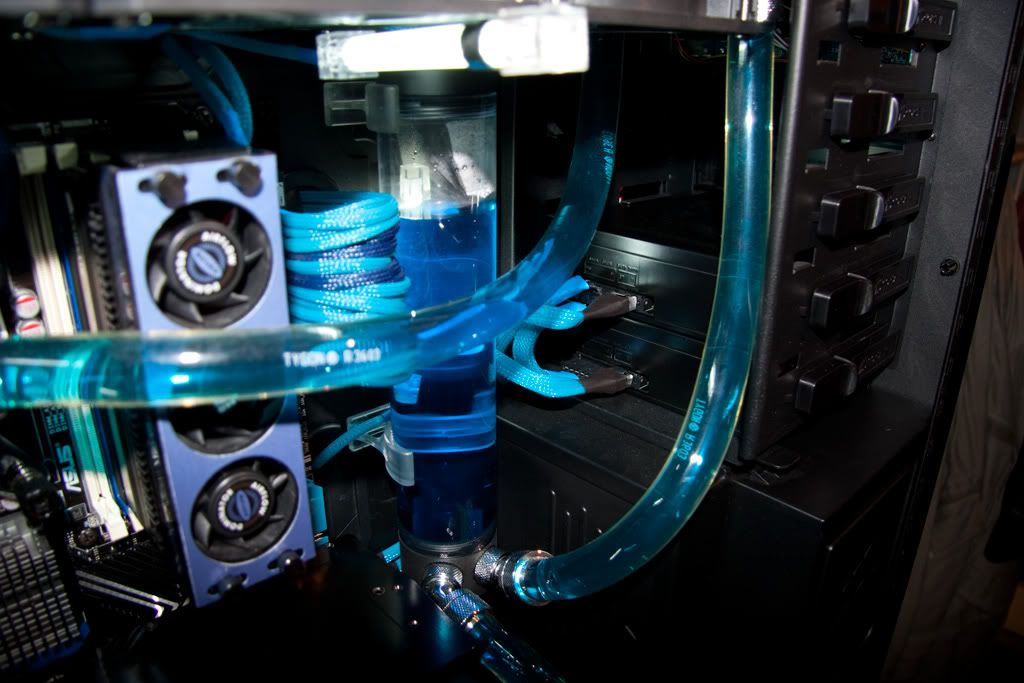
Have replaced the resevour mounts for some new minimal size frosted effect ones after snapping the original ones, and the black ones I bought last week were far too big and bulky.

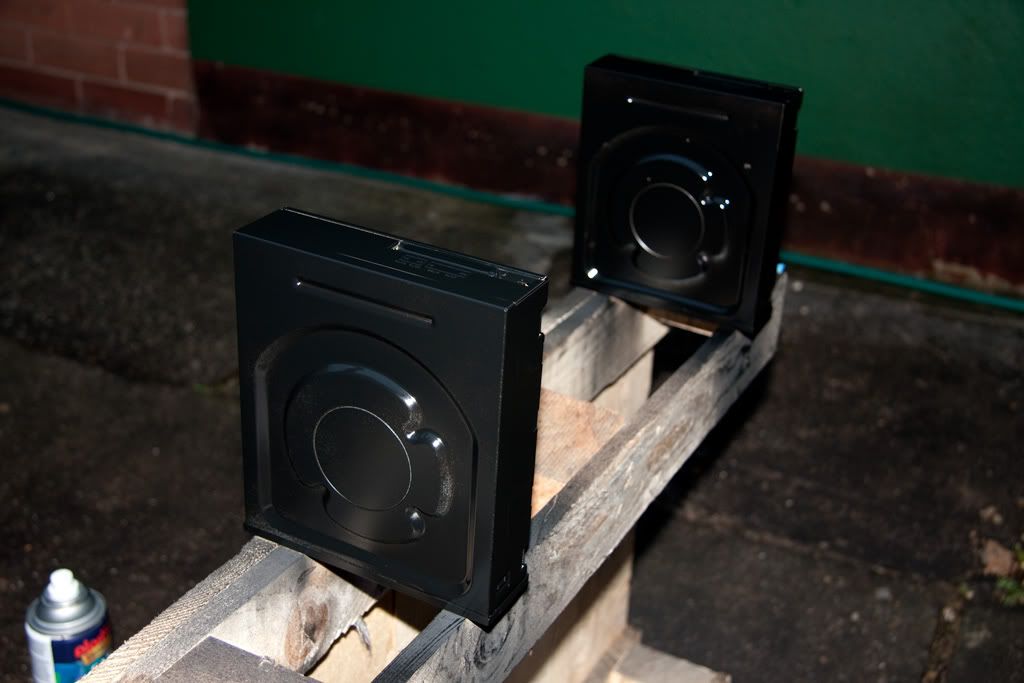
I've got the black spray paint sat ready for the dvd drive casing, and a small support rod for the gfx card which are the last bits to finish off now before some final pictures I think.

But...

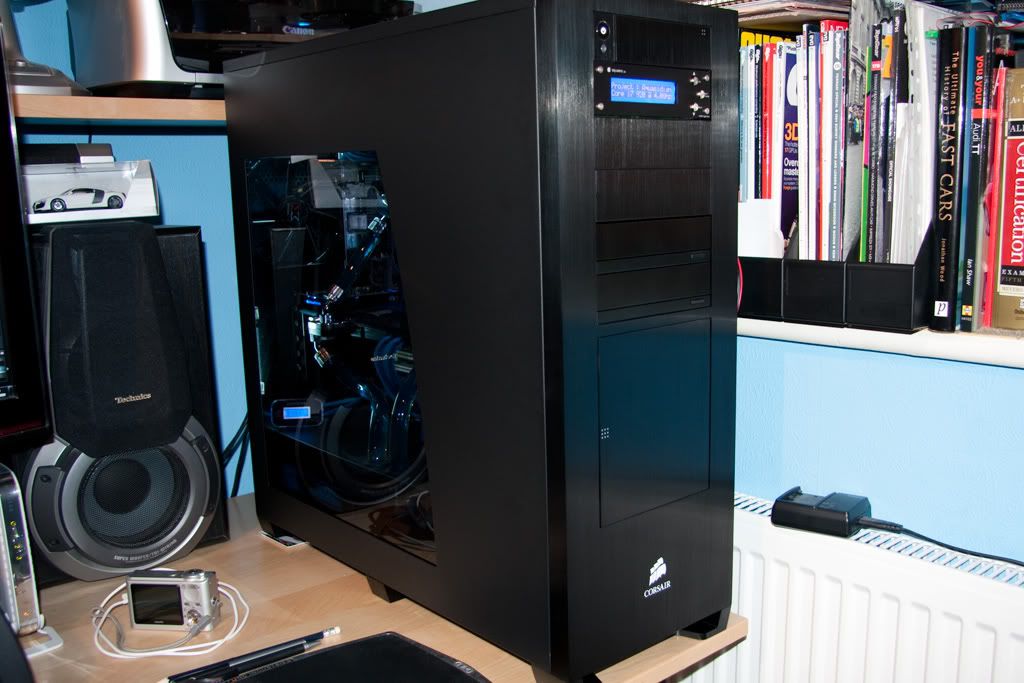
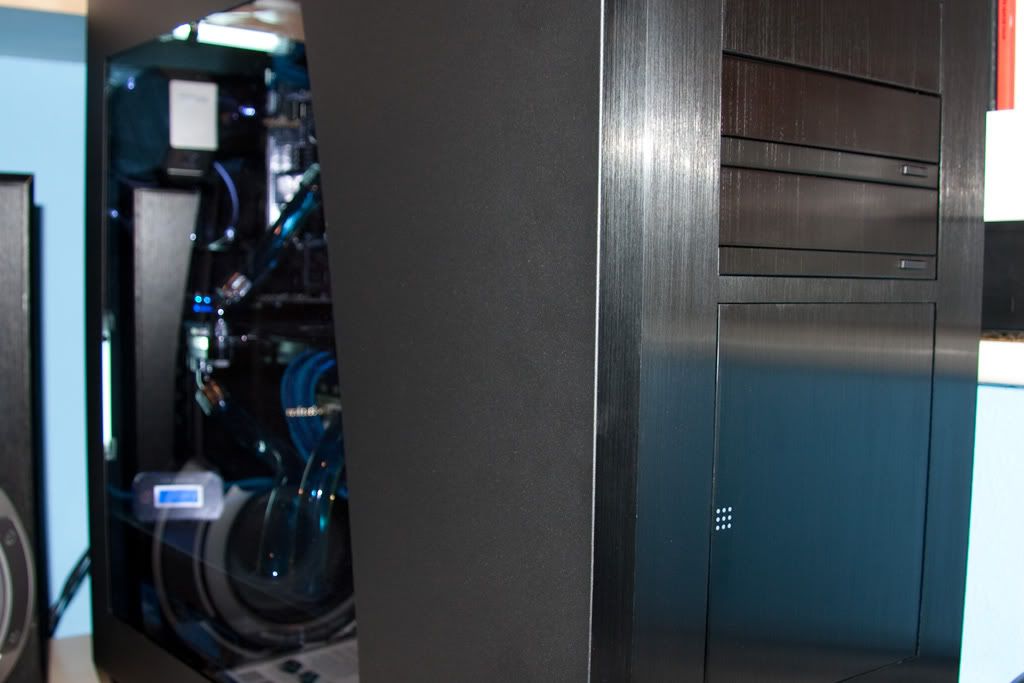
What I have managed to do is to put a 15cm scratch down the middle of the case side window :( Was lent up against the bench and I managed to knock the other side panel which fell into the perspex panel. Gutted is not the word, I've emailed Corsair support to see if I can get a replacement piece.

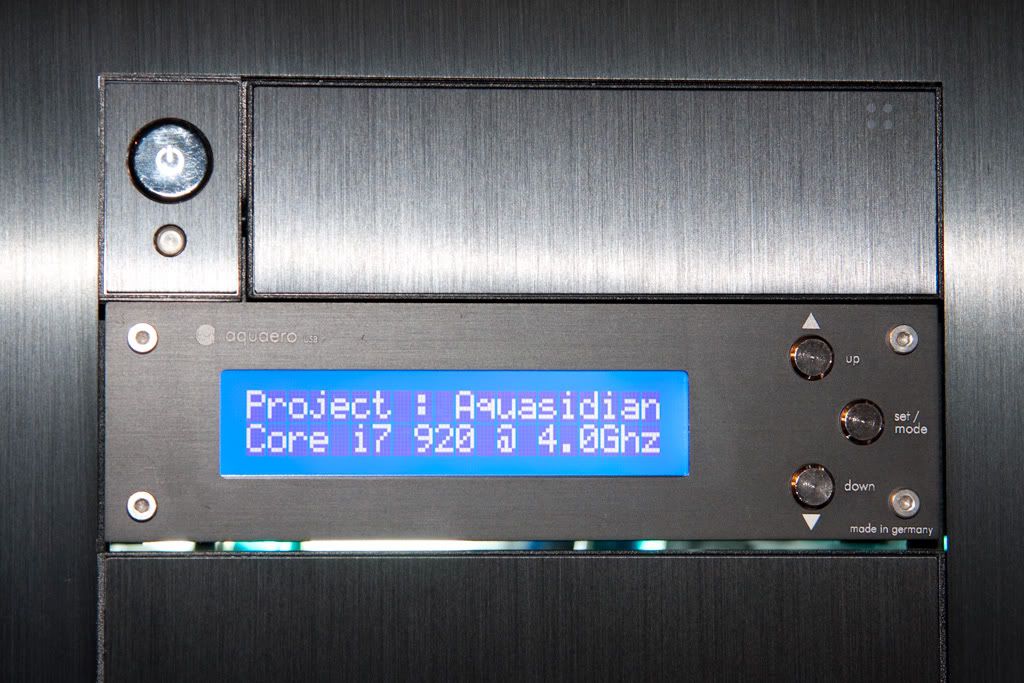
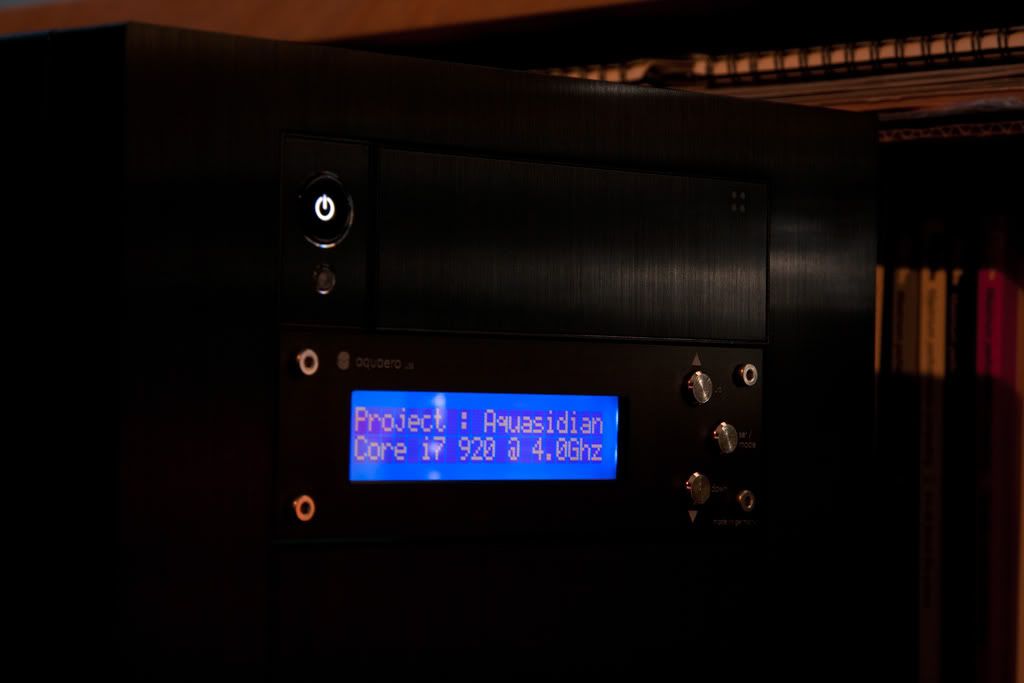
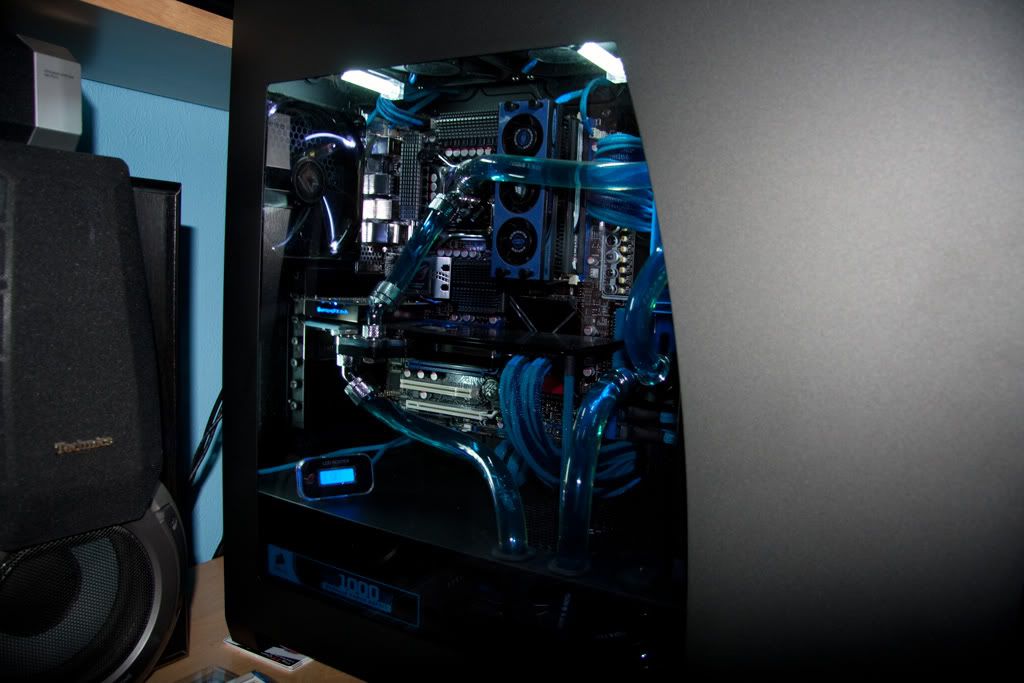
One picture from last night to keep everyone going :D

41.jpg


Nick
 
Last edited:
Ok, update time...

DVD drives masked up and first coat on paint on:

44.jpg


Metal rod cut to length for the gfx card support:

45.jpg


Gfx card support in placed. Used a tiny piece of felt tape on each end to not scratch the case at all and to help keep it in place. Just had to push the gfx card up and then slot it in. The gfx card still isn't totally level, but there is too much tension to push it up and further, and this way it can't sag down over time at all:

46.jpg


Black dvd drives back in the case, looks loads better:

47.jpg


Last shot for today:

48.jpg


Not bad for a couple of hours work to get a few small touches completed. Just need to get the case window sorted out now and I think thats it :D Will get some decent pictures of the system sorted out and posted when I can.
 
Last edited:
Love it! That's proper modding, a black stick. :P

It does the job, haha! I'm no modder, clearly, :)

I am getting one of these cases off Mr Santa Claus and have a quick question.

Are SSD's able to use those special power/sata fittings on the hard drive cage?

They certainly are. I've got one in mine as the OS drive :) There are holes already drilled in the drive caddys to fit them in.

One point to mention tho is to make sure you fit the caddy back in perfectly straight. Mine were somehow lifting up and the drive was missing the connector at the back and not working of course. Took me a long time to work out why.
 
The XSPC 360 rad went straight in mate, was ordered from OCUK if that matters.

The very quick update is that I now have a 500mm x 500mm piece of plexiglass to replace the scratched window. But instead of being a clear panel it's a smoked tint which I think will work very well. Just need to cut it down slightly and then drilling to be fitted.

I've also got a pair of the Lian Li black alu drive bezels to cover the dvd drives. They need a bit of modding but they basically fit very well. They need the rear trimming off of each side and then some new way to mount and secure it.

Will get on with that this week and get some pice up of the progress.

Also, I'm not really liking the Skythe fan controler any more so thinking of replacing it with one of the Aqua Computer Aquaero ones in black alu finish with the blue and white display. Just need to find some money to buy one now tho. :)
 
So the Lian Li drive bezel covers are now fitted:

50.jpg


Took about an hour to complete, used a dremel with standard cut off disc to trim down the mounting on each side, and then just some thick "no more nails" double sided tape to stick them in place.

I've also managed to fit the new side window after my scratch disaster last week. Took a while to trim the new panel down from 50cm x 50cm to the required size, but found the jigsaw worked fine. Then fixed the old panel to the new one and drilled the holes using the old panel as a guide.

Too my time with it as I wanted to avoid making a hash of the new panel having never worked with perspex before. I only had to make one hole slight larger to get it all to fit very easily in fact.

I like the crisper look to the case now with the smoked panel, but it does loose some of the colour of the aqua pipes and sleeving inside and I'm not sure if thats what I wanted to do. But I think for £10 for the panel I can always change it again if I needed to.

51.jpg


I'm still hoping to get the fan controller replaced soon with one of the Aqua Computer ones, the Skythe one really doesn't match the black alu of the rest of the front now at all and I'm hoping the Aquero one will do. Apart from that I think it's complete.

Nick
 
Last edited:
Kick a$$ :)
Looks very good mate, good lighting too the smaller cathodes seem much better than the overpowering & awkward 30cm ones.

Great photography too what camera did this?, detail looks perfect & I can't see any noise in dark areas, the shots look perfect, my current hand me down camera takes terrible indoor pics full of noise in dark areas and want to get around to buying a decent camera but have no idea which 1 to get :confused:.

Thanks!

The camera is a Canon 40D with the standard kit lense for all of these shots I think. Certainly helps having a nice bit of kit to use to make the most of the lighting and components used in the build.
 
Right, well this is probably the last actual build update as all the parts are now in place. Just need to take some decent photos to show it all off now.

So the last part was to replace the fan controller with one of the Aqua Computer Aquaero 4.0 ones. This unit has a much cleaner look than the Skythe one and fits the colour scheme perfectly. The only thing it's missing is a brushed alu look to the panel to match the rest of the case front, but what I might do is to modify one of the unused drive bay covers and use that instead as the covers on the Aquaero are swapable. But where the Skythe unit was jet black this is much more charcoal like the matt aluminium finish so is 99% perfect anyway.

The actual fitting of the unit is also not that great, it seems the screws provided won't fit into the threadded hole and I've now got two screws half stuck in and I can't get them out. So somehow I've got to dremel them out and then replace them with a normal nut and bolt. So once thats done it will fit better in the front panel of the case as it's currently sat a couple of mm from being lined up perfectly.

Anyway, last pics for now untill I get some final ones done...

52.jpg


53.jpg


54.jpg


Thanks for all of the positive comments throughout the build :cool:
 
Last edited:
Hi Nem, how did you route the wires for the hdd and lower fans? im struggling to find an un-obtrusive way.
Stunning build! such a great effect with the individually braided wires!

The cable for the fan blowing into the hotswap bays, should be routed out of the back of the cover for the fan, there is a small cutout I think, and then under the hotswap bay connectors which is covered by the plastic cover for that area also. The lower fan, in the false case floor, just goes straight out the back through the motherboard tray area rubber gromets.

An outstanding build, was it looks alone or other factors that made you choose the 800D over the TJ107?

Mainly as it was new, was massive, and I just quite liked the look of it. Also it was going to take a 120x3 rad in the roof without and mods.

I've just ordered the 2 dust filters for the top of the case, so once they arrive and I've blown the dust out which has already built up, I'll get some final pics taken :)

Final case temps seem to be 38 - 40 Deg C on the cpu reported by the bios (via the LCD poster screen) at idle, and that seems to rise to about 42 - 45 while gaming or running 3d Mark stuff. This is using 1.3vcore at 4.2Ghz currently :)

Nick
 
Last edited:
awesome build, can i ask what cathode lights you used in your build and where you got them? thanks!

They are just normal 10cm white ones. Were from a German site, mainly as I was ordering the GFX card water block from them before it was in stock in the uk, so added a few other items to come at the same time.

Nem,
Do you recon you could get some pics of how you mounted the lian drive covers?.. thats a fantastic mod..
How did you set the optical drive back on the mounts?

regards
Callum

Yeah no problem. Give me a day or two to get some picture sorted out. It's very simple in reality tho, just need a dremel or similar to trim the bezel mounting down either side and then I've used some thick and permanent double sided tape to mount them in the right place.

the optical drives are not actually secured very well yet. The lower one is quite a tight fit anyway, and with the coat of paint on them from when I sprayed them black it's pretty much staying on one place. The upper one I've just put a couple of bits of tape at the front to make it stay forward. I just have to remember to press the button gently :)

Nick
 
Well the dust filters arrived so I spent the whole of yesterday evening blowing the entire case out. Used pretty much a whole can of compressed air while holding the vaccum cleaner hose close to try and drag as much of the dust out as I could. Pretty amazing how much had built up in only a month or two.

I've also replaced the ram cooler with a Zalman offering, it's one of the dual fan units like the new corsair ones, but is titanium in colour to matches the heatsinks on the Rampage board perfectly. Really happy with the result now, the original ram cooler just didn't seem to fit the look and stood out too much for my liking.

So, if I get time this weekend I'll get some pics taken, and a quick guide on the Lian Li dvd bezel covers also.
 
Nem I wonder if you could tell me how you have your fans configured on your radiator in the roof please.

I am assuming you are only using the 3 that are on the bottom of the rad. Are they pushing or pulling?

I have some 120mm dust filters at hand and as you mention dust in an earlier post I am very tempted in fitting them. However I cant seem to decide whats best, do I pull/push air from the outside into the case hence the need for filters or do I pull/push air out which I would have thought wouldnt really need the filters.

There are the 3x 120mm 1850rpm Gentle Typhoons underneath the raditaor pulling air in from the outside, hence why I needed the dust filters on them. Then the 140mm xigmatek one on the case rear pushing out. Also the 140mm stock corsair fan on the midle case floor pushing up as standard.

Nick
 
Nice cooler, is it quieter than the corsair?
Do i spy a scratch on your new window???!

(my Lian bezels showed up now, so if you get time to take some snaps it would be greatly appreciated)

Probably about the same noise level, it does come with an add on cable to make it quieter if you need it, but it would be difficult to braid the cable with it on :)

There isn't a scratch thankfully, just reflections in the window I think.

I'll try and get a couple of pics for you soon yeah.
 
How's the Zalman, it looks very nice. I'm thinking of getting a cooler for my 12GB as they get quite toasty!

The Zalman cooler is working very well I think. Looks a lot more modern than the coolermaster one, and also better than the newer model Coolermaster one with the dual fan.

I've not got any way of monitoring the ram temps tho so can't offer any actual comparison.
 
Back
Top Bottom