PROJECT CAR: BMW M3 E36 SALOON - Path to bankruptcy or endless smiles?

Hi there

So a bit of a big post, as done quite a bit to the car over the weekend:


So all the interior carpets got a thorough cleansing, mats removed, carpets washed and then rinsed off and left out to dry as they were obviously soaked but a lot of dirt came out of them. The interior is leather is untouched but is in a bad way, I've done a test cleaning on the rear bench which has certainly had an impact as its now a different shade, the yellowness has gone, so I need to yet do the rest of the leather.

But here is the interior with the carpets and mats cleaned:

boot.jpg


front seats.jpg

rear seats.jpg

car mats.jpg

fuel.jpg


Also cleaned out the fuel cap area as it was full of gunk and grime, thankfully the rubber seal is in good condition with no rips or splits.


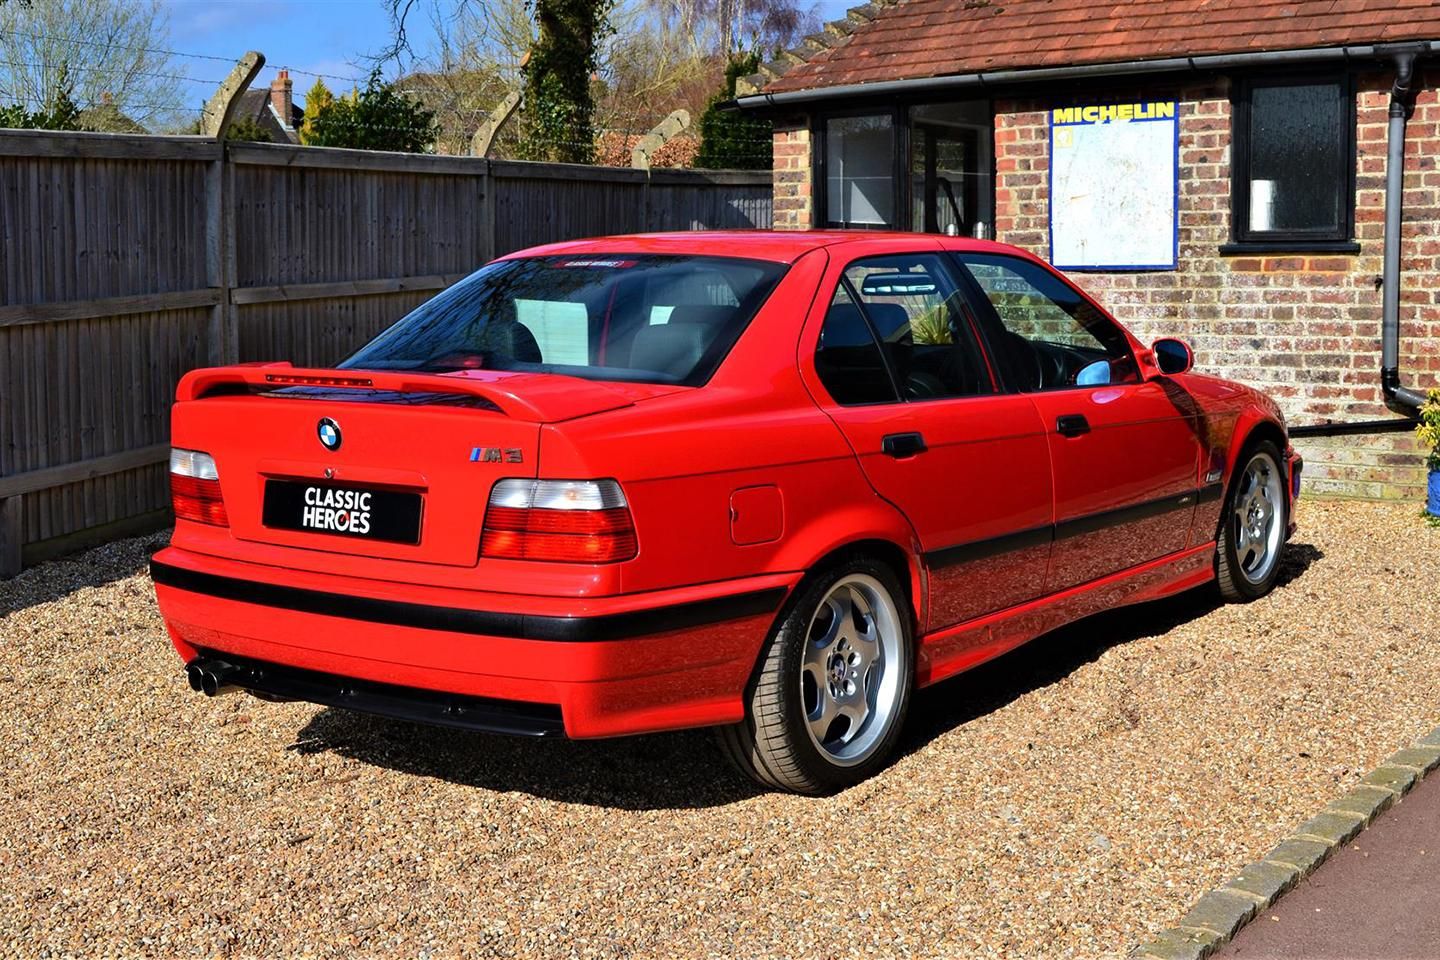
The rubber weather seals around the door handles and rear window were like the scuttle panel, all dried up, cracked and dried out, so they have all been replaced:


door_handle_old.jpg

door handle off.jpg

door handle new.jpg


new rear screen rubber.jpg


cable.jpg


Also fitted a new throttle cable, throttle pedal and a set of new BMW spark plugs, the car drives much nicer, the plugs removed also seemed incorrect or were just budget as they were the Denso £4 plugs whereas these cars are supposed to be platinum. Anyway the throttle cable has made the accelerator pedal much smoother and I adjusted it so the top of the pedal does not have a large dead zone, new spark plugs seem to have given the car smoother running and in general just feels more eager, I'd say a good 20HP has been released with the plugs and new filter so hopefully somewhere closer to the original 280HP these had.

I also have done all the plastic trims in G4 Technic which has worked wonders and ordered new parts of trim for the damaged/scuffed ones, but might actually just replace the whole lot as they are not outrageously priced at around £20 each.

Wheels get a full refurb this Thursday, I also have new wheel bolts, BMW centre caps and new M stickers for the wheels, so with fresh wheels, fresh trim the car will look a lot better, once this is all done the plan is to start hitting the paint with some polishing and paint correction.

I've also got a a sofa repair man coming next week who repairs leather sofas but has also done a few cars, his work looks incredible and his pricing very fair, looking at around £220 for full interior but if he can bring the leather back and remove/hide the cracks then its worth every penny.

Car is lovely to drive, around 22-26mpg average in town, 30+ on a run and low/mid teens on a blast.
 
Good choice.

The extra GT stuff looks dated now.

Okay on an original GT but the cleaner the better.

Will you try and get the sunflower rims?

Nope sticking with these wheels as they are original to the Saloon, all I've done is purchased another 8.5" one as the car is currently running three 7.5" and only one 8.5", the rears are wider and deeper dished from factory I believe or were on some saloons, it is actually very hard to find out what was original and not as BMW kept changing things over the years.

Some of the parts BMW got me actually don't fit the car even though they should for instance panel filter BMW thought was in the footwell, it turns out with it been a very late 3.0 car one of the very last it has some quirks no doubt cross over between model years, as such my car actually has to round pollen filters and they are under the scuttle panel, so those are ordered.

I believe originally the wheels were no doubt 7.5" all round, or the tyre setup was certainly a square 235/40/17 setup all round, but later models / coupes were 225/45/17 front and 245/40/17 rear with the wider deeper dished rear wheels, the latter is the setup I've gone for as it means I could also get the latest Michelin PS5 tyres, which in the default factory setup the only tyre choice was pretty much Nankang NS2.


Looking at above link the style of wheel mine has is original to the saloon, also looking closely the rears do appear to be deeper dished. :)
 
Last edited:
Yeah yours is certainly a crossover between facelift and non. As you have the 3.0 engine but the newer kidney grilles.

Staggered is worth the upgrade in all ways.

And yes that style of rim was specific to the saloon. What the name of it?
 
Hi there

Grabbed a picture when leaving work last night and then gave the car its first wash and sprayed on some wax to protect the paint from any bird poopings, the trim restorer has worked wonders and I've also ordered new trim for front and rear due to scuffs and marks as at £20-30 a piece might as well just replace:

w1.jpg

w2.jpg


Unfortunately the Mrs had an accident whilst helping me clean the interior and has knocked of the rear view mirror, any recommendations for what glue etc to purchase to put it back in place please?
Were you "christening" it at the time? :p
 
pretty sure I used loctite 319 ... but, subsequently had worn windscreen replaced anyway, after relocating wiper arm and it fell back and clicked against screen.

yes - gtechs impressive on the trim - how did you prep the surface .. will you use it on dash too
 
pretty sure I used loctite 319 ... but, subsequently had worn windscreen replaced anyway, after relocating wiper arm and it fell back and clicked against screen.

yes - gtechs impressive on the trim - how did you prep the surface .. will you use it on dash too


I wiped the exterior trim down with white spirit to remove any dirt and seemed to do the trick fine.

Was not aware I could use same stuff on the interior and not sure how effective it would be as the interior is light grey not black.
 
Hi there

Grabbed a picture when leaving work last night and then gave the car its first wash and sprayed on some wax to protect the paint from any bird poopings, the trim restorer has worked wonders and I've also ordered new trim for front and rear due to scuffs and marks as at £20-30 a piece might as well just replace:

w1.jpg

w2.jpg


Unfortunately the Mrs had an accident whilst helping me clean the interior and has knocked of the rear view mirror, any recommendations for what glue etc to purchase to put it back in place please?
Beautiful car mate, you’ve really dropped on with that !

As for the rear mirror, I’ve had a similar issue with the dash cam in my Scania, “proper” mirror stickers didn’t stay on for very long and eventually fall off, so I tried double sided Gorilla tape, you have to cut it to size but it’s working brilliantly even after driving through a rather bumpy quarry the other day at speed! :D

Great stuff.
 
Hi there

So a lot of work done of the past several days which I shall detail in the next few post:

So last week the wheels got refurbed and Andy at Powder Coating Shropshire who also let me borrow his ramp to get the underside of the car cleaned up as it was covered in oil and dirt from several years of oil leaks and driving etc.


Arriving and getting the car on his 4 poster ramp, plan was to clean the underside, re-attach the sill trims with new clips, sort the exhaust brackets out etc and trace where oil leak sources are:

arrived.jpg clips.jpg diff.jpg engine oil.jpg exhaust.jpg gearbox.jpg


So the differential oil leak is simply down to someone not using a copper washer on the drain plug, I shall rectify this when I change the differential fluid.
The oil all over the gearbox and engine, a contributor is certainly the CPV valve can clearly be seen leaking.
Anyway the side trims are now properly secured, a few of the old clips had broken or were missing, the oil is cleaned off and I shall change the CPV valve and add a washer to differential drain plug which should solve most if not all the oil leaks.

Exhaust no longer wobbles around with the new brackets, so a big thanks to Andy for use of his ramp and himself along with some of his tools as we had to grind the old exhaust brackets off, the outer skin of the exhaust is has rotted but the inner skin is OK, entire exhaust system looks factory stock.
 
Andy as always does an extremely thorough job with the wheels, he puts them in an acid bath, then primes etc. etc. to ensure what he does will last many years to come, the process takes a full day but as I was using his ramp I had plenty to get on with.


Here is an old wheel and a freshly done wheel next to it along with some photos of Andy coating and baking the wheels to get the desired finish:

wheelcomparison.jpg wheels1.jpg wheels2.jpg wheels3.jpg


Both myself and Andy were rather surprised to find all four wheels were actually perfectly straight, no corrective or repair work was required to the shape of the wheels or any repairs of cracks etc, the advantage of older cars having better made wheels and much taller tyre sidewalls to protect the wheels.


Then parked the car outside and grabbed some photos of the car all finished:

wheelsdone1.jpg

wheelsdone4.jpg

wheelsdone5.jpg

wheelsdone2.jpg


A total transformation and I love the colour which is a bright silver with plenty of flake, like a hyper silver but Andy calls it Alien Silver, there was an AMG Mercedes present with its wheels done in same colour which also looked superb, gives the car a fresh factory look.

OVER the moon once again with Andy's work, always top notch!
 
Hi there

So finally managed to track down the correct pollen filters, turns out my car has two filters located under the scuttle panel, quite easy to change out, once you know where they are:


pollen1.jpg

pollen2.jpg

pollen3.jpg


Turns out the car had NO pollen filters present, no wonder turning the heater blower on could result in dust going into the cabin, disgusting, but now solved.


Also the rear plastic lower trims had turned a horrible shade of green, so grabbed a new pair from BMW:


doortrim.jpg


The little bits here and there bringing he car upto scratch, still lots to do.
 
Hi there


So this weekend was my first ever attempt at machine polishing, I used an Auto-Brite DA12 polisher which was very easy to use, as the paint had several scratches and was really heavily swirled to the point it looked like it had been washed with a brillo pad up close I decided this would be my first attempt and a car to practice on.

Detailers will frown but I cheated and did very little prep, all I did was wipe all the panels down with panel wipe to ensure there was no dirt/dust present on the paint.

I then got to work with Cartec Diamond Cut 3000 and appropriate pad which is a deep cut but can cause holograms on the paint, it did not cause the latter and was very effective at removing the scratches and 90% of the swirling marks and literally transformed the paint. For my first panel I added 10 pea sized drops onto the pad and massaged into the paint and then started at speed 1 and built upto speed 5-6 and slowly moving along the panel whilst working on 1-2 foot of panel at a time in a slow motion but ensuring to not stay still for too long and keep each panel upto 5 minutes maximum, results were superb. I was then adding 4 pea sized drops of product for every following panel / section, only downside was was some white dust.

I then did a pass using Cartec polish 9000 which is specifically designed for light swirling and giving deep gloss, this product was super easy to use, I used the same method of start with 10 pea sized drops as this product has its own polishing sponge which is less course. This product made no mess at all.

Both products were buffed off after each panel treatment and were extremely easy to remove.

The result was nothing short of amazing most the scratches were removed and the deep ones massively reduced and swirling was 90% reduced.

I then added a coat of Meguiars wax and then following day followed by a coat of AutoBrite sealant.


The results are a total transformation and I am both happy with these results but even more so that I did not mess up the paint.


D2.jpg

D3.jpg

D4.jpg

D5.jpg

D1.jpg


The last picture of the boot lid had some really deep scratches and looked like it had been washed with a brillo pad or a sponge that had fallen on the floor, so the dramatic change for a days hard graft, well the results show for themselves. :)
 
Did you have to polish at dawn then - looks good; had it been re-sprayed at some time, beneath headlight and bonnet edge look chip free.

what's the plan for the exhaust skin ? - has resonance increased.
 
Did you have to polish at dawn then - looks good; had it been re-sprayed at some time, beneath headlight and bonnet edge look chip free.

what's the plan for the exhaust skin ? - has resonance increased.

The house setup is good, there is always somewhere in the shade, so I moved the car to the side of the house which has a shaded part most of the day then back to the rear garden later in the evening when sun moves to front of house.

Exhaust will be left, no leak and no odd noise, at somepoint will replace it for something stainless steel and light or a good condition used factory item.
 
Is it worth spraying the exhaust with something like ACF50 (or something stronger) just to preserve it a bit longer?

(Obviously leave it a while before starting it up after spraying it, unless you want clouds of smoke as it burns off)
 
Took the car to a meet at Swettenham Arms in Congleton tonight, great turnout and then the car got it’s second tank of Vpower since ownership.

Also the keen eyed will see the car now has the correct piece of trim for passenger front wing. :)

DDC7A71F-19F4-490D-A202-320E62EAAB69.jpeg
 
Back
Top Bottom