[Project Log] "Parvum|Beast" - Semi Sponsored Build

I like the red but it doesn't go with your case colour theme. The blue looks a bit light - not really strong enough. Under lighting, neither colour seems to react well to anything other than the pink (which is horrible) or the white. What about a darker blue to tie in with the case colour?

yeh was thinking about it, but if you look the sleeving part also,
i could keep the lighter blue fluid, and then implement some of the light blue sleeving, so its conencted.. and agreed, none of them looked good under light, except the white led.
 
Installing the waterblocks

Here's the waterblock installing, as you might notice i did not install the monarch x4 block on the memory yet, i will do this in a later post, when i mount the blocked mobo into the case :) pics will follow!

1eb80f11-f80a-4a18-a183-ac59be819238_zpsio4i33hu.jpg

671e0dab-706f-4629-8f73-1250828bd1ce_zpsyeofgdzc.jpg

2aeb973a-7375-4d12-9885-e897908b920c_zpsqa8brtog.jpg

6b78deba-1ab2-4119-8a0a-84cb9827d28b_zpszmxkulfe.jpg

6a2e3ad9-8f48-4e5f-b7c4-bf11bbde98e1_zpsqe8ncjvh.jpg

dbbff702-9cb7-4ab5-8dbc-22c9f14d1efa_zpsy9xr429p.jpg

d80c5ecf-0434-48f0-875d-8fa1957413f4_zpsfqqbrbnh.jpg

0aa0d86c-fe40-497e-9684-7287fb806ec6_zps039pvjra.jpg

155ff814-4e9f-4164-b438-02c34e498147_zpszfyjus2x.jpg

c1f2b02b-a788-42dd-a20f-b3c8cf11f8ba_zpscypyidgo.jpg

0afc585f-59dd-42c2-b5fc-04304649ea84_zpsowposlpw.jpg

006cdc40-3288-4e7c-89e1-598fc3d99ef3_zpsjahehaso.jpg

5b643fa7-ccc7-486d-8f73-ebe8bcc99967_zpsj9irvvjv.jpg

a0adb1e5-037e-4c49-876d-80a3158e8f38_zpsqz4pnb2v.jpg

02bc5f31-4cd8-43e6-91a2-f218f96a26e8_zpso42xyel2.jpg

79c5c1e7-9ee0-42e7-ad47-05ea94a3b338_zpstktlh6tj.jpg

9db2f8bb-ef1b-40a1-b640-5bea85baac56_zps4ww0t3wg.jpg

fecddaa6-ee38-4dc0-9946-b5e32d67e8bb_zpsm43ytacs.jpg

88e7ab23-d302-4bea-af78-5f6e6fbcd60a_zpsbnf6d1so.jpg

74d5752f-a41f-400b-889c-2f46d354bd0a_zps6cwhzitg.jpg

b6a5996c-ed3f-4ec8-b95e-1933f2eb03d9_zpsbly9s1sf.jpg

f52b1eab-001c-47ab-8ca2-cf31a756ff53_zpslzsswzsl.jpg

82f37497-6e0f-4b87-a3f4-73e32efc02e9_zps17mgqsnw.jpg

3c02c194-4abd-45d9-b69e-f20b86b4987f_zpsrkdyufbp.jpg

d4fafed9-f91e-406a-ae6d-5839edc222a4_zpsji3qmprm.jpg

449dea0f-6fc9-41f5-8e9f-f92215f36763_zpsaxppwgtj.jpg

1e6d141d-0839-400b-8a3e-db703f09435a_zpsp8slii6w.jpg

c40c7cba-dac9-4dc2-9a53-b2ea475e8288_zps5qpitxh5.jpg


Theese polished blocks just look so amazing ! cant wait to see it all with liquid in it ! <3
You might notice that after i blocked the pump and put on the nickel housing, I just HAD to sleeve those cables,
i am NOT a fan of the original black,blue and yellow cables :D So i took my time and sleeved them in the colors i will be using in the build later on.
 
Thanks a lot, i am pretty sure that they are, knowing that they support allmost all types of ddr4 and ddr3 memory sticks.
but dont hang me up on it.. instead try the EK waterblocks Cooling Configurator :)
that should help you out :)

i will meassure that when i wake up again, its in the middle of the night now and i HAVE to sleep ! :D
 
Test Mounting of the Waterblocks, and modding the flipped GPU.

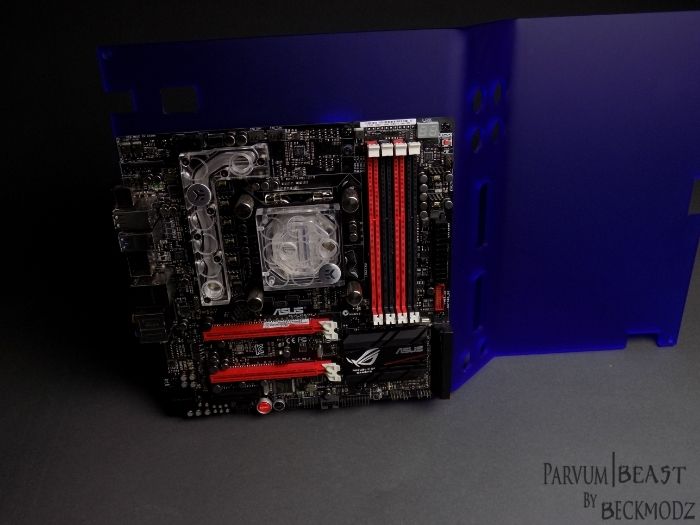
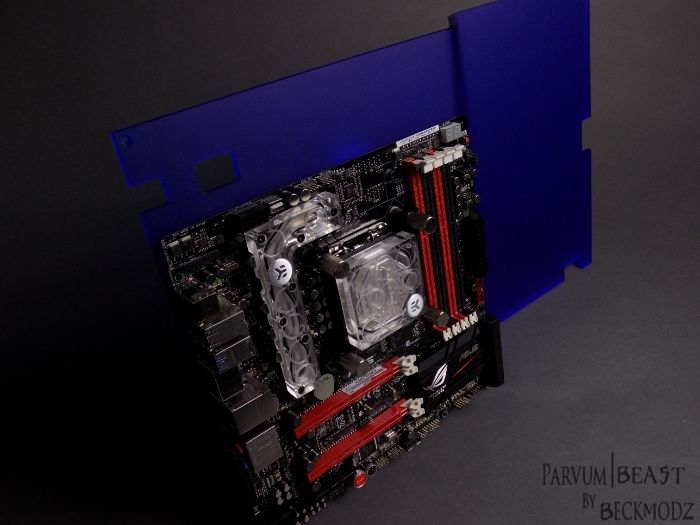
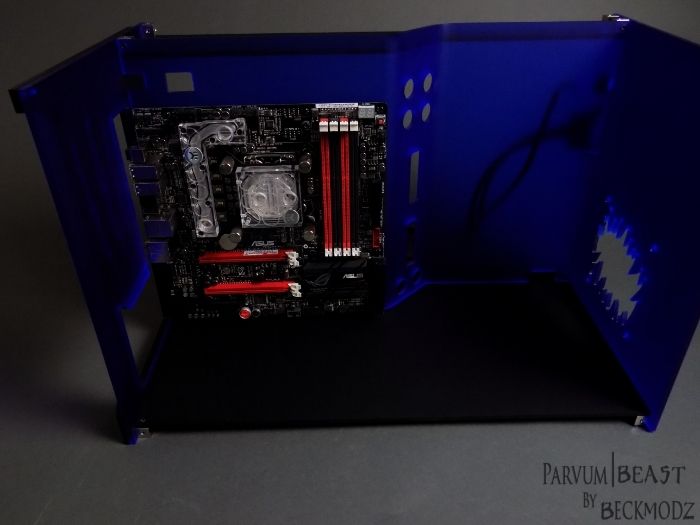
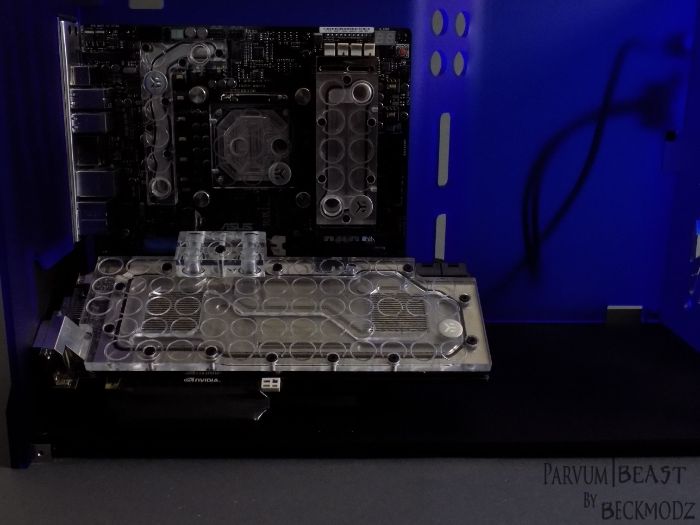
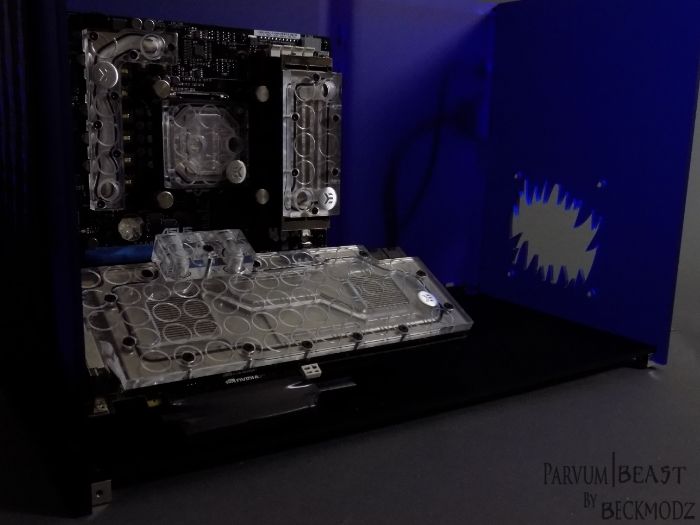
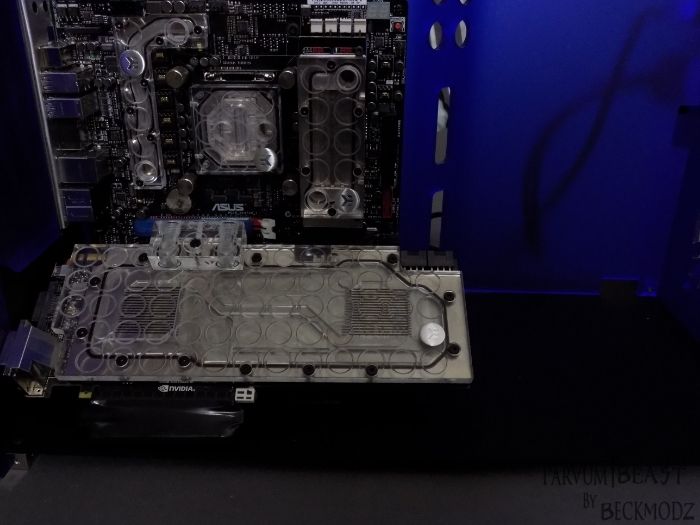
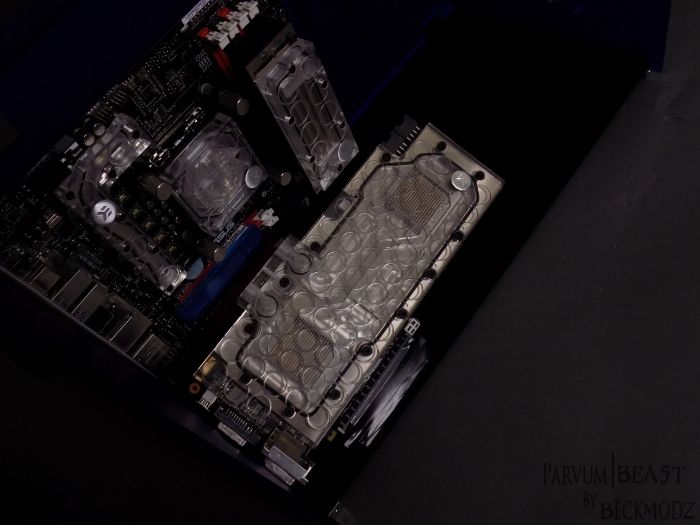
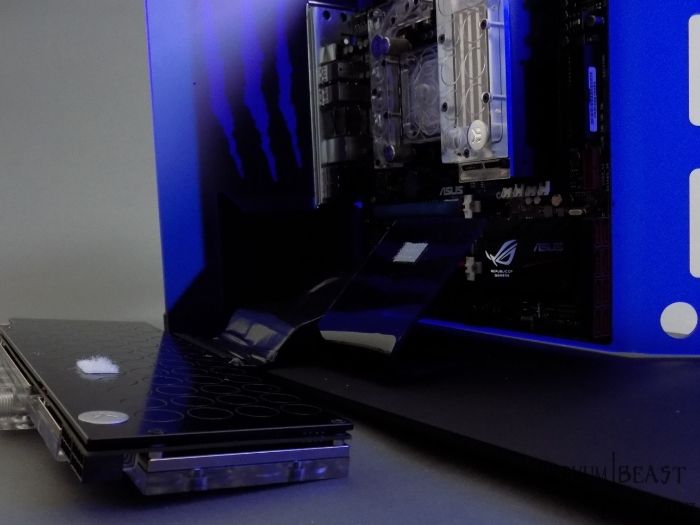
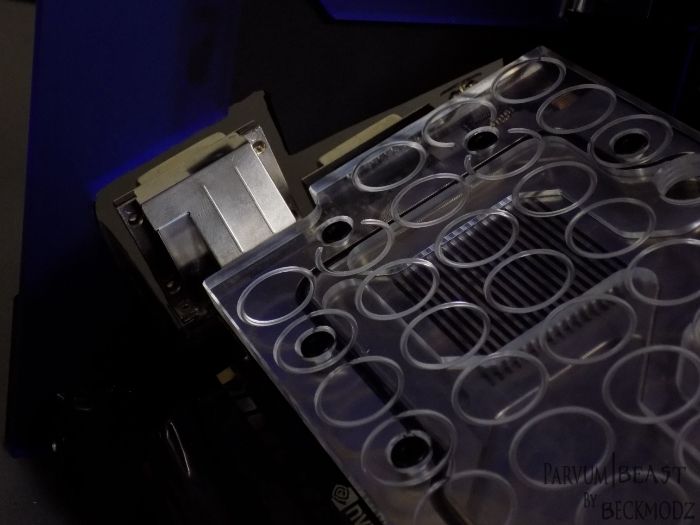
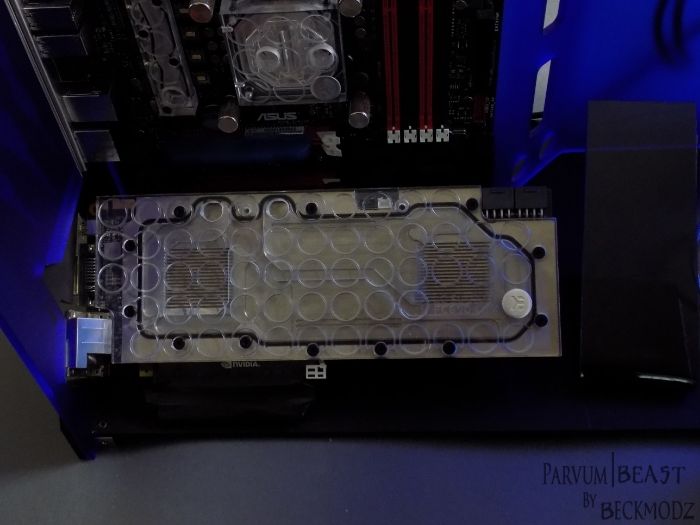
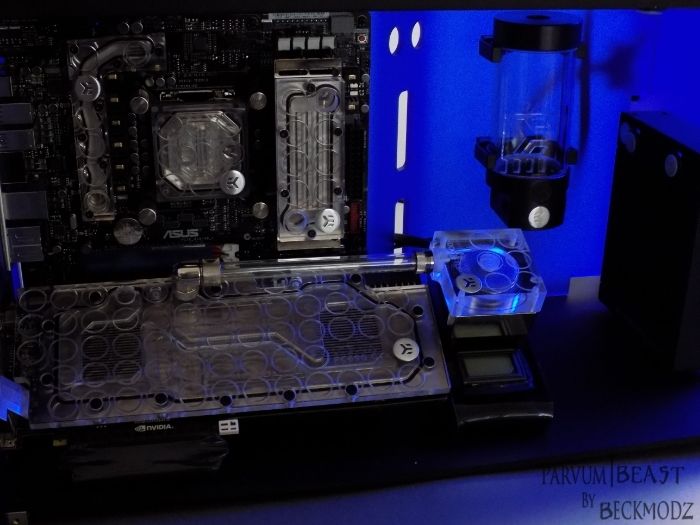
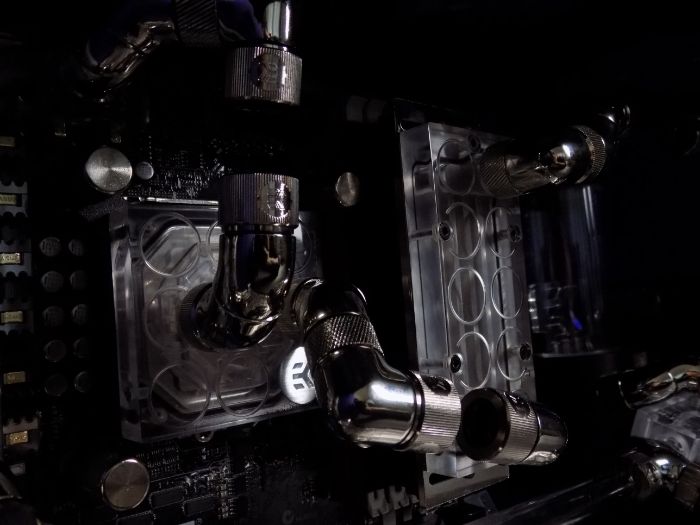
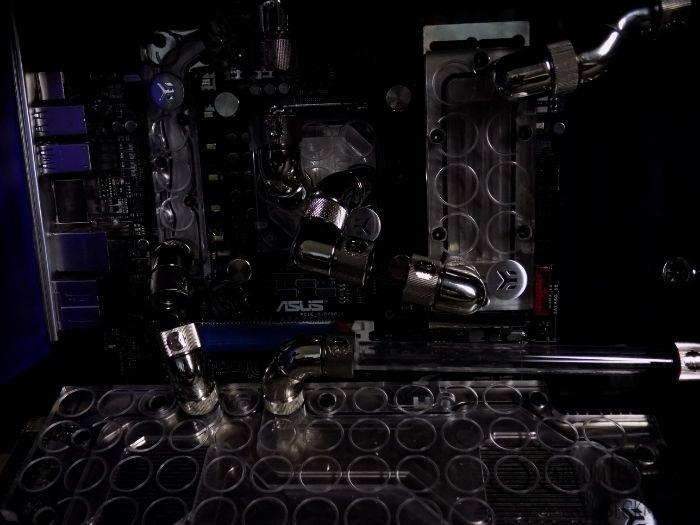
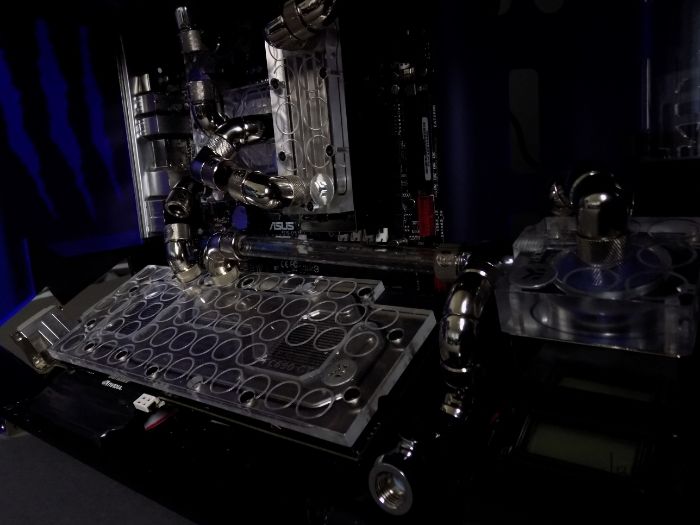
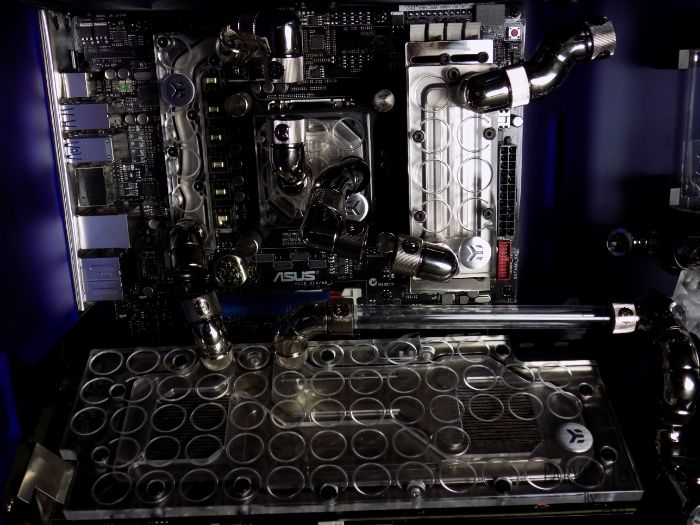
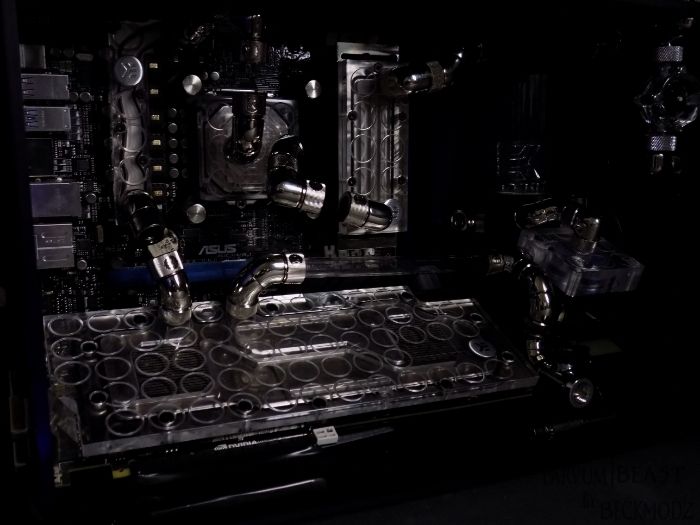
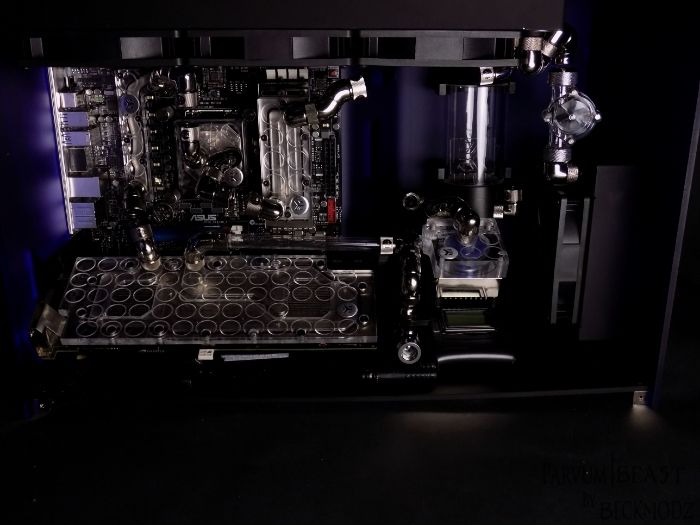
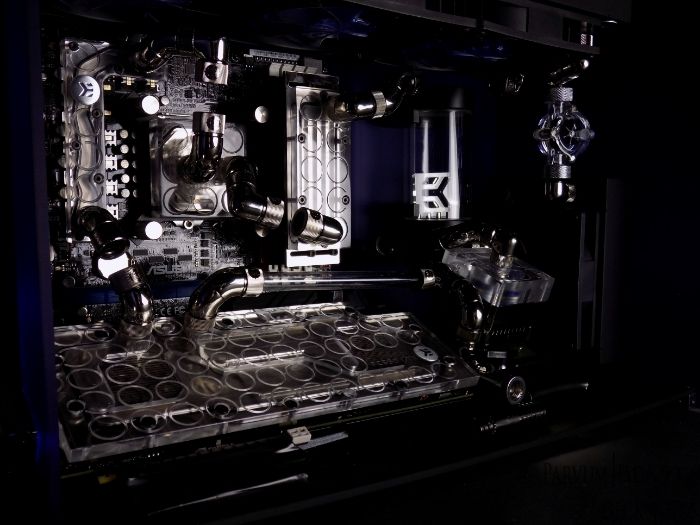
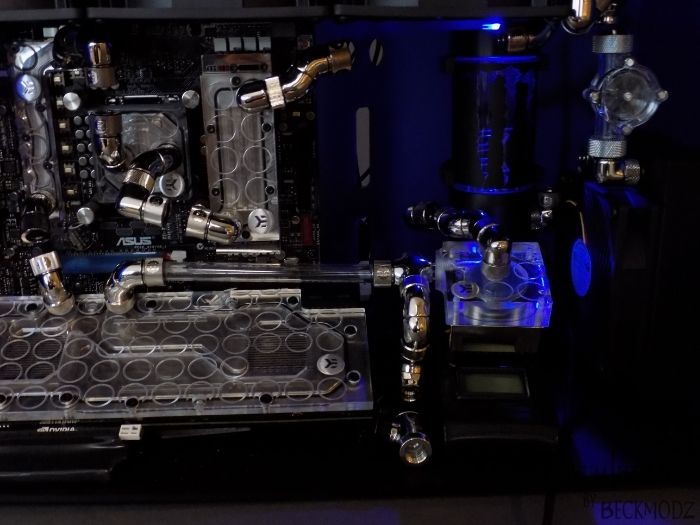
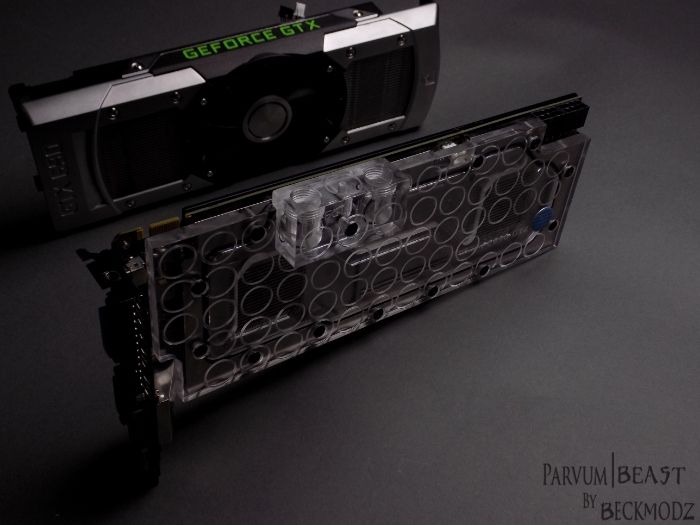
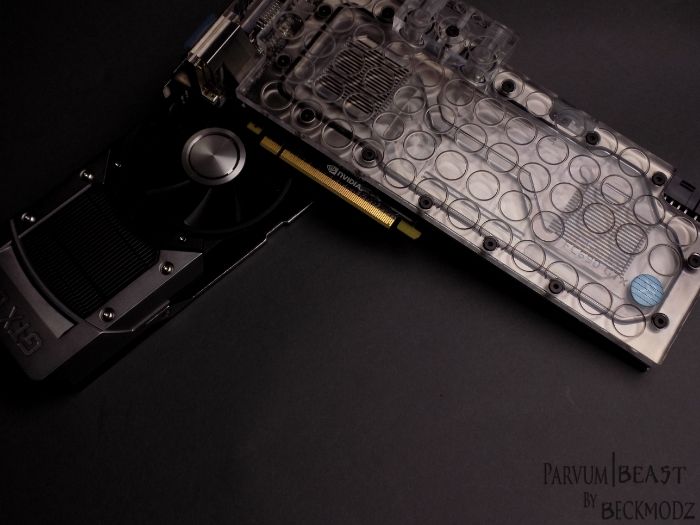
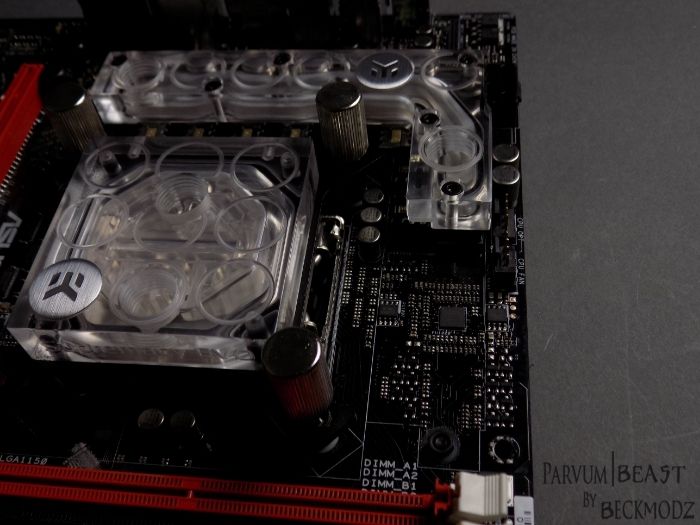
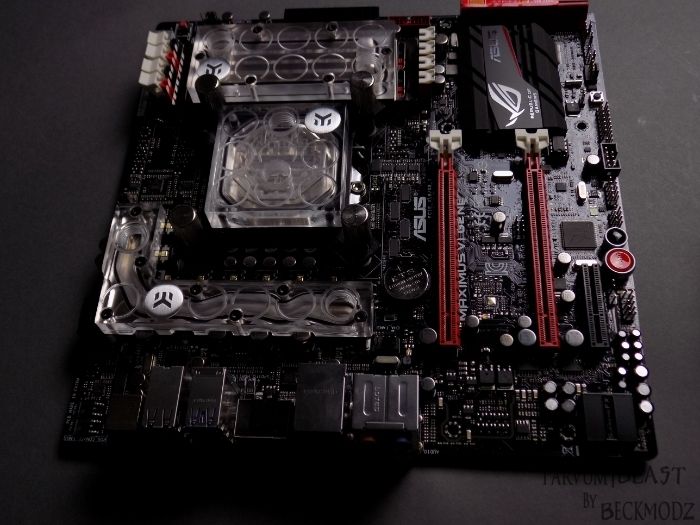
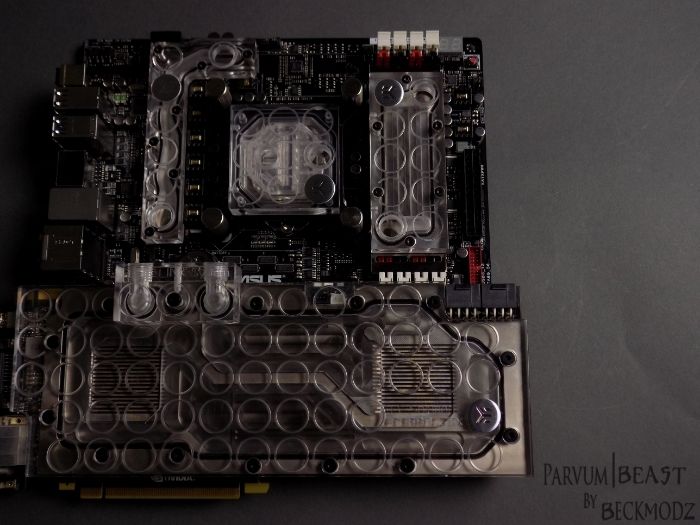
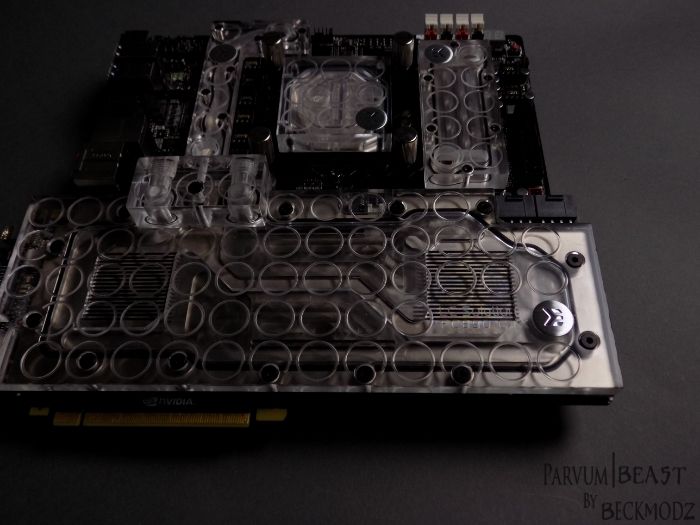
Allright, got a lot of work done last few days. Test mounted the blocks to see how it looked best,
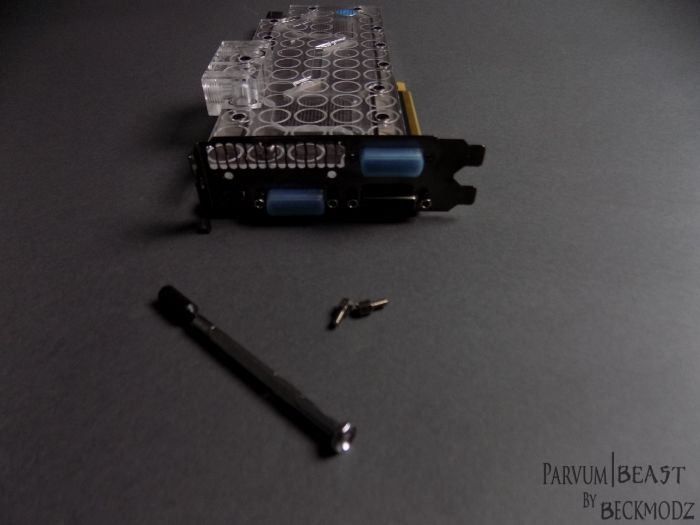
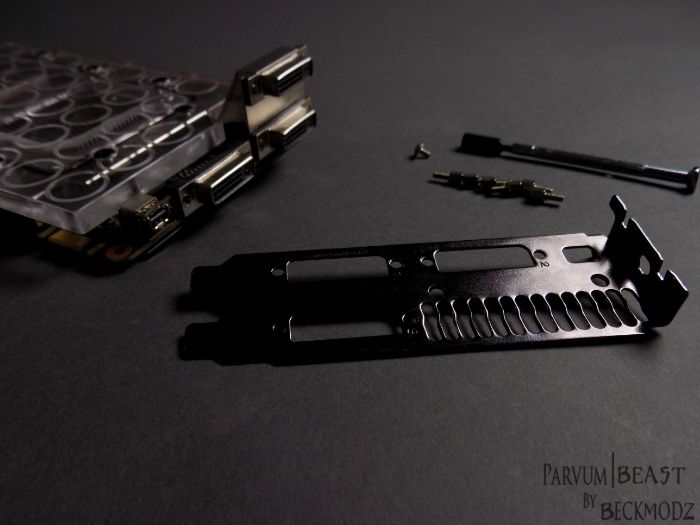
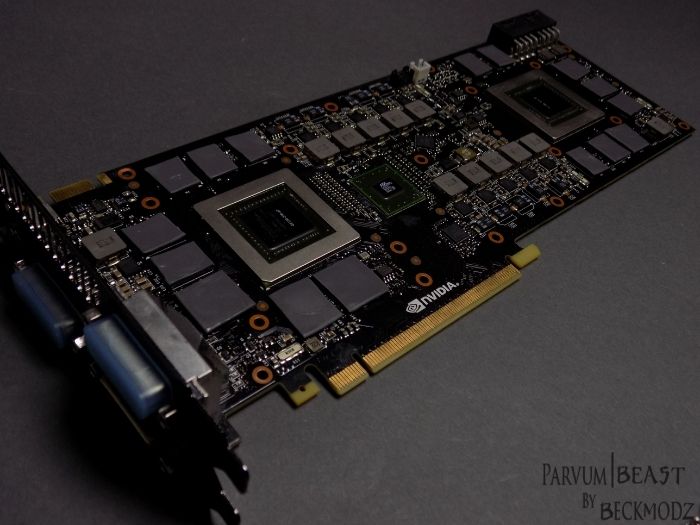
then flipped the gpu, bend some acrylic sheets to act like supporters for the gpu, and added some velcro tape to hold it in place.
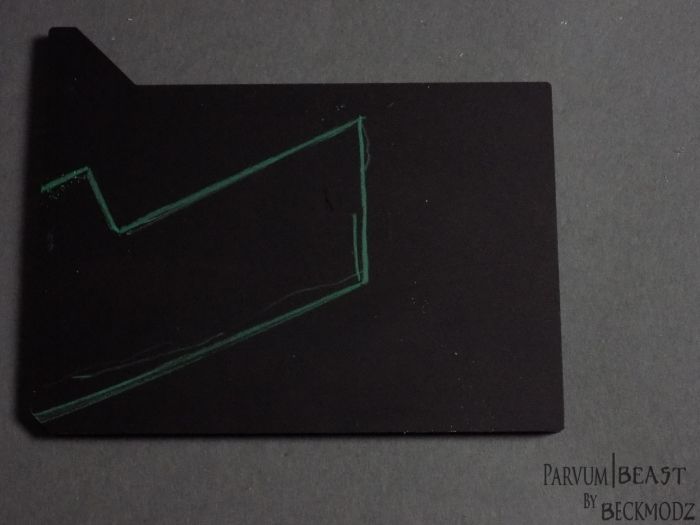
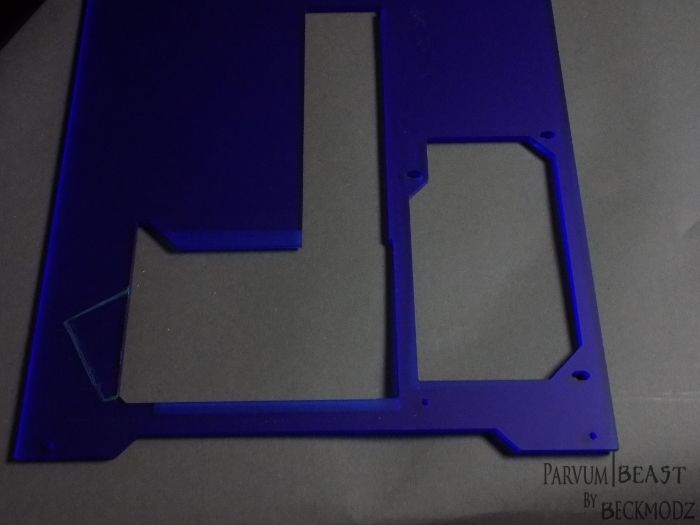
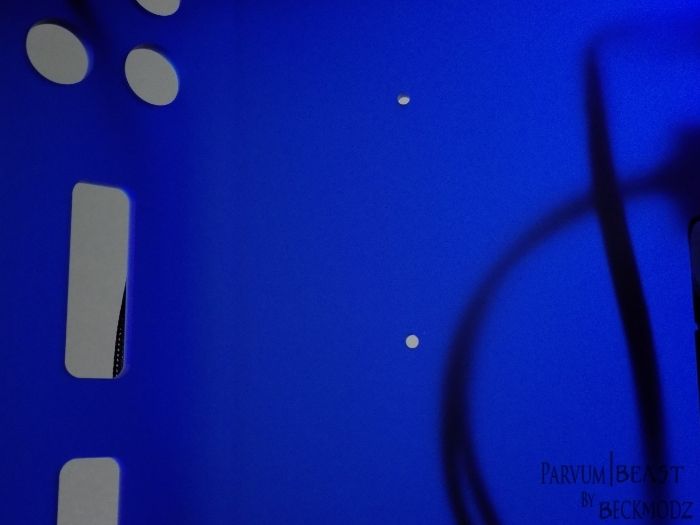
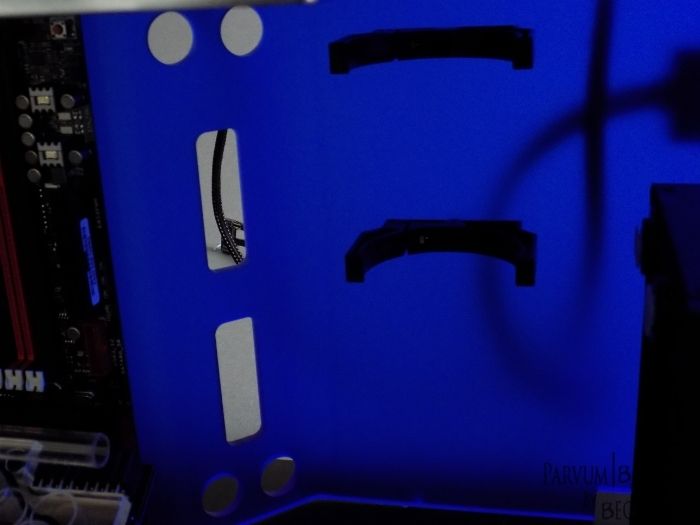
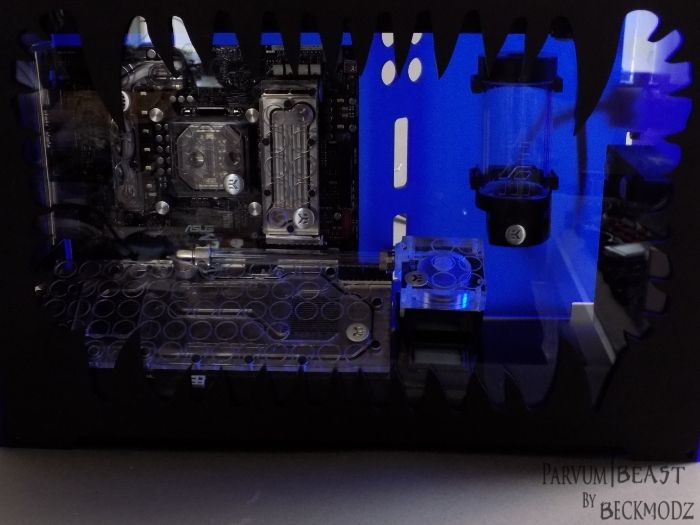
after that, it was time to figure out how i wanted the cut in the case and pci slot cover to be.
Then after the cut i saw i cut too big of a hole, but still its okay :)
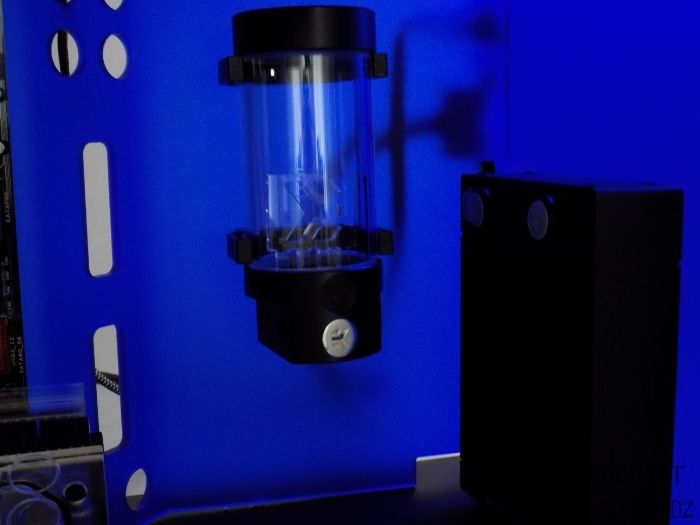
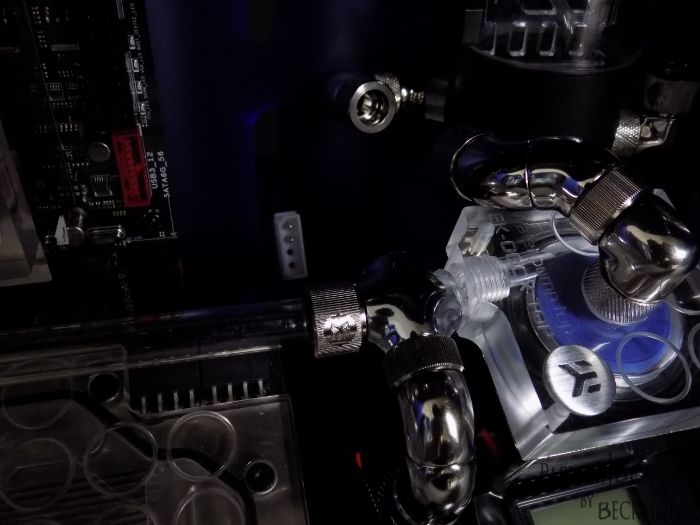
I also was thinking a lot about the pump placement, if i wanted it next to the 120mm rad, mounted in the back at the mobo tray, or where to put it for the best looks..
Then i thought maybe i could make another acrylic piece bended in the angle of the GPU, so that the Pump actually is tilted in same angle as the GPu, and i must say it's got the look i was hoping for :) ..
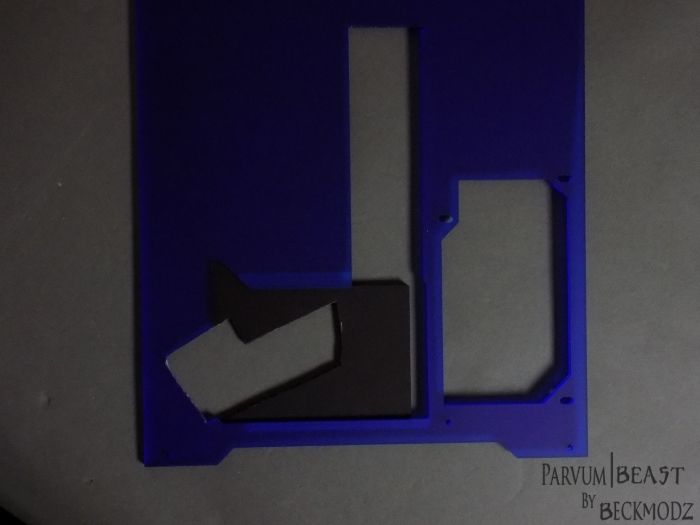
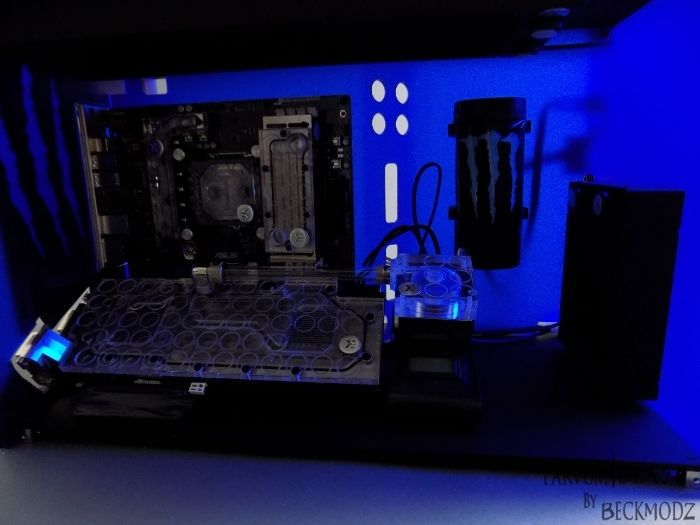
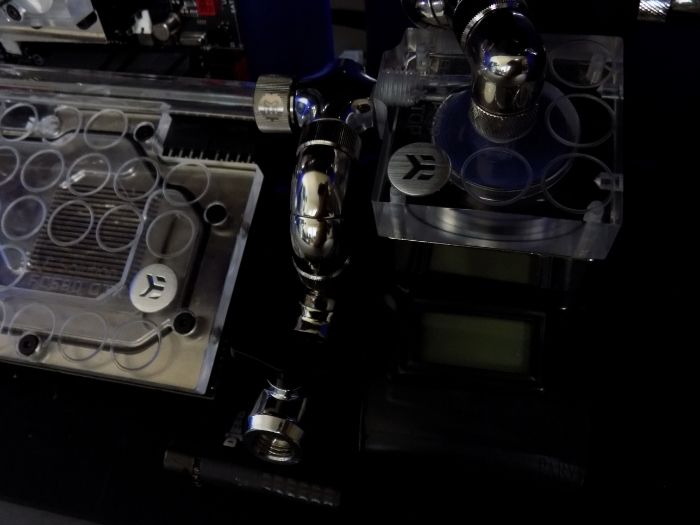
Also cut out a hole for the LCD temperature display..
But still awaiting the final piece from Parvum, so maybe i will change it later or redo it,
but for now it works out great i think :)
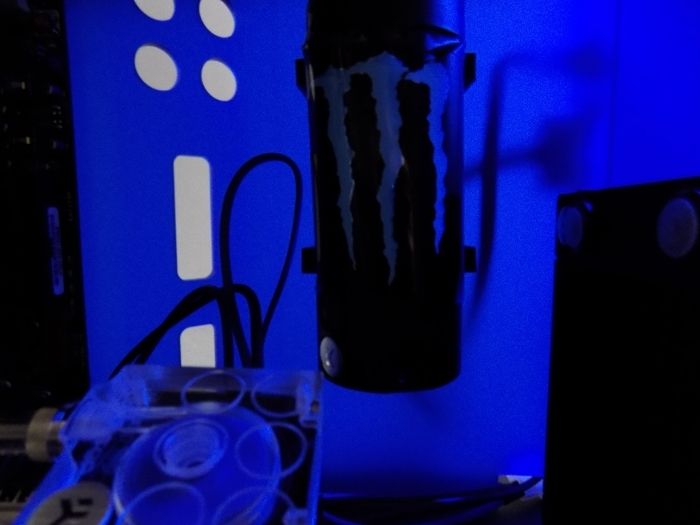
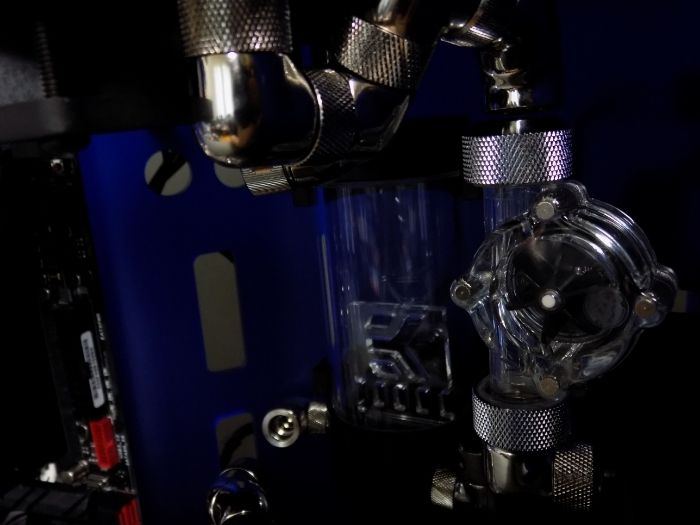
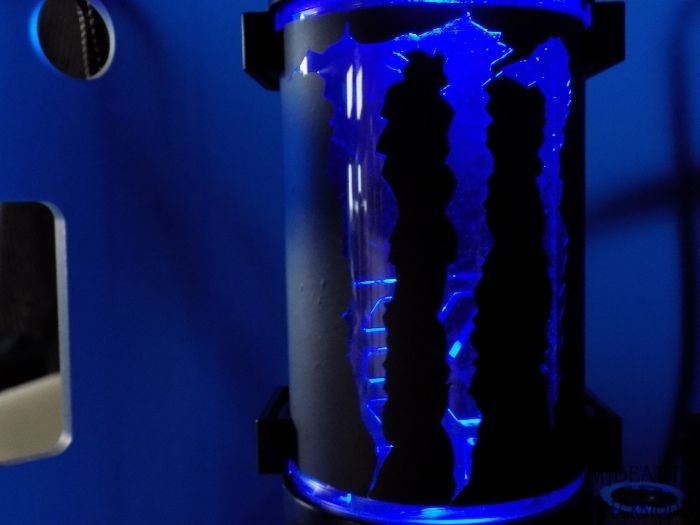
I also drilled holes for the reservoir mount, and shot a few pics with everything in its place, and also with the window on to see how it looked :)

66b3cd74-fde5-4e17-b4b4-97bd20783c18_zps0jpmkztk.jpg

d3ef12f1-f10f-4a26-8599-2b77c0e00dd1_zpseod0yj30.jpg

358fdd33-b616-435b-b8ed-10d7cd65afc0_zpsv6uu0lw6.jpg

13c1ea24-3b71-4f90-87cc-382d361768fd_zpstt5qc2s6.jpg

a45a7135-d5a7-49b2-b106-f3a7a9305c94_zpst5sa2zaj.jpg

4830c30c-f0a9-4841-8108-22b4a0fec1f0_zpsnshwehfw.jpg

cb1ab9a6-6a1f-470f-9c51-0d65bbc70738_zpssyynumlq.jpg

e45b26de-ca5f-471e-ac33-a44717246584_zpsa2qpn1bf.jpg

659c5c8e-d95a-4555-865b-1d053d3657f3_zpsmuorqcwm.jpg

391ab422-cef8-401b-a31d-1e470a8a89d5_zpskrnieirf.jpg

982573c2-ca98-4dd2-8113-ea5d1ba93fed_zpsm0gyif90.jpg

9406f179-ac7a-4a87-952a-6933d5a29011_zpss5c3kc8q.jpg

84f289cb-97b8-4143-ab34-56d71e545404_zpszjuu1hrt.jpg

0cba7533-2af8-4d4d-8f1e-b1af1fb90990_zpsuqu7f20f.jpg

50481a81-c807-4b1f-a026-ada7ec396116_zpspr4wgxj9.jpg

86fb2178-0af7-4846-a310-654658d66cc6_zpsuyotmcdg.jpg

2a42b256-6da8-472f-9896-5938f5f8481c_zpskayi7l3i.jpg

8eac1dac-2bd7-428d-87fd-102562813712_zpsh7p4ooim.jpg

9085ec7d-8342-4aca-9bf2-94361c143133_zpszfzor62n.jpg

929d0875-4be5-48c4-86a8-5a47b51322c7_zpswla8kf46.jpg

0667b86c-df2e-4bd0-aab6-98843906f902_zpsjmlbjbmv.jpg

b94fd185-db52-40a2-bcb2-586078f66bb9_zpskjfdvd1c.jpg

0792c0ec-14e1-4b94-b46b-2e93dbb11e7a_zpstffvle5g.jpg

5094085c-d220-45bb-a01a-31ca6c6353f6_zpson2k6ftr.jpg

b58345f4-cb78-498f-92c8-928b437a9771_zpsbsovcl02.jpg


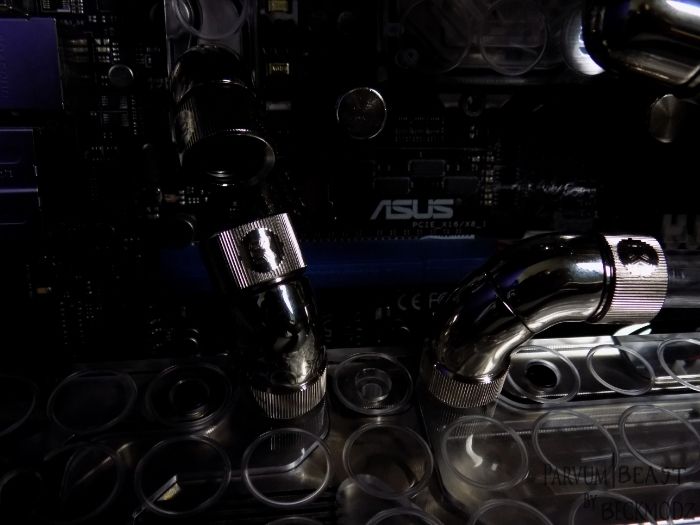
So what do you think guys ? .. next up will probably be installing fittings and tubing and figuring out the loop :)
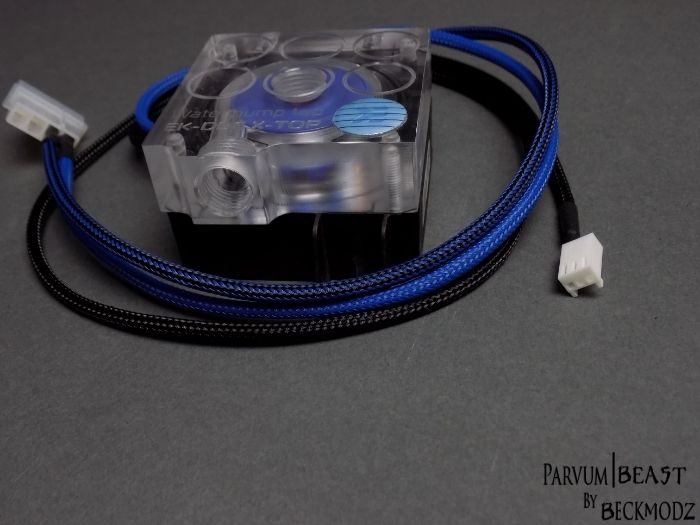
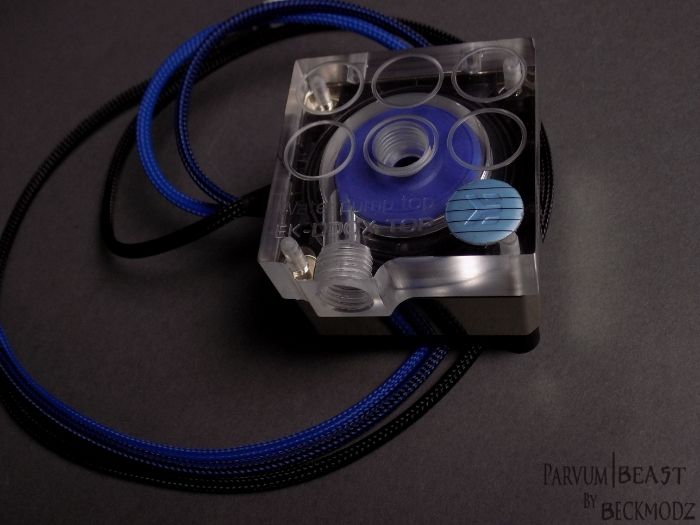
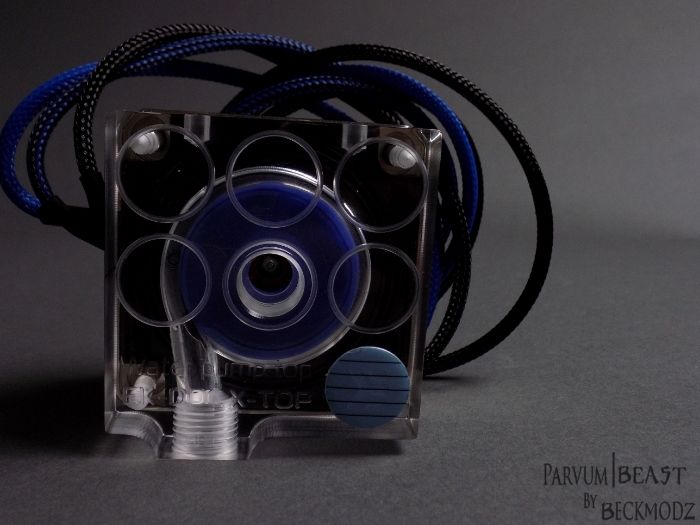
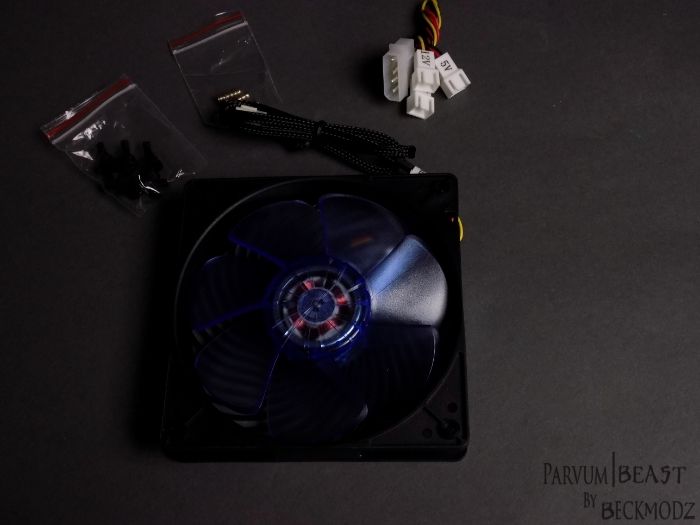
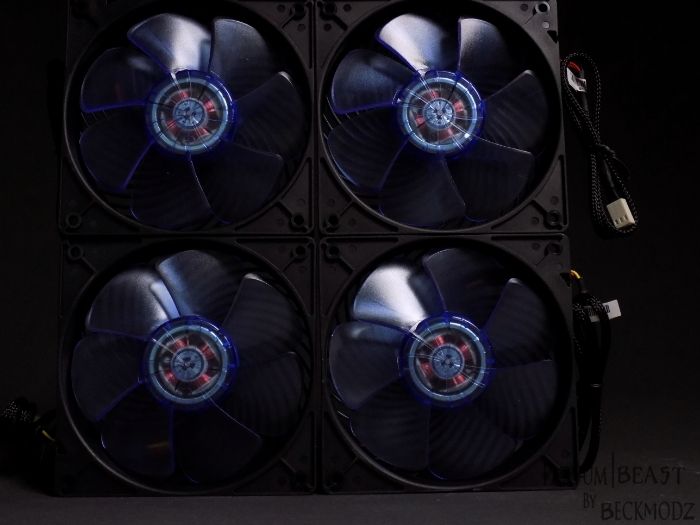
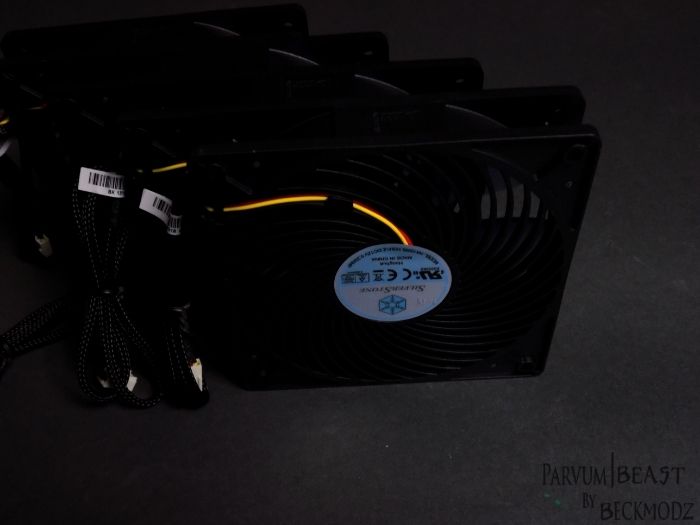
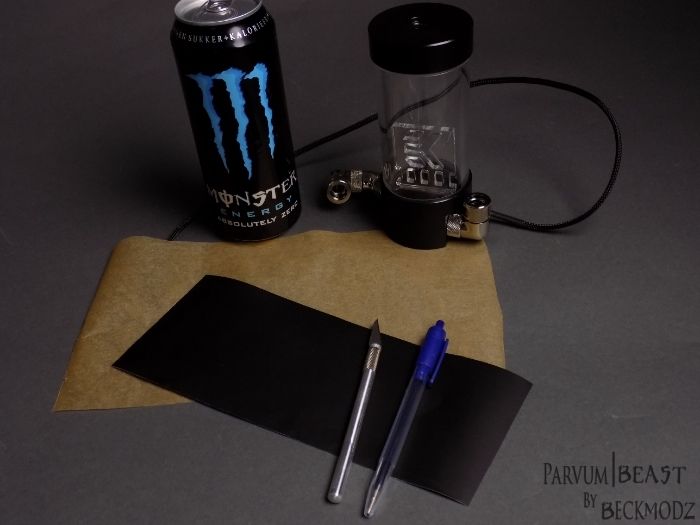
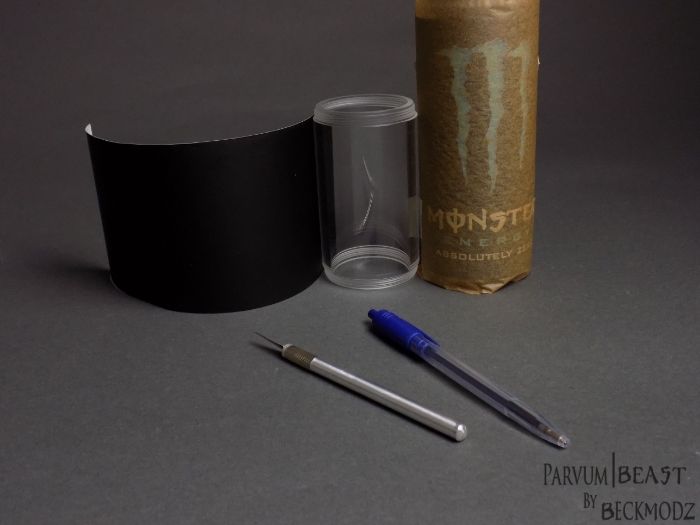
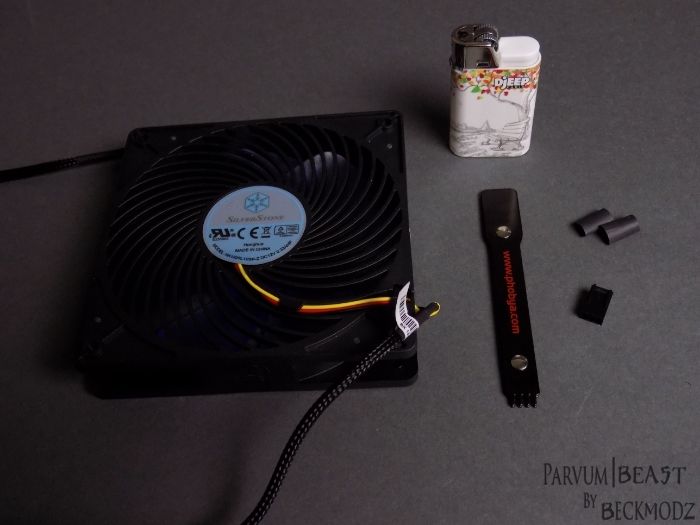
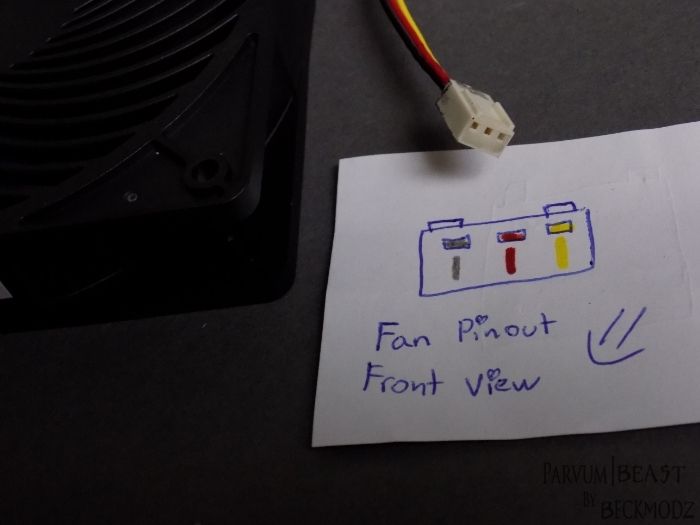
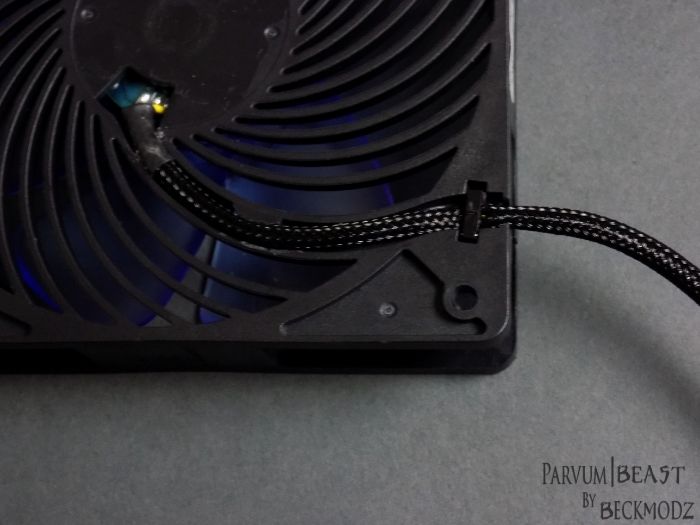
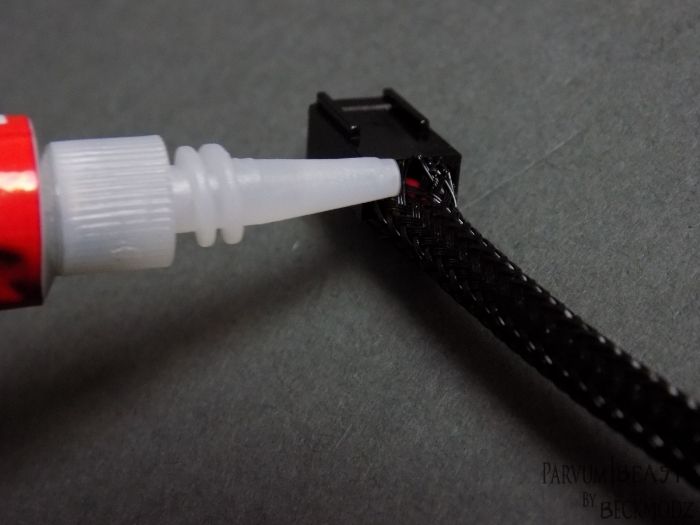
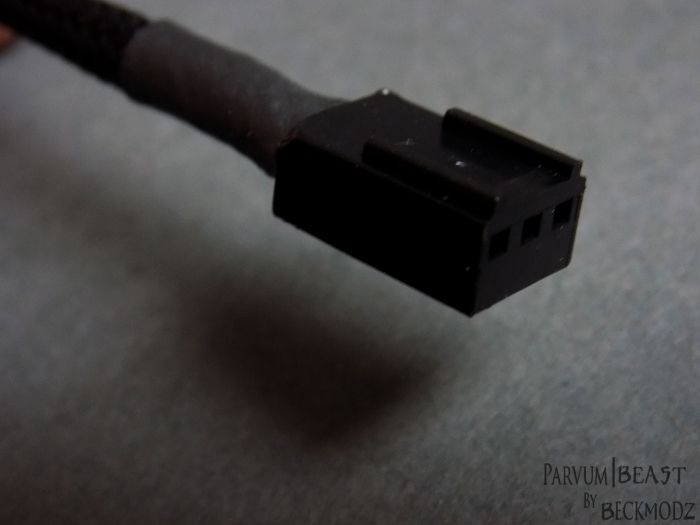
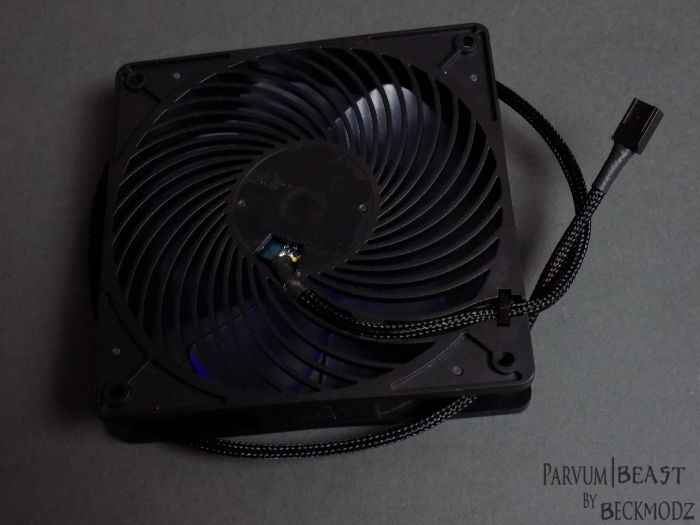
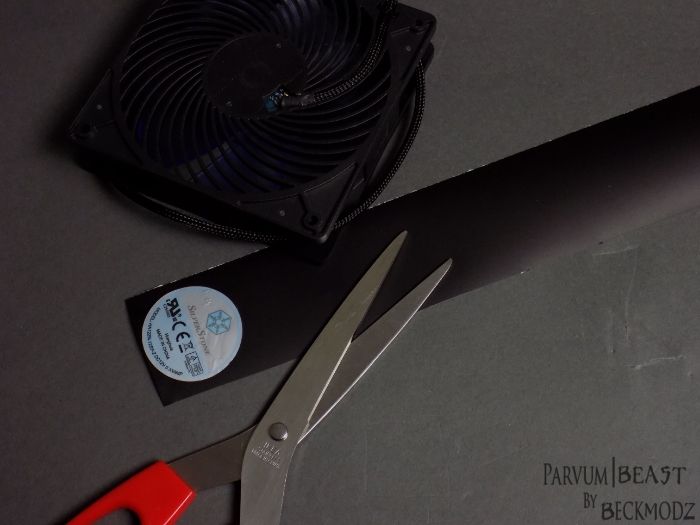
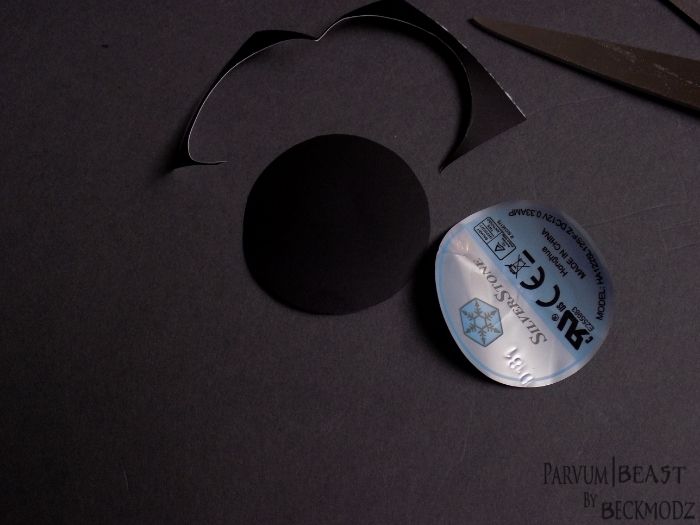
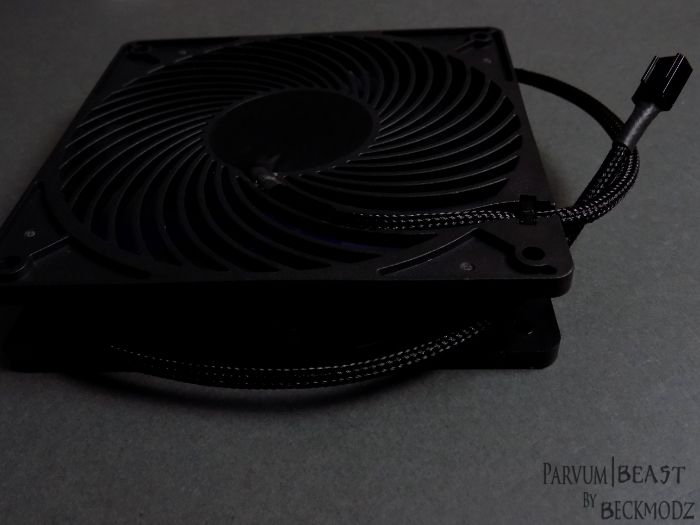
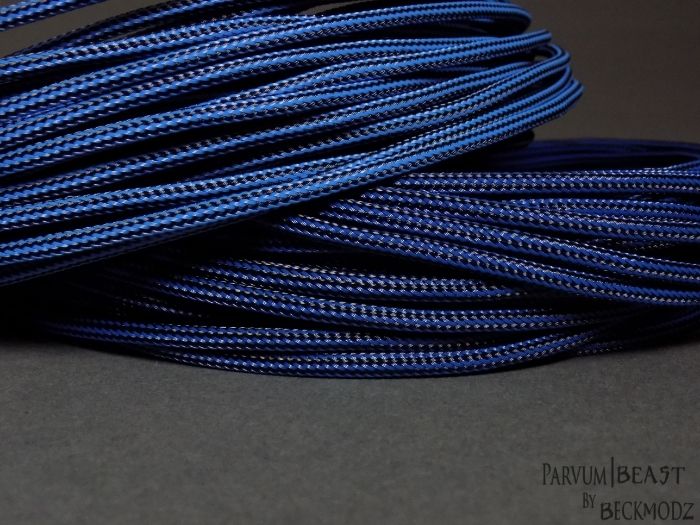
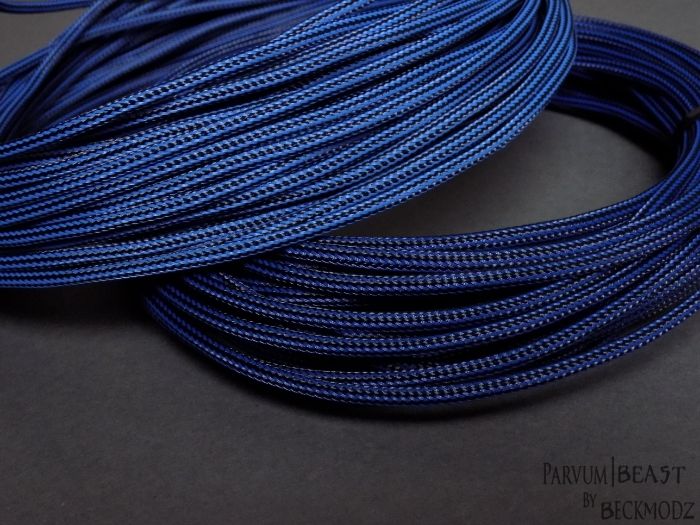
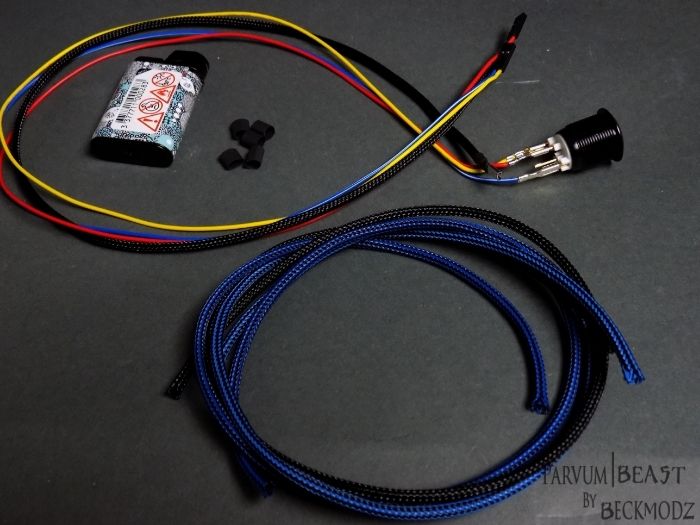
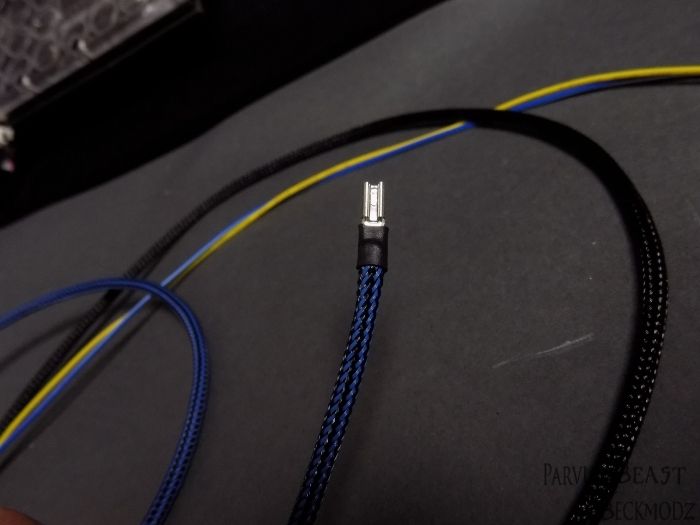
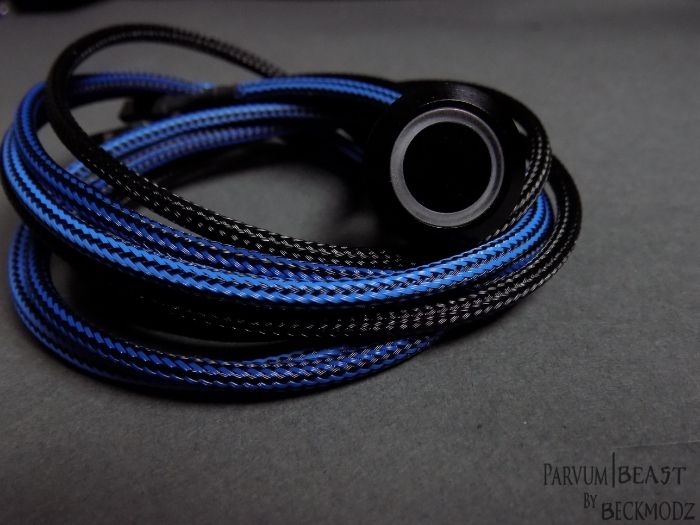
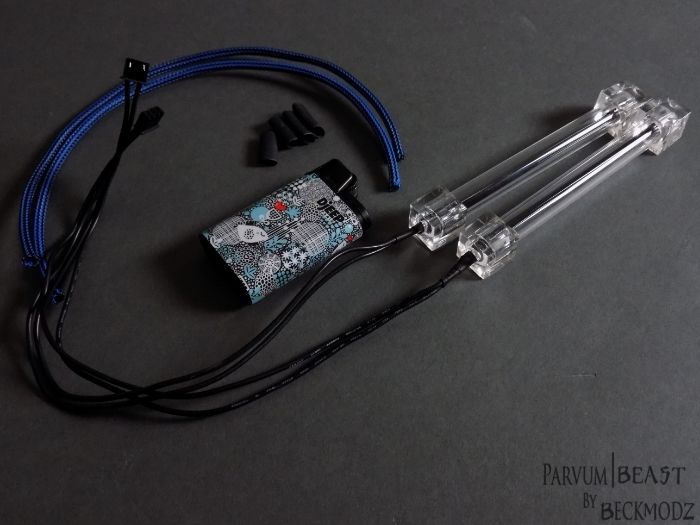
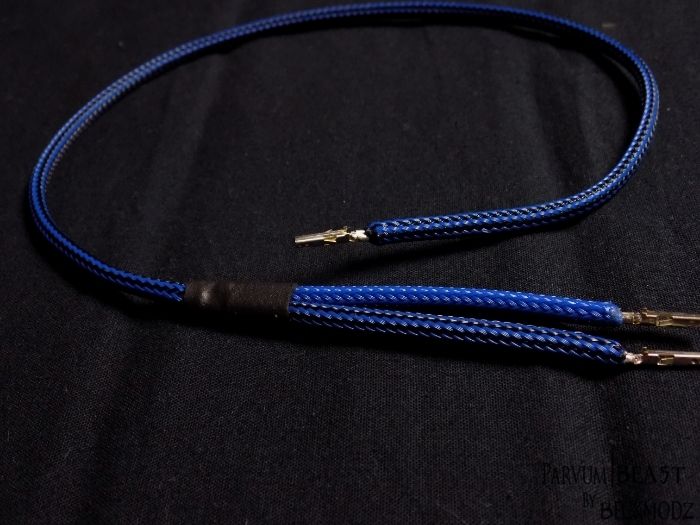
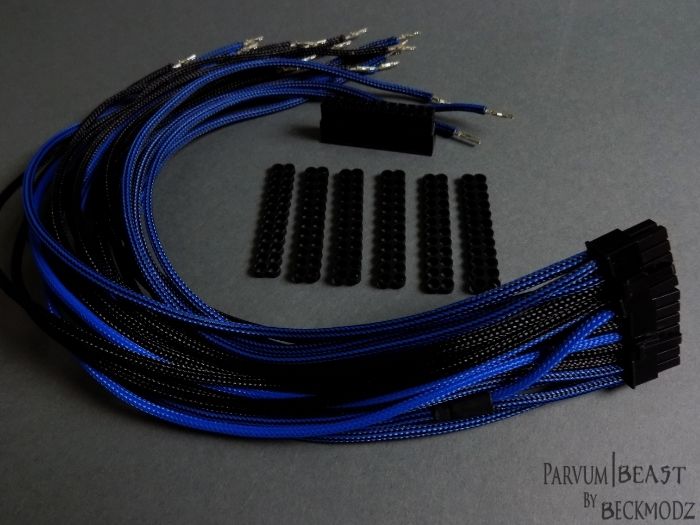
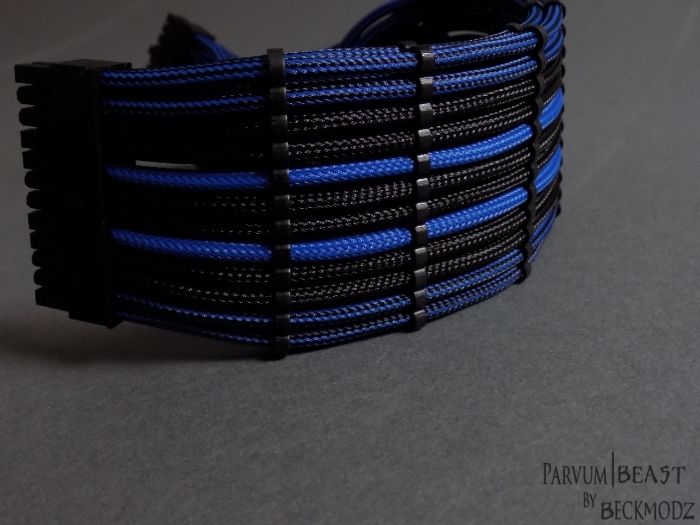
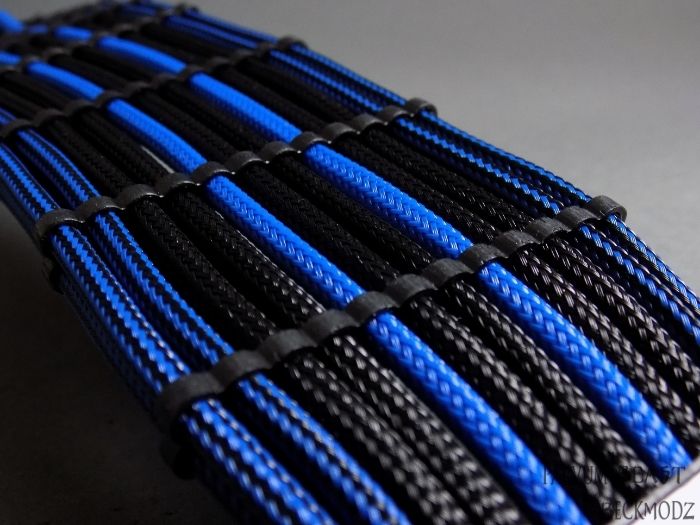
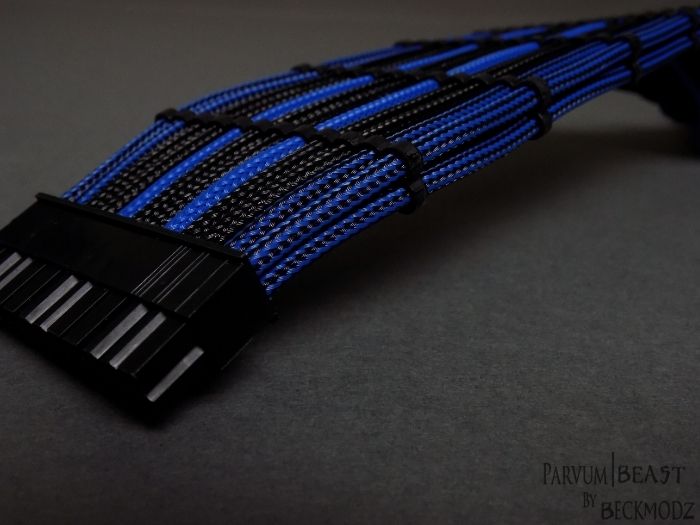
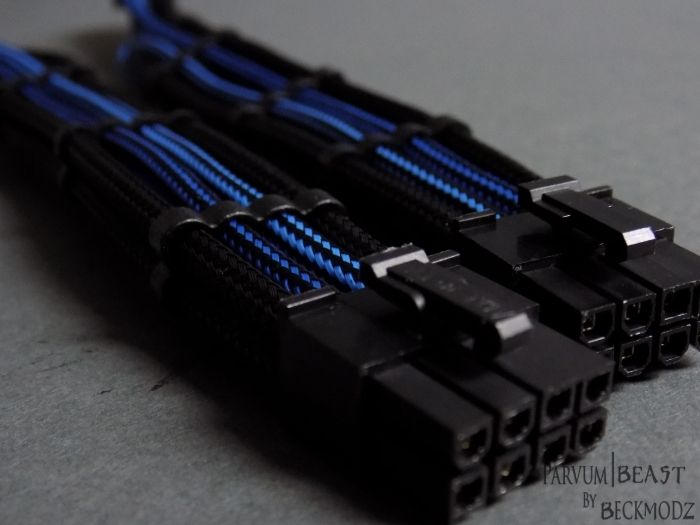
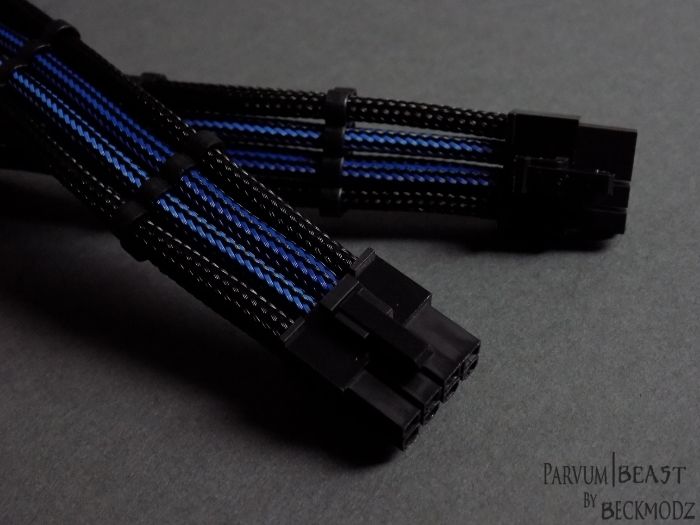
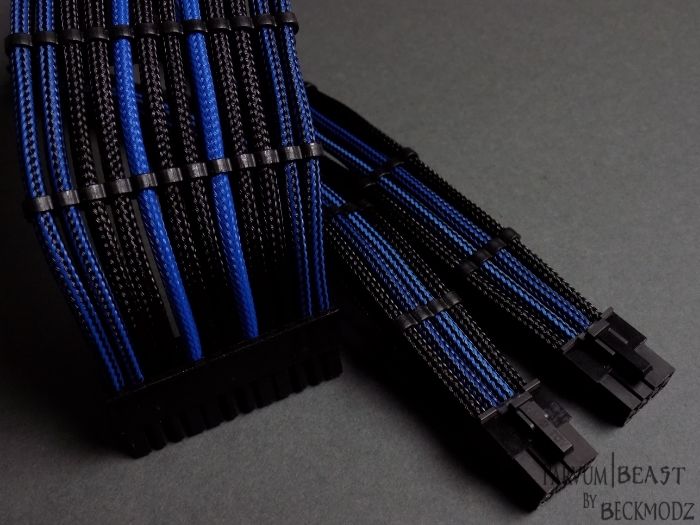
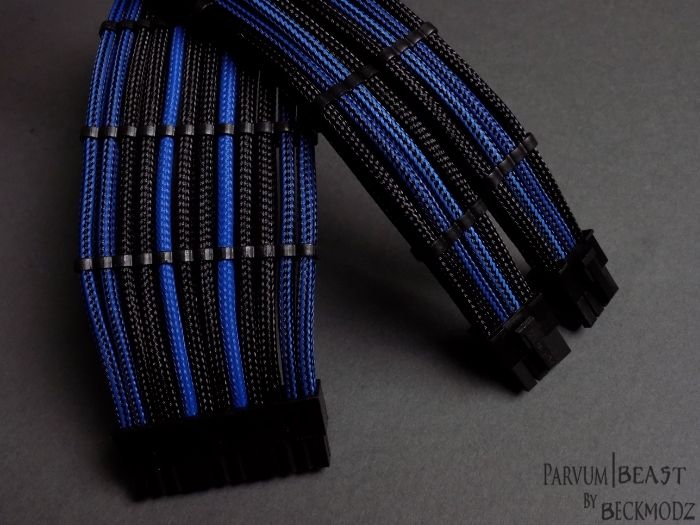
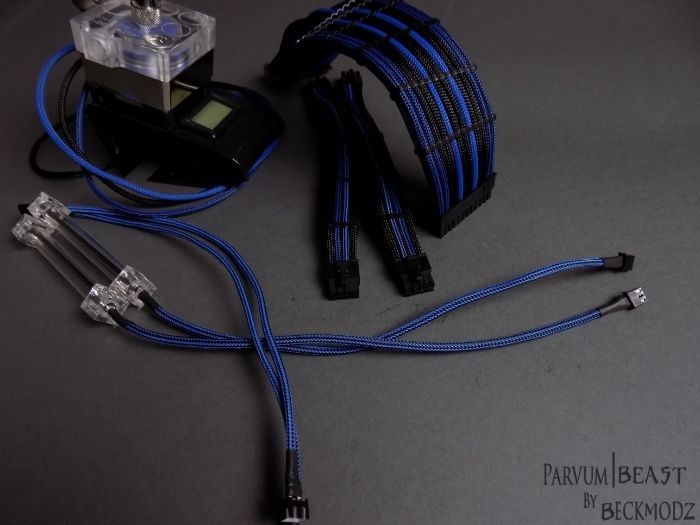
 
Just had to try this since its a monster blue energy inspired build :D

So i just finished my Moster Blue Energy Drink, and decided maybe i should cut it and try to fit it over the reservoir, as a reservoir

sleeve :D .. And i have to say, i actually think it looks kindda awesome.. Maybe i should try do mod it a bit, and see if i can cut out the logo and

make the "M" light up with the UV blue liquid in the res ?

6ef270b2-ca43-467d-9ddf-01f377e6e969_zpspze85yjy.jpg

6ca226cb-b7fb-46fb-92fd-b57c928ae381_zpsatyj8wp3.jpg


So what do you think guys ? ..worth doing, or just looks to lame ? .. Keep in mind i have monster logo on case also, and that this build is a monster

tribute build to the blue energy drink that i love so much :)
 
Look at it this way: if you make a mistake with the Dremel, you'll just be 'forced' to drink another can to 'reset' and try again :D

Haha thats true.. and when i get to mistake #14 i will be crawling around on the ceiling thinking i'm spiderman :D
OR worse, go racing with cars on the highway thinking i'm the flash ! :D
 
UPDATE: The fans and the rest of the sleeving just arrived <3<3 ..
Will take images of it monday where i will also try to cut out the monster energy drink can, and see if i can make it beautiful as reservoir sleeve,
or if i have to try something else :)
 
The Fans, Silverstone AP121 Uv Blue Blades

So the new fans just came in ! The Silverstone AP121 with Uv Blue Blades <3 ..
Originally i was going for the other version with blue led and transparent blades, and silver housing. But after trying them out i disliked it

a lot.. NOT the fans themselves, but only the way it fit my color theeme.. So obviously i had to get the black housing ones with blue blades instead,

and i am pretty sure it will look sweet with uv blue blades along with the uv blue liquid from ekwb :)

Also i tried to mount them on the EK Radiators, as a temporarily solution.. just to see how it looks..
Will take them off again later when i re-sleeve the wires from them :)

0ec19205-e564-4363-981d-8937d88d4a74_zpsawasjfie.jpg


c49f8eef-0c80-4649-a206-c418bb70631b_zpsjh0ekgj7.jpg


ca121d10-1371-4cbc-bb30-237c3d17d64f_zpsmkiqbydh.jpg


f9ca065e-ca18-4664-9887-0de8c6935cbe_zpssim2x738.jpg


f9c811ee-cc15-4d1f-ac25-ca3265bda274_zpsgw1y1vfu.jpg


25b5aef1-5c89-4c15-a90f-e58ce308f11b_zpsubbwcbte.jpg


19f40fc4-255d-4461-a076-0321b504e6a6_zps9vwclb39.jpg


17455310-e214-4d7c-86f6-aabbaabbe22f_zpssxedhbpl.jpg


f4357be7-9048-43f6-9dcf-76e29ff06ee7_zpslthdbrok.jpg


fbde8f02-b587-4ab6-8243-8076c005c7dc_zpsgdb3g2ke.jpg


Love how it looks.. Tho i know i HAVE to re-sleeve the fan wires, looks okay from stock, but thats just not good enough for me :)
Pictures of all sleeving progress will follow very soon guys !
 
Figuring out the Loop

Okay, so this Update is all about the Loop. I took all my beloved fittings from EKWB and CoolerKit, and just went crazy with them :)

At first i was going to use minimal amount of fittings and instead do a lot more of Bending the tubing, But these fittings just look so awesome, that i

decided to use as many of them as i could instead hehe ..

I tried many different loop ideas, and after an hours work i am pretty sure that this one is how i think it looks the best, and cleanest :)

6bbc8d43-6745-4dbc-a69a-df168d8f8b94_zps6w3m9y1n.jpg


ca651756-295e-4653-8852-19c685524baf_zpswb2szf8e.jpg


f083a1ca-5f4c-40c0-9a7e-2577d6d24162_zps65cbospz.jpg


cbe262ad-6b14-4703-b8d4-d1e671f5fb58_zps0xn635nm.jpg


0c8d9e1e-4259-4148-bb43-8d5952953584_zpsp4y8ro2k.jpg


8d433c72-8689-4c55-90ad-41ca0e2743e5_zpsubbrb71m.jpg


56d4bc8e-b421-42ec-8c04-d4efbd0eeba3_zpsvmbnel1p.jpg


e8c04b3c-32be-4675-8eab-4e18b1c9e39b_zpsokmathzc.jpg


6d60900e-e9a4-4ab4-a3a8-d5800769591d_zps9fainbvj.jpg


a93a6d45-199f-4d1f-be8a-83fb66b58238_zpsbavrokhe.jpg


880afaab-6338-4343-ab19-12e98a08d9d3_zpsvohaourz.jpg


c7349bb9-f42b-4ed9-bcf6-a84084427ed5_zpswdllqsno.jpg


287f8e46-8bb9-4443-864e-376d15dc9cf5_zps77uz2lkb.jpg


47effb3a-7c38-4ad7-a12a-201ca9620c79_zpsvo8c0b7o.jpg


8ba1c767-950e-4c39-8ee3-f826e8a4a275_zpszyadwuwk.jpg


Am pretty happy with how this could turn out!...
Next up is probably tubing it, and making reservoir cover out of something.
and then a lot of sleeving later !
Hope you like it !!
 
Do like what you've done to mount the gfx card. Always thought that they build them upside down. Nice to see the block you've actually spent money on rather than the back of the PCB.

Thank you very much, and yes i fully agree, makes no sence to spend so much money on a plexi gpu block, and u have to flip pc over to see it : D..
 
Reservoir Vinyl Sleeve

Allright, so i was going back and forward in my head with ideas on how to make the reservoir sleeve.
I tried to cut out the Monster logo from the Blue energy can, and seriously i tried like 6 times and just couldnt get it to be pretty enough!
Then i was thinking about some other options, first one was to cut out the logo in a alu tube, but my dremel was tired of living and decided to die :(
Next was to find some Plastic tube, but couldnt fint it in the right thickness, so had to figure out something else.
Thats when i came up with using some of my Matt Black Vinyl Sticker, and cutting the logo into the vinyl and then just stick it on the res.
Actually i'm quite happy with the result, the matt black vinyl sticker thing actually matches the case acrylic to perfection.

So anyways, here's some pics of the progress of the making.

26a42da5-f1ec-4e6a-8207-5c66fcdf9b9c_zpslyyuv122.jpg


0f7caf14-52a9-4ab0-aed2-492cbd33c3aa_zpstyztwqhx.jpg


cc3918d2-e244-470a-aa07-fd919eb93ac2_zpsn1o9ccza.jpg


c4712348-4bc1-4ab7-9719-ab1896e3e062_zpsa9dimb2n.jpg


cac902c1-d752-447d-b106-2cf5c6599ec0_zpsr6k4gbez.jpg


3dd606d5-9d06-490e-8382-6494167bd118_zpseakptwfd.jpg


26a3993d-1b8b-44e4-9564-8658607e79e1_zpsxav0afpr.jpg


df63b74a-596b-4574-a412-30cebd401a1c_zpsjjo8asef.jpg


12222318-19c7-4ab9-939f-51ed9b65cea0_zps7bdrrcsr.jpg


f1963afc-9f23-4cb3-be65-d80d0c1a8dcd_zpshffqflup.jpg


Hope you like it, i threw some light in it to give you a better idea of how it's going to look.
Obviously a little different once the UV Blue liquid fills the reservoir, but i think it's going to look awesome,
and fit the Monster Energy Lo-Carb build theme pretty good..
And YES i see there are some air bubbles that i have to get fixed, but that will be done later:)
 
Re-Sleeving the fans, and extra sleeving arrived

So we all know how badly case fans are sleeved from the factory ! .. and if there's anything that kicks off my OCD its the red,yellow,black wires on the fan,
when everything else is sleeved, and also the poorly made heatshrinks!
SO obviously i HAD to redo the sleeving of them.
I cut away some of the cable "holders" (the thing on the fan that holds the wires in place and helps route the cables)
so that the new sleeving would have enough room to be placed nicely. Also i used superglue to hold the sleeving in place on the wires
before shrinking the heatshrink..
Also that silver sticker had to go, and instead i used some matt black vinyl sticker !

AND Mainframecustom.com sent me some extra sleeving. the LC Teleios Fusion – Black/Blue, and the LC Teleios Fusion – Blue/Navy Blue
which i am sure will look much better in the Beast then the lighter blue colored sleeving would :)
Now here's some pics!

591c5baf-5c5a-49b0-8756-a0c984ac43d4_zps0pefqllv.jpg

REMEMBER kids, DO YOUR PINOUTS <3
e016d914-84fe-465e-af37-e33366f0d5d3_zpslvspin1w.jpg


9c95e9f1-fcb4-4a65-a85a-e6039ae617fc_zpspxspbchj.jpg


2a9f111d-5dff-4652-a16e-d5c5121ee017_zpstkbgvsb5.jpg


bf1a1bda-1a12-4947-a030-b3b23113b1aa_zpsg4uhfjpu.jpg


f3aece65-d8b0-40c2-a0ab-9f81206b971e_zpswkgebmeo.jpg


1034ee00-a960-4cd0-84d8-495372bc2ed8_zps5czjgtze.jpg


09e65b86-a4e2-4402-bfb5-154ce8803bca_zpsf8x9u6c6.jpg


32f4653c-851c-4dcc-9cef-9dd38c5eacdc_zpst0eakkfz.jpg


4203085b-6fbb-4c89-920e-134d135b4719_zpsbs7ksexd.jpg


e15bbe68-b707-48cf-b006-2b4a2e8f4534_zpsmvbqvyrw.jpg

The New sleeving from mainframecustom.com
e4ee892a-2aef-4b1c-b2ab-1768e4b8fbf1_zpsq2xz7e4c.jpg


a4f3889d-b2d5-4dc1-aa35-184d7cd2b6ae_zpslqowsk8b.jpg


I was thinking about getting the heatshrink to cover most of the fan connector, because it simply looks better,
but maybe i will do it later and buy some sata shrink for it :) Enjoy!
 
Genius! Looks good too. You might end up having to take out the anti-cyclone EK logo if the new fluid isn't opaque. Looks a bit odd peering through the holes otherwise....although in the flesh it might not be noticeable.

If you're near the Watford area, you're welcome to borrow a Dremel. I've got two now as one of mine refused to let go of the Tungsten Carbide bit I was using on the back of a case to widen the res mounting holes. Must be something about Dremels and res's!


Thanks :) Yep was thinking about taking it out, just wasnt sure how noticable it would be, but since you mentioned it, i will do it ! :D .. so thx for that ! ..

Hahaha i live in Denmark ! :D .. but thx anyways!..
yeh dremels dont like reservoirs they jinx them! ..
 
Some More Sleeving, 24pin, 2 x 8pin and more

I Love Sleeving !!! :D
So guys, i just finished the 24pin, 2 x 8pin pcie's some cathodes, the powerbutton and some more ..
I had a a vote on my facebook page "BeckModZ - Liquid Designs" and other facebook groups, about the color combination for the 24pin,
i actually started out with 33 different versions of it.. sick! but narrowed it down to 4 samples that people voted on.
So the combination that won was my favorite too, but i changed out the middle wires for some black ones instead,
there was a lot of blue on the 24 pin originally, and i changed it with some more black sleeving instead, since there's allready so much blue goin on in the build.

Anyways, here's some shots of the connectors and stuff.
This post will be updated later on when i get the rest of the sleeving done.
Will also make a image series or video turorial on sleeving, but will do that when the whole build has finished.


14fda14f-1c40-4cf0-8cd1-a43e911eafe0_zpswdzkhwni.jpg


ee763ae5-8837-4ffd-809e-01e01b1d5137_zpsqmzci0wt.jpg


dd71c9f5-de12-4191-bf91-a8233cca8bff_zpsbq0qwcks.jpg


7802d485-d963-4ae0-bcce-83eb7005ecd4_zpsodqwymzd.jpg


03f4f972-d24a-499a-a353-102e03fa7a1b_zpsx1qqltfn.jpg


eb6aed5d-826f-4c55-8b5c-8aa757e255e1_zpstjzkuvke.jpg


04651341-bf93-4f35-8c4d-638a06a93d1f_zpsibo57fdv.jpg


4b432f26-5c1f-4dcd-8479-a33b52543d2b_zpspht8jge8.jpg


9a78e84d-c20e-434b-8675-5bbee1d77118_zpsuwb2rkht.jpg


5400fd6e-02c1-44aa-8a0b-1759575feef3_zpsplktxiyk.jpg


8d586a3c-4e4b-471e-b470-30867ebfccd2_zpsdbmqfu0u.jpg


6d3c7503-9ffc-4963-b37f-74b66d2b0f71_zpsgunltlhv.jpg


7075c3b6-2cc1-477d-9a2b-cf777c3cf0e7_zpsr097xmiq.jpg


6869b4ec-8173-4802-8a29-d521f975bf93_zpstvndbflr.jpg


c17490f0-dd5c-49e4-a5b5-f22bff537a01_zpsmvvjjwdh.jpg


Hope you like it peepz..
I really enjoy sleeving, and this LC Teleios sleeving looks so amazing, and is so easy to work with when going
heatchrinkless style!.. the weaving just looks so beautifull!!..
ooh btw, i also leak tested and filled the beast with liquid.. images will follow sooooon.
 
Back
Top Bottom