Project: Silent Overkill

I wanted it to be able to do (at least) aluminium without problems so this one isn't linear rods and leadscrews but ball screws and linear rails. Still technically possible but involves splashing more cash at it....and I still haven't got the space.

Brrp whirr click......

Translator software v 1.2 written by Wayne Kerr.... checking system... system good.. translating........

"Give it a month or two and I will work out how restrictive the bed size is and throw loads of money at it"
 
It's 300x300mm which is larger than my 3D printer....so I'm hoping it'll be ok for most stuff. I'd be happy for it to be larger and make my life easier...but I'd have to move house first...and that sounds both expensive and stressful! I picked up a Trend height-adjustable roller on Black Friday so I'm thinking that will support the material hanging over the back but still let it roll. We'll find out which side of the fine line between genius and crazy that lands at some point! :D
I'll post pics when I've got something eating up all more floor space!
 
The Makita router I'm going to use as a spindle has arrived. "Comes with ¼” (6mm) and 3/8” (8mm) collets" *facepalm* Nope, it comes with a 1/4" collet and 6mm ≠ 1/4". It looks like there is an 8mm collet available ...but it doesn't look like the others, it's just a split ring...and I don't trust it. So, 6mm collet ordered as most of my milling type cutters are metric. Most of my smaller tooling is Dremel stuff and that's a 1/8" shank. Someone does make a 1/8" collect for a Makita router...it's £31.50 + shipping ...aaaand that's a nope from me.
 
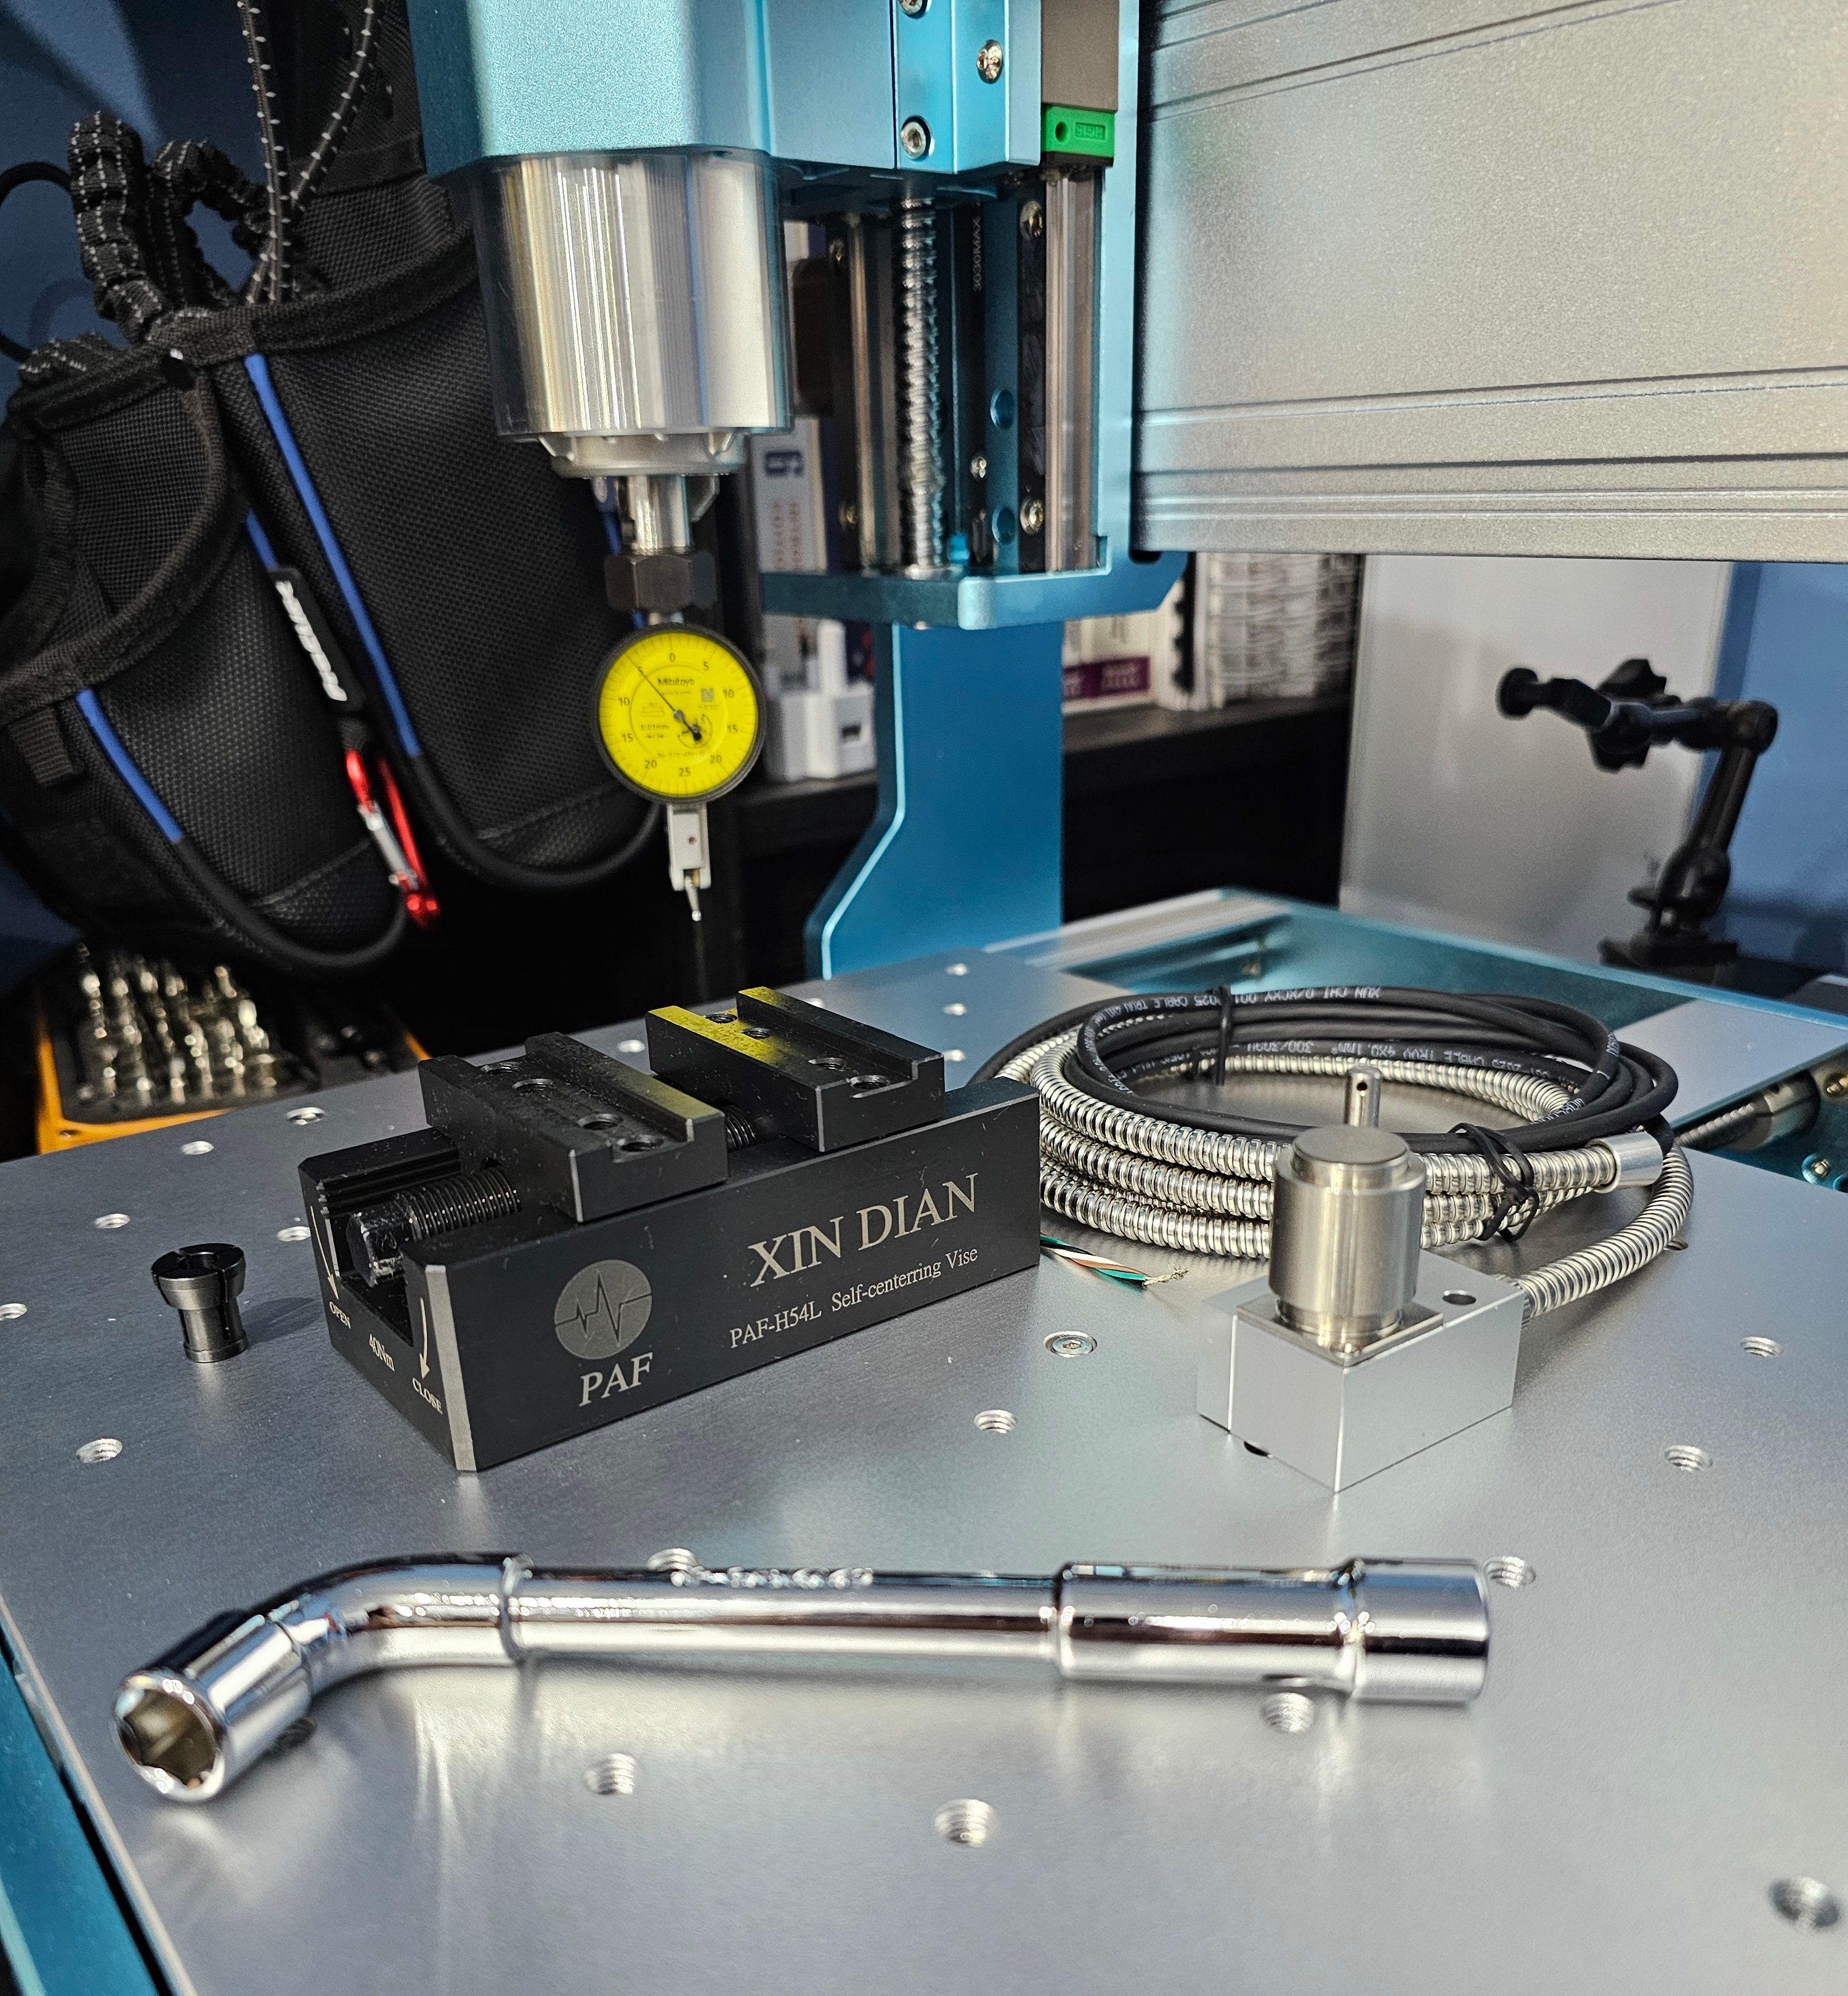
Ok, I'll cave. I was hoping to get things assembled before pics. It's not difficult to assemble but I will need to set up a DTI and sweep that across to make sure it's aligned when I tighten the bolts - otherwise I'll be cutting wedges instead of flat plates. Same thing with tramming the spindle. I think partly I'm finding it very difficult to actually do anything at the moment - even though I'm keen to 'play' with my new 'toy'. May be just burned out - hopefully the Christmas break will help. I suspect there's also a certain amount of Schroedinger's Cat at play: it can't be disappointing if I haven't tested it :rolleyes: Yeah, I know; I hear it too.


'Mounted' on the floor. Trip hazard? Dunno what you mean guv'! :D
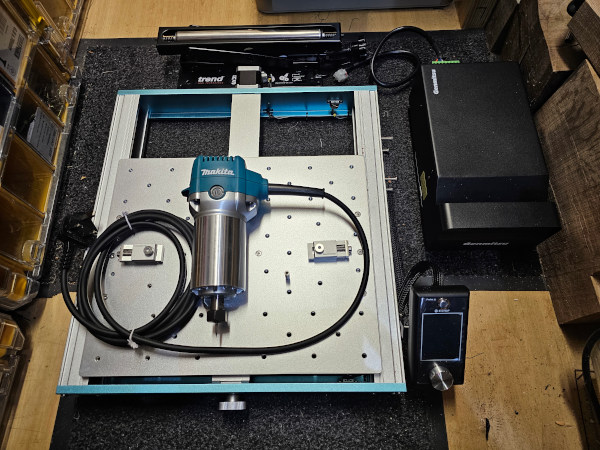
On the bed there's obviously the router that will be the spindle. The little cylinder to the right of it is a 1/4" to 1/8" collet reducer so I can chuck up the supplied engraving bits (one mounted to test it and the runout looks good) and potentially anything else that comes with a 1/8" shank.
Either side are a pair of Genmitsu toe clamps that fell in my basket at the same time - might be quite good for clamping acrylic sheet without sticking up over the sides much.
Black box to the right is the control box and the Trend thing at the back is the height-adjustable roller that might let me hang the material over the back....or might just not reach and be useless.


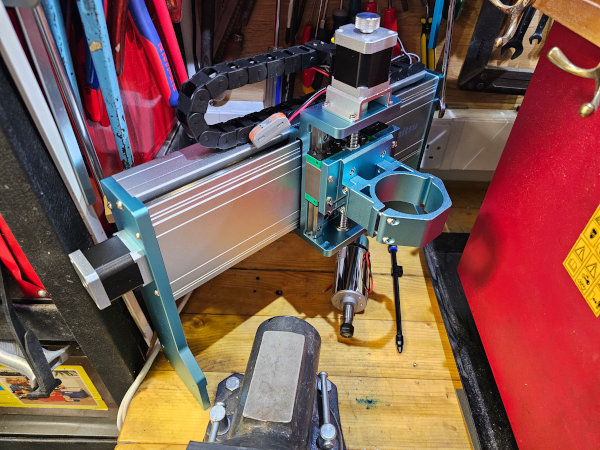
Gantry, 300w spindle and an air-blast nozzle. I'm set up for compressed air in the workshop but it's a silent compressor so you sacrifice speed for retaining your hearing. Will have to see if it can keep up without horribly exceeding the compressor's duty-cycle.

Edit: thanks very much autocorrect but my CNC has a gantry, not a gentry.... it's not that posh!
 
Last edited:
It certainly looks more robust than a Shapeko or Oozenest, which is the sort of thing I thought you were getting when you said Makita router.

She looks good, excited to see what she can do for me us you :D :P
 
May I suggest some deadening mat under the bed? trust me, you will thank me later. Totally takes the ring out of it !
 
What between the bed and the workpiece? For metal I think that would be a disaster but I can see it might work for softer material.

I've got the gantry mounted and things moving about. Got to work out how to dial it in now. DTI was a genius idea but the mag-mount doesn't stick so well to the all-aluminium bed and frame. I could mount it in the spindle but the mounting stubs I have are 8mm (too large) and 4mm (too small). Will have to go digging through drawers to see if I have anything else or if not, make something up.
 
Ah, Dynamat on the underside of the bed (or rather similar but legally distinct from Dynamat). I see what you mean now. I will see what it sounds like when I eventually get it up and running. Certainly something that can be done afterwards if it's bad, Actually, that stuff claims to be 1.5mm thick and there's only just over a mm gap between the underside of the bed and the rear rail.....and I've already discovered the hard way that the bed extends beyond the back of the frame when you home it. It fails to push the control box through the wall but succeeds in pushing itself forward, through things on the desk. :rolleyes:
Not sure if you've got the slatted bed (aluminium extrusion with T-slots across it) or solid. Mine's a solid 8mm thick slab of aluminium so it may be that it doesn't ring as much....or more, we'll see! Have to check how flat it is yet; might need surfacing.
 
If you want to lose about 20mm Z height, make yourself a big acetal fixture plate like Alex Banks did. Butt load of holes and threads for dowel pins and clamps all baked into his Fusion designs so he has repeatable tracking points for alignment of multiple cutting ops.

There's an old video on bit-tech's YouTube somewhere about it.
 
Last edited:
I've got a low-profile CNC style vise on order - the ones with the teeth that bite into the bottom of the part. The bed does have some threaded holes already but I don't as yet know 'where' they are - like coordinates or at 50mm spacing....they seem a bit random at the moment!
Collet sizes are the thing that's really hobbling me at the moment - once I get far enough that putting stuff on the bed becomes an issue, I'll be laughing! :rolleyes: Right now, I've started assembling it in the office because I knew I wouldn't get it done crouched on the floor in a confined space (the shed/workshop) in the cold....and while this is true, I share the office with my wife and she's working form home today. And that means nothing running because at the very least I MIGHT HAVE TO CHANGE THE FANS!
 
Ok, got some lathe time in, made a stem, threaded it, missed the dimension on the stem and trashed it. Started again, nailed it at 6.35mm, parted it off...it didn't fit. Re-measured and it was the better part of 0.1mm too large. When things get hot, they expand so it's perfectly possible for a part to shrink when it cools down...but I've never seen one grow! Re-chucked it on the threaded part and took it down to dimension with emery cloth. Cleaned up the threads with a die...and dropped it to disappear under the bench *facepalm* Eventually I found it...but trust me, there was swearing.
This is what I've got now, so I can mount the DTI in the router spindle and sweep across the plate and also tram in the spindle.

 
Well, the bad news is that I have so far discovered that the gantry is canted such that there is at least 0.2mm difference from one side of the bed to the other. It's also not flat. I've not managed to check front to back yet because when you jog the carriage side to side, if you hit a limit switch, the controller panics and you then can't move it until you home it again (which is the farthest point away from where you need to be - I suspect that's a definition!) and on the Y axis, it hits the limit switch, collides with the end and panics. Should be a minor tweak but it's a little annoying. Have just printed some limit switch covers as apparently aluminium chips and totally exposed electrics don't mix well...who'd have thought! I did think this would move the limit switches forward by the thickness of the print but it appears not; the screws were nearly welded into the frame and then the actual limit switches are either glued in place or have been clamped so hard to the frame that they're now practically one piece! Luckily the covers were designed to screw over the top rather than between the switch and the frame like I'd though. So I just have to adjust the flags that trip the switches...which are, of course, underneath the bed. Take up CNC they said, it'll be fun they said :rolleyes:
 
Ok, so where are we now? Well, someone posted up to a 2016 build by JR23 build and I realised that by the time I've got some of this as physical, CNC'd items, it's going to be about dead-on a decade since I said I had this planned....which isn't depressing at all! :rolleyes:

So progress then for ....for...for something dammit!


  • I've got a 6mm collet arrived. That the little black thing on the left. Genuine Makita part and cost me less than a tenner shipped. Fantastic....now if only they even made the other sizes that I'm going to need! Beginning to think it might have been cheaper to spend more on a spindle that takes collets you can actually buy for sensible money!
  • Vise. A fancy self-centering CNC style vise with bitey teeth. What, you can't see the bitey teeth that grip the stock without getting in the way? Yeah, neither can I but it's technically what I ordered and I've just fallen foul of AE's multiple items under one listing debacle. It actually seems pretty good - at least without running a DTI over it and seeing if it's square etc. It doesn't seem to have any slop and moves smoothly so I'm calling it nice for now :D I'm currently watching Clough42's December 2017 set of videos on how to make my own imitation TalonGrips. Why don't I buy them? Easy, because the cheapest I've found them is £30 a pop and I'd need at least four to start off with! ...and that's assuming the vise accepts the 'standard' size ones.
  • Tool setter. Useful for measuring how far your tool sticks out after you change it. Watched a video and decided I clearly need one. Should be better than the supplied plastic thingy.
  • Touch Probe. Not pictured. Can't be bothered to go back and add it to the picture :p Should let me accurately locate the edges of parts so I can put things like holes in the right place.
  • Tramming. I've got the spindle aligned within a reading of about 0.01mm in both the X and Y axes. The numbers don't mean a lot in this context other than it's very nearly square to the table. I've also go the gantry roughly square to the table but the table bows by about 0.2mm or so towards the middle. One cutters arrive, I can face off the table and it should be good...that or we go round again.

So what else is new? I've worked out the flow of how to set zero on the offline controller and I think I can customise the touch probe routing to use the tool setter by sticking a text file on the micro SD card. Look, you can either multiply the price by 50, or faff about with irritations like this....you already know which path I went...and why!
I've got some cutters in the post too. One of them is a thread mill (if you ask Amazon, it's some sort of exercise device but they're simply uneducated in these things!) that should let me mill a G1/4 thread into the acrylic parts I hope to make. Assuming it works, it should be safer than hand tapping them after everything else has been completed.

So what now? Now we hope work doesn't kick off, that family behave themselves and buckle down for Christmas while various shippers and couriers lose all my orders! Hope you have a good one all!
 
You're not being a helmet....but it also isn't quite that simple. Is it ever?! Collets are normally made of spring tempered steel...and that means selecting an appropriate steel and then heating it till it glows without burning your house down. Quenching it without setting fire to your trousers. Then heating it to some specific lower temperature for some specific time and then hoping it's still in the shape you wanted to start with. I may have to do a simpler version of this for the vise bitey bits that need to be hardened (and tempered or they'll just shatter the teeth off) but that should be simpler....I hope!
 
it's going to be about dead-on a decade since I said I had this planned....which isn't depressing at all! :rolleyes:
Couldn't possibly relate to this at all. Nope, absolutely did not buy the 901 for my 2016 birthday after planning for a year prior.

V1 of fully CAD designed Asteria 3 turns 5 next week.
 
Last edited:
Back
Top Bottom