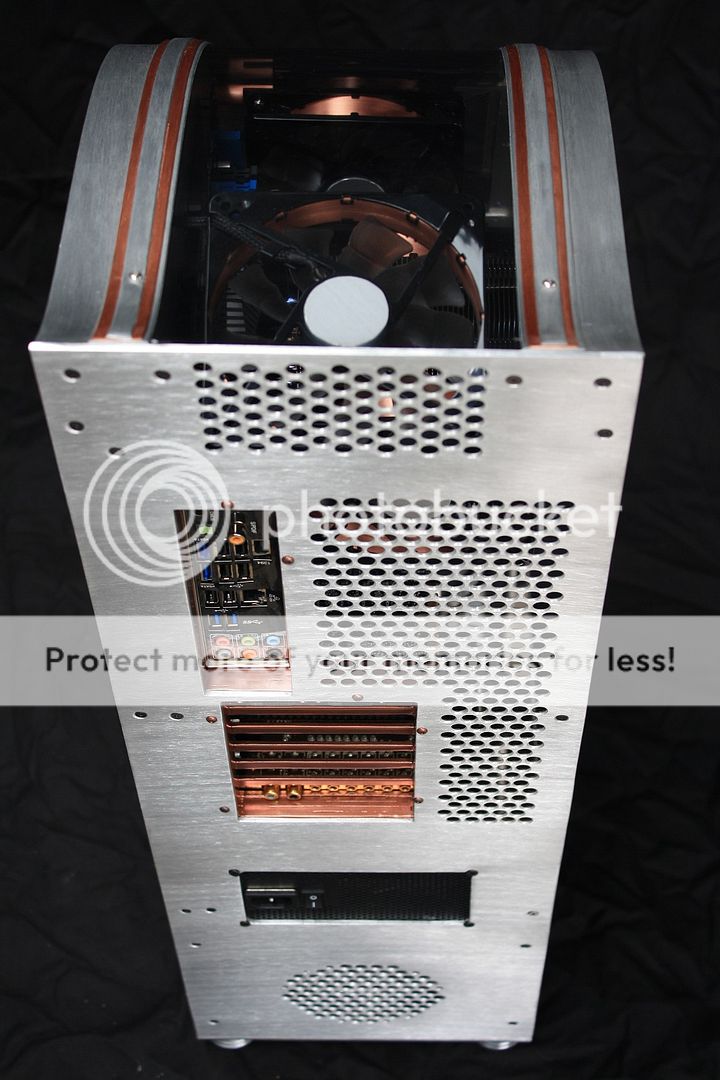
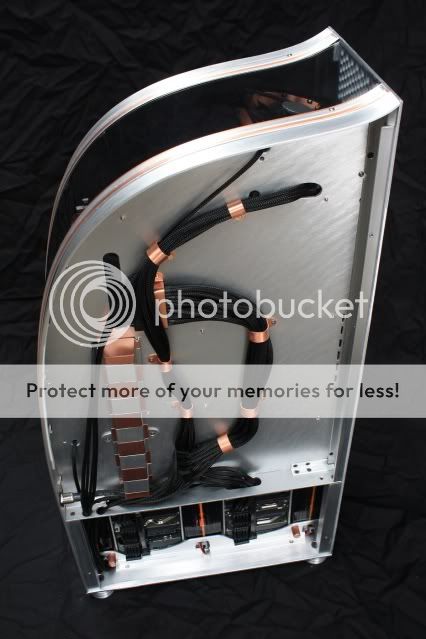
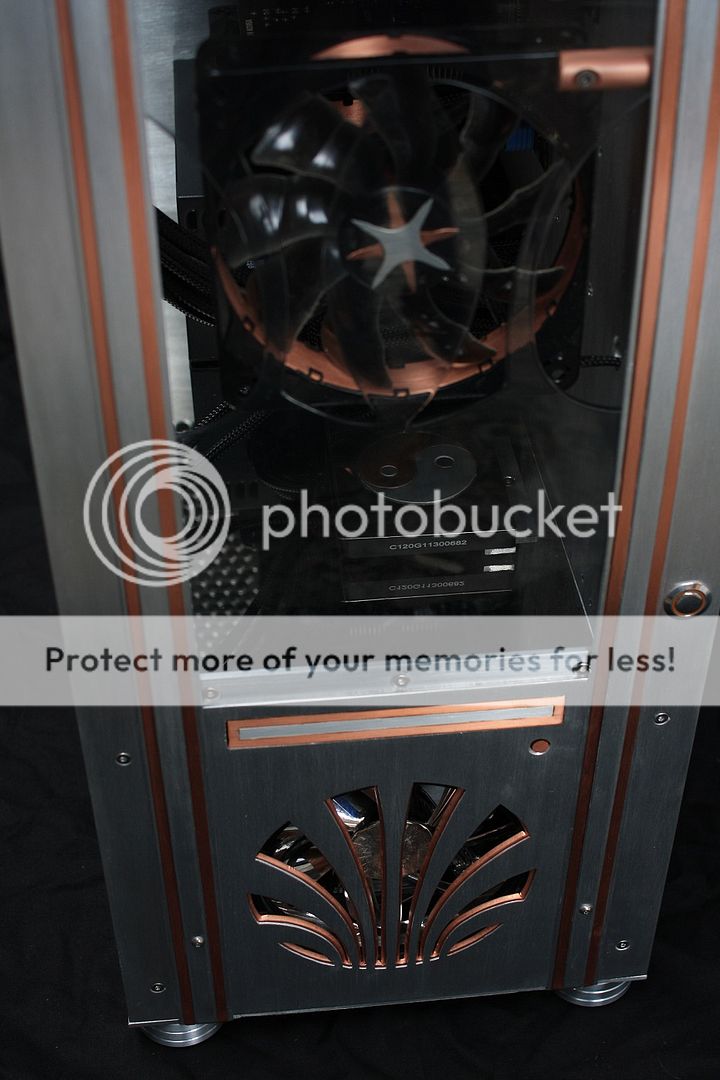
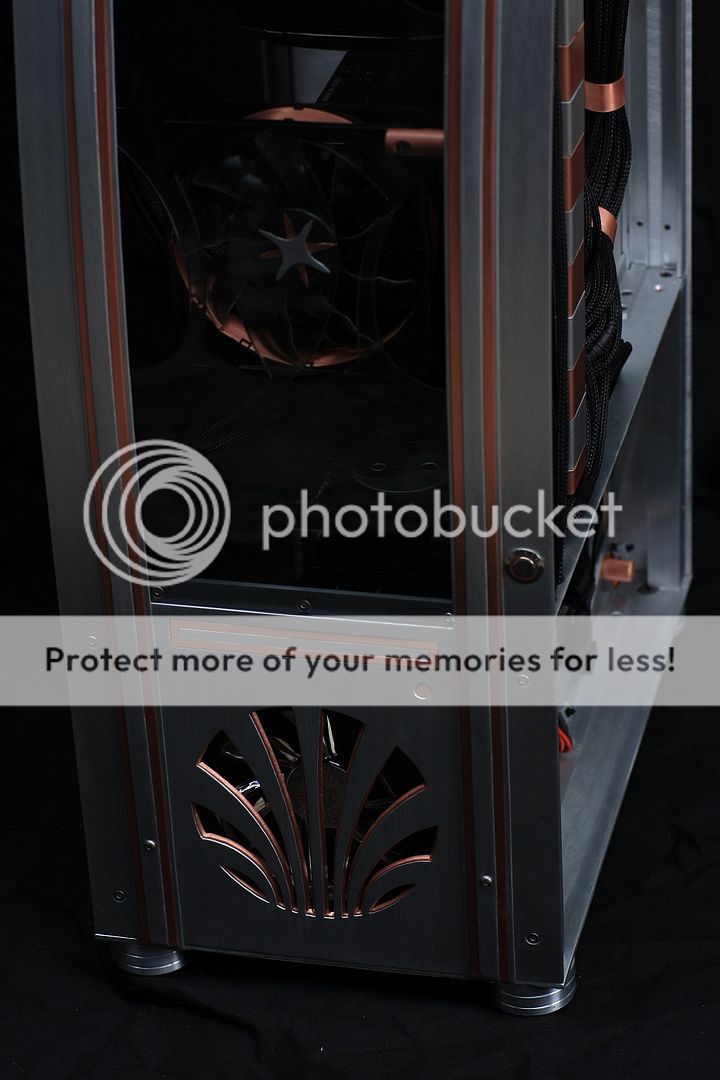
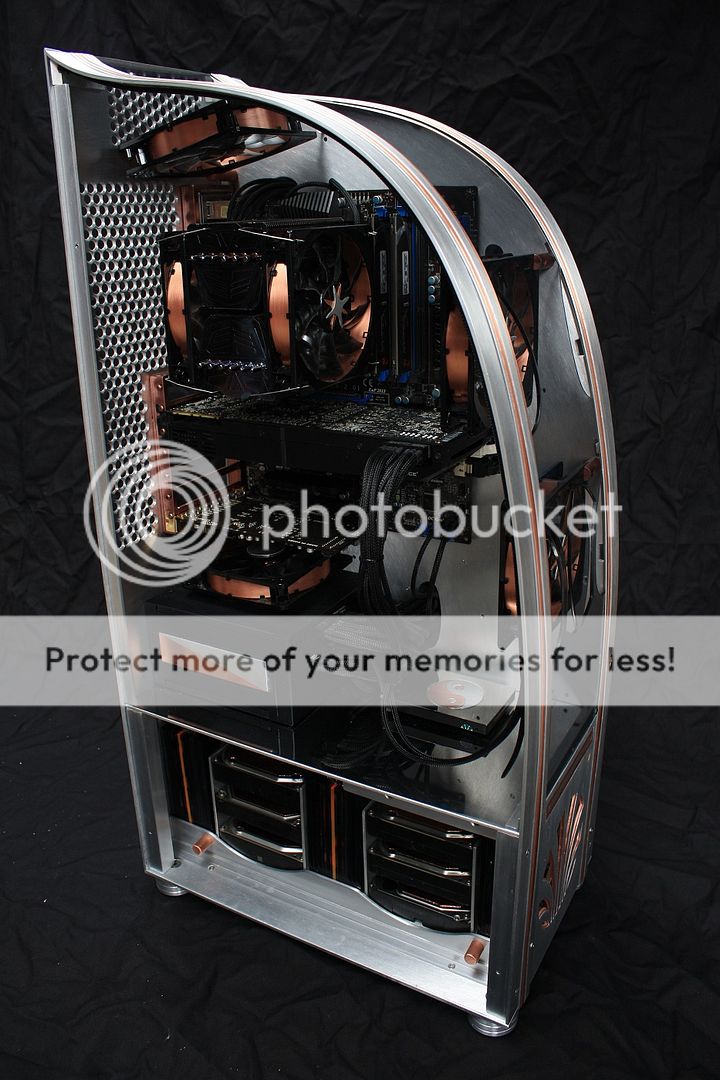
Project Stealthlow

A few night photos & these were taken before I tried the new lighting I just finished doing the wire work on them, it's not for definite but I wired 4 led's to loosely sit on both sides of the holders which should provide a nice little boost of light for the stick bars so depends on if I like them or not if they stay final or not, for the main section I decided to just use 1 of the 30cm white led strips which I might lay some tinting film over if it's too bright so should have completed photos up real soon as it's just a matter of getting a mini flood of great finished photos which might take a couple of days to capture it as best as I can :D.

I found after taking the led strips & diffusing paper from the holders the 5mm gaps on both sides allowed a tiny bit of light from the fans & the plastic chrome looked nice but is hard to photograph perfect, taking good pictures of lighting is difficult to capture it as good as how the eye sees it but wow I think I've got far better at night shots :D.

I applied copper foil tape to where the hdd labels were, bought a big 300mm x 1000mm sheet, they look a lot better than what they did :).

ProjectStealthlow1198.jpg


ProjectStealthlow1199.jpg


ProjectStealthlow1200.jpg


ProjectStealthlow1201.jpg


ProjectStealthlow1202.jpg


ProjectStealthlow1203.jpg


ProjectStealthlow1204.jpg


ProjectStealthlow1205.jpg


ProjectStealthlow1206.jpg


ProjectStealthlow1207.jpg


Now I'll get onto installing all these freshly wired lights & then get onto doing the final photos :).
 
Work of art :)
Thank you Diggsy, purely accidental if it seems like art :D honestly I've just been on a mission to get good at making cases since my first case but this time had big functionality in mind & wanted it to look good also, I think I achieved this, took me a flipping long time though lol :D end of November up until now (life stuff/waiting for bits/materials/remaking bits) but learnt heaps of new fabrication tricks & now have an awesome looking/sounding pc so jobsagooden hehe :D.

Sorry to hear about your RGB troubles. I've had no such trouble with either of my generic eBay strips that I bought. Mine don't come with those 4 pin plugs and has a larger and more comprehensive keypad but the control box looks similar. I think Phobya source a lot of different products and stick their name on them.

What does the inside of the control box look like? One of mine seems to oscillate a touch on the slow side so might be opening it to see if I can fix that.
Wish I went for the ones you pointed out mate :D was quite a big waste of money on the rgb strips, everything of phobya brand that I've tried has been good except for the rgb strips so the plain single colour led strips from them are fine & far better wired. Inside the control box it's well packed into it & the excess wire helps further to keep it all in place but I had to make a custom one so it would fit where I wanted it to because of it being a pretty tall box for what's inside it.

Anyway I installed just a 30cm white led strip but it was way to bright & I didn't fancy more waiting around for delivery of tinting film so just sleeved it with the mdpc sata sleeve :D & now it is perfect, not too bright & not too dim :cool: I added some white led's to the fan holders also to give the stick bars a little more kick & I believe I can finally call this case completed now :eek::cool::D so just need to do completed photos, could take me a couple of days, the rest of today I'll be tidying & cleaning where I've messed up my room is an absolute mess with modding stuff everywhere :D.
 
Last edited:
Nice to see ocuk have dropped the limit of how many photos can be shown at once :cool:.

Got to work on a photo finish outside, flipping english weather it started raining so had to rush it into the garage :D I have a load of black cloth though from when I did the photo-shoot on air cube so got a board of chipboard & threw the black cloth on it & pegged it up lifting & turning as I went but I started too late in the day as it started getting dark plus I totally forgot about the white foam mounting tape I resorted to using for the rgb strip on the cable side so another photo-shoot is definitely needed with that ugly white foam tape removed :D so this is the first photo-shoot of 2 or 3, probably 3 because of me not removing the white tape & 1 of the photo-shoots will be night shots.

On with the show :D.

This is final photo-shoot 1 of 2 or 3.

ProjectStealthlow1208.jpg


ProjectStealthlow1209.jpg


ProjectStealthlow1210.jpg


ProjectStealthlow1211.jpg


ProjectStealthlow1212.jpg


ProjectStealthlow1213.jpg


ProjectStealthlow1214.jpg


ProjectStealthlow1215.jpg


ProjectStealthlow1216.jpg


ProjectStealthlow1217.jpg


ProjectStealthlow1218.jpg


ProjectStealthlow1219.jpg


ProjectStealthlow1220.jpg


ProjectStealthlow1221.jpg


ProjectStealthlow1222.jpg


ProjectStealthlow1223.jpg


ProjectStealthlow1224.jpg


ProjectStealthlow1225.jpg


ProjectStealthlow1226.jpg


ProjectStealthlow1227.jpg


ProjectStealthlow1228.jpg


ProjectStealthlow1229.jpg


ProjectStealthlow1230.jpg


ProjectStealthlow1231.jpg


ProjectStealthlow1232.jpg


ProjectStealthlow1233.jpg


ProjectStealthlow1234.jpg


ProjectStealthlow1235.jpg


ProjectStealthlow1236.jpg


ProjectStealthlow1237.jpg


ProjectStealthlow1238.jpg


ProjectStealthlow1239.jpg


ProjectStealthlow1240.jpg


ProjectStealthlow1241.jpg


ProjectStealthlow1242.jpg


ProjectStealthlow1243.jpg


ProjectStealthlow1244.jpg


ProjectStealthlow1245.jpg


ProjectStealthlow1246.jpg


ProjectStealthlow1247.jpg


ProjectStealthlow1248.jpg


ProjectStealthlow1249.jpg


ProjectStealthlow1250.jpg


ProjectStealthlow1251.jpg


ProjectStealthlow1252.jpg


ProjectStealthlow1253.jpg


ProjectStealthlow1254.jpg


ProjectStealthlow1255.jpg


ProjectStealthlow1256.jpg


ProjectStealthlow1257.jpg


So is this good? :D.
 
That's bloody amazing! Nice to see it has all come together!

Now get some temp checks running!

kd
:D Thank you KD already done temp checks & alls good even when the room temp is 32c which is a bit of a rarity here :D so now temps are falling back to normal it really handles well which is brilliant considering it's an air cooled virtually silent gaming/media rig :).

oh my goodnes....that thing is absolutely stunning!

Awesome work :D
:D Thank you Dandaman :).

the design isnt to my taste, but the quality of the workmanship is just incredible!
Thanks panyan yeah not to everyones taste & wouldn't expect it to be :).

This is totally award worthy, if this doesn't get something at Christmas I'll eat my cat. :D

Any judge, mod or deciding party reading this with a sick sense of humour who is thinking about not awarding it just to see a grown man eat a cat... please don't
:D lol Thanks randal24 :).

Night shots & removed the white foam mounting tape :D.

ProjectStealthlow1258.jpg


ProjectStealthlow1259.jpg


ProjectStealthlow1260.jpg


ProjectStealthlow1261.jpg


ProjectStealthlow1262.jpg


ProjectStealthlow1263.jpg


ProjectStealthlow1264.jpg


ProjectStealthlow1265.jpg


ProjectStealthlow1266.jpg


ProjectStealthlow1267.jpg


ProjectStealthlow1268.jpg


ProjectStealthlow1269.jpg


ProjectStealthlow1270.jpg


ProjectStealthlow1271.jpg


ProjectStealthlow1272.jpg


ProjectStealthlow1273.jpg


ProjectStealthlow1274.jpg


ProjectStealthlow1275.jpg


ProjectStealthlow1276.jpg


ProjectStealthlow1277.jpg


ProjectStealthlow1278.jpg


ProjectStealthlow1279.jpg


ProjectStealthlow1280.jpg


ProjectStealthlow1281.jpg


ProjectStealthlow1282.jpg


ProjectStealthlow1283.jpg


ProjectStealthlow1284.jpg


ProjectStealthlow1285.jpg


ProjectStealthlow1286.jpg


ProjectStealthlow1287.jpg


ProjectStealthlow1288.jpg


ProjectStealthlow1289.jpg


ProjectStealthlow1290.jpg


ProjectStealthlow1291.jpg


ProjectStealthlow1292.jpg


ProjectStealthlow1293.jpg


ProjectStealthlow1294.jpg


ProjectStealthlow1295.jpg


ProjectStealthlow1296.jpg


ProjectStealthlow1297.jpg


ProjectStealthlow1298.jpg


ProjectStealthlow1299.jpg


ProjectStealthlow1300.jpg


ProjectStealthlow1301.jpg


ProjectStealthlow1302.jpg


Ahhh night shots done :).

Specs are.
Corsair AX 850
MSI P67A-GD65 B3 rev
Intel I5-2500K @ 4.5ghz
Prolimatech Megahalems with push pull fans
Enermax T.B.Silence fans all modded
Enermax apollish white led
Nvidia GTX 580
Auzentech prelude x-fi
Corsair force series 3 120GB SSD
DVD optical drive
6 HDD
Temps are nice & noise is almost completely silent, just the 580 I can hear.

Dimensions
393mm deep
235mm wide
769mm high
26KG weight when fully loaded

Still 1 more photo-shoot to come :).
 
Can't believe I didn't see this before, just read the whole thing last night and this morning. I'm speechless. Absolutely amazing :)

Thank you beejjacobs :) it's just been featured on casemodblog here :cool:.

Again Thank you to all who commented which helps give a moral boost to keep pushing forward & gave tips, the mod wouldn't have been the same without them so cheers :).
 
Im really surprised,I really didn't think i would like it but what can i say apart from i was very wrong,Great job!

:D Thanks Tokin I can appreciate not everyone would like it but it's nice to know it's not only me who likes it :D.
Temps at 28c ambient, like I said good healthy temps considering how quiet it is, would be interesting to see how cool it runs with good CFM fans inside this :D.
28cambienttemps.jpg


Now I'll go & do the final photo-shoot :).
 
Mate, you do realise it is no long a computer case, right?

It is a work of art.

Although if I might suggest one thing? Perhaps a bit more light for the photos?

There is still enough light to see the awesomeness though. :)

:D Thanks shahpor could do with buying more cloth so I can set up an ok photo booth really (I don't mess with the photos after taking them other than resizing them for smaller file size), they are pretty dark shots for a final photo-shoot, need a cheap version of photoshop really so I could correct the light in them, maybe that's all I need do.

If it's art it wasn't intentional because I'm not an artist, just put a lot of effort into the looks this time so it could try to hold it's head up with some of the best case mods :).

Not saying there will be but there might be another photo-shoot & if there is I won't rush the shots & build them up over a week or 2 to get the best ones :D.
 
That is a beautiful computer you have there wayino!!!
Thanks VOoDOo :).

Group photo I said I'd do :D just it isn't a good photo, there are quite a few things I need to make before starting another project & a small photo booth is 1 of them, tried taking a few more but they were no better than the ones I already posted.
ProjectStealthlow1369.jpg
 
Just read through the thread. Congratulations. that's an awesome achievement.
Thanks Tribune :) my first case I didn't know my rear from my elbow :D, 2nd was okish looking but flimsy, last case I learnt a nice bit on making a strong case & asthetics but layout could have been better, this one I think I nailed strength, looks & layout nicely :).

Wow, comparing this case to your older ones really highlights the quality of the build. Do you have any off the shelf cases to compare it too?

Great work btw :)
Thanks Judgeneo :) other cases are a Lian-Li pc60 plusII & a fractal refine r2 but I'm not up for taking a group photo, stealthlow is awkward to shift around the house with it's size & weight :D.

Amazing work waynio like you said the photos look stunning but I'm sure they don't do the case justice.

The craftsmanship in this is just ore inspiring well done on a lovely case.
Cheers Alex, I could do with making a nice photo booth that can be easily dismantled, in fact that's the next thing for me to make ;).

Nice to see the finished article, quality workmanship at its finest.
Congratulations on a fantastic piece of work.
Thank you MCMLX :).

I bet you're absolutely chuffed with yourself.
Just a bit :D cheers Poodmund :).

So what next?
:p
kd
Sturdy lazy susan & photo booth, then a scroll saw table, then maybe a desk & then :D another case :D.
 
Last edited:
Forgot all about this project (been busy) - great to see it totally finshed.

You achieved an incredible finish for a custom build - your attention to detail and design skills really show in the overall finish.

Great stuff - really admire your talent and dedication.

Thanks Plec I'll be back soon enough with another, modding it starts off as an average interest & can mutate into a bit of an addiction but I enjoy it so isn't so bad :D.

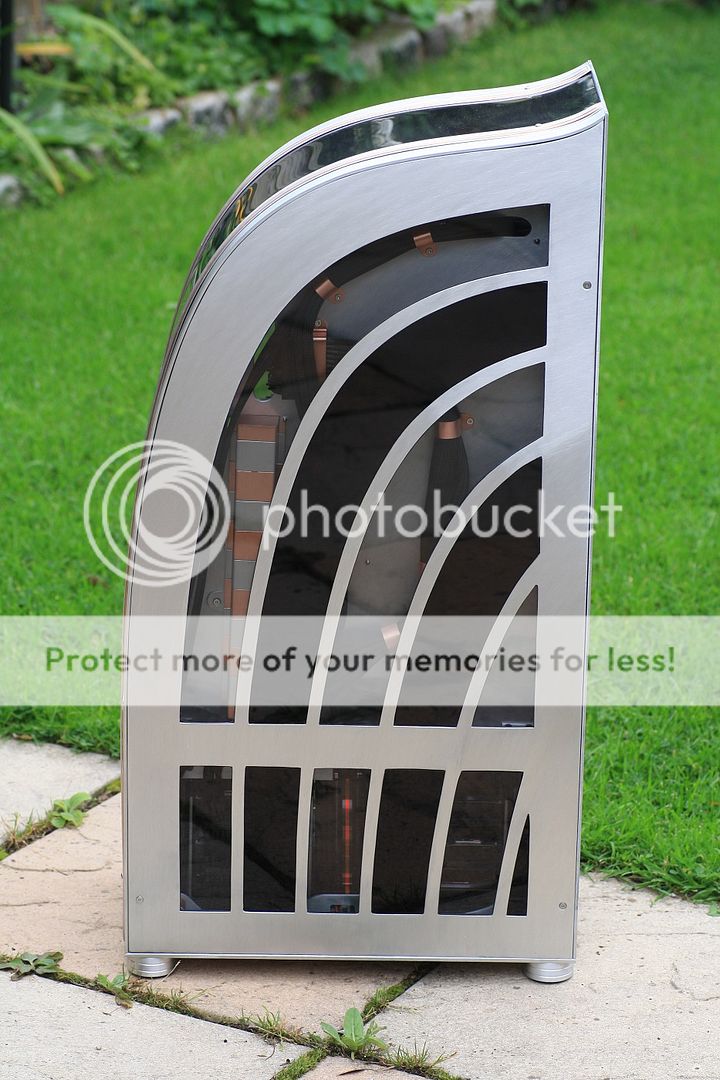
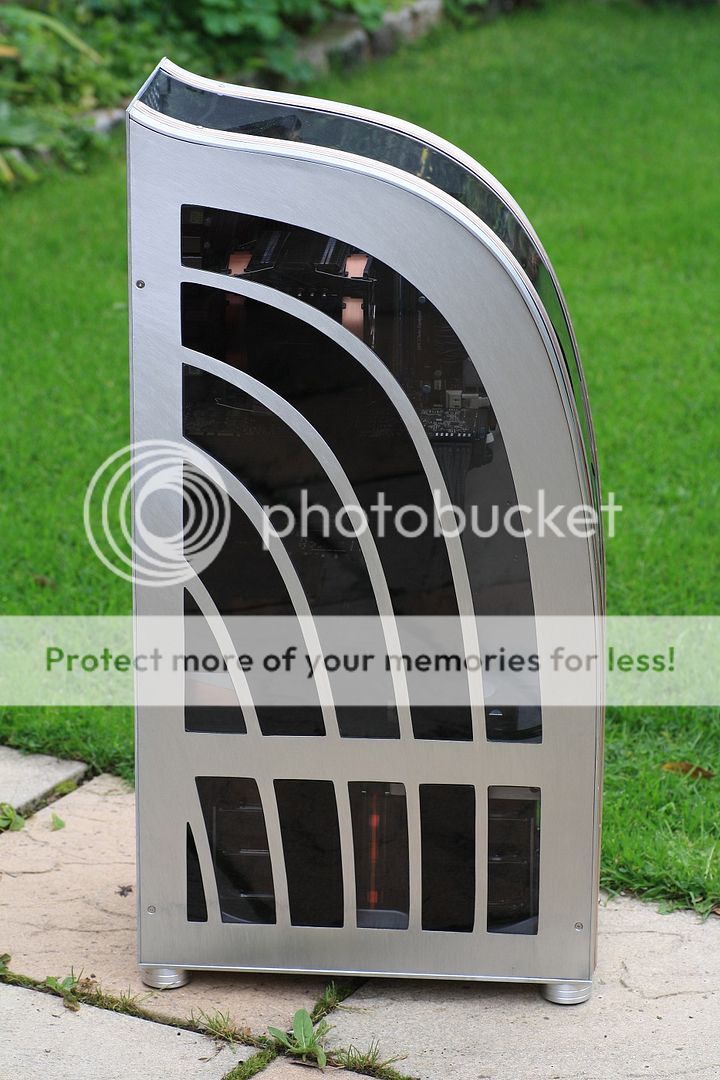
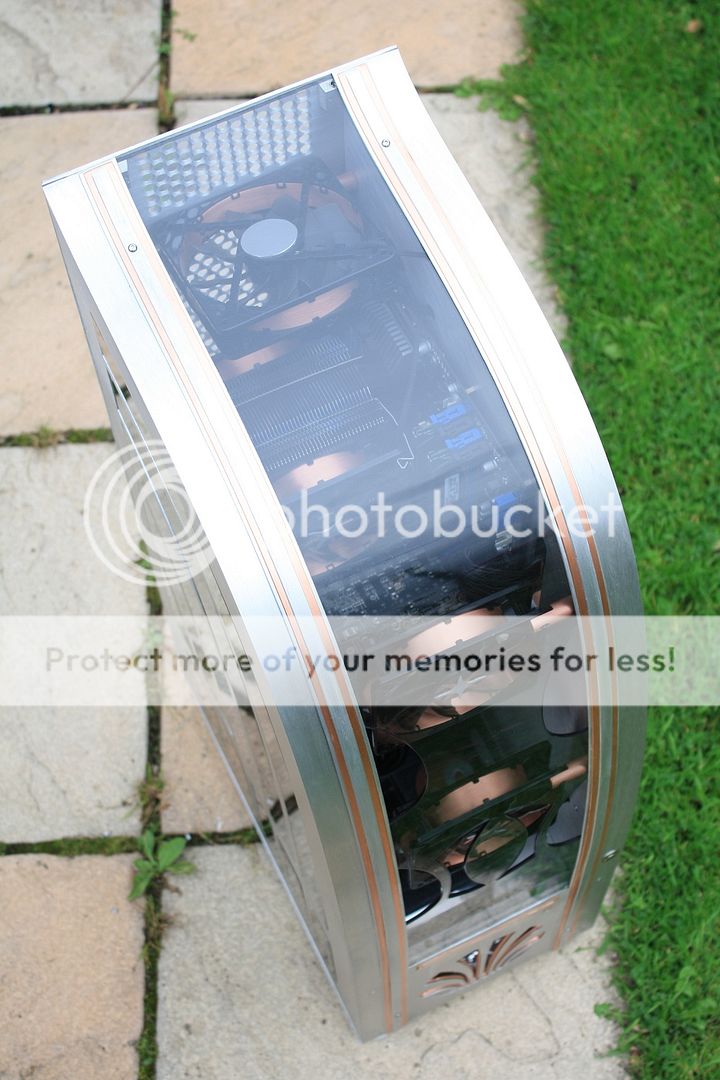
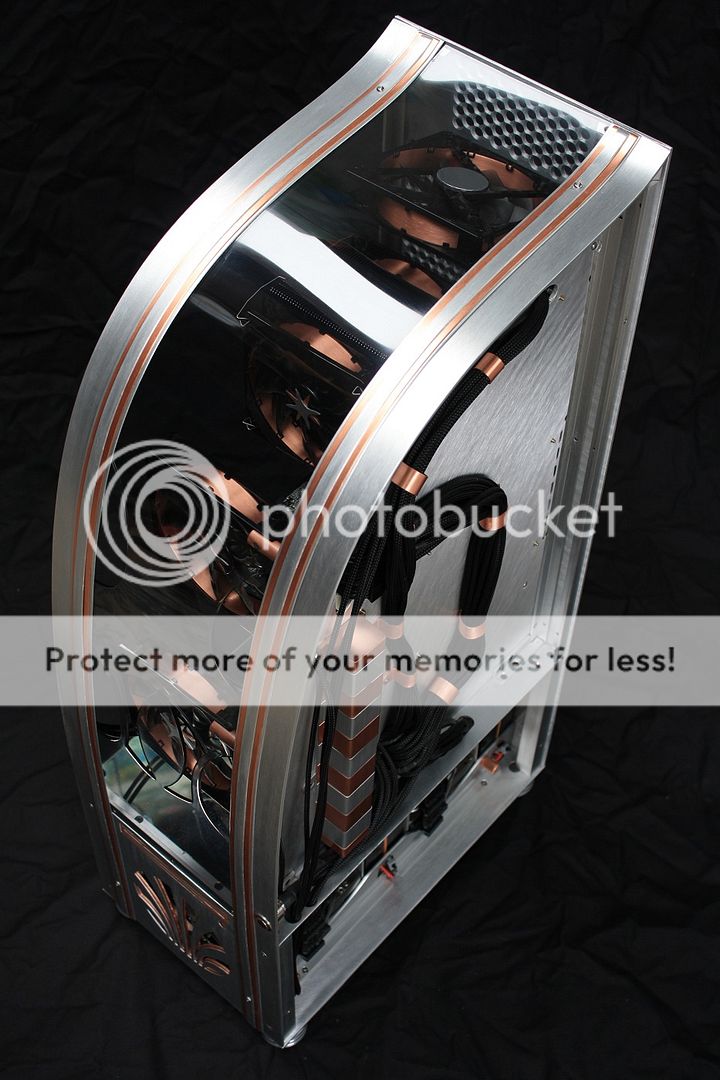
Weather was too nice to ignore this week after the cloudy summer we had so got that final photo shoot in :cool: & here is a photo flood :eek::D.

Did all these including the night shots in the garden I waited for sunset so had a small time to take a lot of good shots before it got too dark & I feel these shots represent it better took too many good shots so just put all the ones I like together 64 out of 170 :D.

ProjectStealthlow1370.jpg


ProjectStealthlow1371.jpg


ProjectStealthlow1372.jpg


ProjectStealthlow1373.jpg


ProjectStealthlow1374.jpg


ProjectStealthlow1375.jpg


ProjectStealthlow1376.jpg


ProjectStealthlow1377.jpg


ProjectStealthlow1378.jpg


ProjectStealthlow1379.jpg


ProjectStealthlow1380.jpg


ProjectStealthlow1381.jpg


ProjectStealthlow1382.jpg


ProjectStealthlow1383.jpg


ProjectStealthlow1384.jpg


ProjectStealthlow1385.jpg


ProjectStealthlow1386.jpg


ProjectStealthlow1387.jpg


ProjectStealthlow1388.jpg


ProjectStealthlow1389.jpg


ProjectStealthlow1390.jpg


ProjectStealthlow1391.jpg


ProjectStealthlow1392.jpg


ProjectStealthlow1393.jpg


ProjectStealthlow1394.jpg


ProjectStealthlow1395.jpg


ProjectStealthlow1396.jpg


ProjectStealthlow1397.jpg


ProjectStealthlow1398.jpg


ProjectStealthlow1399.jpg


ProjectStealthlow1400.jpg


ProjectStealthlow1401.jpg


ProjectStealthlow1402.jpg


ProjectStealthlow1403.jpg


ProjectStealthlow1404.jpg


ProjectStealthlow1405.jpg


ProjectStealthlow1406.jpg


ProjectStealthlow1407.jpg


ProjectStealthlow1408.jpg


ProjectStealthlow1409.jpg


ProjectStealthlow1410.jpg


ProjectStealthlow1411.jpg


ProjectStealthlow1412.jpg


ProjectStealthlow1413.jpg


ProjectStealthlow1414.jpg


ProjectStealthlow1415.jpg


ProjectStealthlow1416.jpg


ProjectStealthlow1417.jpg


ProjectStealthlow1418.jpg


ProjectStealthlow1419.jpg


ProjectStealthlow1420.jpg


ProjectStealthlow1421.jpg


ProjectStealthlow1422.jpg


ProjectStealthlow1423.jpg


ProjectStealthlow1424.jpg


ProjectStealthlow1425.jpg


ProjectStealthlow1426.jpg


ProjectStealthlow1427.jpg


ProjectStealthlow1428.jpg


ProjectStealthlow1429.jpg


ProjectStealthlow1430.jpg


ProjectStealthlow1431.jpg


ProjectStealthlow1432.jpg


ProjectStealthlow1433.jpg


I'm satisfied with these now so I can get working on a new design to start in the winter again lol :).
 
great night shots, I love how subtle the lighting is!!! I loved your work this time around so um sure I will loath your work next time!

:D Cheers VOoDOo I've been convinced to see how an extra led strip looks at the back, if it's too much I'll not bother but if it's a good outcome then 1 last photo update for a few more night shots ;).
 
very nice looking case now its finished

Thanks mate :) I'm back to my old tricks of saying it's finished & then 1 more detail lol but not quite as bad :D, I added 1 extra white led strip, extended the cables, sleeved them & put a 3 pin fan adaptor on the end & then sleeved the led strip to tone it down some & placed it at the back behind the side panels mounting angle bar, I'll get photos up asap to show THE final night shots ;).
 
Got the final bit done, an extra white led strip which I extended sleeved & put a 3 pin fan connector on the end so it could pass through to the cable stash section in the bottom & sleeved the led to dim it a lot & found facing it into the corner was best for a subtle light, enjoy these final revised night photos with correct lighting :).

ProjectStealthlow1434.jpg


ProjectStealthlow1435.jpg


ProjectStealthlow1436.jpg


ProjectStealthlow1437.jpg


ProjectStealthlow1438.jpg


ProjectStealthlow1439.jpg


ProjectStealthlow1440.jpg


ProjectStealthlow1441.jpg


ProjectStealthlow1442.jpg


ProjectStealthlow1443.jpg


ProjectStealthlow1444.jpg


ProjectStealthlow1445.jpg


ProjectStealthlow1446.jpg


ProjectStealthlow1447.jpg


ProjectStealthlow1448.jpg


ProjectStealthlow1449.jpg


ProjectStealthlow1450.jpg


ProjectStealthlow1451.jpg


ProjectStealthlow1452.jpg


ProjectStealthlow1453.jpg


Really is complete now :cool: I did ok this time for only getting it wrong about it being complete once lol :D.
 
Absolutely amazing... doesn't compare to any other mod i have seen in terms of precision and dedication! Congrats on finishing it :D:D:cool:
:) Thanks Rooster212, I blame Attila aka oldnewb for making me want to get better at DIY scratch building :D his cases are ridiculously awesome :cool:.

Massive congrats on completing this, been following it all the way through and the end product is just mind blowing. Never seen anything like it :D.
Thanks joxang it's nice to have it completed & in use & that was the final touch a little extra light ;).

Now I can just enjoy it & start putting ideas together for my next :D.
 
Cracking workmanship gone into this, well done. Personally though I find the curves a little awkward, but impressive none the less
Thanks Simonnn, the curves was mostly for a new challenge & to build skill but it also works in helping all the air find it's way out the back with minimal fan speed (sooo tempted to try normal fans in this to see how good it cools :D), shame I rushed into buying a different ssd with me having probs with the corsair force 3 120gb else I'd have built a sweet photo booth for high quality photos of projects, something I'll have ready for my future ones :).

Was having the probs with the ssd when I had it in ACHI mode, put it into IDE mode & no problems, just a drop in speed, better that than BSOD's ;) & it's still super fast :).

I realised my next project will be a tough one to design with it not being a rematch with my earlier projects so will take a bit longer to develop the design, can't be rushed but I'll be aiming to have a plan ready by the end of the year :).
 
I looked at this build so many times ...

I wondered if it was possible to distract you ..

If it was possible to distract you ...I am probably not strong enough to lift it ..

If I could distract you AND If I could lift it ..

If I could run fast enough ...

.....

I'd spend the rest of eternity looking at it and polishing the shiny ...

I said "Shiny !" ... dirty minded $%^$%ard :)

utterly jealous and very proud of you man ! ... totally makes us geeks look a whole lot more creative than the world gives us credit for !

hope you are enjoying it .... but have to concurr with some others ...
"What the hell do you do next ?!"
:D

Hehe thanks OCD-OC :) yeah I'm enjoying it, so nice & quiet with good performance & the lighting just lets you see inside it while not acting like a huge distracting christmas tree lol.

I'm juggling many ideas for what to try & make next ;) I have a few tools in mind so I can do things more efficiently so I'm very unsure of when I'll be starting my next with buying some extra new tools & want to make some furniture before starting a new pc case so could be some time next year I think which will give me plenty of time to work out some sweet designs so could be juggling more than 1 project when I do get around to it, it's good to have a different project to turn to when the other is driving you mad or you just getting bored with it lol :D.

That has ended so ridiculously well
Thanks lrlcr :).

Great results there, looks exactly as you wanted it.

If you scroll down on the outdoor photos it looks as though it is spinning round. :D
Yeah it did even if I was very close to trying something else for the curved window lol :D thanks Poodmund

I swear you disconnect that and take picture of it more than you actually use it!

Stunning build mate! Love it completely! :)

Think you should consider a career move haha!
:D Cheers ~REALiTY :).

That is one fantastic job you've done there waynio, I'm not really fan of the shape of the case to be totally honest (I like angles rather than curves) but the colour scheme is very nice and the workmanship looks fantastic. The ATCS team could have learned a few things from you even.

First class job, I look forward to your next endeavor.
Thanks Moeks :) hopefully I'll prioritise right & go for the tools rather than blow it on things that don't mean a lot :D then it will be not far off before I get started with another project :).
 
Just ran through what this cost for what was used, I'll ignore the bits that ended up in my scrap collection :D & this is in buying 1 off pieces or small orders & nice fresh materials so not going around scrap yards where I might have found some of the needed materials at a better price etc but that is something I should give a try.

£99 alu sheet
£20 alu bars
£48 copper sheet/rod
£10 mirror polished stainless steel sheet
£80 acrylic
£10 bolts
£20 helicoils
£5 Metal lacquer - used a full bottle
£15 Satinising mops - completely used them up
£4 Acrylic adhesive - only used a little out of a £20 tin
£10 Primer/paint - for pci/io piece still have plenty left

Total
£321 Not bad I think :).

Price for hardware at current time but using the other weeks hdd prices.

Corsair AX850
MDPC-x sleeving
MSI P67A-GD65 B3
Intel 2500K
Prolimatech megahalems
Kingston Hyper X 2x4GB 1600 ddr3 9,9,9,28
GTX 580
Auzentech prelude x-fi
Corsair force series 3 120GB ssd
6 HDD
9 Fans

£1600 Ouch I didn't realise I had such an expensive rig until working it out to be honest with doing incremental upgrades though so don't feel the full impact :D but I remember buying my first crappy beige barely upgradable pc complete with snake pit at £1200 about 13 years ago so it really doesn't seem so bad :D.

But didn't buy everything at once as I don't have that kinda money, the hdd's optical & sound card are from my previous system also :).
 
You just won yourself a well deserved vote for the mod of the year contest over at bit-tech. Congrats!

:D Thanks neo appreciated mate :cool: it's a pleasure & an honor to be in the moty again :) 25 beauties & I like them all this year :cool:.

May as well show what I'm working on for my next rig while I'm posting :D.

2012 Project which is temporarily called Lean & Green :D.

First part of 3 is an ok capacity HTPC for light computer stuff & XBMC which I aim to use no more than 50w electric, I realised I don't need to use a power rig at all times & is in fact about 10% or less when I need a power rig so decided to make a dual rig, 1 for light stuff & 1 for heavier stuff :).

There will also be a joining piece for connecting the HTPC to a gaming rig :D.

Here's some concept shots of the low power HTPC I been working on the past month or so :), not a solid month but little bits here & there, if I put a solid month into a design it would look crazy :D & all the parts slot in/out including the custom fan :D.

LeanGreen01.jpg


LeanGreen02.jpg


LeanGreen03.jpg


LeanGreen04.jpg


LeanGreen05.jpg


LeanGreen06.jpg


LeanGreen07.jpg


LeanGreen08.jpg


LeanGreen09.jpg


LeanGreen10.jpg


LeanGreen11.jpg


LeanGreen12.jpg


LeanGreen13.jpg


LeanGreen14.jpg


LeanGreen15.jpg


LeanGreen16.jpg


I'm sure it's not to everyone's taste again but it'll do the job for me nicely :).

Here it is with the connecting piece to join the gaming rig.
LeanGreen18.jpg


Been saving up & could have bought the parts & materials for the HTPC but bought a Hazro none glass 27" 2560x1440 IPS monitor last Thursday so set the project back a bit :o but woooo this is the type of quality screen I've been looking for :cool: been trying to get a good monitor for ages now but been going for cheaper ones & being dissatisfied over & over so IPS was my last hope for a good screen which is easy on the eyes & it looks real good & after calibrating it it uses less electric than the Asus 23" 120hz screen I just ditched :p, awesome screen :).
 
Back
Top Bottom