Project Stealthlow

That looks like a bloody time-consuming process!!!

So much attention to detail, it's incredible!!

I cannot wait to see this finished :D
Oh it is lol :( but worth it when it's done :D I'm pushing to get this done ASAP now so hopefully should if no more probs :).

Seriously when are you gonna stop getting better!?

I revisit this post probably every other day to see whats going on and just when i think you have outdone yourself for the final time you do it again! That looks amazing!

Quit whatever you do and do this for a living! :)
:D Thanks mate :).

Cant wait till its finished :D
Neither can I now :D that week of waiting was killing me :D so march on I will :).

I see says VOoDOo!!! Very nice Wayino!!! Thought that was a pic of a blacklight bar at first. Thank you for the visual presentation
:) Cheers VOoDOo, esaier to show photos than explain :D.

Everything antiqued after grinding down the 12mm sticks to 7.3mm.
ProjectStealthlow1072.jpg


And the fun begins oh yeah, this is them after the disc sander.
ProjectStealthlow1073.jpg


ProjectStealthlow1074.jpg


After 160 grit going 1 way, length ways so they will polish up better.
ProjectStealthlow1075.jpg


240
ProjectStealthlow1076.jpg


600
ProjectStealthlow1077.jpg


Sure wouldn't be able to do all these hours & be able to slightly smile without my trusty mp3 jukebox :D.
ProjectStealthlow1078.jpg


1200
ProjectStealthlow1079.jpg


ProjectStealthlow1080.jpg


ProjectStealthlow1081.jpg


2000
ProjectStealthlow1082.jpg


Polishing.
ProjectStealthlow1083.jpg


Result :D.
ProjectStealthlow1084.jpg


After cleaning them all up I started sticking them back together.
ProjectStealthlow1085.jpg


ProjectStealthlow1086.jpg


ProjectStealthlow1087.jpg


Copper ? clips, that's right not P clips but ? clips lol :D.
ProjectStealthlow1088.jpg


Anyway once the revised fan holders have cured that's the last time consuming bit, then it's just the optical tray & eject button & a tiny bit of wire work for a molex cable & the power switch, then the final touch install the lighting & get the copper ? clips :D installed & then route all the wires tidy, then I think it's done & time for the final photo shoot can't wait so I'll get it completed ASAP :D.
 
Been a while since I popped in here,

Still doing amazing work, those new fan holders are orgasmic! :D
:D Cheers Baplad :).

That is incredible! No idea how you keep going with this! Hopefully you'll get years out of this build! Although somehow knowing the bug that this creates from what others have said, you'll finish this and need a new project!

kd
:D Cheers KD neither do I but I've been holding off on playing any games & will do until I can play them on this :D.
And yeah I intend to use this one for as long as possible but I'll still do projects but not likely for myself, this case should do me nicely for a long time :).

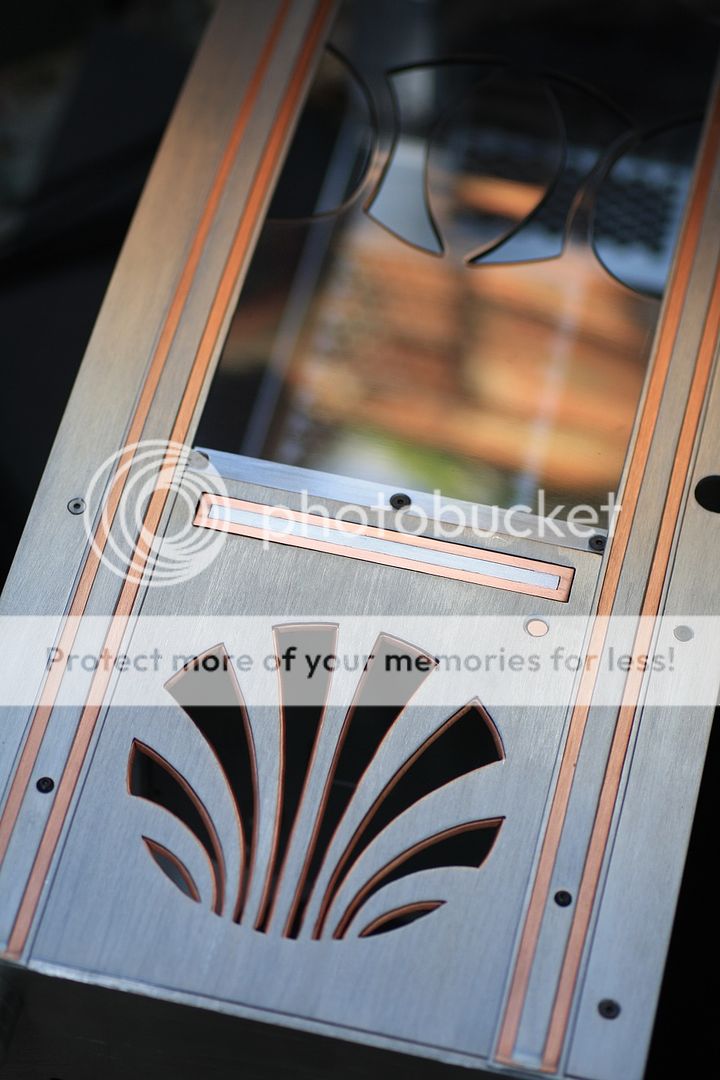
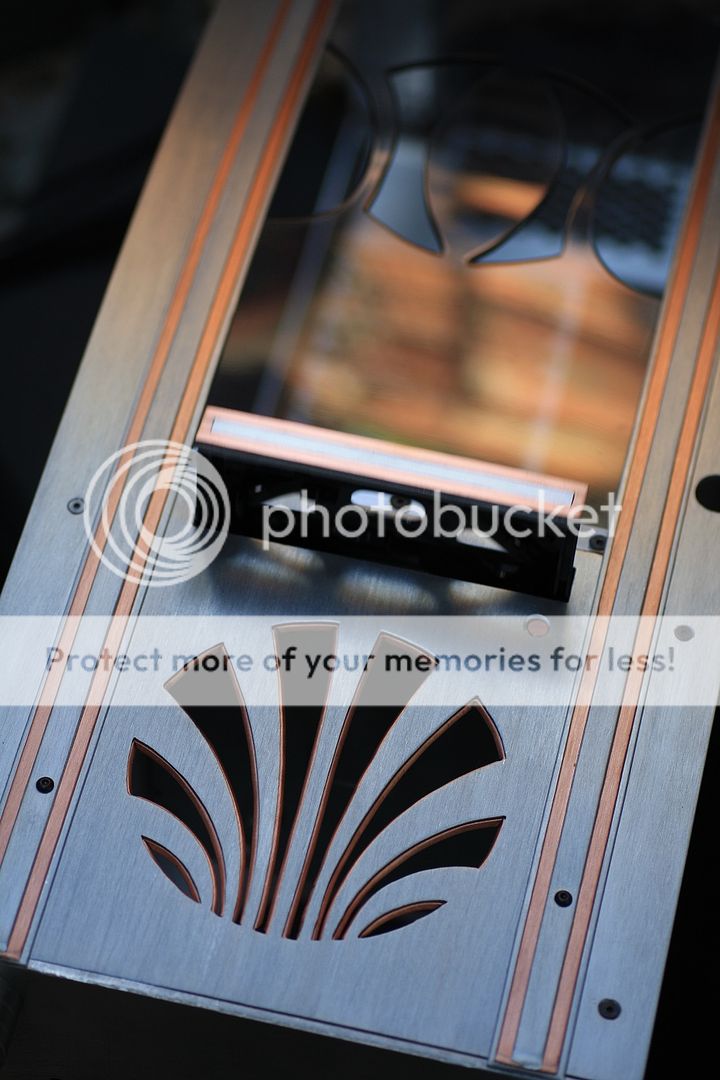
Installed the optical drive to gauge what depth is needed for the tray cover = 5mm :) & same for the eject button but an extra piece on top so it's pushable so decided on a 3mm piece of alu & a mix of 2mm copper & 2mm alu for a tray cover, figured I should power it up to make sure the tray can eject :D it couldn't but only needed a tiny bit of filing to let it work which required me to tweak my design a little again.

OK the good stuff :D.

I pre brushed the panels & then masked them up because some of the pieces would be impossible to brush once they are cut (many tiny pieces), then printed, cut up & stuck my designs on with prit stick :D it really works excellent, far nicer more accurate & faster method than marking manually saves me many hours so I'll do this all the time now, putting this student version of sketchup to good use :).

So here's the scraps from what I done.
ProjectStealthlow1089.jpg


And here you can see fan label covers for front & back, a plate I did for the psu side where the label used to be, eject button bits, optical tray cover which needs a little filing so the middle fits inside the copper one & lastly the ssd cover with yin yang alu/copper placed inside the circle :) I didn't think I'd get much use out of the scroll saw for the rest of this project but I guess I couldn't resist :D.
ProjectStealthlow1090.jpg


ProjectStealthlow1091.jpg


ProjectStealthlow1092.jpg


The ssd cover was going to be mirror polished stainless steel but I gave up trying to cut it well so tried polishing some alu sheet but wasn't anywhere near as good as the steel so brushed it instead & I'll paint that piece matt black (has to be a different look to the alu/copper & black should be sweet :D could get some brass but then I'd end up adding brass trim bits all over the place also :D), bear in mind the bits you can see here are the rough ugly side :D the nice side should pretty sweet :).
 
Well we all know what to get waynio for christmas....A waterjet!!!! Looking good Waynio!!!

:D Cheers VOoDOo yeah I'm not keen on relying on others for fabrication not to mention the cost :D, so a good scroll saw has many possibilities & so far I've only shown the most basic stuff that I have in store for future projects :D.

:D No cats or dogs for this log, just this little curious guy sat watching with all the shiny stuff about :D.
ProjectStealthlow1093.jpg


Got the stainless steel cut, I ended up using 1 of the band saw sections in the scroll saw which changed a half hour job into a minute :) & this is after a coat of metal lacquer on all these bits.
ProjectStealthlow1094.jpg


ProjectStealthlow1095.jpg


The corsair force 3 120GB which I bought the other day, need some double sided tape though to make it semi permanent & it still fits in the case :D.
ProjectStealthlow1096.jpg


ProjectStealthlow1097.jpg


Optical eject button made with 5mm opal frosted acrylic which I'm kinda hoping will catch optical activity light & create a slight glow around the 2mm copper top.
ProjectStealthlow1098.jpg


Replacement for the psu sticker.
ProjectStealthlow1099.jpg


Covers for the labels on the backs of the fans.
ProjectStealthlow1100.jpg


Pattern covers for the front of the fans.
ProjectStealthlow1101.jpg


Optical tray cover & friends :D.
ProjectStealthlow1102.jpg


Randoms :D.
ProjectStealthlow1103.jpg


ProjectStealthlow1104.jpg


ProjectStealthlow1105.jpg


List of things to do in order of which I'll tackle first :) on the final steps woooooo I could dance like a freak with or without music :D.

Work out exactly where I want the cables to be & add extra mounting holes to mobo panel
molex cable
Fix led strips cables from molex to a fan adaptor or to work with the fan cable = half done
Lay gap filling material next to all faint gaps where there will be light.
Make a block that helps keep the light control box stay in place next to psu.
Fix light strips to curve bars.
Install hardware :).

Get a pile of junk food & beer & get that 30lbs back or not I'm liking the extra energy levels I have with that gone :D.
 
Love the CD tray :)
Am I blind or has the making of that not been logged?

Cheers mate :), I did it amongst the final metal work bits, might not have seen it, all the latest bits were done on the scroll saw which is in the cellar which is cramped up so too much messing to have the camera set up around it it very much needs sorting out :D, the tripod I use has a massive foot print so only got a couple of pictures after I finished cutting but I'm loving the possibilities with this scrollsaw :) it is exactly as awesome as I thought it would be :D.
 
Last fabrication update I think :D depends on how the sata data cables are if they need a clamp piece adding to keep them tidy or not.

So I added all the required mounting holes to the mobo tray to support the cable holders.
ProjectStealthlow1109.jpg


I also decided to make a cable clamp holder also, I added the mounting holes for this before making the part & took the cable to be clamped & took measurements off it with the digital callipers & got to it on sketchup to design & print the needed piece complete with cut/bend lines & excess length so it could be trimmed down & rounded, couldn't be bothered setting up my basic bending brake & just did a quick setup with plywood & the vice & manual pressing which is easily doable when material isn't very wide.
ProjectStealthlow1110.jpg


ProjectStealthlow1111.jpg


ProjectStealthlow1112.jpg


ProjectStealthlow1113.jpg


ProjectStealthlow1114.jpg


Held the piece where I wanted the piece to be & marked where the mounting holes are & then drilled the holes in the new piece, needed an accurate drilling with me not being able to clamp this down so the drill press came in handy as it sometimes does :).
ProjectStealthlow1115.jpg


ProjectStealthlow1116.jpg


ProjectStealthlow1117.jpg


All done for this piece & all the mounting holes & that's all for the fabrication of this project, now it's just the power/hdd activity switch wiring & a molex cable & installing the lighting :).
ProjectStealthlow1118.jpg


ProjectStealthlow1119.jpg


ProjectStealthlow1120.jpg


So might not have completed the project yet thanks to me using the wrong adhesive for quite a few parts & having to re-stick them with epoxy resin but all the challenging stuff & slightly challenging stuff is done I'd say :D. Hmmm actually I have a mass of cabling to pretty up :D:o & it has to be done with windows being on both sides :D it's the sata data cables I'm unsure about looking tidy but if they are a nightmare I could make a couple of clamps like I did for the 24 pin extension.
 
I am absolutely loving this build! The case is amazing and really inspiring!!
Chris :-)
Cheers Chris :).

Work of art. You have hardware planned out for it? Thinking the copper highlights on the GA-P67A-UD7 would look good.
p67ud7.jpg


Though if you could stuff it full of broken components, you can call it real 'art' and submit it to a gallery :p.
Cheers joxang :D That is the mobo I was going to get until I seen the price at release was almost double what the msi p67a-gd65 cost :eek: so scrapped plans for that one but don't regret it at all with the 4.5ghz OC I have on the 2500k :cool: but the colour scheme on that mobo is really sweet & would have fit in perfect with this case :D I seen someone get sponsored with that board also & it isn't even on show in the mod :eek: I expect gigabyte would have jumped at the chance to have it featured in this case, oh well :o.

I did a test run of the cabling & it doesn't look so bad until the sata data cables come into play so I will make something to keep the data cables either hidden or clamped in place.

ProjectStealthlow1121.jpg


ProjectStealthlow1122.jpg


ProjectStealthlow1123.jpg


ProjectStealthlow1124.jpg


ProjectStealthlow1125.jpg


ProjectStealthlow1126.jpg


And wow I just noticed I seemed to have accidentally made the letters s & f merged together in the 24 pin cable & 8 pin cable :D.
 
List of things to do in order of which I'll tackle first :) on the final final steps now.


Make extra clamp for the lower part of the 24 pin cable to hold it closer to the mobo panel & stop it bulging out.

Make a set of clamps & casing to hold or hide the sata data cable mess & let the modding community decide which is best :D unless I come up with a sweet cover that doesn't need feedback on :D.

The LED strips in the fan holders I need to change the molex to a fan adaptor or to work with the fan cable = half done

Lay gap filling material next to all faint gaps where there will be light.

Fix light strips to curve bars.

Do night & day photo shoots of it up & running which will rely on weather as I want to do them outside :).
 
I'm worried about the cabling.

any way it canbe loomed nicel to make neat routes and corners with individual wires coming off the loom and going their ownway. all at the same angle of course.

Keep the faith

Alls good except the sata data cables which I've been working on as soon as I seen how unruley they were :D & modded 2 of the spare ? clips I made so it all is nice now, cheers Dubs :).

Wooo hooo got the epoxy resin, I went for 1 I've used before & has proven it's worth (araldite rapid steel) since there was no JB weld at B&Q lol I almost bought a tube of liquid metal but I figured with such a huge amount of adhesive for only £3 more than the araldite which you get a tiny amount in comparison I figured it wouldn't be as good.

Anyway on with this sata data cable case update, it's a mix of 2mm alu as a 5mm strip with extra ears with mount holes in to attach to the mobo panel which goes from near the bottom of the 2nd level to just below the 8 holes I made for the pass trough's so it bolts on when all the cables are plugged into the mobo & 1mm alu & 1mm copper bent to make a nice cover to hide the horrors of the sata cables :D had to get my bending brake out for these though for the 5mm ends was too much for the weak ply wood & had to use the brake in a conventional & unconventional way to get all the right bends.

Here's what it all looked like after thinking, designing, printing, sticking & cutting & before bending.
ProjectStealthlow1127.jpg


All laid out waiting to be stuck.
ProjectStealthlow1128.jpg


A kind of half arsed jig :D it was the middle piece that cut me, simple basic piece like that compared to all the other bits & that cuts me lol :D.
ProjectStealthlow1129.jpg


Couple more shots of the pieces.
ProjectStealthlow1130.jpg


ProjectStealthlow1131.jpg


And the extra copper details that I nearly put on the fans but scrapped the idea, they look kinda nice on this piece but undecided if I'll stick them on or not, if I do I'll cut some alu pieces to place on the copper bits too :) kinda looks like some kind of marzipan lol.
ProjectStealthlow1132.jpg


ProjectStealthlow1133.jpg


By the time I finished placing the last couple of pieces with adhesive it had already started setting so had to remove the last 2 & clean off the partly dried adhesive & re stick them.
ProjectStealthlow1134.jpg


ProjectStealthlow1135.jpg


Once things had set after 10 minutes I went all around the piece with a razor blade to take off any excess adhesive & took a few shots, it takes about 8 hours for it to fully cure.
ProjectStealthlow1136.jpg


ProjectStealthlow1137.jpg


ProjectStealthlow1138.jpg


Up next for this is to very carefully brush it as 1 piece & then lacquer it :).
 
This is one piece of fine work, took me a few days of reading the whole log but its taken you almost a year to get to this stage. No way i could keep up with the attention to detail, i think i would get board... well done and can't wait to see the whole case come together

Big logs can take some time to look through eh :D thanks redfist :).

Updated the mobo bios to the latest & got all other latest updates ready for a switch over yesterday, then got started at around 8 PM putting hardware in & getting the cable work done & installing win 7 & finally got it running, fully up to date & fully optimized & made a ghost image, took all night to do it all but I'm now typing from Stealthlow right now :D & woooooooo it's really nice & quiet & looks really good running, I took a good few photos of it during the night while I was putting all the hardware inside so I'll get them up in a mo ;), the noisiest part is the GPU, the RGB power cable though I'll need to get a new one, I was slimming it down so I could slip it underneath the hdd platform & I believe I cut an internal cable on it so need a new one so I haven't put the side panels on yet since it needs that last thing sorting but won't be able to get it until next Wednesday, other than that though it's all done & I can finally get stuck into a good game :).

Still a night with lights & day photo shoot to do on this also :).
 
GET THOSE PICS UP NOW!

Cant wait to see this haha :)

Real great job mate! Honestly, you are the ModMaster haha
:D This update ;), still more to come though, this bunch of photos really don't do it any justice but that's because I'm totally knackered :D I'll get a proper photo session in ASAP :) cheers mate.

OMG!

Wow!

I seem to have missed two pages of updates in which you seem to have been going on an incredible modding orgy :D

It is now looking amazing and I can't wait to see the fans lit with UV and all the metal "twiddles" in place. It was amazing when you started, but now you have taken it to another level entirely.

Where can I vote for mod of the year? Actually scratch that, where can I vote for mod of the century?
incredible modding orgy lol :D, guess it's because I could finally see the finish line on this & me wanting to get lost in gaming for a bit hehe :D thanks John.

Looks amazing,Great job so far
Thanks Tokin :).

Righty oh then :D.

All done except for the RGB lighting which will have to wait, (knackered the power cable for it) but I can finally relax knowing that's the final bit, everything molex or fan related cables is nicely stashed underneath the hdd's :D so with the mass of wires going through the small mouse holes I had to make them bigger because of the switches for the lights on the fans so this pile of shots in bad lighting will be the last picture update until I get the RGB lighting sorted & then I'll put some effort into the photos at day & night, so I'm gonna get the weight back on & enjoy some good games until I can resume this, been feeling starved of some good gaming :D.

32 photos so might have to do 2 posts in at least 2 forums I post at.

Like this under both hdd cages :D.
ProjectStealthlow1139.jpg


ProjectStealthlow1140.jpg


ProjectStealthlow1141.jpg


ProjectStealthlow1142.jpg


ProjectStealthlow1143.jpg


ProjectStealthlow1144.jpg


ProjectStealthlow1145.jpg


ProjectStealthlow1146.jpg


ProjectStealthlow1147.jpg


ProjectStealthlow1148.jpg


ProjectStealthlow1149.jpg


Old
ProjectStealthlow1150.jpg


New
ProjectStealthlow1151.jpg


ProjectStealthlow1152.jpg


ProjectStealthlow1153.jpg


ProjectStealthlow1154.jpg


ProjectStealthlow1155.jpg


ProjectStealthlow1156.jpg


ProjectStealthlow1157.jpg


ProjectStealthlow1158.jpg


ProjectStealthlow1159.jpg


ProjectStealthlow1160.jpg


In use finally :D.
ProjectStealthlow1161.jpg


ProjectStealthlow1162.jpg


ProjectStealthlow1163.jpg


ProjectStealthlow1164.jpg


ProjectStealthlow1165.jpg


ProjectStealthlow1166.jpg


I love the unique light the fan holders project :).
ProjectStealthlow1167.jpg


ProjectStealthlow1168.jpg


ProjectStealthlow1169.jpg


ProjectStealthlow1170.jpg


So, a little wait for the new RGB light power cable & then final shots, these are just to show it's now in use, mostly crappy shots I know but it's 99.9% complete now yaaaaaay I keep getting random big grins knowing it's in use now :p:D.

When I walk into my room I can't even hear it & it's sat right next to my monitor so it's awesomely quiet, just the gpu that I can hear & that is with the side panels off :), :D time I got around to completing alice madness returns at last :D but I'll have to start from the begining again since I'm on a new os install on the super duper corsair force 3 120GB or the Yin Yang 120GB as I'll call it, here is a quick bench I did on the reads, veeeerrrrrry niiiiiiiice :D:cool:.
stealthlowtemps.png


Oh yeah the temps are better than air cube to my amazement, was expecting warmer temps but it out does the air cube by a few celcius which had much more air flow but this I really thought about the flow on how to make it work best & I'd call this my first perfect design :eek::D:cool:.

Forgot to weigh this beast so I'll weigh it when it's done ;).
 
It all looks brilliant!

The HDD LED's look amazing! Gives it something extra! But i cant believe how amazing it looks!

All your crazy attention to detail has paid off! And those temps arent bad either haha!

But this begs the question... what do you do now?

Honestly the best mod i have seen, you have shocked me at every turn with the quality of this build nice job!
Thanks mate I'll get far better photos up once it is 100% complete so I'll probably need to do about 1000 photos & pick about 50 choice shots out lol, the shots of the hdd LED's look nothing like how they do to my eyes so I think the photos of the case lights will be the most difficult to take nicely.

Been considering making a really strong alu lazy susan for taking photos & for making maintenance a lot easier :).

But what I do next for a project I have no idea yet but an idea will surely start forming, I did design a passively cooled htpc but to be honest it's not the slightest bit challenging to make & bet I could have it made in a few days as it's all methods I've already learnt so would be easy lol :D.

So I'll just do basic scetches of any nice ideas that come to mind & then if something good enough comes up I'll dedicate to making it :) I'd like to make a sweet desk so a desk will probably be my next project, I found a great place near by for exotic timber :cool:.

Wayne this is looking stunning.
Thank you Evoss:).

:D

Looks great. When does it go into production?
lol :D thanks John :) I have to admit though I'd be keen to know how long it would take me to make another & if I'd be able to get the curved window done correct first time :D:p.

Fantastic .. nothing else to say.
Cheers MAXIBOY :).

Wow. I wish I had the ability to create things such as this.
Absolutely nothing to fault, however, that blue LED at the top of the motherboard would annoy the heck out of me... :P

P.S Where are the power and reset buttons?

Great job though! :)
Trust me mate, I used to think the same looking at other modders pieces & then I just got busy with some basic tools & rough ideas, found I enjoy doing it & been adding some nicer tools along the way, technique & skills come with practice, did my first scratch build in 2008 & not even been going at it all the time, just been treating it like a hobby, I've seen people who have stayed sat on the fence about trying their first for a long time & they seem to soak up a lot of how things are done & they manage to make a great first project & there are no rules or strict guide lines other than take a good bit of safety serious so you don't hurt or kill yourself :D.

Oh & the blue mobo light :o:D yeah I should disable that right away lol it's an indicator that alls ok on the system, can be switched off in the bios ;).

And the power/hdd activity LED is a 16mm steel vandal switch, has an orange LED circle which I wired for the hdd activity & is about 50mm up & 40mm to the right of the optical tray, no need for power LED with the hdd light show :D & soon to be RGB light show in the main sections :cool: & I stopped seeing the need for a reset switch about a year ago, pressing reset isn't good for a system & neither is powering off all of a sudden so may as well just hold the power button down until it turns off if I ever need to ;).
 
WOW!!! Those cable holders are freakin amazing!!! Pure gold....I mean copper!!! non-ferrous metal!
Hehe cheers VOoDOo :D I might be revising them so they go straight up to cover the sata cables completely & sleeve the lower ends & make sure there isn't any slack.

Ah okay :) I didn't notice the power button at first, but now I see it :p Again, looks great!
:D It is a small switch.

Wow really nice work. The cover for the cables is so meticulous mind you looking through the log I would expect no less.

Also the light coming off the fan surrounds as you say is so unique and 1 of a kind.

Can not wait for final pictures of this.
Thanks alex2k10, had to order from an iffy shop (iffy for their business practices against other shops) for white led strips but hopefully I should get them asap so I can see if white is better for the fan holders or not, heard a fair bit of bad about the place but was the only place selling the white ones & not warm white.

Wish i could build anything like this :(

Great build the detail you go in to is outstanding tbh nice one
Maybe you could in time mate, best to absorb as much info as possible on case logs, me I just took apart my lian-li case & checked it out thoroughly to see how it all forms & fixes together & made a quite rubbish first case lol, then a 2nd, then a 3rd which was nicer but still plenty of room for improvement & now this beauty, so I think I've improved an incredible amount since my first :D:cool: now I can get an idea, design it & figure out a way on how to build it, no way would I have seen myself doing something like this 3 years ago lol ;).

Quite simply, stunning!!
Thanks MCMLX :).

The more the side panels were off & it being right next to me the more I started disliking the lighting lol I think all the fan holders need are little covers for the tops to cut off the excess light but only in the slot for the fan where the bare led strips are, anyway I put the side panels on to get a better feel for it all & glad I did :D.

I actually thought the temps might be even better with the panels on because of the design but noted temps are about the same, not better not worse unless you consider 1 or 2c warmer as worse :D, I also had the iffy RGB strip working but I really couldn't figure out what I was doing right when I had it working so was completely hit & miss but should have no probs when the new cable comes, I took it to the scroll saw instead of grinding it slimmer on the disc sander (lesson learnt on that now :D) think I'll keep it set on orange light as it's closest to the copper & it also creates a very cool effect on the fan spinner pieces I made but I'll have the option to pick quite a nice bunch of colours or even have it slowly fade into all the different colours which is quite nice :) or switch them off if they get irritating, the apollish fans I enabled the rear 2 the front one is too bright & makes the front look wrong so this makes it look nice with just that one switched off.

I've also ordered white led strips to see if I prefer them in the fan holders, the uv is quite overwhelming to be honest & not really a part of the colours I had in mind but felt I should experiment so might end up with all white or uv or a mix of both, would have been nice to use RGB strips in them but the control box would be very difficult to hide to keep cables neat but I'm going to take apart the faulty one I have to see if I could make a slightly smaller box for it so it can fit under the hdd cages, if I can then maybe it will be RGB in the fan holder stick pieces :).

Took a few more pictures since I put the panels on, also disabled the mobo led's, got some nice shots 53 taken 21 shown.

ProjectStealthlow1171.jpg


Glad I did this photoshoot as it's reminded me I need to place the windows better so they reflect everything correctly :o:D.
ProjectStealthlow1172.jpg


ProjectStealthlow1173.jpg


ProjectStealthlow1174.jpg


ProjectStealthlow1175.jpg


ProjectStealthlow1176.jpg


ProjectStealthlow1177.jpg


ProjectStealthlow1178.jpg


ProjectStealthlow1179.jpg


ProjectStealthlow1180.jpg


ProjectStealthlow1181.jpg


ProjectStealthlow1182.jpg


ProjectStealthlow1183.jpg


ProjectStealthlow1184.jpg


ProjectStealthlow1185.jpg


ProjectStealthlow1186.jpg


ProjectStealthlow1187.jpg


ProjectStealthlow1188.jpg


ProjectStealthlow1189.jpg


ProjectStealthlow1190.jpg


ProjectStealthlow1191.jpg


Let me know if I'm over doing it with the photos, just it looked good when I put the panels on & couldn't resist :D.

I think I should make a big sturdy lazy susan with alu/copper marquetry for easy maintenance & better photos :D after making that optical tray & the yin yang 120 I know I can do metal marquetry with the scroll saw wooooo :D with 2mm upwards I can do it nicely, 1mm it's surprisingly more tricky probably because it cuts faster & easier. I like to do a side project after a big one to ease myself back to normal so I slow down the modding withdrawels by not having a sudden stop lol.
 
Can never have too many pictures of that badboy!! It's simply stunning mate!

If you're going to do a lazy susan, if it were me, I'd do one the same size/shape as the footprint of the case with the circular bearings in the centre (so it's like a circle with extensions) so when it's where you want it, it sits square with the case and doesn't ruin the lines, but still rotates when you want it to...

Maybe you could put those feet on the bottom of the lazy susan so nobody would ever know it was there :) (maybe with a larger version in the centre to support the bearing... if it needs it)

That's my idea, don't know if it's doable, but I think it sounds cool lol :)
Nice idea making it a part of the case I'll think about that mate, nice one :cool: I'd have to make a braking thing for it though so it can stay locked in position when needed, think I'll get busy on the design now to see if it's doable, would make a great feature :D.

That is incredibly stunning!

Nice to see it all come together! Just out of interest the lights look Blue, are they blue or purple? Because they look like the blue I get off of my purple LED's xD

kd
Thanks KD the lights are UV so purple but in the photos they do look blue :D, not keen on the rear 2 but the front one looks ok really through the grill.

The side panels really set it off well. I have a feeling it's going to look stunning when you get rgb sorted.

P.s you can never have too many photos.
:D Thanks Alex.

EVER!!! Ecspecially of this beast. I love how much attention to detail you have sir. You have passed the journeyman modding test and set the bar higher for those who follow!!!!
It's always been me looking up to other modders & now starting to feel somewhere near there level but on electronics & motors I'm still completely unevolved lol :D so I have lots to learn still even in fabrication to be honest :).

Nice job on the cabling, you had me worried for a minute.

Have a sneakinf suspision that you're going to get the end of this build and having finished it feel a craving to start something else.

I hope so, cos it won't be the same on here without reading about a Waynio build.
:D It was quite unruly :D I'm really considering re-making that sata cable hider so it completely covers the wire side for the sata cables.

Next project I might just buy materials as & when I need them to make the cost seem nice & low :D buying everything I think I need for a project is just too much for me unless I save up for a while so maybe focusing on 1 part of a design at a time is the way to go for me, I am really looking forward to making what I intended to make on the pci/io piece now I have that scroll saw, should be able to make those perfect now & easily & it's going to be weird to justify making more cases as I think this one is going to be in use for a very long time but it would be cool to make a mini version of this :D, who knows I might start making them for others where they are in a plain state like a Lian-Li case ready for modders to put their own style into it but I'd have to get clued up on pricing so I don't sell myself short & don't overprice.

+1!

Seeing updates in this thread was the best part of Case Central :)
:D Cheers EniGmA :cool:.

I took apart the RGB control box to see if I could make a more compact one for going underneath the hdd cages & I will be able to so it'll be RGB lighting all around this case :D system side, cable side & storage side :) so the 3 white & 3 uv led strips will go in the mod bits box for another time so now I have to design & make the new slim boxes. Already had 1 30cm RGB strip so just had to order 2 more & another control box (it lets you run 3 strips through it) so if I push myself I should be able to call this complete by the end of the week & maybe another week to make the lazy susan :D or if I have the lazy susan as part of the case then 2 weeks I'd guess.
 
Another hefty all night session of modding & a trip to Blackpool & then back to modding :D I redesigned the sata hiding piece with a little reinforcement & extra length for a complete cover & 3mm extra space for depth & did my best to make sure all of the pieces are the same as each other but that sheet metal bender is difficult enough to line up 1 piece ready for bending so had to do 1 at a time which is why they lack perfection, anyway now I'll be able to have the cables fully extended & fold up excess length inside the piece & finished designing & making the new slightly slimmer RGB control box so up next is sleeving the visible parts of the sata cables then put these parts back to use again :D.

ProjectStealthlow1192.jpg


ProjectStealthlow1193.jpg


ProjectStealthlow1194.jpg


ProjectStealthlow1195.jpg


ProjectStealthlow1196.jpg


ProjectStealthlow1197.jpg


I seem to be able to design in 2d quite ok now, wasn't too sure if I'd manage making a slimmer RGB control box but have & it's an awesome fit & just about the right size for the 19mm space underneath the hdd cages as the new box is just short of 19mm :D, the only reason the original box was too big is beause of them cramping the cable work so could have been a good bit slimmer but because of the bad cable work inside these things I had to make it longer but at least I can cram it under there now & have RGB lights in the storage section also :) I also placed a cut to size piece of 1mm foam board for under the pcb so it doesn't get any contact with the alu.
 
Is that the phobya rgb unit you got. if so i been looking at that but have yet to see anyone use it yet.

Yes, had to make a slimmer version of the case so it could fit under the hdd cages :D.

I didn't anticipate getting so much done while waiting for bits to arrive so I'm knackered round about now but I think if I got the sata sleeving done & install the new sata cable hider all I'll have to do I think is install the lighting tomorrow & hopefully get final photos done, I do want to get the final photos done outside for day & night or just as it's getting darker & it's not meant to be raining over the next couple of days & cloudy which will allow for some sweet closing photos :cool:.

So Yeah, time to shut down my rig & do these sata cables & then get a goooood sleep :D.
 
Sounds really good wouldnt mind a video of the lights once you fit them to see the effect they have on the case.

Also i think you have made a bespoke piece of art and not a computer case.

Yeah I kinda wish I went for a canon 550d now for the higher picture quality & the sweet high def video it can do but I'd have been stuck with the standard lens if I did & the macro lens I got is real nice for detail shots, got an older SD video cam so might see about getting cables to transfer a vid over to the pc, my old kodak does 720p video but it is crappy picture quality but might do a vid with it anyway, I don't fancy splashing out for an ok high def video cam although I seen a pretty awesome one that straps to your head so could do some POV modding bits but it's £300 & I'd sooner spend that on new tools :D.

I decided to not sleeve the sata cables, would have been too bulky so even harder to manage but I installed the new bigger cable hider & wow if I made it even 1mm deeper the side panel wouldn't have gone on :eek::D so the cables are tucked up so it all looks neat now, I even made an end cap that I'll stick on the top, just need to brush it, lacquer it & then stick it on top.

Now I'm just waiting for the extra RGB stuff to come so I can complete this, should be here from 4pm to 5pm so should be able to complete it today & get the final photos up tomorrow evening providing there are no more problems :D.
 
Well i shall look forward to that dont worry about vid if you can not get one. Dont want you to spend £300 just to get a video lol.

The phobya RGB strips are garbage :D I found out why 1 of the 60cm strips were working temperamentally & it had broke around the solder points, the other worked ok but on the cable side, 2 of the 30cm ones inside the fan holders worked but the 3rd didn't & couldn't figure out why so I've had enough of these garbage RGB strips from phobya & have ripped them out & thrown them aside never to be used or sold as they aren't good enough to sell IMO, you was wise to look into other people using them Alex :D can't believe how much time I've wasted with them, I only originally wanted subtle lighting anyway so I must have lost the plot a bit going fully & brightly lit up :D.

I have another idea that I should have done in the first place for lighting the stick bars on the fan holders, heaps cheaper & not a pile of clutter to stash. Opal frosted acrylic, it lights up really well with a good single bright LED plugged into it so with the now empty 5mm gaps on each end of the fan holders I will place some of that inside & bung a normal LED inside each one & do some experimenting with some of my own lighting ideas (back to true modding yay :D), just wish I went this way originally, would have saved time & money.

So yeah completed photos not just yet sadly or is it sadly, means there is some good modding to come :D.
 
Got an order in for frosted opal acrylic & chrome vinyl for experimenting & possible sweet solution to my lighting problem :D.

-------------

End of weekend quiet update without pictures :D.

Not been a wasted weekend really, covered the hard drive labels with copper foil tape, took the blue msi logos off the mobo, took the brand names & labels off the gpu & soundcard & scraped the green uv paint off the edge of the soundcard & then run a black marker over it :D.

So everything is done & waiting for me to get a lighting solution sorted now & then I believe I can call it completed :) I did start taking some pictures of the bottom section but the battery ran out so couldn't finish & get them on the pc, probably for best anyway, would be nice to make the next update the final photo shoots :).
 
Last edited:
Back
Top Bottom