Random 3D printing chatter

@vail3r Ah Skadis pegboard....now there's something you won't find a shortage of premade models for! There's probably a remix of that Star Destroyer with Skadis mounts!
Filament does that; only runs out when it's least convenient. Even if you have a follow-on spool in an AMS changer, should you feel too smug about it, the end of the filament won't let go of the empty spool and it'll jam instead of switching to the next spool. *Facepalm*
 
I'm sure I've read that some nozzles have to have the temp raised because they conduct heat more/less. Could be that or it could be a less efficient design to get round Bondtech's patent or awkward machining requirements.
As the temp is raised "too" high, could the slicer be increasing the flow rate to compensate?
 
I’m not in a position to replace all the parts due to me having to quit work recently due to health issues. Is there any recommendations for a sub £200 laptop (2nd hand is fine) that would run fusion? Prints I would be making are not large in size mainly clips/brackets and random low profile parts.
I've sent you a private message (conversation).
 
Just got my 0.4mm hardened nozzle for the A1 Mini. Maybe next month the A1 Mini might turn up to put it in! :rolleyes:
Stock is really very random - if there's a few different things you want, there's no way you can get all of them on one order. I tried but I think it's going to be 3 orders.
 
If you're printing filaments that are abrasive, a brass or even unhardened steel nozzle won't last that long. Abrasive filaments are anything with carbon fibre (CF), Glass Fibre (GF), wood, glitter....basically anything in them other than plastic.
I believe that you may have to bump the hotend temperature slightly with a hardened nozzle (don't quote me on that!) as it may not conduct the heat quite so well as a brass nozzle.
 
You need a G10 (aka Garolite) bed then. Printed PETG, PLA, PET-CF, TPU, TPE. No glue, no problems, no peeling at the corners either. Wouldn't go back!
 
I can't say I've played with a 3 v2 Neo but I do know that the extruder was the weakest part of the Ender 5 Pro I have. The tension and the grip were both bad. Dual gear ought to be better in theory.
 
£9 for both a fix and an upgrade seems like a bargain! Glad it worked :D
That was my issue with Creality is that whilst I told myself I was up for tinkering, upgrading, modifying and improving....it turns out that I had rather limited patience with it and just wanted to get on with it. Went Bambu and can't say I'm unhappy. My next "divorce" will be when the A1 Mini turns up. Might spur me to get the Ender 5 Pro revamped and either sold or rehomed - honestly haven't fired it up since I got the X1C...and that's even when I've had stuff 'queued' to print.
 
Caution: This post contains unfiltered rant!

Just been trying to print some eSun TPE to make some soft rubber feet for a lamp - to stop it sliding off the desk. Now, this stuff is like TPU....but harder....or softer...more difficult! I've not yet been able to tune it well and I thought I'd managed to block a 0.4mm nozzle...which is a pain. So I swapped in a 0.6mm nozzle and got it workable - by workable, I mean that it's small and black so you can't really see how bad it is :rolleyes: So I hit print on the final two feet and start watching YouTube while it prints. Look over and it's merrily printing fresh air a few mm above the last extrusion. I've clogged a 0.6mm nozzle?!
Took it all apart, cleared it all out, ran some PETG through it and we're all good. Load the TPE back in and it just will not grab it. Eventually I figure that I've maybe fouled my extruder gears, give up (pending research on how to fix that) and swap everything back to default as it still seems to feed PETG ok. Packing away and I suddenly notice how thin the filament feels....could it be? Got some calipers on it and this section is....wait for it....1.3mm. I think we may have just found why it won't get pulled through!

Now, bearing in mind that earlier, I'd found this (click for larger) on the spool:


So there's a really bad splice in the filament that, had I not spotted it by complete chance, would have jammed everything up completely. Diameter was 2.8mm.

So yeah, difficult to print, terrible quality control and irresponsibly bad splicing. I don't think I'll be touching another eSun filament again and definitely not their TPE!

Edit: oh, I forgot to mention that it's wibbly on the reel and sticks to itself....so it doesn't unspool easily.
 
Last edited:
I think I asked whether anyone had played with food storage containers for spool storage. I just stumbled on a print that uses this exact thing and not only proves the concept but also shows which ones to buy for best fit!
You want this project

And I'm not sure I can post a link - although I don't think OCUK would compete with anyone on cereal containers! - you want to search for "Skroam 4PCS Cereal Containers Storage [4L/135.2 oz]" and you should find four of them for £19. You want this type with the three shallow grooves rather than the deeper hand/finger grip as it will take full 1kg spools.

I've printed a first one in PETG (2½ hours) and it fits so I'm printing a plate of three sets in high-speed PLA (2 hours for one, 6 hours for three).

You'll need to stock up on 608ZZ or 608-2RS bearings (usual skateboard bearings) or just use the container for silica and not to print out of.

I've ordered some rectangular hygrometers so I'll let you know tomorrow that they definitely fit - we'll see just how much bridge droop was allowed for in the model!

Oh, don't try printing the STEP files. I'm a big fan of STEP (or preferably f3d) over STL but they're oddly more massive than any other STEP I've come across and an order of magnitude larger than the STLs.
 
What sort of maintenance needs to be done on filament printers? I have a Creality Ender 5 Pro which I've had since the first few months of Lockdown and it's just dawned on me that I've not oiled or greased any moving parts ever. I take it a wee bit of lithium grease on the various wheels won't go amiss?
I'm far from an authority here but yes, a bit of grease on the lead screws is good. I think the Bambu-supplied grease is a bit thinner than white lithium but generally it comes down to any grease is better than no grease. As long as it isn't too think and slows it down too much basically. You may also want to check the tension of the belts and also the wheels. The wheels can be adjusted - the screw is a cam so turning it brings the wheel closer or further away from the rail. You want it to move freely, not be free spinning (not touching the rail) but not biting so hard it restricts movement of the gantry or grinds away the wheels.
 
I need some 3D designs printed (making a table size version of Battleships for a party), basically rectangular shot holders (2, 3, 4 and 5 holder). Assume finding an existing design and/or modifying one as I have only found one for a 3 shot holder is the best way to go? If I need to modify myself, would I need a CAD program and would a rectangle with circular cutouts be feasible for someone with no experience? Thank you.
How quick your learning curve is, is very difficult to predict! If you want to model your own or modify someone else's, you'd need a CAD program. Fusion 360 is free for hobby use and there are many YouTube videos on how to get started. OnShape is web-based and I think also free for hobby use. Tinker CAD as well. If you're modifying someone else's design, what format it is in may affect your choice of program. Often people supply STL files (a triangular mesh). Fusion isn't great at working with STLs but it will handle STEP or F3D well. I believe that Tinker CAD is more aimed at STLs but it's not something I've played with myself.
As far as how difficult it is, that depends on how complicated you make it. You could sketch a basic boat shape as seen from above with circles for the shot glass locations and then extrude that upwards to make a block with circular cutouts. You could do that in a couple of minutes but it you want to start adding features or sloping faces, it gets more complicated - not impossibly so though.
 
Pretty sure that both JLPCB and PCBWay both do 3D printing (as well as other CAM, SLS, Multi Jet etc) and fairly cheap. Delivery might take a little while though if time is an issue.
 
A1 Mini turned up this morning. Got it printing stuff already. Shhhhh, don't tell my wife...she hasn't noticed yet! Now where do I hide an Ender 5 Pro (that's currently taking up all the floor space) so she'll continue not to notice once she's walked in the office?! :confused:
 
Also got some of their new(-is) PETG-CF to compare against Eryone's PETG-CF that drives me nuts. Dropped it in, it printed a perfect flow dynamics calibration without so much as a dribble, a string or a peel. Moved on to the model, didn't fould the head or dribble everywhere. Got a long way on the print to go yet and it'll be interesting removing the supports I had to use but so far, I can't argue with the results.
 
Had a play with some of Bambu's new PETG-HF. Fair warning, it clearly states that it needs to be dried before use....so obviously I just chucked it in and started printing. Why? I figured that it's a brand new product and I'd had to wait for the stuff to come back in stock so how much water could it have absorbed in that time in a vacuum sealed bag?!

Printed a model that was 60x35x30 with a separate lid. It was about 10% faster with the HF than the normal. Quality? Well, a somewhat mixed bag - but bearing in mind I didn't dry it. A little under-extruded out the gate - a few very slight smears on the top surface. Ran a flow and PA calibration and it's difficult to tell if that made it better or worse to be honest. I started losing bed adhesion at that point - so that could be it was wet. Third go round, it let go the bed and pulled the tool head cover off. Ended up printing it in SunLu PETG on the A1. Trying another print with the 1st layer speed dropped to 60% of normal.....and nope. It just doesn't like interrupted 1st layers on my (G10) print bed. So, stuff with a solid bottom only then, it seems. Maybe I'll try shoving a textured bed in there and have a last failure! :rolleyes:
 
A couple of updates on the PETG-HF: one good, one bad. With the textured PEI bed it stuck fine and I got through the whole reel printing filament bunker inserts. That's the good. The bad: when it got to the end of the roll, it nearly trashed my AMS:


A joy to get out of there!


This is the result of the Bambu PETG-CF by the way. Just don't look round the other side where it was insufficiently supported :D


I did find on subsequent parts that I needed to turn down the speed of internal solid infill so that the second top-layer stuck. Without it, the first layer after infill went down slowly and was fine but then the next layer went down at 250mm/s and a significant amount didn't stick leaving ends sticking up which mostly got ironed down but did make imperfections in the surface.

Lastly, have I gone overboard on tidying the filament storage?! Don't worry...there's more en route for those last remaining boxes! :D


Shelf brackets are PETG-CF (Eryone for the top, Bambu for the bottom). Corner wall bracket for the Valve Index base station is PETG. Wall mount for the workbench monitor is PETG (although not visible). Hmmm, I may have a plastic problem! :cry:
 
Couldn't see it mentioned but apologies if I missed it, what boxes are you using for those dry boxes? I've got more than a few rolls of open filament wrapped up in plastic that could do with a more permanent storage setup! Cheers
You know, I could have sworn I posted more details somewhere...but I can't find them either :rolleyes:
So, I printed what confirmed my suspicion that this would fit (remarkably difficult to find reliable dimensions of these things!): Marsgizmo Filament Bunker v3. There are plenty of remixes and so on but this seems to be the original.
There's also a video with an idea about making them upside-down that might be of interest:
The containers I used I'm not sure if I can post a link but search for "Skroam 4 Piece Plastic Storage Containers" and you'll find them. They're the 4 litre size and they have the three grooves for a handle rather than the deep inset handle that reduces the width of the container significantly.
Edit: I think the octagonal shape of the opening on the top panel is also a giveaway of the correct type.

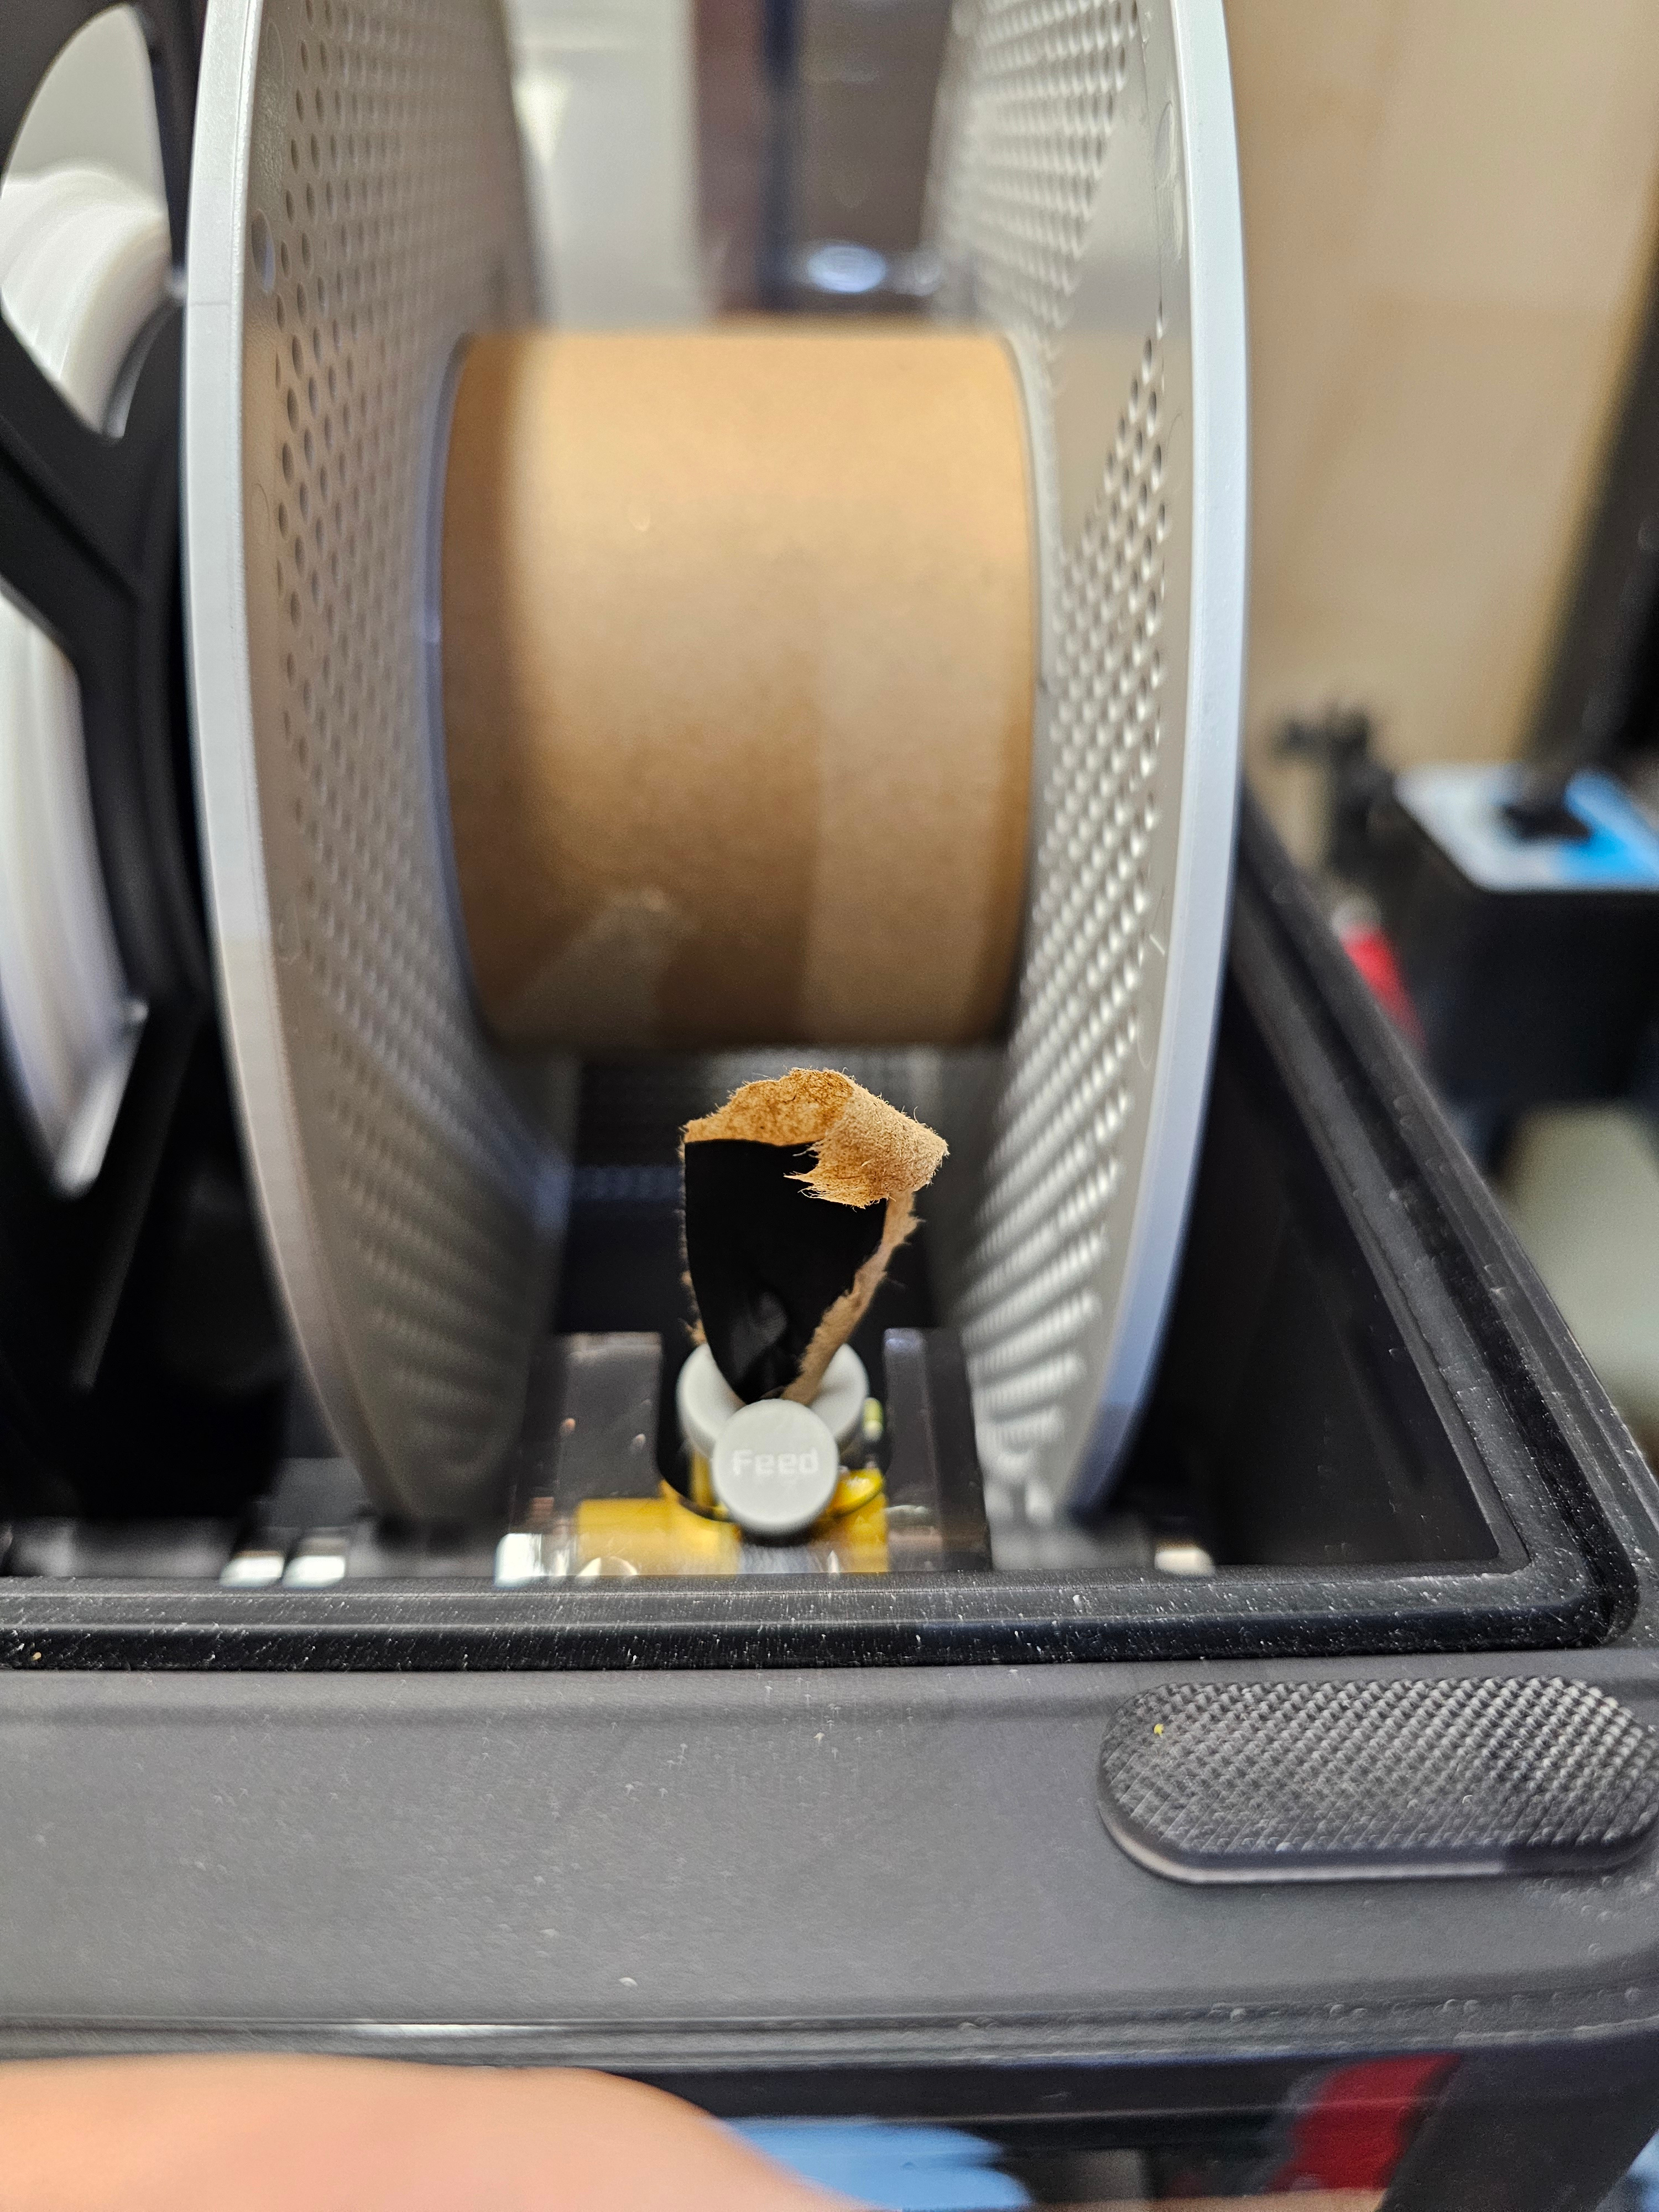
So far, most of my containers read either 10% or 14%. I think this is the lowest they read. I've got one at 19% and a roll of PETG that I hate (cardboard spool that gave me no end of grief) that's sitting at 26% even after drying it twice.

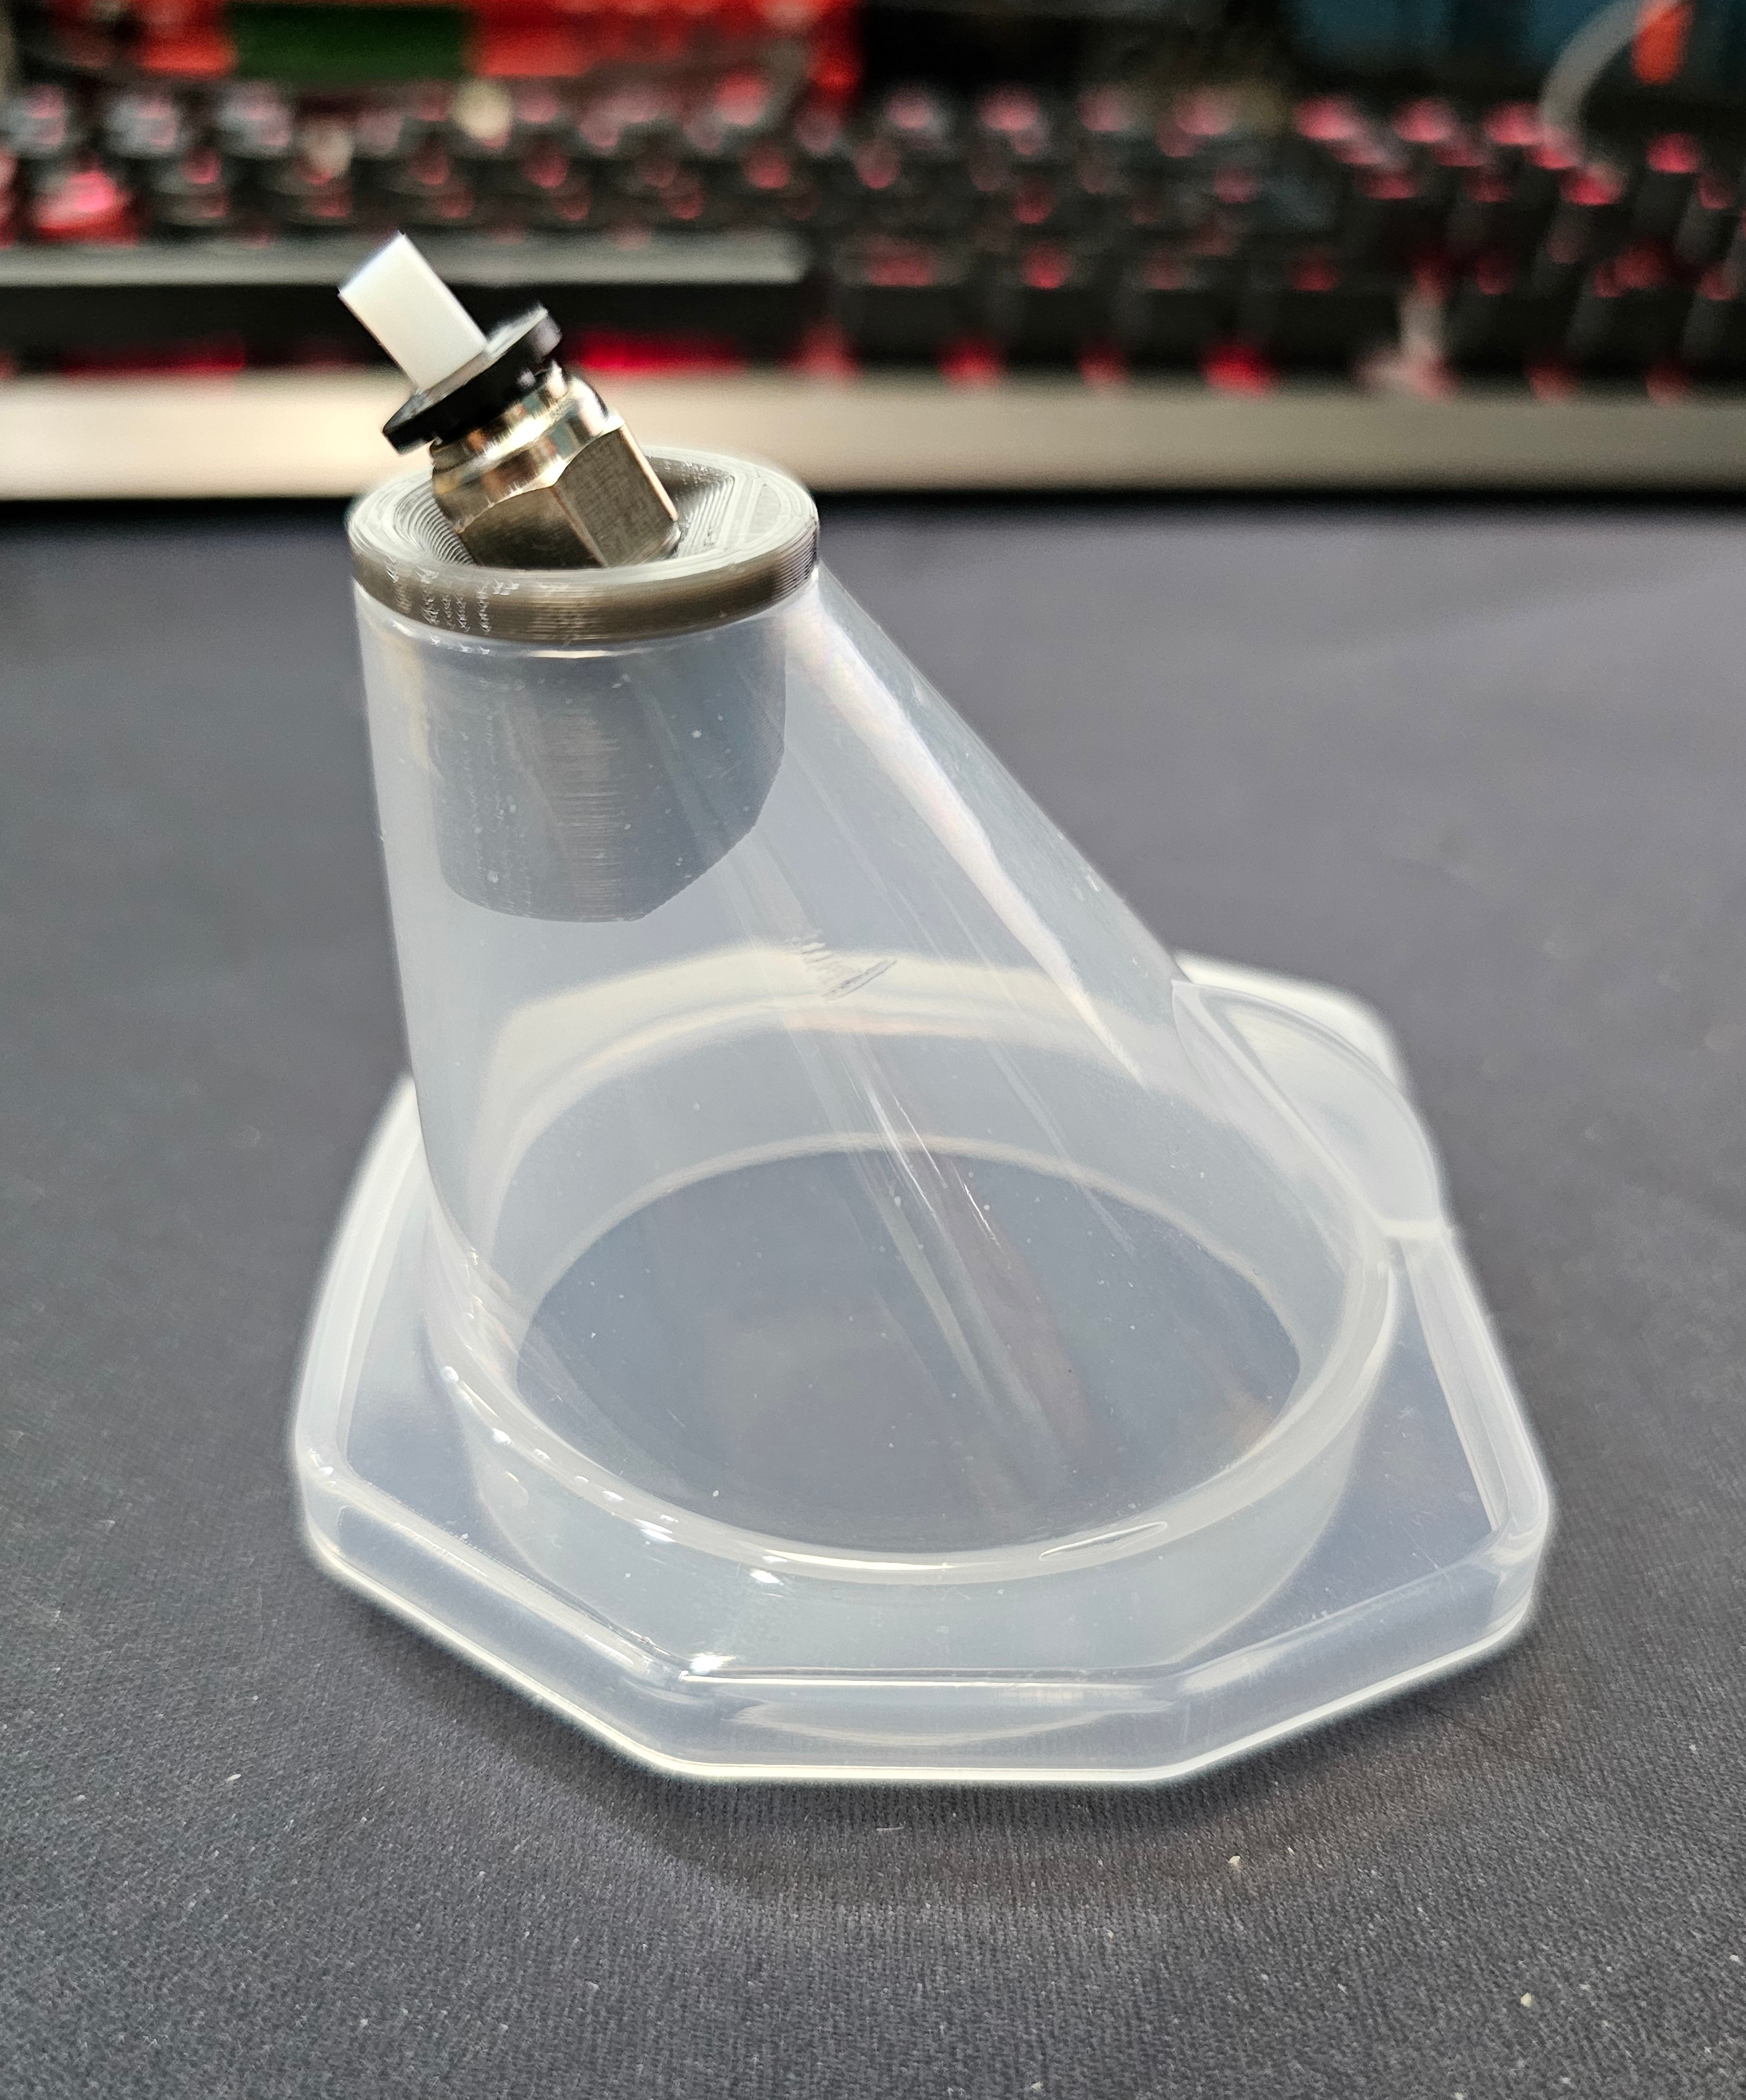
Rather than make holes in all of mine, I printed a plug for one of the spouts and put a tube in that:


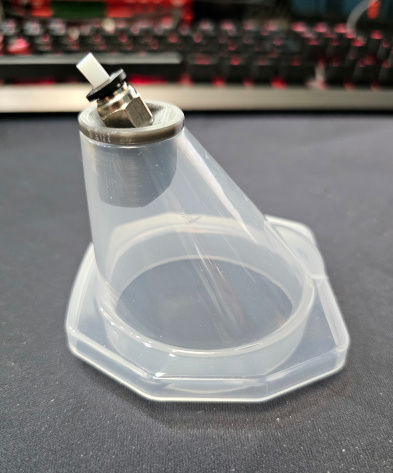
Help yourself to the step file if you're using the same containers. I've got the Fusion 360 model if that more helpful...but it's one of those that's evolved during the design process so it's not a masterpiece of concise design :D
Edit: Another option is to design directly for the octagonal opening as there is more of a seal there. You might be able to start from the design in the video and modify from there if that's the way you want to go.
The inserts are PC4-M10 pneumatic push connectors by the way.... although it's worth noting that if you're designing a model with the thread included, it's NOT an M10 thread but a G1/8 which is a BSPP series thread (in Fusion it's under BSPP Pipe threads).
 
Last edited:
Back
Top Bottom