Robocain - Robocop 2 robot

Associate
Joined
8 Nov 2006
Posts
1,423
Dont know if anyone wants to follow a rather long project im just starting, im going to make the Robocain robot but its going to take quite a while as im doing it all by hand (no cnc).

The real puppet used in the film looks like this:
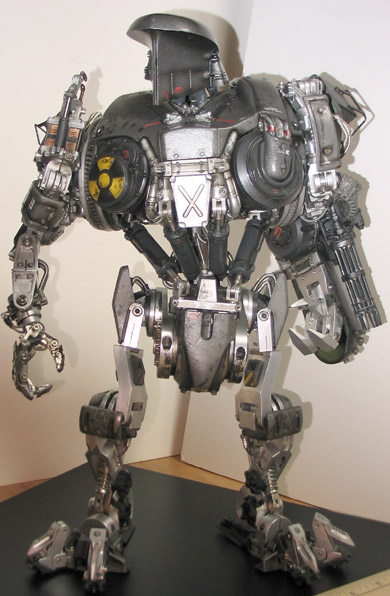
cain1.jpg


cain2.jpg


it stands about 14 inches tall, Im going to make it 19-20 inches tall.

I could post progress in here or just a link to my site?
http://www.ukmonsters.co.uk/robocain/robocain.html

might be best as its a slow process!
 
That looks very interesting, good luck with it. :)

A couple of questions, how long do you think it will take you and what tools do you use to machine the parts?

I think it'll take about 1000 hours, maybe a year. I have a little micro milling machine and a mini lathe

what mats are you using?

mats? eh, im not an engineer so if thats an engineering term you better translate it into laymans.

are you sure your not iron man :D

*edit, just looked at your website, amazing what you can achieve with a drill press and some hack saws :)

Do you use your drill press as a make shift milling machine?

no i have a mill now, but yeh i did just have a drill press for some of my early stuff, i just used to cut everything out with a hacksaw and then file it smooth, dont know how I used to do it!
 
lol, funny you should say that, i got asked to quote on a ..... hook .... thing with a ball on the end the other day.

Anyway, Aluminium will be the main metal, the plastic looking parts are urethane on the real model but I dont want to cast anything so i'll be using delrin and styrene for the really fiddly bits.
 
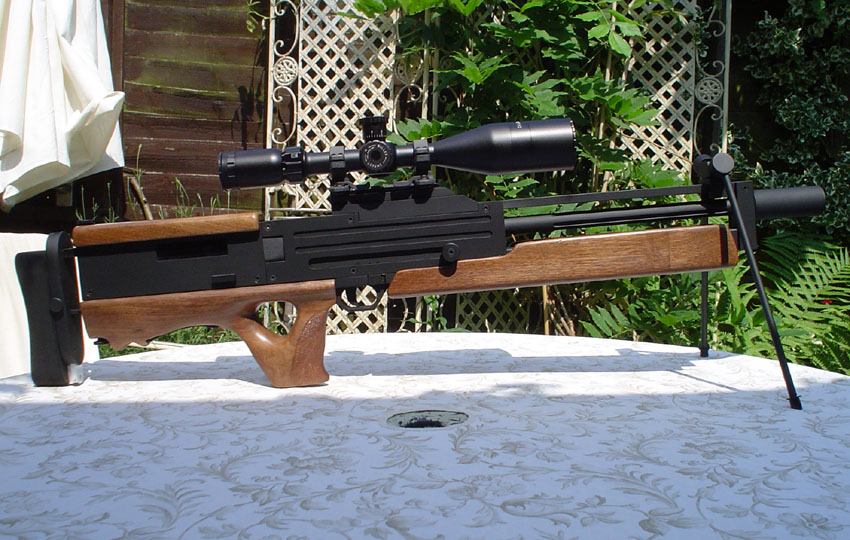
Candyman! I wondering where I remembered that name, then I remember the WA2000 you posted on ASCUK.

I was wondering, what milling machine do you use?

Thanks for your support guys :D:D, i think im gonna need it, 250 hours was bad enough, this could be 4-5 times that.

My mill is a little Sieg / axminster X1, i got it for £250 a few years back, probably the same again for tooling. My lathe is a C2a from the same family, got that for £299. Both from axminster, their prices seem to fluctuate when they get near the end of line or a new model comes out. The mill was maybe a little small for some of the guns, but for the robot its probably just about right.
 
thanks guys, i update in some other forums every 2/3 days when I take new pictures. I dont here as its not the right sort of place, so i'll do it every 2 weeks or so.

Hot Toys were saying they would make it, but that was about 2 years ago, I dismissed this project initially because of that and I didnt have enough pictures. Then I found a load of pics on a robocop forum and hot toys still hadnt moved on it so I thought i better!

How on earth do you design all the pieces?

well i didnt design it, im just copying it!
 
JAYJT29: of course :) updates every 2/3 days and all the thumbnailed pics are here http://www.ukmonsters.co.uk/robocain/robocain.html I wasnt going to update too frequently on here as the thread would end up about 100 pages by the end, I was just going to put up 1 a week with everything in it, but since you ask, here is todays!

ElectroBlaster:thanks for your praise, it helps me stay motivated. The first gun I made, the WA2000, at the time I didnt have a mill or lathe, I cut and shaped all the metal by hand, as in hacksaw and files, the only machine I used was a pilar drill and a dremel for the wood.

Chimerical I do make things and sell them, I havnt sold one of my guns before, but hey if the price is right!

----------------------------------------------------------------------------------

Got hold of 2 pieces of 15mm thick for where the thigh joins the hip.

DSC08521.JPG


my woefully small rotary table is under here somewhere!

DSC08522.JPG


cut down 5mm both sides to make the circles then trimmed off the excess

DSC08523.JPG


all smoothed out

DSC08524.JPG


sinking the holes in the sides

DSC08525.JPG


like so

DSC08526.JPG
 
Thank you all for your kind words, hard to believe this is a thread in overclockers :o


turned this lovely piece

DSC08527.JPG


then cut a slant on 50% of it, only a few degrees

DSC08528.JPG


Now the gears in the pic I cant copy exactly as this is a different scale, so I had to measure the gears in the pic and then count the teeth. The spec is written bottom right in that pic, to achive that tooth count and that overall diamete the gears quite conveniently needed to be Mod 1 pitch. So I bought a wide 28t, mod 1 gear that I can cut in half and use both sides.

DSC08529.JPG


next the recess needs to be cut, so back on the rotary table. you can see the gear cut in half on the right.

DSC08530.JPG


and that goes something like that

DSC08531.JPG


im waiting on a pair of little 10 tooth gears to arrive form "technobots" good website for bits and pieces (google it). for now im fitting it up with an old pinion from one of my trucks

DSC08532.JPG


some careful machining required here

DSC08533.JPG


all in place and made a little plate for the main gear, had to turn some M2 screws down a bit as they were too big!

DSC08551.JPG


then made a block, fitted it to one of the hip joints and attached the top of the leg.

DSC08586.JPG
 
Thanks for the support guys its much appreciated and helps me stay motivated when I get to tough bits :)

Made 2 more little fittings, getting the hang of these now, 2 small pieces of rod, drill one 2mm and bevel the end, hold against the 2nd mark wher the hole is drill 1.7 tap M2, then drill through 2mm and counter the top 3.5 then add M2 hardware, everyone with me? no? good......

DSC08587.JPG


Me looking grumpy

DSC08589.JPG


milled a recess both sides then drill and tap to attach the aforementioned fittings.

DSC08590.JPG


got the plastic gears I said about

DSC08591.JPG


all fitted together, starting to look like a leg, made a plastic capping to sit on the joint behind the ..... thing....... you know what I mean, its been a long day.

DSC08592.JPG


Ok starting on the hip, not easy to see the shape of the curves, especially round the butt.

started with 2 big chunks, this way I can attach the legs from the hip side then sandwich the two halfs together.

DSC08593.JPG


bit of a big curve to do by hand so using the rotary table to get the shape

DSC08594.JPG


something like that, drilled through the middle and everything lines up, turned a spacer (right) to hold the leg away from the hip

DSC08595.JPG


looks ok, dimentions feel right

DSC08596.JPG


now having to put the bevel on both sides, I did consider fitting it back up on the rotary table but that would have been a pain so im doing it by hand.

DSC08597.JPG
 
In absolute awe! Do you have an engineering background?

no I work with computers, only thing I made in school was a wooden boat when I was 9...... it capsized. I havnt been on any courses or anything, this just comes naturally.


I think i speak for everyone when I say, This thread need more topless+dust mask pics!
¬_¬

you wait till it warms up, i'll be down to my pants.

Incredible, it’s just amazing to see how you craft the parts. :) Do you spend a lot of time going back and re-engineering them?

Not sure what you mean, if you mean in terms of how they all fit together then yes, in most cases I can work out how things are held together but sometimes its guess work. I have an easier time of it because this wont need to be used for filming and so not having to be constantly adjusted and moved about. A lot of the joints look pretty over engineered to last all the wear and tear, im able to cut corners here without it really showing.
 
Last edited:
thank you all for the support :D:D:D:D


Beveled the other edge to match and cut a recess then made a plate to secure the 2 halves together, looks pretty close to the real one (you'll see later)

DSC08598.JPG


next groin, what fun. Rough shape out of delrin

DSC08599.JPG


had to file the matching curve by hand

DSC08600.JPG


......... next followed a lot of hacking away, and swearing where I forgot to take pics, I got a bit involved

DSC08601.JPG


something like that

DSC08602.JPG


attached with hardware as per the pic.

DSC08603.JPG


Ok on to the rear end!

hard to cut pieces like this on the mill as theres never much to grip in the vice

DSC08604.JPG


2nd one

DSC08605.JPG


DSC08606.JPG


trimmed back

DSC08607.JPG


picture on the left, see the little plate that joins the 2 halves together

DSC08608.JPG


rather carefully milled the grooves out

DSC08609.JPG


then drilled, countersunk and tapped with 2mm hardware.

DSC08610.JPG
 
what kit are you using to do this with?

what AOD said, thanks Aod, you seem to be paying attention, nice to have your support over from the airsoft side of things :)

this is my Sieg X1 micro mill and C2A lathe, both from Axminster tools. I got them BOTH for about £550. Then a lot of tooling, vices, cutters, rotary table etc, fair few odds and ends add up. Other than this pilar drill and then basic tools, files, hacksaw, lots of bits I have acumulated over time but nothing particularly expensive, a good drill set, center drill or 2, set square, things like that.

lathe-mill.jpg
 
Back
Top Bottom