Ronski's Solar & battery DIY build with whole house backup

I see shade. Micro optimisers?

No, optimisers don't play nice with Victron MPPT solar charge controllers.

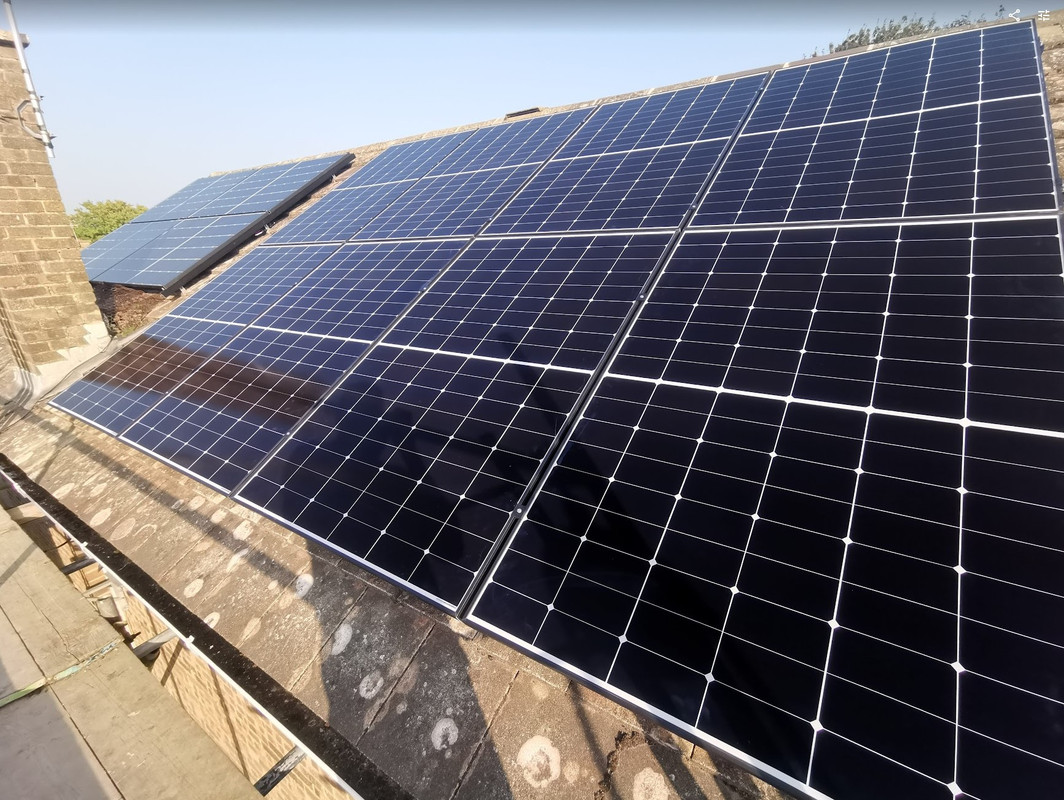
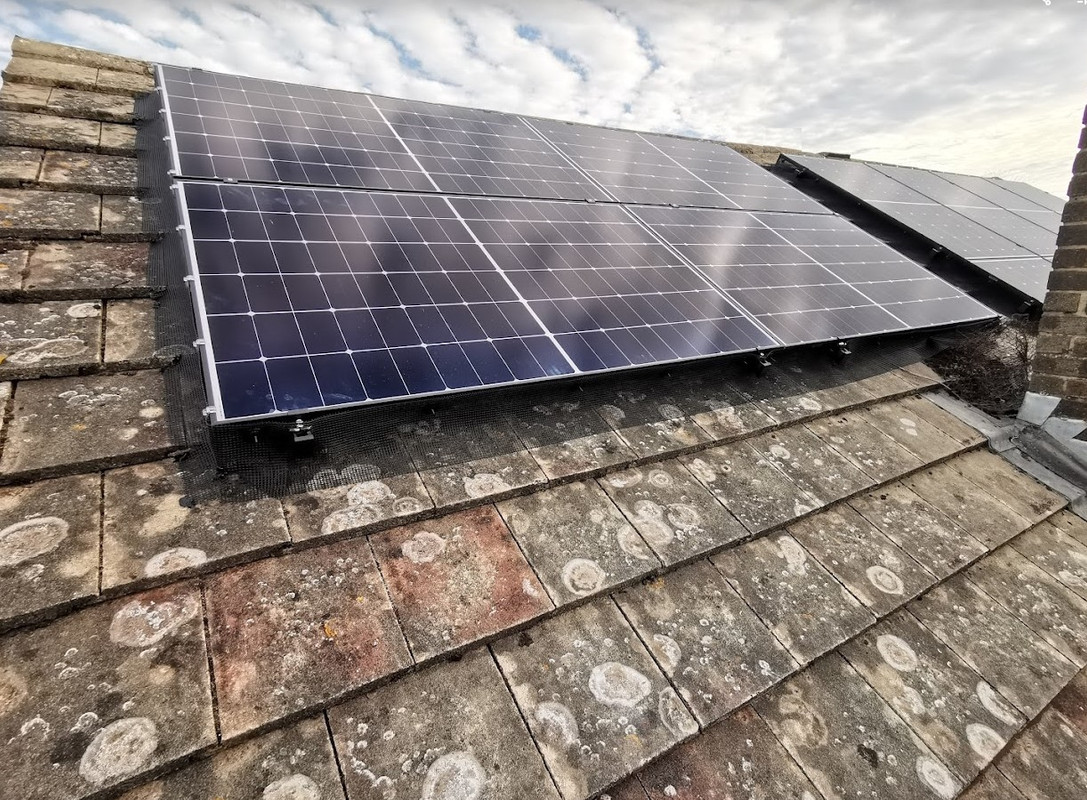
The roof I'm doing has 12 panels, they are wired in three parallel sets of four (4S3P), so whilst the four in the above picture would be affected by the shading, the other eight will not, and its only mid to late afternoon the chimney starts shading those four panels (picture was taken at 16:15). Its the main reason I've done those panels landscape, the shadow comes up from the bottom of the roof as the sun goes round.

My garage has some shading around lunchtime from a tree, probably not so much this time of year as the suns higher, more so in the winter, but it still generates pretty well.
 
Last edited:
Solar edge can show each panel.

I know, and it can show each panel because it has an optimiser on each panel, Tigo can do the same, as can Enphase, as can any other system which uses optimisers or micro inverters, but normal strings of panels can't.

I did initially look at using SolarEdge for the garage system, and Victron for just the battery, but it got way too expensive.

If I used SolarEdge for the WNW roof then that's another inverter, which means another G99 application, and running cables internally back to the consumer unit, although it would have been a better system presuming I got permission for 16kW export.

I've had a SolarEdge system since December 2015, they are 250w panels ;)

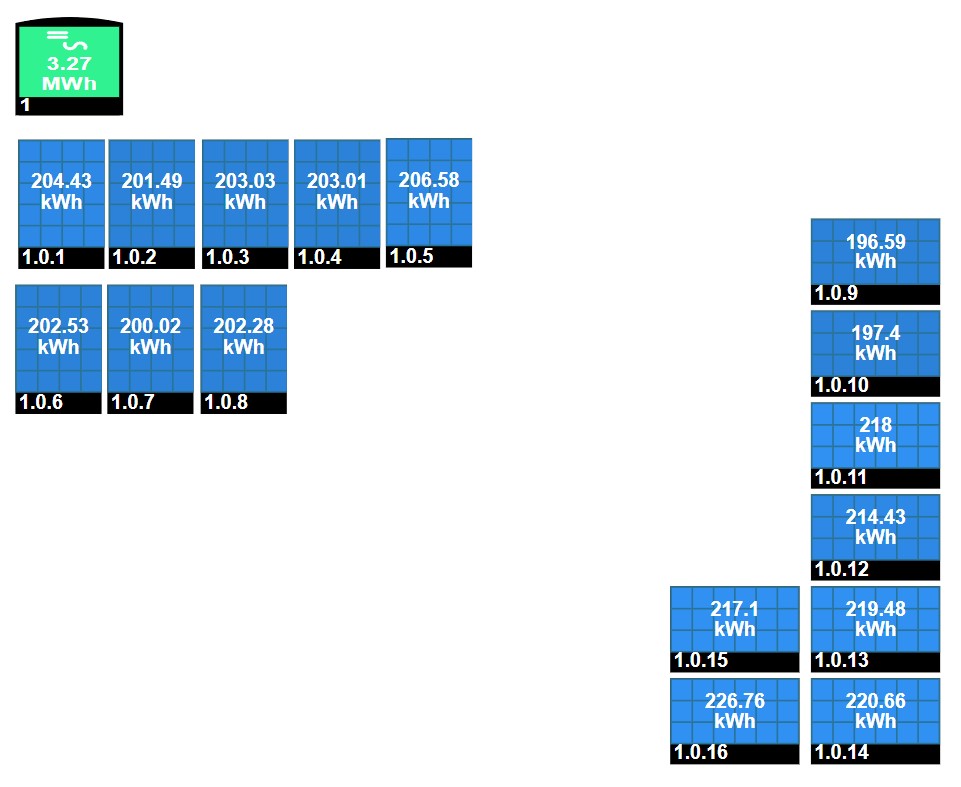
This shows this years generation, the two top right get shaded by a boiler flue, left panels are ESE, the right panels are SSW.

2024-08-31-Solar-Edge-panel-layout.jpg
 
Think I'm pretty much ready for the electricians.

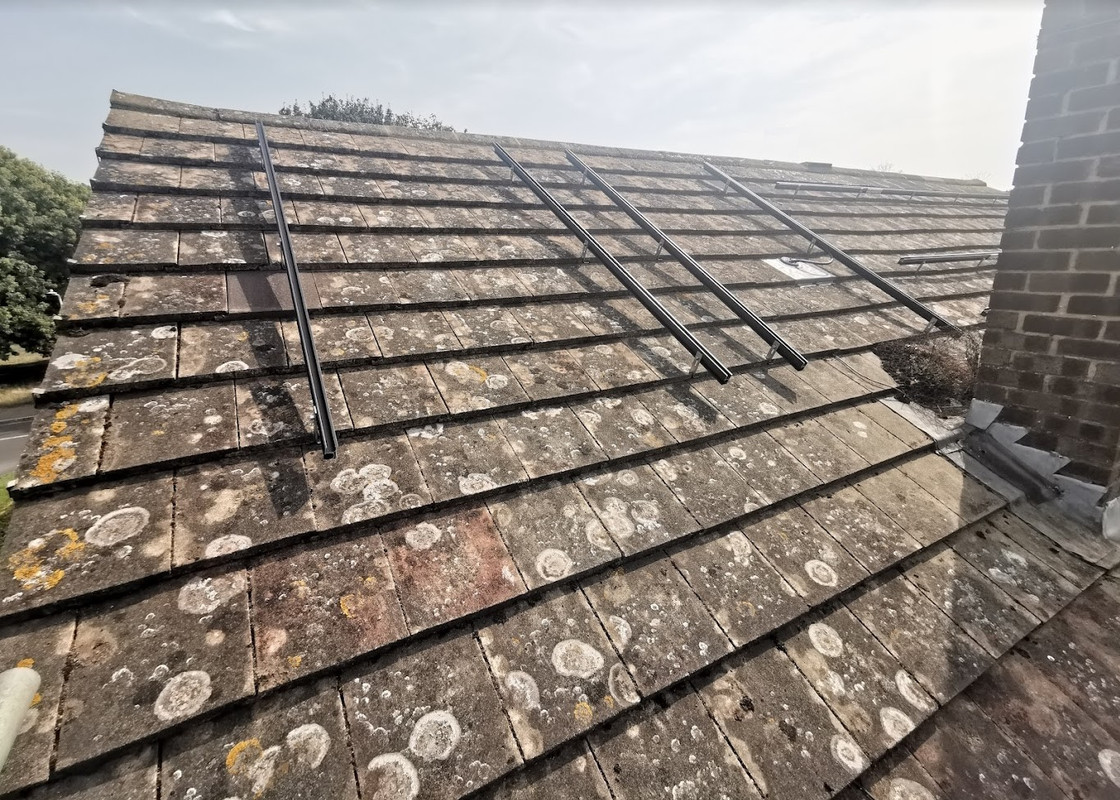
Roof rails are done and ready.

2024-09-01-Main-WNW-roof-array.jpg


This is 13:00, and that shadows well out the way at the moment.

2024-09-01-Small-WNW-roof-array.jpg


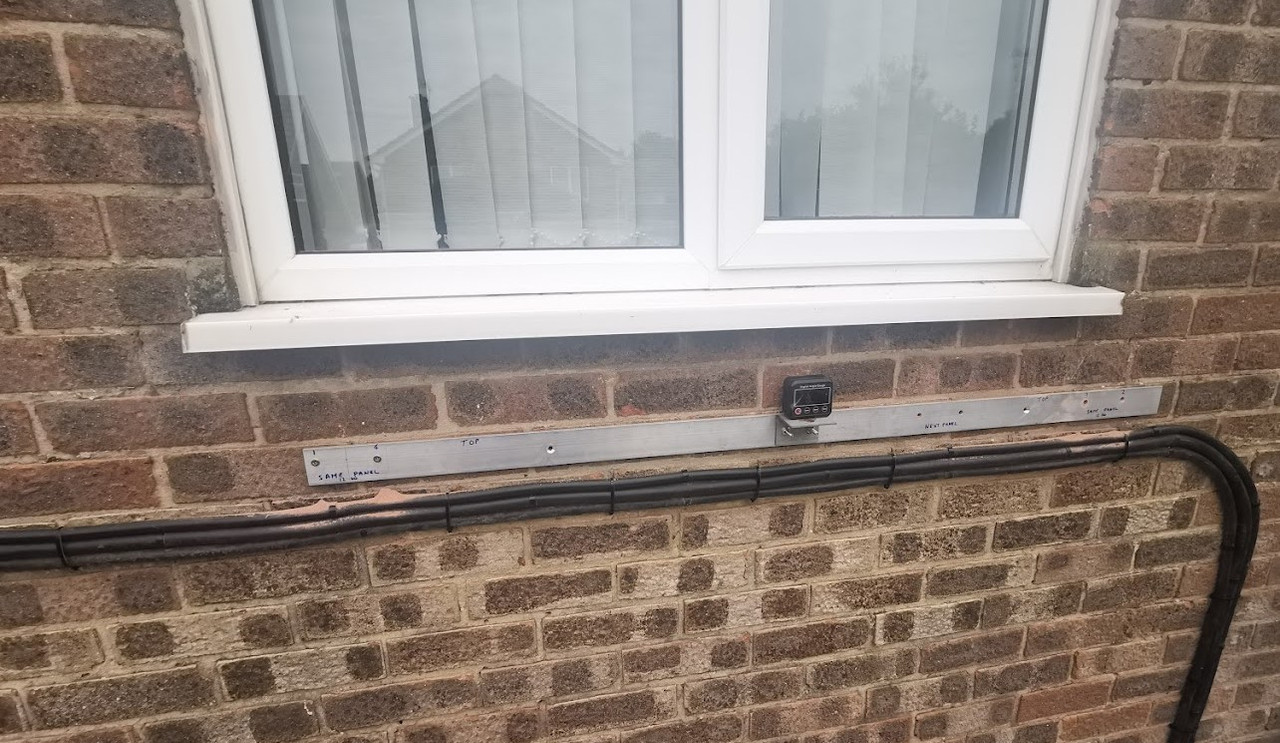
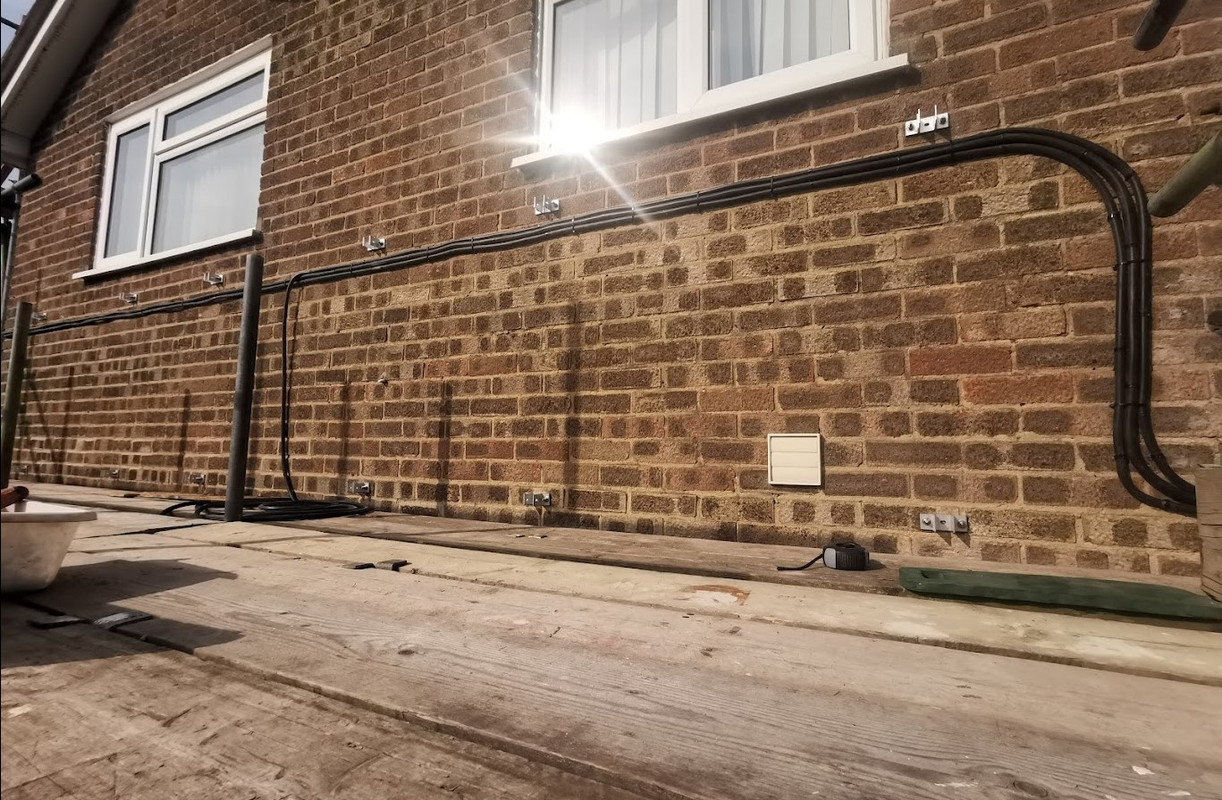
The rear wall mounts are all bolted in place, and ready for the panels.

2024-09-01-Rear-wall-mounts.jpg


I do need to put some new LED wall lights along the bottom just below the panels, and some conduit up behind the panels to feed the lights.

Also a few things to sort out on the roof, but that can be done after the panels are fitted, or before if I get time.
 
Last edited:
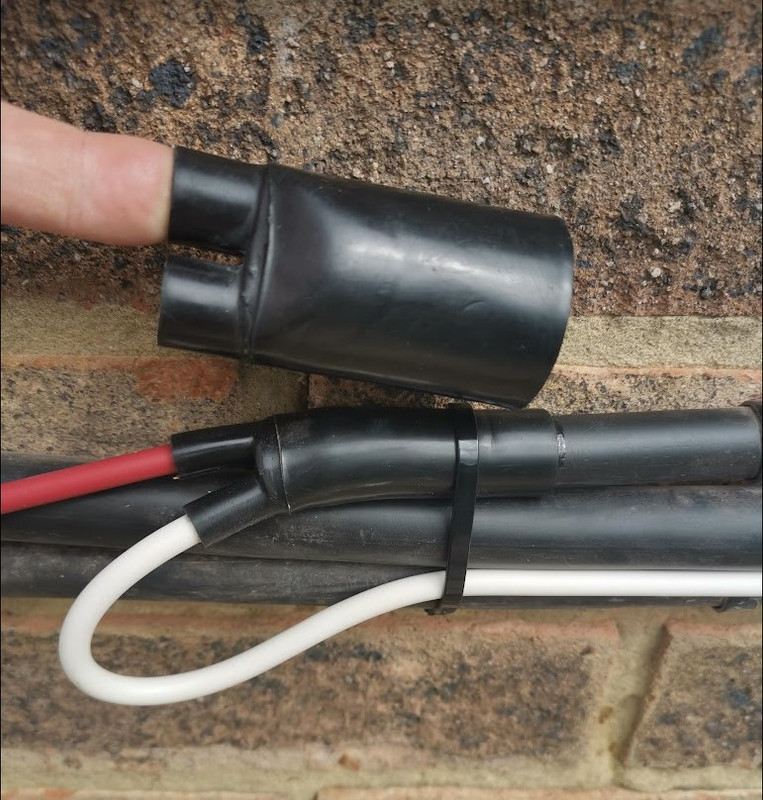
I haven't updated for a while, last weekend I finalised the wiring design for the rear wall panels, and fitted the heat shrink boot.

Heat shrink started out the same size as the top one, incredible how much it shrinks, it is also adhesive lined, so seals the cable nicely.

2024-09-07-Heat-shrink.jpg


I also started installing some conduit for the new outside lights, the conduit will be hidden behind the panels, and drops down to the lights. I finished this off this Saturday, and mounted the lights and PIR, ready for the electrician to run in the cables. No pictures of this, you'll have to wait and see the end result.

Yesterday, was supposed to be a nice easy day, a cracked tile on the bottom row on the roof, and also a loose one further along, but.................


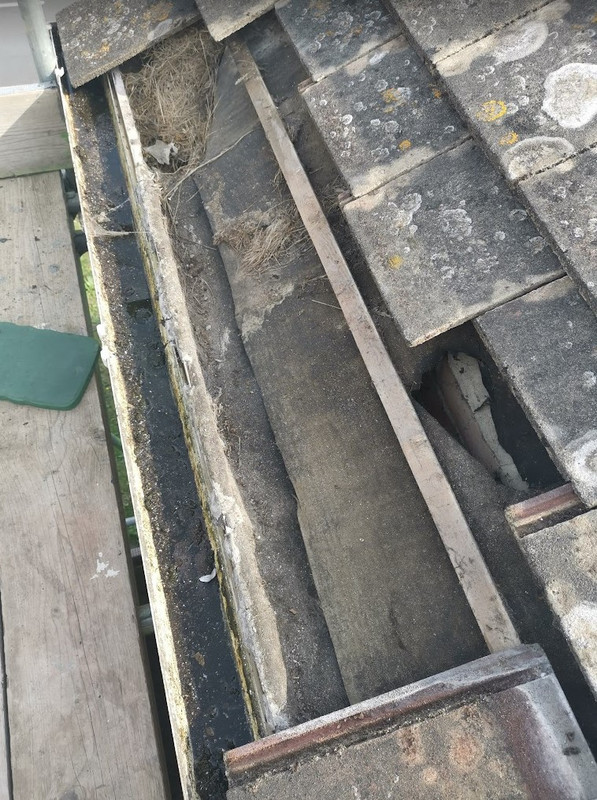
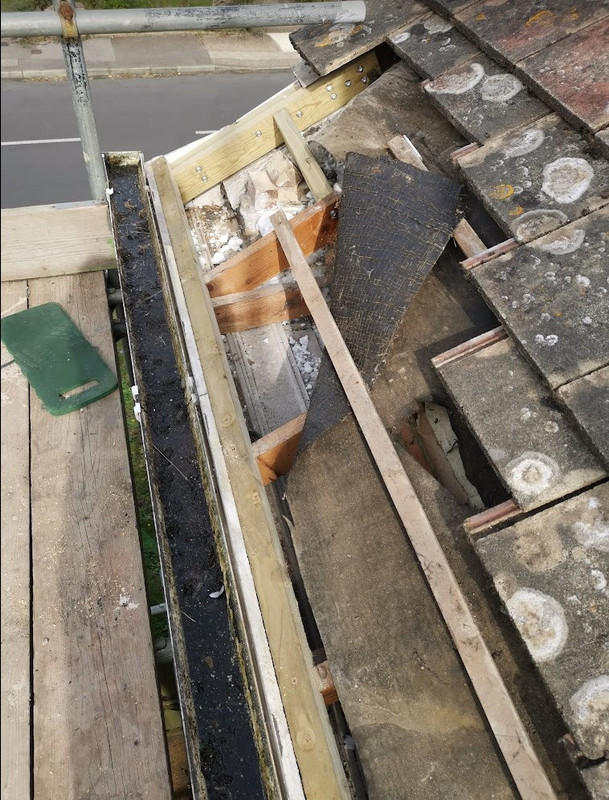
2024-09-15-Birds-nest.jpg


A hole in the felt, the felt didn't lip over to the gutter, and a lot of nest material top left of the above picture, this was 11am on a Sunday, but worse was to be found.......

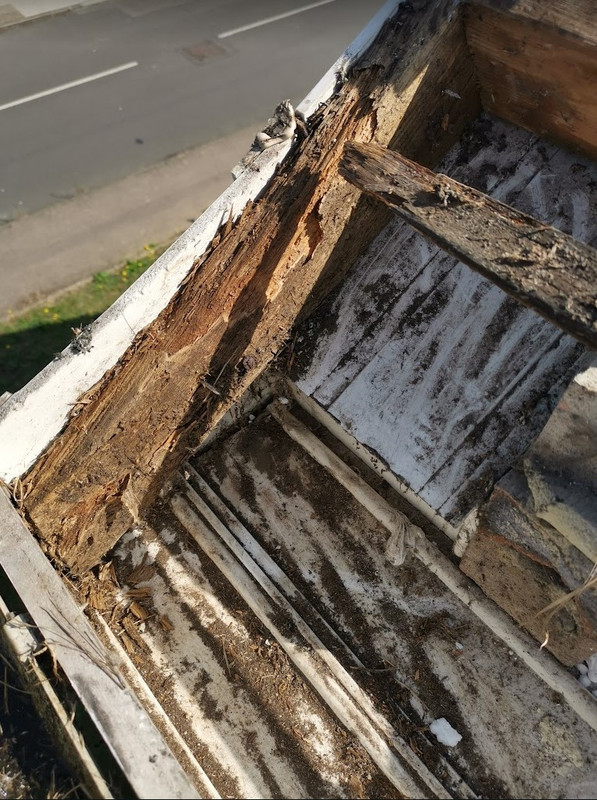
2024-09-15-Rot.jpg


When I removed the corner tiles, the rather knackered felt, and all the nesting material, I found the end rafter was completely rotten, along with the tile battens. This was 12:22.
I think this had been bodged up before, likely when the soffits and fascia was replaced in the late 90's before we owned the house, not sure if the nesting material was more recent, but couldn't see where they'd got in.

Time was short, and also the DIY stores close at 4pm on a Sunday, so I had to come up with a plan and quickly, and make sure I purchased what I needed.

Rotten wood cut out, and new wood laid in.

2024-09-15-Rafter-repiars.jpg


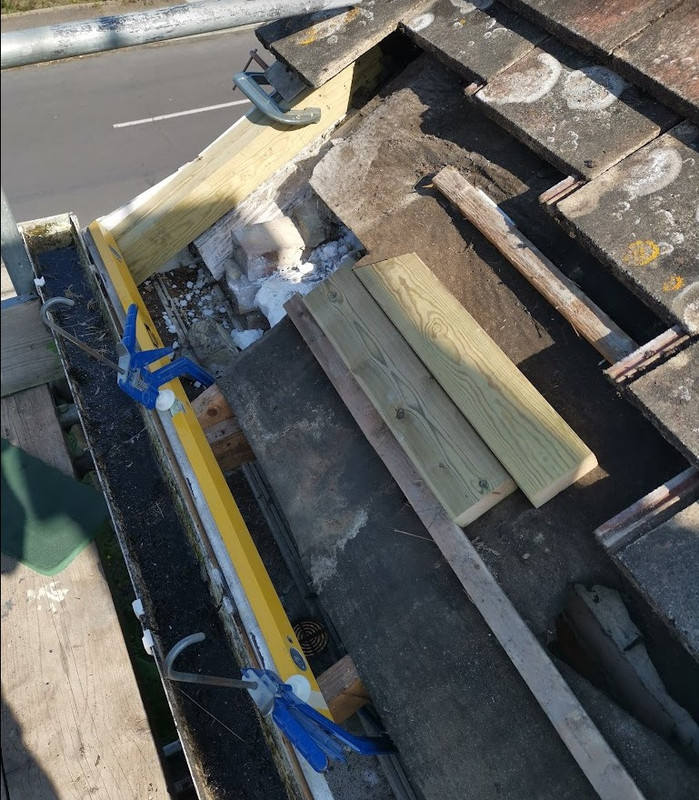
Then all screwed in place.

2024-09-15-Rafter-repairs-finished.jpg


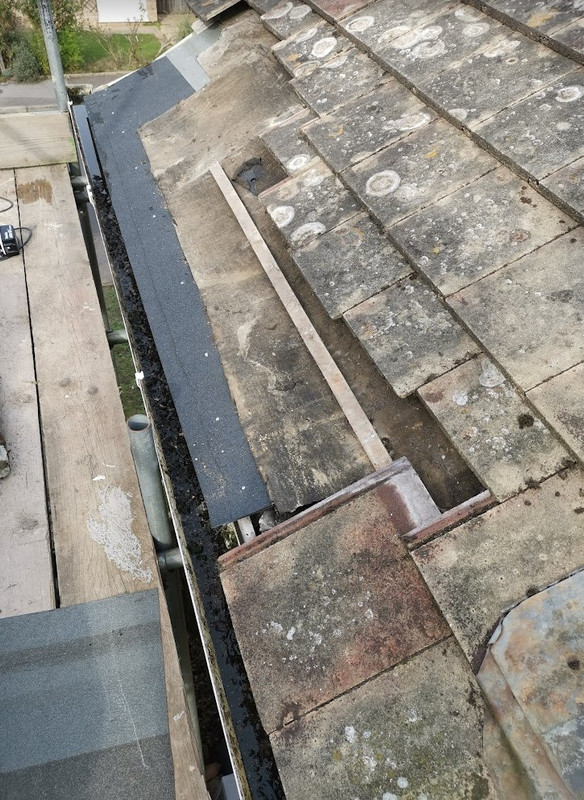
There was some brickwork to cement back in place, then some new felt laid in, which meant another trip to buy some, as I thought I had some, but there wasn't much left, the next picture was taken at 16:05.

2024-09-16-Felted.jpg


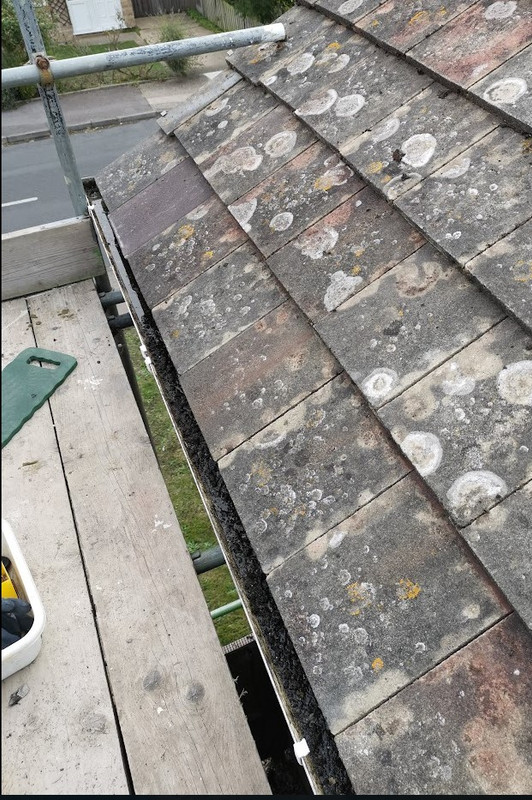
And the repairs finished at 18:00, the end row of tiles had to be bedded on cement, one sits a little lower than it should, but it doesn't matter.

2024-09-15-Made-good.jpg


Tonight I've been up on the roof, and sprayed the entire N/W side with Wet and Forget.
 
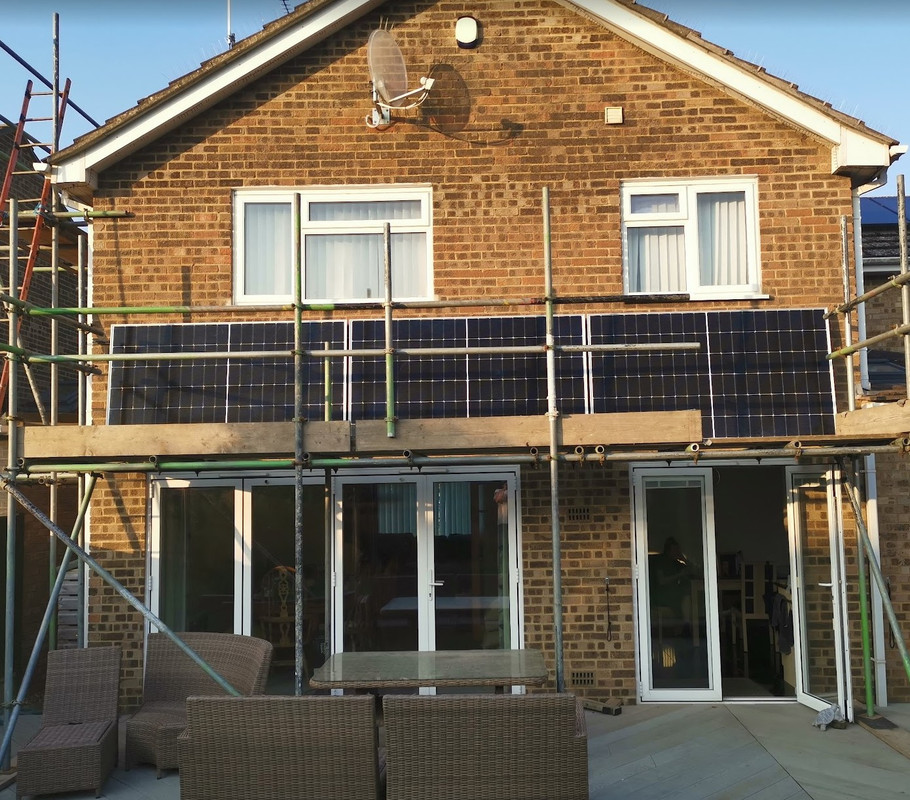
Another hard days work, electricians arrived 8am this morning, they work as a pair but also have an apprentice, which meant four of us in total to get the panels up, and into place on the roof which made things a lot easier, but still a very hard days work.

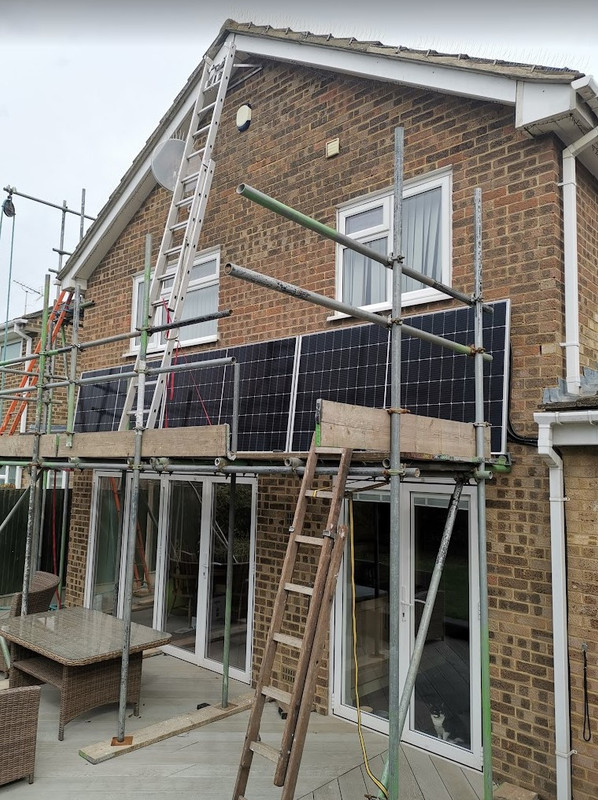
2024-09-19-NW-Roof-panels-installed.jpg


We're all really pleased with how the panels look, very flat, and central on the roof, there was only one problem, and it wasn't of my making.

The electrician had a brain fart and got the MC4 plugs the wrong way around (easy done with MC4 plugs), so the polarity is reversed, which is not good. Had I used single core black PV cable we could have just swapped it around in the combiner box, but PV Ultra is colour coded red and white. So they are coming back with new plugs tomorrow, they had enough spare plugs to do one array, but not all three.

2024-09-19-Rear-Wall-panels-installed.jpg


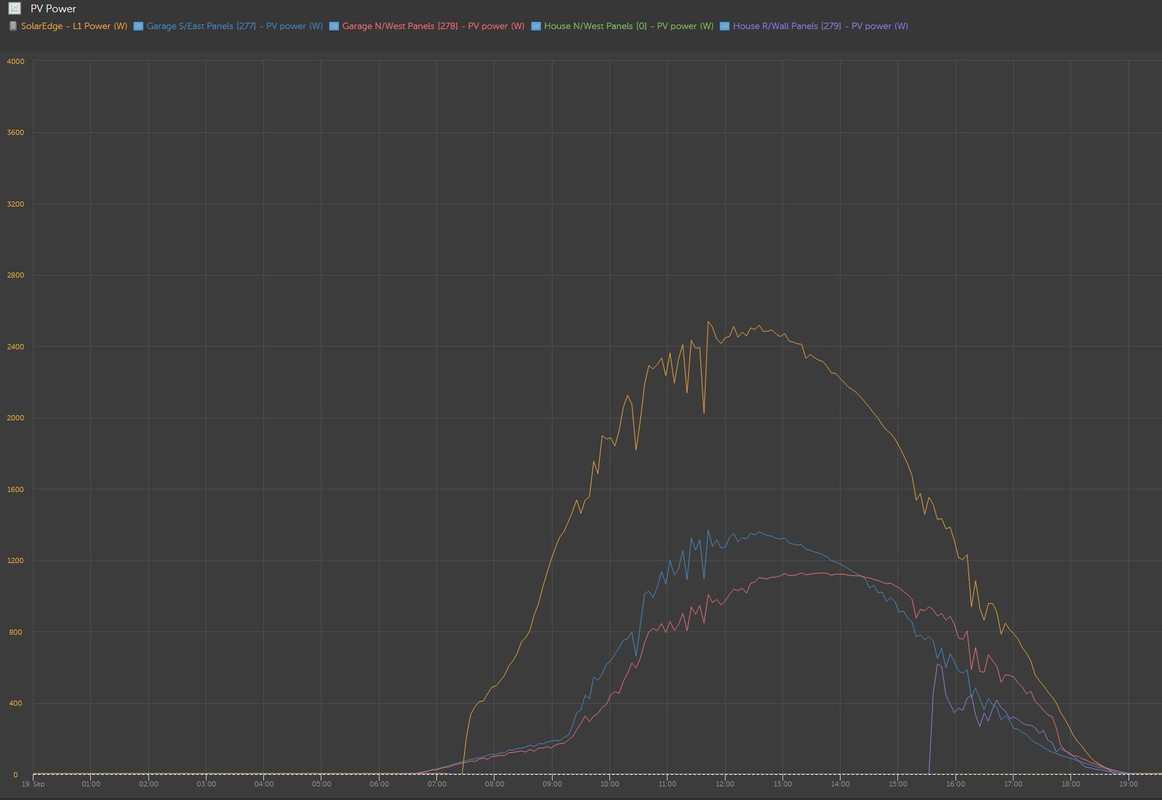
Now this array is fully functional, and came to life at 15:30, the scaffold poles do shade the panels though, and we were working in front of them tightening bolts, and securing cables, but again very pleased with how they have turned out.

Total installed PV is 15.525 kWp


2024-09-19-PV-Power-individual.jpg
 
Last edited:
So now do you need more batteries? :p
No, but when we come around to spring next year I will need to automatically send some to the grid, and some to the batteries, basically balancing the charge & grid rate to maximise generation, otherwise the batteries will charge pretty quickly, then the 11.5kWp connected to the 8kW inverter will be clipped to 8kW, although its unlikely we'll ever generate the full 11.5kW due to the panel orientation and angles.
 
They're alright if you've got plenty of open space, but we've not got that, and have neighbours, so just not practical.

Now if perovskite solar panels come out in a few years I may be tempted to change some panels, as that would be a big jump in power generation, but there are complications with doing that, with regards to the solar charge controllers, inverter size, even cabling.

If I'm thinking correctly, then if you have a 20% efficient panel and you increased that to 30%, then that's a 50% increase in power for a panel of the same physical size.
 
Last edited:
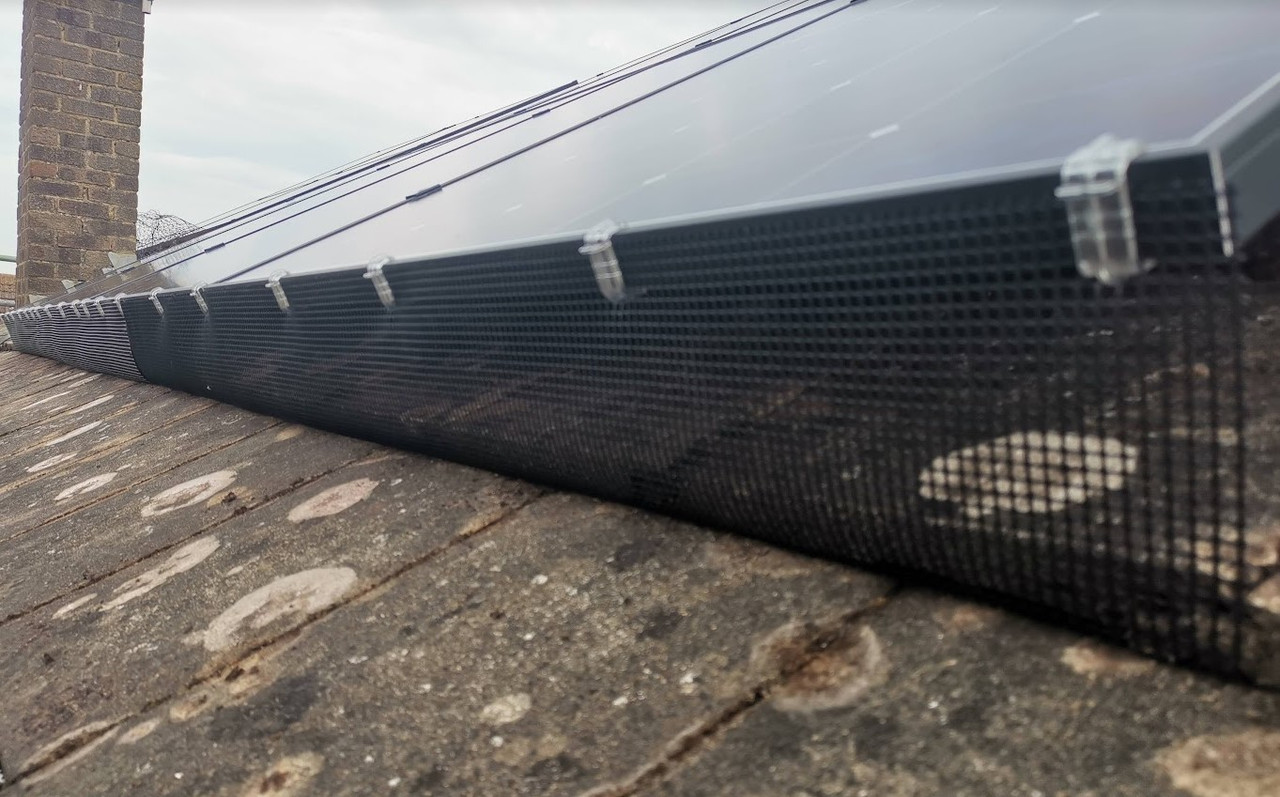
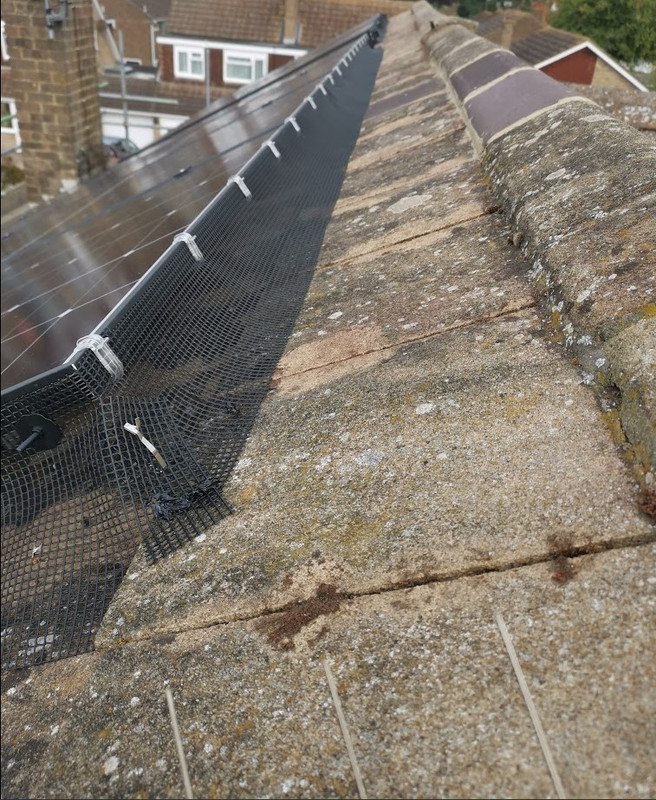
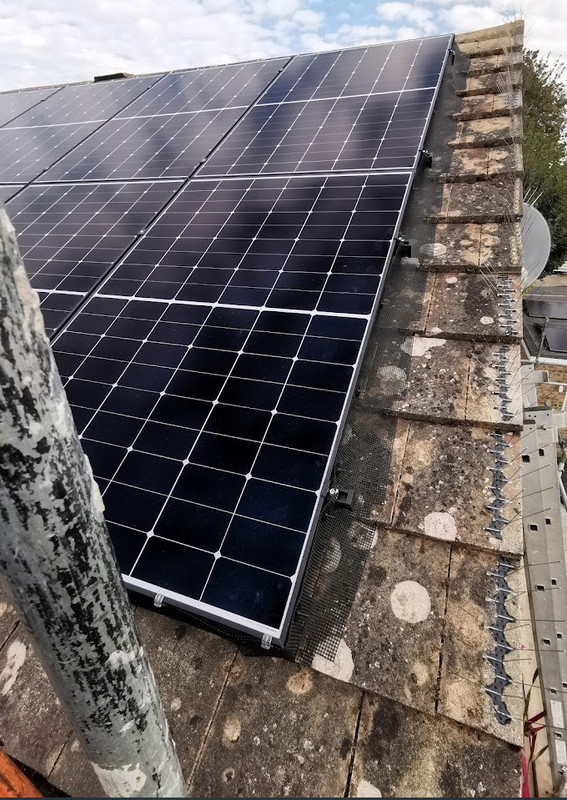
Surprisingly it wasn't raining today apart from early morning, so this afternoon I started fitting the bird mesh.

In the picture below I'm using Enviroguard 30mm SolarGuard Clear Speed Clips, these clip onto the edge of the panel that doesn't have lip underneath.

For the sides with the lip, I'll be using Enviroguard Budget Solar Guard Clip, both from City Plumbing.

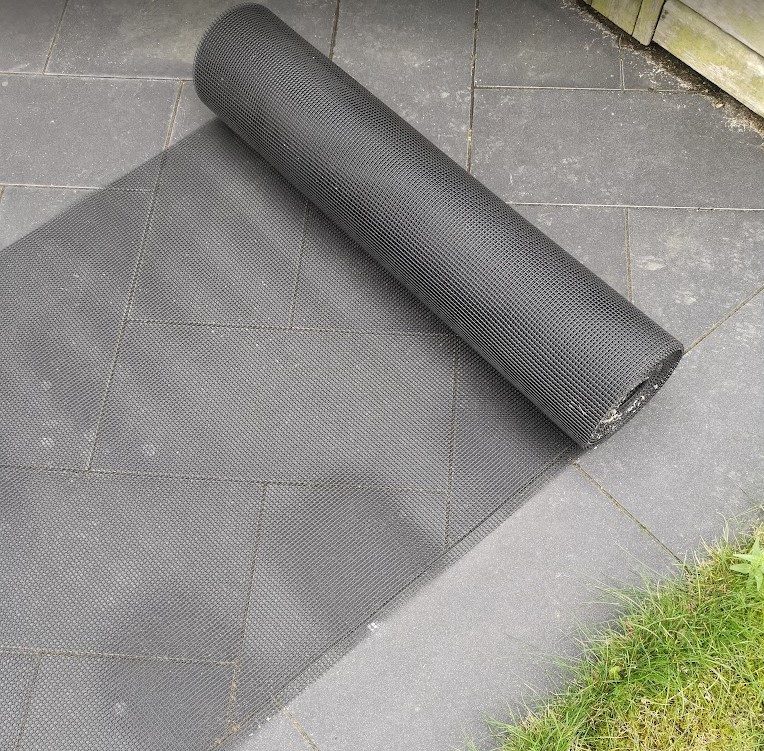
For the actual bird mesh, its simply plastic fencing, with a 5mm square hole, I bought a huge roll years ago when I did the Solaredge system.

The bottom edge is tucked under the tiles.

2024-09-22-Bird-mesh.jpg


2024-09-22-Fine-mesh-fencing-bird-mesh.jpg
 
Last edited:
Anybody fancy working at height?

I've secured all the ladders with ratchet straps.

This was to fit the bird netting to the rear edge of the panels, bit tricky as I had to work one handed whilst hanging on with the other!

2024-09-29-Ladder-to-apex-of-scaffold.jpg


View from the top of the ladder.

2024-09-29-Bird-netting-top-of-panels.jpg


Rear edge, this is what I had to fit from the ladder.

2024-09-29-Bird-netting-rear-edge.jpg


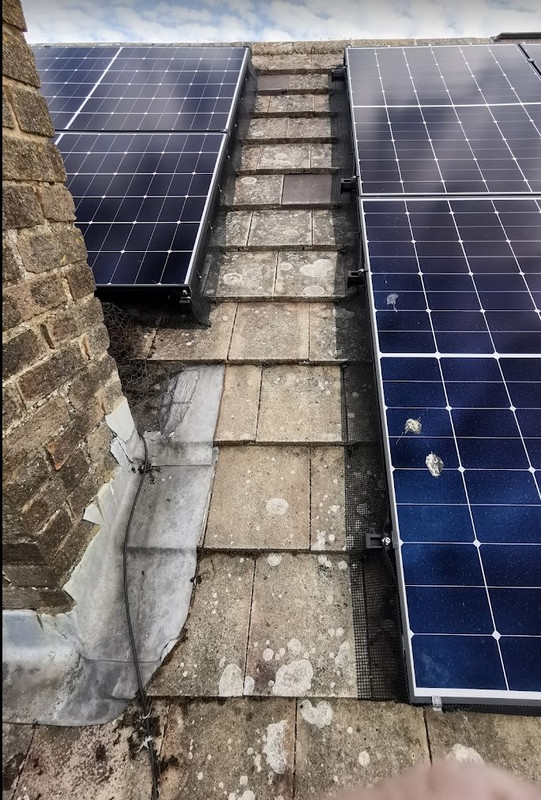
Netting up the centre, birds have already messed on the panels - the end of the aerial is just above the panels.

2029-09-29-Bird-netting-middle.jpg


And the front panels, luckily I was able to reach to put this on, no need for the ladder up the front.

2029-09-29-Bird-netting-front-panels.jpg


Just need to get the scaffolding taken down now.
 
Back
Top Bottom