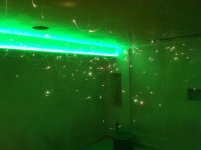
sk3lph's brand new Media/Cinema room

Another little step forward this week.

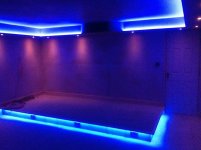
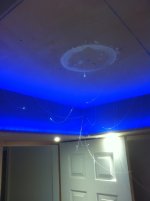
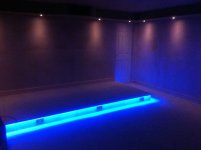
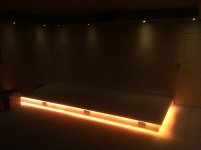
The electrics were finished off which required the joiner to come back and modify the lip of the step which didn't have sufficient space for the LED strip light. The LED lighting in the coffer lip has been installed but the wrong driver was supplied so the electrician will be back on Monday to finish that off and get it working.

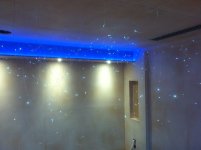
So the remote for the downlights works so they are now dimable together with the LED strip in the step as the pictures show.
VyG1RD2.jpg

leQYsEw.jpg

Next week there will be a bit more activity, as I said electrician on Monday, Air Con Install completion on Tuesday and the Home Cinema installer will be coming round towards the end of the week to cut the holes for the four ceiling speakers and measure the window up for the black out blind.

I'm also getting some loft boards this weekend so I can safely move around in the loft space for measuring up for the star ceiling lighting.

Another update soon,
 
Last edited:
Thanks for the kind words folks, I'm very pleased with how this is progressing, looking forward to seeing what the coffer looks like lit up.

That looks great!

Don't suppose you would mind sharing a kit list at some point particular things like LED strips. No idea where to start! Also interested how much the coving cost (or if not perhaps how many hours it took you joiner?).

Jealous also!!

Hi Ste,

If you are doing something like this yourself I'd have a look at the thread I originally posted some time ago now, which is linked to in the first post of this thread. There was lots of good advice imparted particularly a post from Lucid where he advised to hire good people which is advice I heeded in this project and it's made the process very smooth as they know what they are doing and crack on with the job. Yes it'll cost more but the finished article will have that professional look which may not be there if you do it yourself.

With regard to your questions, the coffer was built out of MDF screwed onto a wooden frame, so the material cost is not that much. It took the joiner about 3 to 4 days to build it and I was quoted £2k but that was also to build the rear platform and also the stud wall at the front, so you could be looking at less than half that for just the coffer.

The LED strip lights are from Deltech.

The LED downlights are from Brite source

Good luck with your project.
 
The comments here have gone in an interesting direction - my missus has had a lot to put up with during the building for all of this and is getting towards the end of her tether with all the disruption - I can see a suggestion of turning the room into a strip club will push her over the edge.

Anyway I couldn't resist posting a pic of the now working coffer lighting, the air con should hopefully be completed tomorrow.

22mKgsH.jpg
 
Last edited:
Looking good I wouldn't have used blue though I just find it far to intrusive as a light colour but everything is personal taste.

The lights shown are colour changing, so have a wide spectrum to choose from or can have it cycling through the colours too. Had another look in the room and come to the conclusion that the camera makes the lights look too bright, the room is actually dimly lit with only them on.

Anyway, small update, the air con install hit a problem in that the diffuser back boxes are the wrong size (slightly too small), so they are going to come back again to finish off when the right box size has been done.

Holes for the ceiling speakers will be cut on Friday and I'm also currently sorting out the star ceiling lighting kit.
 
Well the road to paradise may well have a few pot holes on it along the way.

The Atmos ceiling speaker holes were done last Friday and I quickly established that they are in the wrong place. The AV installer (Chris) I have been dealing with (who has been brilliant) passed the job to one of his guys who has arranged the speakers in two 5.1.2 configurations for each of the two rows of seats I'm going to be having rather than arranging them in a 5.1.4 configuration around the single sweet spot chair in the room.

I had a meeting with Chris this morning on site and he was very apologetic and rather annoyed with his colleague for getting the positions wrong and arranged for the problem to be fixed with some involvement from my builder at his expense.

The good news is the Star Ceiling fible optic lighting has been ordered and I'll be looking to start the installation of that a week on Saturday once the Air Con install has been completed and the above problem has been sorted.

Normal service will be resumed with some more pictures when things progress on a bit more.
 
This is awesome. I'd love to do something like this. I watch a film nearly every day, it certainly wouldn't be a waste.

It's probably gone past the point of obsession for me this - I'm almost always plotting and scheming in the back of my mind how I'm going to do stuff.

The ceiling speaker positions have been redone and they are now in the correct position and I've also put down a deposit on the Drinkstuff cinema seats before the special offer expires.

Few jobs to do this weekend - the fibre harness has arrived so I'll be bunching the cables up, labeling and routing them according to the grid reference that I'll mark on the ceiling using chalk string. A friend of mine is coming round the following weekend to help with putting the individual fibres in position - I'll be drilling the holes from below and he will feed them through from above - I'll post some pictures from that in due course.
 
Have you got your AV gear yet, like projector, receiver, blu ray etc?

I hope we're going to get a nice run through when it all arrives. Do you know what equipment you're getting yet?

I mentioned the kit I'm having in the fifth post in this thread, but seeing as it's you I'll post the kit again.

Speakers
Robson Acoustics Chronos (Front Left & Right)
Robson Acoustics Chronos (Front Centre)
Robson Acoustics Stella (Rear Surround)
Robson Acoustics Sub Tonitro (one under each front and left speakers)
Monitor Audio 265id - four installed in ceiling for Atmos.

Screen
135'' 16:9 Acoustically Transparent Projection Screen (centre speaker installed behind it).

Amplifier
Yamaha RXA3050

I'm moving my existing projector from the lounge up to the new room and my current blu-ray player is a PS3 which I may upgrade in due course. I'll also be on the lookout for a good media streamer too.

Needless to say I'll be taking the day off work for the kit being installed so I'll be taking pictures and covering what happens during that here too.
 
Another modest update.

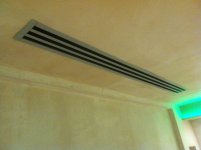
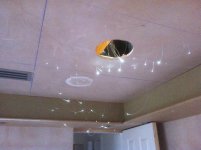
The Air conditioning install has been completed and the following is a pic of one of the two slot diffusers.

6YKGi1a.jpg

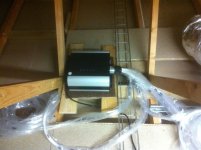
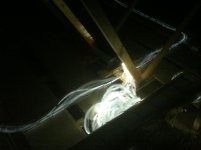
I've also started laying out the fibres in the trays for the star lighting, the following pics show the lightbox above the ceiling and the partially installed fibres glowing with the attic light off.

jMCvJQG.jpg

7QQCfT8.jpg

More pics from the fibre install this Saturday to follow.
 
Last edited:
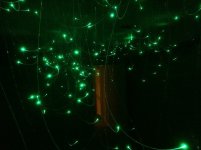
Been working on the star lighting on the ceiling and the hole drilling is now half done.

The following is some pics from the job.

jxwBuRg.jpg

m8jO6BA.jpg

snNsUDw.jpg

h7Z4ehn.jpg

vuQZro0.jpg

It does look a bit like a swarm of fireflies in the pictures which don't really do it justice - it looks amazing.

My helper is busy tomorrow to I'll be fixing the tails into position tomorrow and trimming them back to about 5mm ready for the ceiling to be painted, then they will be trimmed back a couple of mil again to let the light through after the painting.

I'm working next weekend so it'll be 2 weeks before we can do the other half of the ceiling, the black out blind still needs to be fitted but after that the room can be finally decorated.

More updates soonish.
 
Last edited:
Again thanks for the kind comments appreciate it.

I'm interested to see how your star lighting works out. I am refurbishing our house at the moment and had considered using it...somewhere.

Out of curiosity, do you know what make and model you are using? Also how reliable they are?

Keep up the good work. Your home cinema is looking great.

All the info on the star lighting can be found here - I'm using the MaxiLEDRGBW light source.

I've been talking to Pater Fagan there who has been extremely helpful who will be able to answer all your questions and Peter was able to sort me out with a pretty hefty discount.

Interesting that I found it best to do the installation with the light box switched on and hole location from above the ceiling is achieved by pushing a tail through from below.
 
Last edited:
Hmm you lost me now.... what is the point of the star effect?
Me personally would have put more of the (obviously considerable) budget to the acoustic treatments and audio kit rather than the bling.... but then I'm a two channel chap mainly ;)
Are you going to sell tickets to the public ..LOL

Good question on the point of the star ceiling and I suppose it's down to personal taste - I could have covered the room with black velvet and accoustic panels for the best AV experience but as a room it would have been too gloomy and grim.

I'm looking to have a room that has a significant visual impact and the wow factor and I love the star ceiling effect - it looks amazing already and the job isn't even half done. It is not something I could easily revist later as currently the attic above the room has no insulation so now is the best time to do it clearing all the insulation out later would have made the job even bigger and that would really put me off.

I have not dismissed accoustic treatment, my approach is that you can do all the calculations you like but the best way to assess a room is to actually listen to how the kit sounds. If I reckon the room needs it I will get it treated after it's finished.

You are not the first person to ask about selling tickets, I won't be doing that but I'll certainly be sharing it with family and friends.
 
It's all about what pleases you, so I'm not knocking your efforts.....

Just to say, unless you've heard or experience a treated room, you'll not know what your missing.... unless you have a lot of listening experience of systems and rooms...... the result in my room was pretty major.

Appreciate your advice and I can see it's something that you strongly believe in - I will be looking into this further down the line.
 
I've seen these ceilings on AVF before and while not something i'd have at home personally, they do look good and have a wow factor :)

Out of curiosity, how do you repaint the ceiling in future? Do you have to cover them somehow or do you leave plenty of slack so you can feed more out again?

Nope, you just trim a little bit off them again, obviously if the ceiling gets repainted a lot then eventually they will run out, leaving about 3mm proud from the ceiling should mean they last quite a number of years as I doubt I'll be redecorating the room very often.
 
OK - you've both got my attention and I'll look into this now rather than later - would be very interested in your stories and pictures from your own setups so that I can get some ideas for incorporating here. I'm currently thinking maybe bass traps at the front with side and rear panels - I'll send off my details to the company suggested earlier.

A separate sound treatment thread would be good if either of you are up for it?:cool:
 
I was thinking about room treatment myself. I know full well the value it can have from years of two channel hifi, but wondered to what extent the amount of auto EQ, standing wave reduction, anti node support,, etc. in modern multichannel receivers negates the issues with room response?

This is exactly what my AV installer has been saying, room treatments are not as important as modern receivers compensate for room acoustic issues.
 
Update time, various reasons that there has been a bit of a delay to progress but I have now got half the fibres in and they are now all secured (which is a slog of a job) and they are all trimmed to about 5mm length ready for the ceiling to be painted.

Couple of quick You Tube vids to give a rough idea on what it's like. The points of light look a bit fat as they protruding from the ceiling, they will look smaller once they are trimmed again after the ceiling is painted.

The first one is the basic white colour with slow twinkle.


This one is one of the 23 pre-progammed effects involving different colours and effects.


Looking to get the other half of the ceiling drilled this weekend and hopefully the black-out blind will be put in within the next few days.

Then it can finally be decorated.
 
Last edited:
I've updated the previous post with you tube vids which looks a bit better.

Sorry for the delay, hoping for a bit of a quicker run to the finish line now.
 
Thanks for the comments, to me the strip club option could be a goer, would just need to rearrange the furniture and acquire a couple of temporary poles; make sure the missus is away for a few days and also of course acquire a couple of strippers.

Anyway, my ceiling drilling helper couldn't do a full day on Saturday but we managed to get about 3/4 of the remaining half of the ceiling drilled so I'm now back to fixing the fibers into position with black silicon and Duck Tape so they won't get in the way of the insulation when it's put in between the joists, which is a joy of a job.

Having a meeting with the electrician tomorrow morning to sort out the connection of the wiring for the black out blind, I'll stick a video on here of that working once it's installed.

Probably another couple of weeks before the decorating can start.
 
Back
Top Bottom