1/2" barbs, didn't need to purchase any extra, using the ones that came with all the blocks.. (i was lucky to recieve an extra barb in my gfx block, otherwise i'd have needed 1 more for the res)
You are using an out of date browser. It may not display this or other websites correctly.
You should upgrade or use an alternative browser.
You should upgrade or use an alternative browser.
V1000B water-cooling log
- Thread starter V|per
- Start date
More options
Thread starter's postsSilly photobucket is down by the look of things... imageshack it is...

Normally the blades are just a white blur, but the camera is a bit sensitive...

Normally the blades are just a white blur, but the camera is a bit sensitive...

Caporegime

That looks cool with the white and black.

And yeah photobucket is down.

Ok, so i filed down and sanded smooth my cut edges, and i must say, it looks rather nice, even if i do say so myself 
I have also cut out my applique, but there is going to need a lot of filing down and sanding before its anywhere near ready, as you can see in the PIC
I've decided not to paint the bare aluminium, as it looks pretty sweet as it is (imo) Anyone know where i can get some cheap (unscratched) perspex from? and what would be an ideal thickness?

EDIT: for scale, thats about 5.5inches across the top

I have also cut out my applique, but there is going to need a lot of filing down and sanding before its anywhere near ready, as you can see in the PIC
I've decided not to paint the bare aluminium, as it looks pretty sweet as it is (imo) Anyone know where i can get some cheap (unscratched) perspex from? and what would be an ideal thickness?

EDIT: for scale, thats about 5.5inches across the top
i bought a 3mm thick sheet of acrylic measuring 400*350mm for my project.
my window isn't amazingly big but i'll have to cut that down to fit in the side panel.
they do sell other sizes/thickness' though.
its from a competitor although they don't really specialise in anything hardware based more just custom parts for computers.
my window isn't amazingly big but i'll have to cut that down to fit in the side panel.
they do sell other sizes/thickness' though.
its from a competitor although they don't really specialise in anything hardware based more just custom parts for computers.
Ok, so here's a pic of the window finished minus the perspex and applique:

And a close up of the filing/sanding work:

Yes that is a scratch, the rest is dust, and that scratch is actually barely noticable, the camera really brings it out
I also bought this today:

That 2 foot by 4 foot, 3mm thick, and cost me a grand sum of £4.90 from my local diy store. Should be enough there for a couple of **** ups
Looks like i can finally fit my southbridge heatsink tomorrow, as i took the plunge and bought a Q6600 (along with some more feser 1, some UV sata cables and some UV cold cathodes) So the water cooling can come off for the cpu to be installed, and i'll get the SB cooler on at the same time.

And a close up of the filing/sanding work:

Yes that is a scratch, the rest is dust, and that scratch is actually barely noticable, the camera really brings it out

I also bought this today:

That 2 foot by 4 foot, 3mm thick, and cost me a grand sum of £4.90 from my local diy store. Should be enough there for a couple of **** ups

Looks like i can finally fit my southbridge heatsink tomorrow, as i took the plunge and bought a Q6600 (along with some more feser 1, some UV sata cables and some UV cold cathodes) So the water cooling can come off for the cpu to be installed, and i'll get the SB cooler on at the same time.
Last edited:
Soldato
nice edges there and the lines are tight man really good work, i would wager money you get that window in first time no bother  what way are you fixing it in place?
 what way are you fixing it in place?
superglue \o/
(or failing that, this 'no more nails' stuff that people have been using )
)
(or failing that, this 'no more nails' stuff that people have been using
 )
)Soldato
lol! id suggest hot glue sticks if you havnt got a glue gun just use a lighter to melt it then drip itt all along were ther plexi meets the ali.
its holds it stead fast and if you ever want to clean it just pull it off and the glue comes off in one piece.
little less perminant than the old super dooper glue
its holds it stead fast and if you ever want to clean it just pull it off and the glue comes off in one piece.
little less perminant than the old super dooper glue

Aah man, why didn't i think of that... (i do have a hot glue gun too...)
Soldato
thats what this forum was made for 
super glue just seems so perminant and messy if it goes wrong, i can see a nasty accident involving fingers perspex and glue ouch!!!!
who's the las in the sig? she's hot

super glue just seems so perminant and messy if it goes wrong, i can see a nasty accident involving fingers perspex and glue ouch!!!!
who's the las in the sig? she's hot
Associate
Car trim tape (from Halfrauds) is amazing at fixing windows.
It's black, about 10mm x1mm and forms a very strong bond.
Pros
Black
Doesn't squidge out so retains the clean lines. (looks neat, even from inside)
very strong
Cons
1mm (ish) thick so window not flush to case panel (minor and rubber trim can fill this gap if required)
It's black, about 10mm x1mm and forms a very strong bond.
Pros
Black
Doesn't squidge out so retains the clean lines. (looks neat, even from inside)
very strong
Cons
1mm (ish) thick so window not flush to case panel (minor and rubber trim can fill this gap if required)
Associate
She is science goth from NCIS. Abby?
artaxerxes said:She is science goth from NCIS. Abby?
Indeed

Pauly Perette.. she bares an uncanny likeness to my missus too
 (goth chick rock)
Now i have a dilemma, my new parts have arrived, so i should get fitting stuff... but so has bioshock... ooooh, choices choices!
Soldato
Indeed
Pauly Perette.. she bares an uncanny likeness to my missus too(goth chick rock)
Now i have a dilemma, my new parts have arrived, so i should get fitting stuff... but so has bioshock... ooooh, choices choices!
Really like your watercooled case V|per
 get them parts fitted then you can hammer bioshock as much as you like .
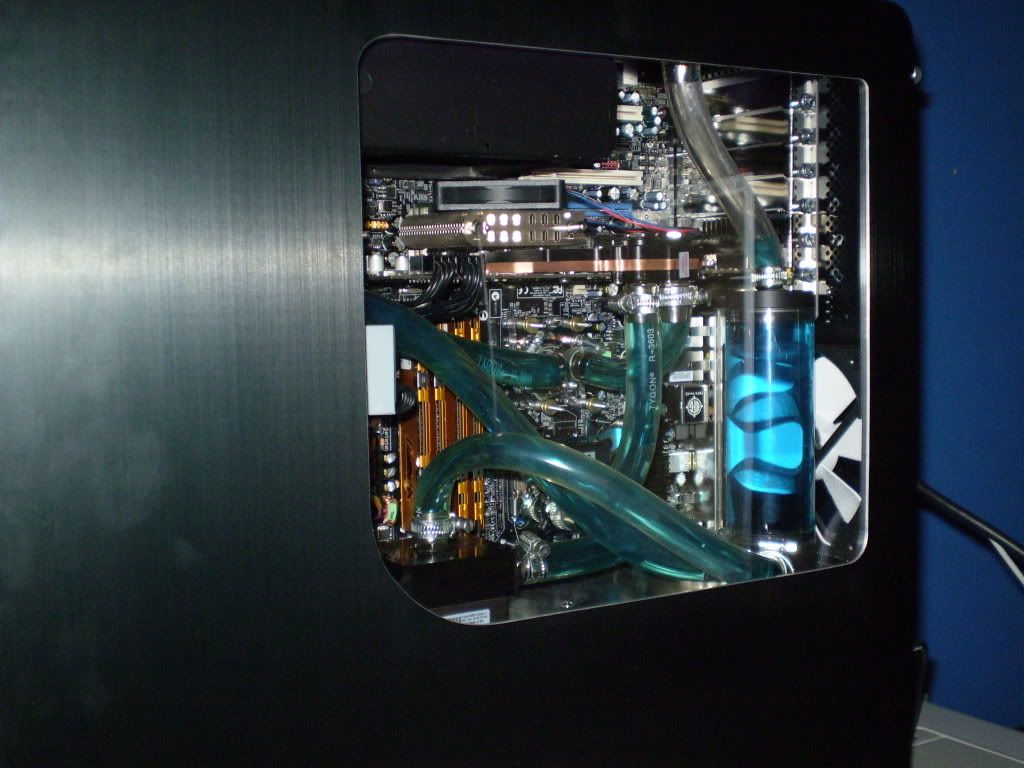
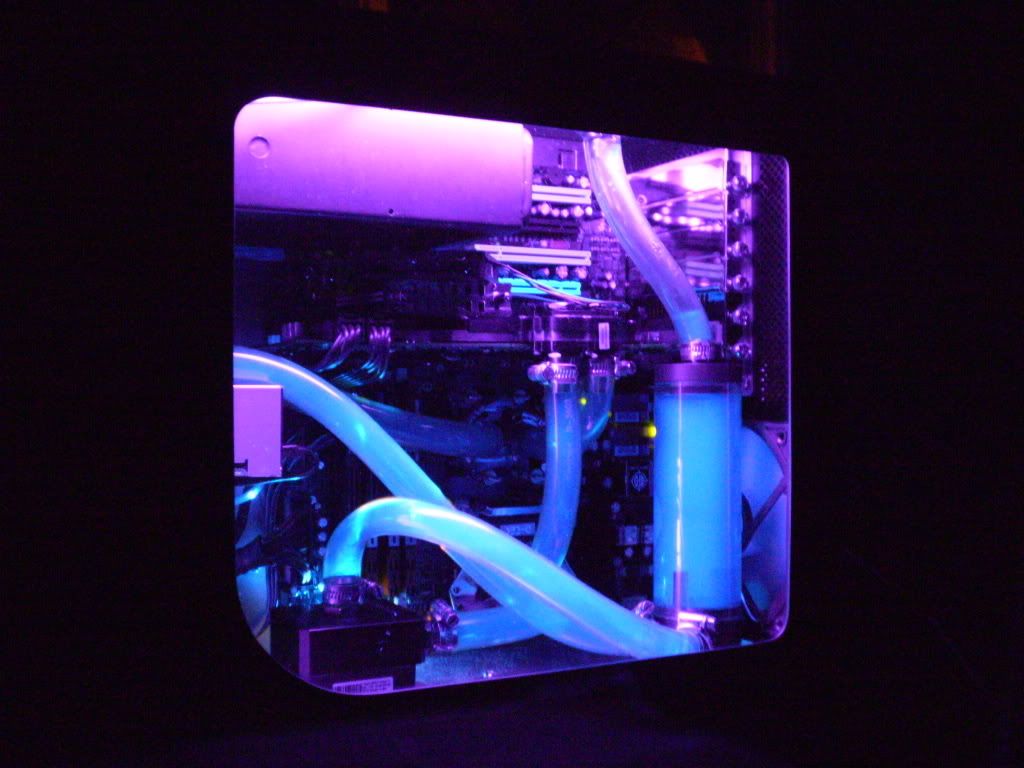
OK, thursday saw me install the quad, troubles clocking, probably the board, but hey, stable 3.6ghz out of it now. Also managed to get the Thermalright cooler in (*****'d a fan on it at the moment, i'll remove it at some point...)
Anyway, also managed to do some propper cable tidying, and got a couple of cathodes in, perspex fitted, and this is the result:

And the dark shot (which looks naff as my camera doesn't work well without a flash..)

Next stop, get that applique finished
Anyway, also managed to do some propper cable tidying, and got a couple of cathodes in, perspex fitted, and this is the result:

And the dark shot (which looks naff as my camera doesn't work well without a flash..)

Next stop, get that applique finished

Last edited:
Whats ISO? 
And it was sat on something
EDIT: set it to take a pic of fireworks... looks a bit better

And it was sat on something
EDIT: set it to take a pic of fireworks... looks a bit better


