I got me 3D printer, awesome!

Associate
Joined
9 Oct 2005
Posts
2,325
Location
Berkshire
Wow you didn't waste any time. :D Good effort, how are you finding it?

-

So I've started the printing process, seems small parts in PETG are going to be a challenge as it stays soft for a while so the quality of print is a bit meh. Started with the endstops for the D-Bot and the taller thinner parts aren't to the standard I would like. Might experiment with some active cooling and see if that helps. Fortunately the part in question only takes 15 minutes to print so I don't mind some trial and error. Will stick some pics up when I get a chance.

Also dropped the extrusion off to an engineering firm today for cutting, got a good look around the guy's workshop and I have the confidence in his ability to deliver to spec. :)

Thanks :). I love it!
They'd missed one part, a print fan nozzle. So I made one from cardboard and my second print was that replacement. Felt pretty damn great when it worked and fitted! The whole X,y,z calibration and alignment or squaring everything was rather nerve wracking though for sure.

Now I'm doing a torture test of the little frog gcode it came with. One of his legs has broken off/got knocked away though. Once he's finished I'll post a photo. There's a little bit of stringing so I may try 5 degrees cooler. It's also at 50 microns layer height though so that'll be tomorrow when I have three hours!
 
Joined
1 Oct 2006
Posts
13,952
Superb, good to see you're not afraid of improvising too. :D Upgrading the printer is very satisfying, the extra bracket here or a stabilisation mod there or something that improves the original design etc. Feels good knowing that you've made something built to a price better using the original purchase doesn't it?

Impressed you managed to get it dialled in so quickly, what type of fan are you using for cooling? Blower or standard?
 
Associate
Joined
9 Oct 2005
Posts
2,325
Location
Berkshire
Ah it's a blower - you can make it out on the shot above, with the temporary cardboard bit aiming it across.

I'm now looking at my one legged frog!

n61g3S4.jpg.png

What do you think? His other leg looks a bit iffy too, but the hind legs are perfect as is the rest of him.
EDIT: Hm but actually where the rears stop is the same z where the leg broke.
 
Last edited:
Joined
1 Oct 2006
Posts
13,952
Could be a number of things from my experiences. Either:

a) not enough cooling
b) over extrusion
c) print temp too high

Given how the body of the frog is OK I'd say you're looking at a or c, the wider area and greater distance between nozzle passes gives it more chance to cool I reckon. Like you say drop the temp for starters. Presumably that's PLA? What temp are you printing at?

I found between 190-210 works best, depending on where the filament is from. The cheap stuff I got with the Tevo wanted 210, but the stuff from Rigid Ink performs best around 190-195. Bed temp 55-60, Rigid Ink adheres better to a cooler bed.

Looking at the first couple of layers I'd say your Z offset is nicely dialled in, no squishing on the bed/elephant foot and a small surface area for the feet but still maintained contact as it printed the higher and smaller layers.

All in all, off to a good start and avoided most of the problems that people seem to face with their first prints. Decent!
 
Associate
Joined
9 Oct 2005
Posts
2,325
Location
Berkshire
Could be a number of things from my experiences. Either:

a) not enough cooling
b) over extrusion
c) print temp too high

Given how the body of the frog is OK I'd say you're looking at a or c, the wider area and greater distance between nozzle passes gives it more chance to cool I reckon. Like you say drop the temp for starters. Presumably that's PLA? What temp are you printing at?

I found between 190-210 works best, depending on where the filament is from. The cheap stuff I got with the Tevo wanted 210, but the stuff from Rigid Ink performs best around 190-195. Bed temp 55-60, Rigid Ink adheres better to a cooler bed.

Looking at the first couple of layers I'd say your Z offset is nicely dialled in, no squishing on the bed/elephant foot and a small surface area for the feet but still maintained contact as it printed the higher and smaller layers.

All in all, off to a good start and avoided most of the problems that people seem to face with their first prints. Decent!

Thanks for your advice Randal.

Yeah it's PLA straight from Josef Prusa's prusa3d, it came with the printer. It's printing at 210 and 50. So sounds like it's at the upper end of the range.

I think tomorrow I'll print a better spool holder, as there's too much friction for my liking right now. And thanks, tbh I was expecting a lot more dialling in than I've done so far! The whole live adjusting the Z at the start took me a few attempts and I'm still unsure about it!
 
Associate
Joined
9 Oct 2005
Posts
2,325
Location
Berkshire
Hey, possible stupid question alert:

After selecting my gcode the printer does 9 "touches" of the head across the bed, before extruding a load at the front edge and then printing.

These dots leave a tiny dot of plastic and a very thing whispy stringing going on too. As it then prints in the centre, where one of them is, it seems a bit wrong.

Is this normal, or hinting at a temp issue?

EDIT: Oh, i just noticed on a test cube at about 3mm up and the PLA is coming off the bed at one corner.
 
Last edited:
Joined
1 Oct 2006
Posts
13,952
It's a configurable value in Marlin, defining the grid for auto levelling. I think you set the points, so 2 points is a 2x2 grid, 3 is 3x3 so 9 test points.

The pass at the front of the bed is to stop filament blobs and clean the nozzle but I've never seen it work successfully. All of this is defined in the starting gcode generated by your slicer typically. G28 is auto home, G29 is bed levelling, then there will be a G0 section with a G0 E0 line for extruding filament and doing the bed scrape to clean the nozzle.
 
Associate
Joined
9 Oct 2005
Posts
2,325
Location
Berkshire
Ah I getchya, just looking at the gcode now. It goes a G28 and then a G80 where the comment is "mesh bed levelling". But it's the little bit of filament that oozes that I'm concerned about.

In other news I've re-adjusted the z so the first layer is closer and I'm printing the cube again. Fingers crossed! (but not too violently, don't want a draft)
 
Associate
Joined
12 Jun 2005
Posts
1,762
Location
Suffolk
Must be something in the air, my Printrbot has been nothing but trouble today resulting in me deciding to strip it down and rebuilt it back to a single extruder. (maybe an upgrade or 2 as well).

It's currently sitting it a box out of my sight before I get annoyed with it. I'm also going to start work on my own maker space where I can set up my printers.

I also recently got a promotion at work which I'm very happy about but it's going to meaning that 3D printing is going to take a back seat for a while (Personal printing and YouTube channel) I'll still be on here and the D-Bot thread and making the odd video but I need to spend time elsewhere for now.

Good luck with all your builds and printing guys.

James.
 
Associate
Joined
17 Oct 2005
Posts
2,246
Location
Perth, Australia
Another day another random aliexpress order :)

2.jpg
 
Associate
Joined
9 Sep 2008
Posts
1,375
So I took the plunge and ordered the cheapest(half decent?) 3D printer I could get my hands on - an HE3D(Tevo Tarantula by another name) about £165 delivered, from Hong Kong with DHL Express(sent Saturday night, arrived Monday lunch time) - also came with auto level sensor though I ordered a standard kit.

No instructions so I just followed YouTube to assemble, different hot-end (had to use my limited reasoning skills to mount it with the undocumented parts). Caught out by some stepper motors running in reverse(printer makes very unpleasant sounds!) - so into Arduino IDE to edit Marlin config header file motor directions, then re-upload to the controller.

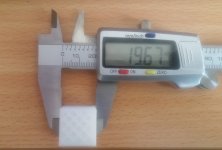
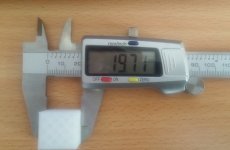
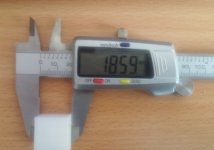
So after all that question on my first print, a 20mm x 20mm cube, here are the measurements I get - any advice on how to improve accuracy?

Width -

uIsoMgj.jpg

Length -

Ch9BNnO.jpg

Height -

5FxhKnM.jpg
 
Last edited:
Associate
Joined
12 Jun 2005
Posts
1,762
Location
Suffolk
Hi phillip2009,

Take a look at this video by Tom, it should help you out with calibrating your new printer and welcome to the hobby.


If you have any other questions please ask away.

James.
 
Last edited:
Soldato
Joined
28 Mar 2005
Posts
13,678
Location
Drunken badger punching
I've had enough with the Leapfrog Creatr we have at work. It finds new and novel ways to fail each time it goes wrong. This last time, the motherboard failed after one of the ultra low quality cooling fans died.

So, due to this, I'm looking at spending £5k on a replacement. I think FDM is best suited to what we do (mould making, mostly hand sized or smaller, sometimes big stuff). I think that SLA will be too costly to run, too slow and too small a build volume for what we do.

I'm thinking:

Ultimaker 2 Extended
DeltaWASP
Makerbot Z18
Makerbot 2X

I like the look of the Leapfrog Xeed, but we've had so, so many issues with our Creatr, I'm thinking it'll be another disaster in waiting. I also like the look of the Mark Two, mainly from the ability to print with composite, but I think it's a bit too isolated from the other FDM printers to be viable.

Don't really want to go down in build volume, and a reliable second extruder wouldn't go amiss either. The heated platform of the Creatr was probably a good thing, but might give it up for something else with an assurance that it's a nice thing to have but not absolutely necessary to get reliable bonding between build platform and components.

Basically I want something we can leave for up to 40 hours and not expect to find it in flames.

Anyone got experience of the above or maybe can recommend alternatives?
 
Associate
Joined
16 Apr 2007
Posts
2,197
Hi guys Im thinking of buying my 1st 3d printer.
I was looking at the Wanhao i3 Duplicator which Ive heard good things about. Its on prime day today too which was unexpected so I can get it delivered tomorrow for £248.91. Will I get any better than this for around that money?
Any advice on wether to go for it or not would be greatly appreciated.
Edit:Bought it so can join the club.
 
Last edited:
Associate
Joined
16 Apr 2007
Posts
2,197
Yay :) Welcome to the club.

James.

Cheers
Just arrived cant wait to get home from work. Looks quite easy to setup and set off the example print then Ill do a Benchy boat. Then who knows.
Any gotchas I should watch out for when setting it up or doing 1st print(instructions actually look quite good).
 
Back
Top Bottom