

You are using an out of date browser. It may not display this or other websites correctly.
You should upgrade or use an alternative browser.
You should upgrade or use an alternative browser.
Project: Hush! - updated 26/12/23
- Thread starter Monkey Puzzle
- Start date
More options
Thread starter's posts- Joined
- 13 Mar 2006
- Posts
- 6,712
One day! Not that much more to do really now - plumbed up and working nicely - will do a nice wooden surround for a laptop bluray drive, needs some tidy replacement tcabling, plan to add some feet with castors for convenience, there's a rectangular hole at the back that needs an aluminium panel made and veneered to fill.It will it ever be done.
- Joined
- 13 Mar 2006
- Posts
- 6,712
Merry Christmas all, it's been a while.
A lot of time and effort have gone into bending the 14mm copper pipes for the hard-tubing, and if I'm honest I procrastinated for a good while because I found this very annoying - it's easy to put a lot of time in only to find the tubes were a little off and needed to be redone. I'd replaced the clear acrylic inlet and outlet port block from the Alphacool Eisblock aurora block they kindly sponsored the project with with an alphacool delrin one instead that you can see in the photos below. It changes the orientation of the inlet and outlet ports and makes plumbing easier with a vertical gpu on a riser block and cuts down on 90 degree bends - might be somewhat pointless with the restriction from the GP and CPU blocks, but every little helps in lowering restriction and allowing a lower and quieter pump speed! I used a hand pipe bender for 14mm copper tube. It's inaccurate and tricky to get the bends clean without scouring into the soft copper leaving a dent. After a lot of trial and error I found barrow black painted copper prebent pipes are easiest to work with - the copper is still soft apart from where it's been work-hardened at the prebent 90 degree bends, which saves having to heat the copper to anneal it, and means not having to then subsequently give the copper an acid bath to remove the oxidised copper inside the pipe (which leaves nasty copper salts behind that are a pain to remove and risk crapping up the water loop.) I used stainless steel 12mm rods to run inside the copper pipe to hold the pipe in place, and removed the paint with 0000 grade steel wool soaked in acetone, and used the rods again to keep the soft copper from getting deformed when polishing and for bevelling the ends of the copper pipes after cutting with sandpaper, so they easily pass the O-rings in the compression fittings. Without smooth bevelling they mangle the orings and are tricky to add/remove the pipes in my experience). Removing the pipes is actually quite quick and easy - the aluminium motherboard tray can flex back a couple of mm which is needed for the pipes to get into the bottom bit of the compression fittings, and the pump is sat in a bracket surrounded by squidgy sorbothane hemispheres so can move around by several mm in all directions to allow pipe fitting.
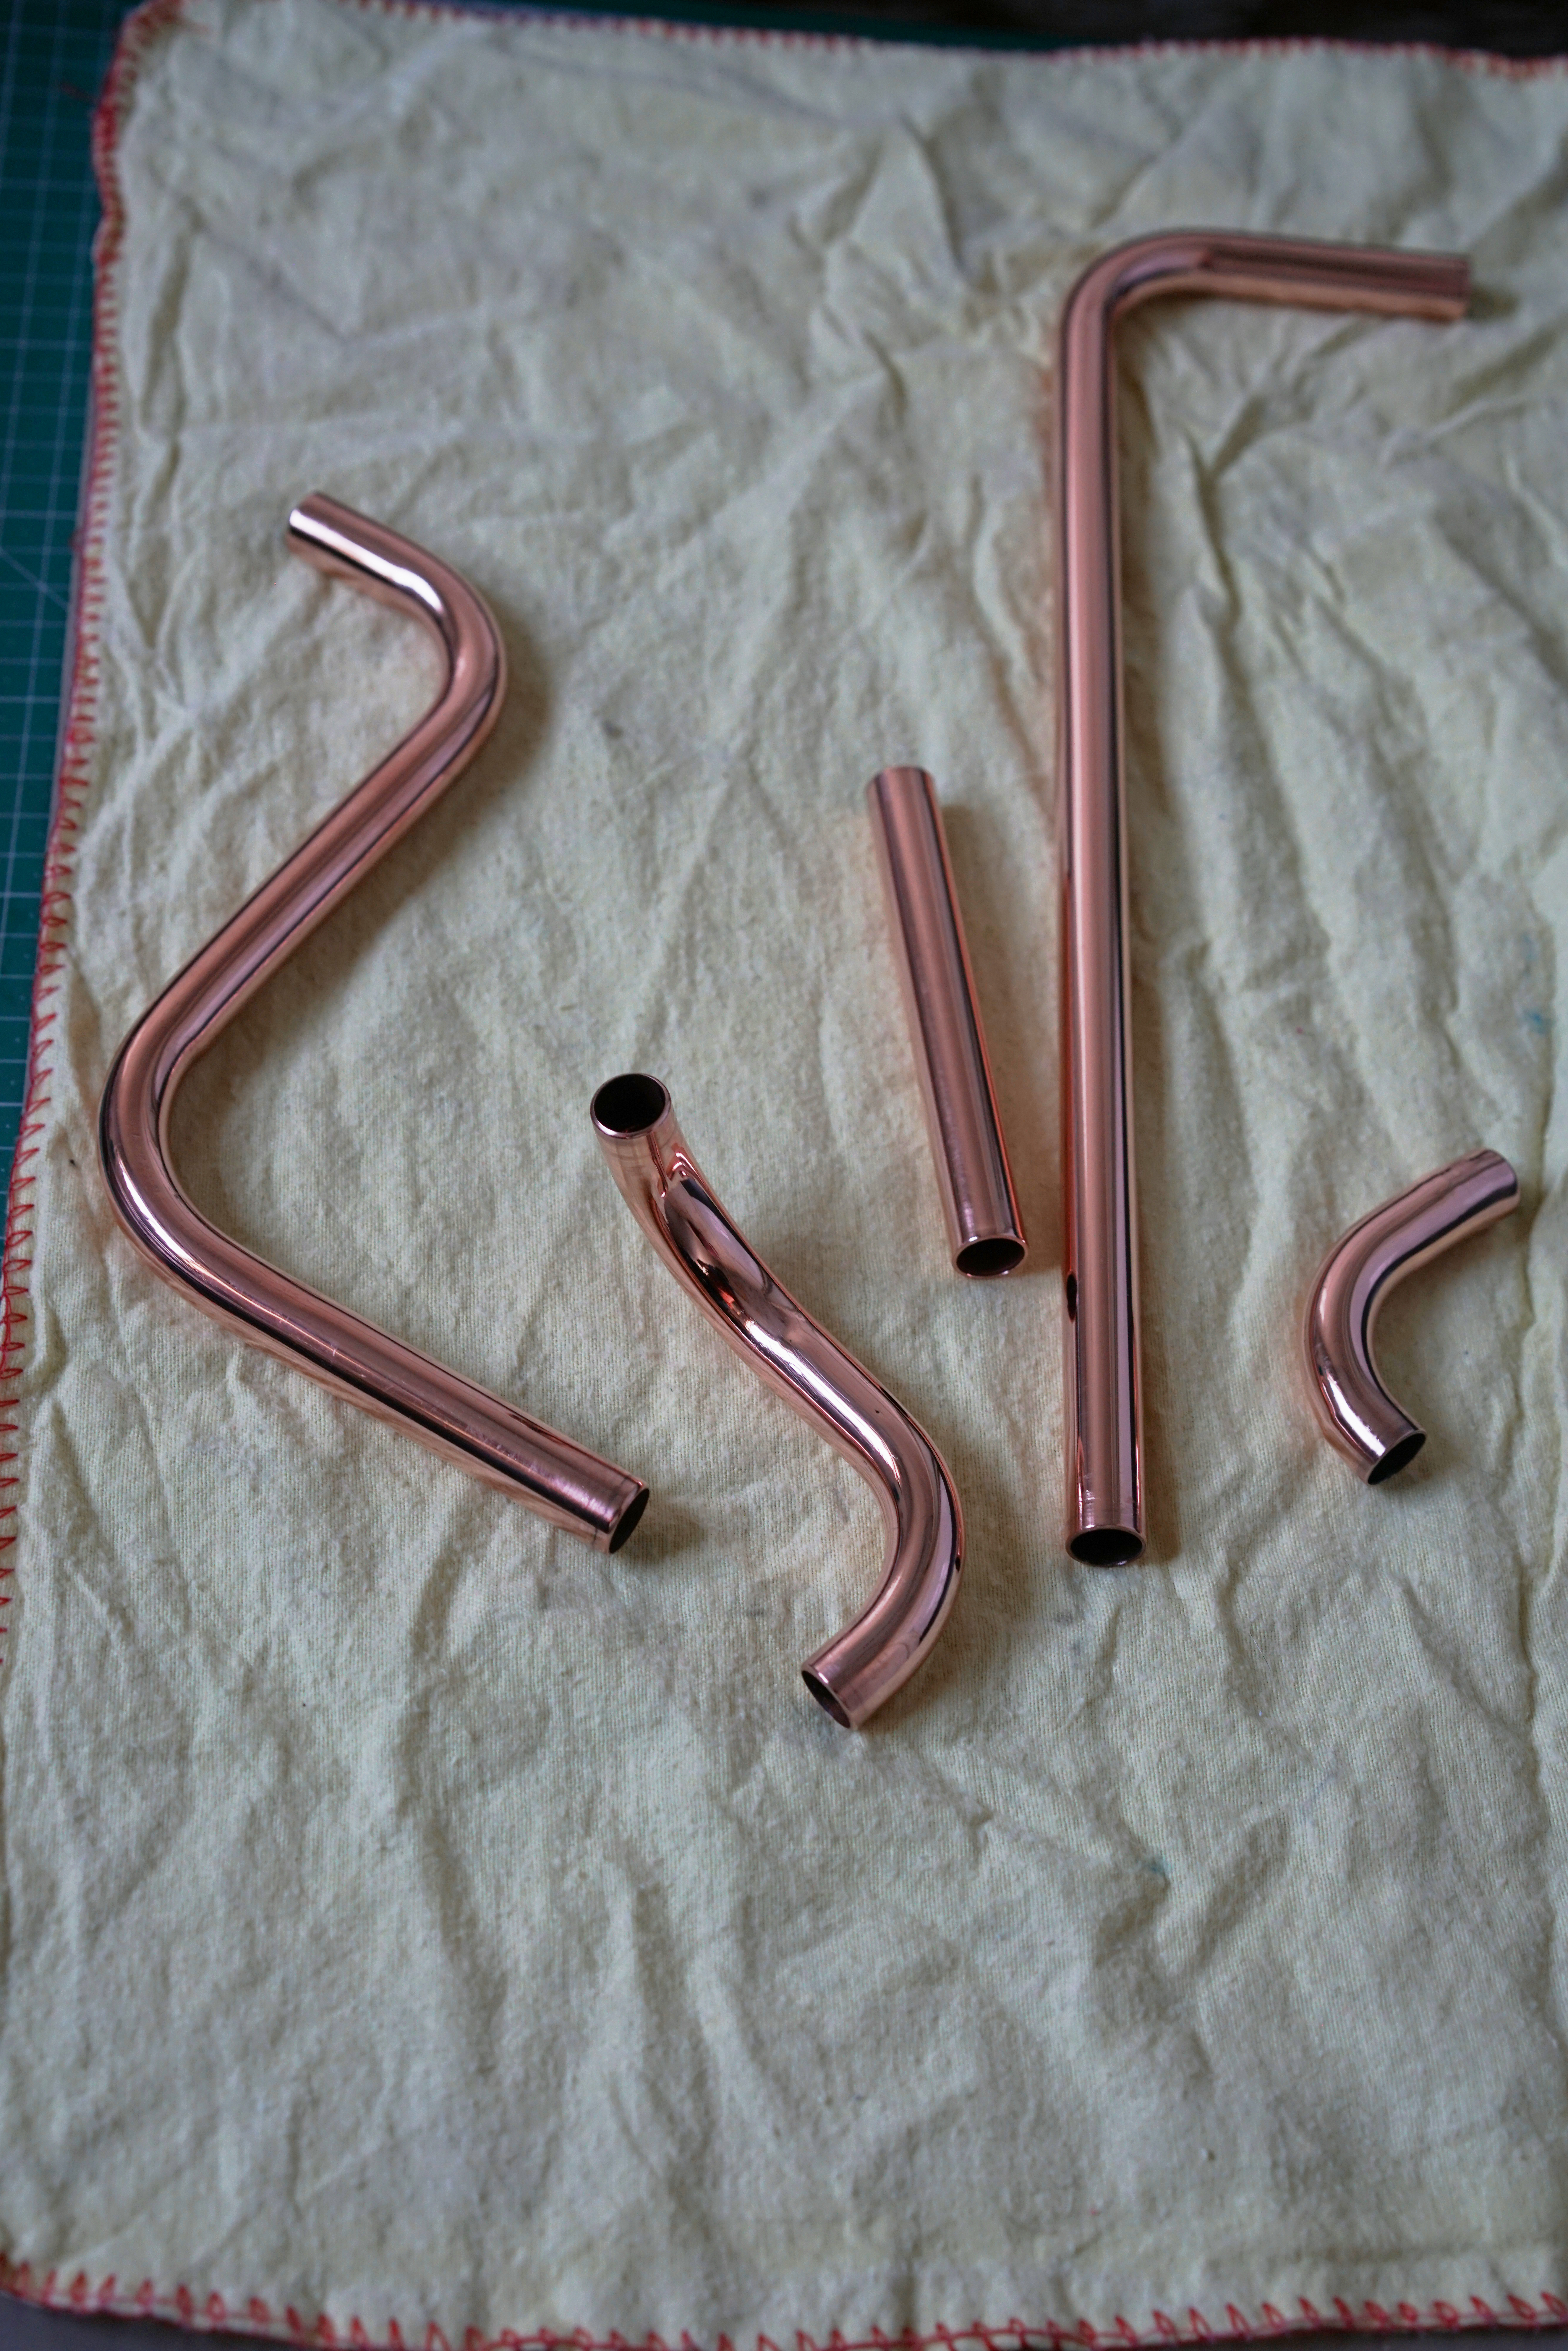
These photos are a bit of a cheat - this is bare polished copper; I'll still need to drain the loop to remove the pipes to repolish and lacquer at some stage to prevent the copper tarnishing over time, but the polished copper looks so pretty I thought some photos first would be nice.
Some polished and bent copper pipes - the little z shaped one is from pump to GPU block, the bigger z from CPU to the radiator. The small 90 degree one has a small band of around 15 degrees at one side that's tricky to see. The long pipe with a 90 degree and the short straight pipe connect with a 45 degree fitting to give a pipe that runs from the radiator back to the pump reservoir.
 DSC07620
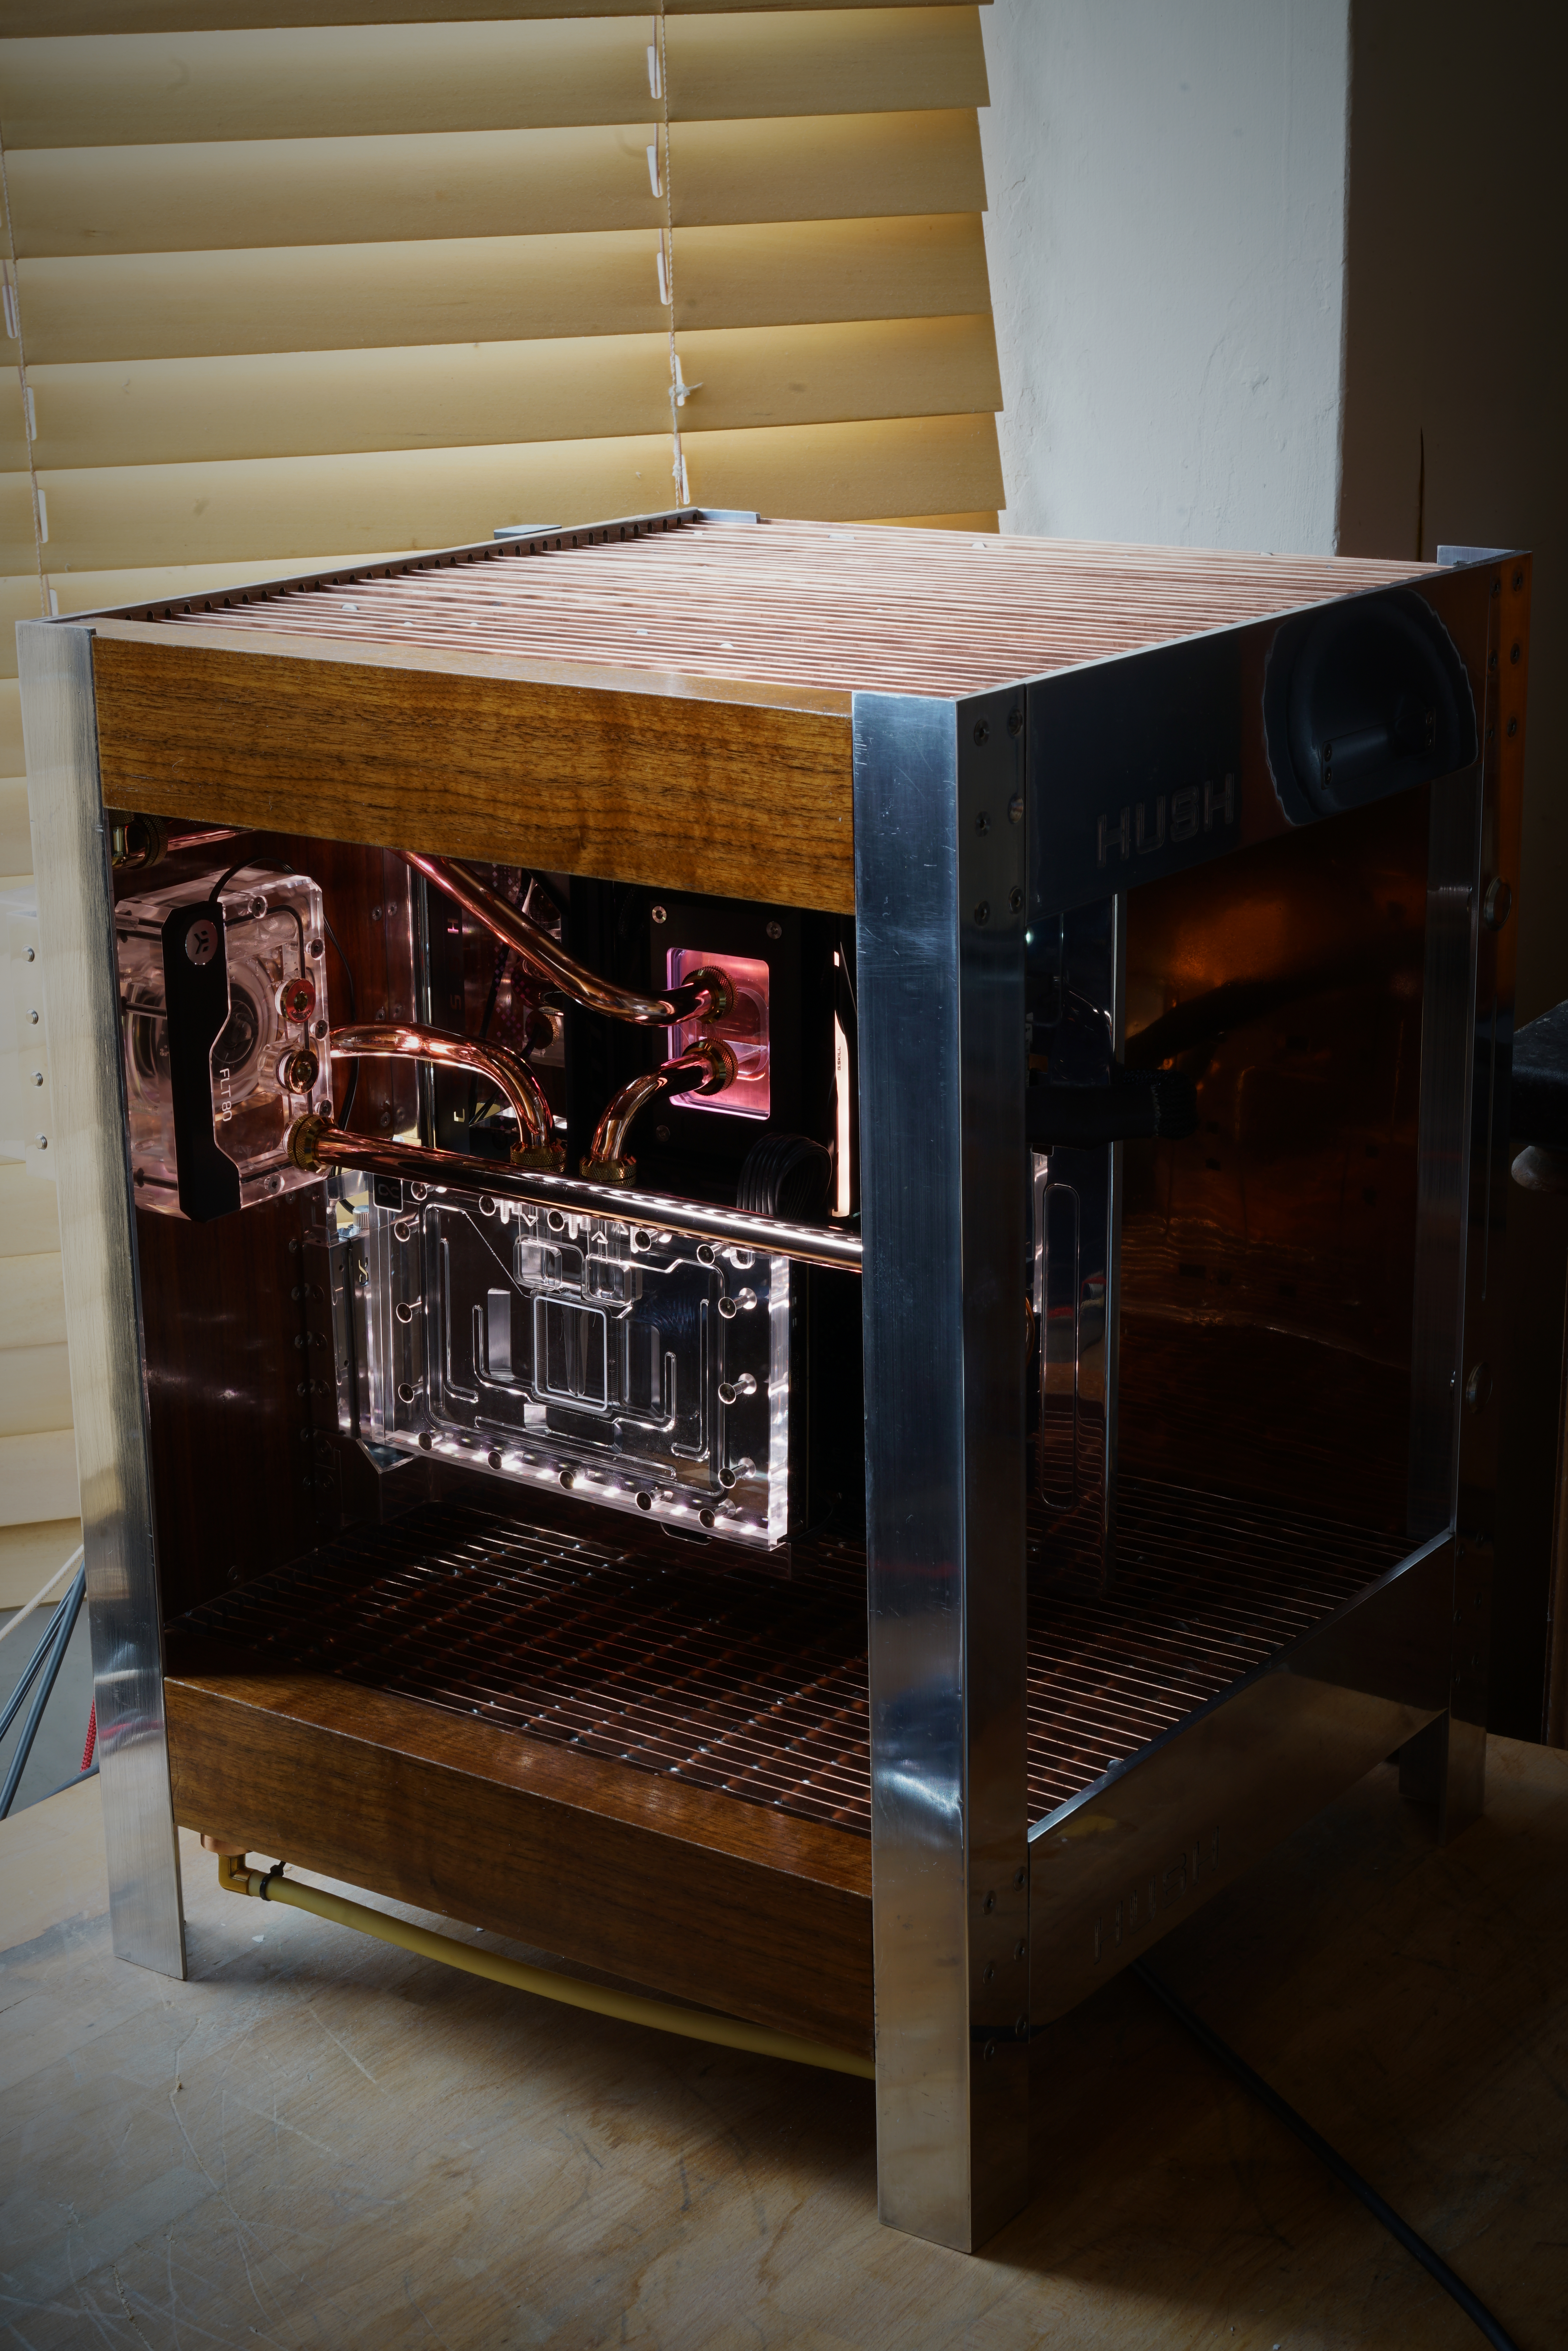
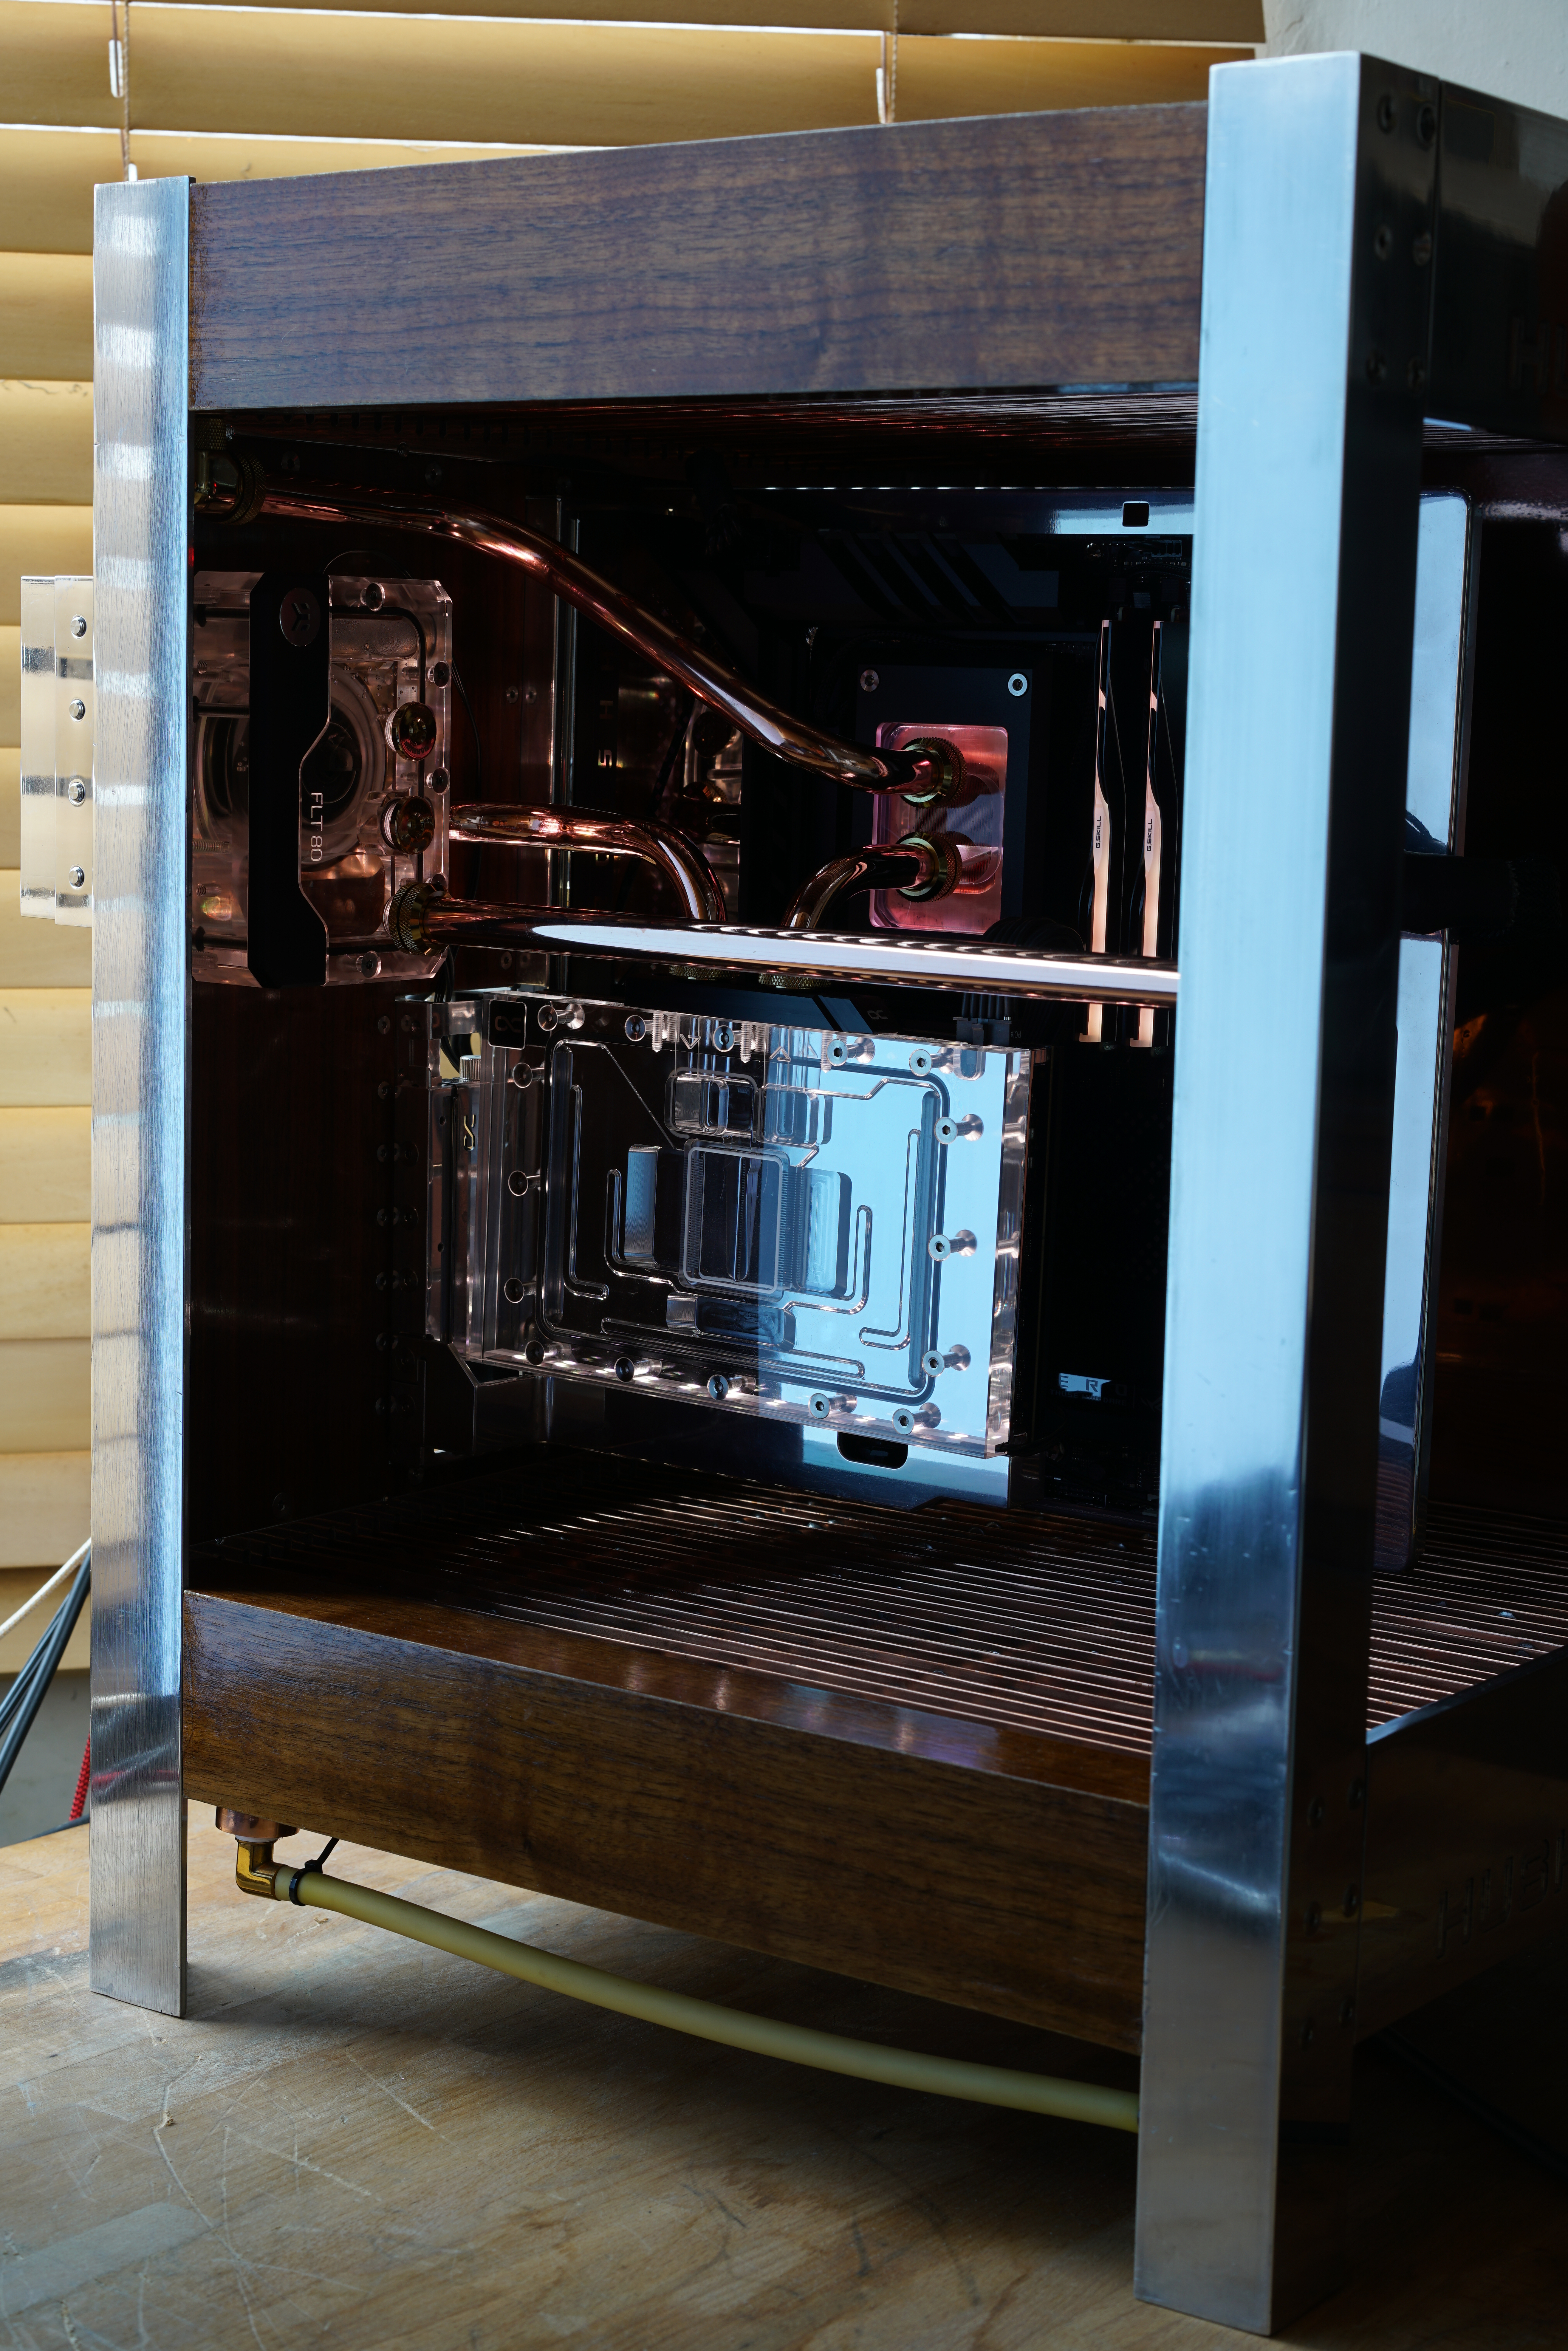
All plumbed up! There's pretty much enough light from the LED strips in the reservoir and CPU and GPU blocks not to need to use the led strips that are hidden behind the front aluminium frame.
 DSC07630
 DSC07645
 DSC07641
I'm not sure if the polishing and removal of all the burnt flux coating the copper fins and pipes of the radiator has done it, or what the case is, but cooling performance seems to have improved. I still need to tinker and see what the performance is like with the pump at lower speeds - the ASUS BIOS is not clear in how to adjust pump speed and I've only just figured out how to do it, but it still seems limited to adjusting pump speed by CPU temperature rather than the water temperature sensor (there's a g1/4 gold screw in temperature probe hiding in the reservoir port beneath the pump outlet port in the photos). I'm going to need to replace the massive bulky cables that come with the ax1600i PSU which is hidden vertically behind the case - you can see the power cable to the PSU in a few of the photos..
Noise-wise, at full speed the pump is quietly audible - the hard piping is certainly not helping I think, but it looks nice so it stays! At 20% speed (~950rpm) I can't hear the pump over the rooms ambient noise floor. I now notice that my 4090 has some mild coil whine when its rendering over ~150FPS in 3D mark testing - I'd thought it had none when it had the air-cooler on.
The PC has a D5 pump, INNO3D 4090 (450w card) and 7950x CPU. With the pump at around 30 percent speed (~1400rpm) when gaming the GPU overclocked at a little over 3GHz core and 11600Mhz memory with the CPU a little overclocked at +100Mhz boost, the GPU after several hours gaming seems to settle at around 52-55 degrees centrigrade with the CPU around perhaps 65-75C. From a wall meter the power draw for the PC is around 600W when gaming, with max of 808W.
A lot of time and effort have gone into bending the 14mm copper pipes for the hard-tubing, and if I'm honest I procrastinated for a good while because I found this very annoying - it's easy to put a lot of time in only to find the tubes were a little off and needed to be redone. I'd replaced the clear acrylic inlet and outlet port block from the Alphacool Eisblock aurora block they kindly sponsored the project with with an alphacool delrin one instead that you can see in the photos below. It changes the orientation of the inlet and outlet ports and makes plumbing easier with a vertical gpu on a riser block and cuts down on 90 degree bends - might be somewhat pointless with the restriction from the GP and CPU blocks, but every little helps in lowering restriction and allowing a lower and quieter pump speed! I used a hand pipe bender for 14mm copper tube. It's inaccurate and tricky to get the bends clean without scouring into the soft copper leaving a dent. After a lot of trial and error I found barrow black painted copper prebent pipes are easiest to work with - the copper is still soft apart from where it's been work-hardened at the prebent 90 degree bends, which saves having to heat the copper to anneal it, and means not having to then subsequently give the copper an acid bath to remove the oxidised copper inside the pipe (which leaves nasty copper salts behind that are a pain to remove and risk crapping up the water loop.) I used stainless steel 12mm rods to run inside the copper pipe to hold the pipe in place, and removed the paint with 0000 grade steel wool soaked in acetone, and used the rods again to keep the soft copper from getting deformed when polishing and for bevelling the ends of the copper pipes after cutting with sandpaper, so they easily pass the O-rings in the compression fittings. Without smooth bevelling they mangle the orings and are tricky to add/remove the pipes in my experience). Removing the pipes is actually quite quick and easy - the aluminium motherboard tray can flex back a couple of mm which is needed for the pipes to get into the bottom bit of the compression fittings, and the pump is sat in a bracket surrounded by squidgy sorbothane hemispheres so can move around by several mm in all directions to allow pipe fitting.
These photos are a bit of a cheat - this is bare polished copper; I'll still need to drain the loop to remove the pipes to repolish and lacquer at some stage to prevent the copper tarnishing over time, but the polished copper looks so pretty I thought some photos first would be nice.
Some polished and bent copper pipes - the little z shaped one is from pump to GPU block, the bigger z from CPU to the radiator. The small 90 degree one has a small band of around 15 degrees at one side that's tricky to see. The long pipe with a 90 degree and the short straight pipe connect with a 45 degree fitting to give a pipe that runs from the radiator back to the pump reservoir.
DSC07620All plumbed up! There's pretty much enough light from the LED strips in the reservoir and CPU and GPU blocks not to need to use the led strips that are hidden behind the front aluminium frame.
DSC07630DSC07645DSC07641I'm not sure if the polishing and removal of all the burnt flux coating the copper fins and pipes of the radiator has done it, or what the case is, but cooling performance seems to have improved. I still need to tinker and see what the performance is like with the pump at lower speeds - the ASUS BIOS is not clear in how to adjust pump speed and I've only just figured out how to do it, but it still seems limited to adjusting pump speed by CPU temperature rather than the water temperature sensor (there's a g1/4 gold screw in temperature probe hiding in the reservoir port beneath the pump outlet port in the photos). I'm going to need to replace the massive bulky cables that come with the ax1600i PSU which is hidden vertically behind the case - you can see the power cable to the PSU in a few of the photos..
Noise-wise, at full speed the pump is quietly audible - the hard piping is certainly not helping I think, but it looks nice so it stays! At 20% speed (~950rpm) I can't hear the pump over the rooms ambient noise floor. I now notice that my 4090 has some mild coil whine when its rendering over ~150FPS in 3D mark testing - I'd thought it had none when it had the air-cooler on.
The PC has a D5 pump, INNO3D 4090 (450w card) and 7950x CPU. With the pump at around 30 percent speed (~1400rpm) when gaming the GPU overclocked at a little over 3GHz core and 11600Mhz memory with the CPU a little overclocked at +100Mhz boost, the GPU after several hours gaming seems to settle at around 52-55 degrees centrigrade with the CPU around perhaps 65-75C. From a wall meter the power draw for the PC is around 600W when gaming, with max of 808W.
Last edited:
Man of Honour
Beautiful and stunning.
Apart from the yellow pipe at the bottom, tell me it's temporary drain.
Apart from the yellow pipe at the bottom, tell me it's temporary drain.
- Joined
- 13 Mar 2006
- Posts
- 6,712
Thanks! The yellowy tube is/was a cream coloured norprene tube that runs to a little ball valve hidden behind the front aluminium 'leg'. It looks a little ghetto with the zip-tie - I'll replace the 1/4" brass barb there at some point with a 8mm brass barb so the 1/4" ID tubing can stretch over and be held without a zip-tie It has yellowed a little (though looks more yellow in the photos than in person)....! A tube makes draining very easy - I'd had a swivel ball valve there before but that looks ugly and I don;t like straining the ports with swivelling if I don't have to! I could replace with a clear tube, though then you'd see the brass barb bits, and I went for norprene to avoid the risk of plasticizer leaching from the tubing into the loop over time, so swings and roundabouts really.Beautiful and stunning.
Apart from the yellow pipe at the bottom, tell me it's temporary drain.
Associate
Just had a notification on this tread, is this the same build that started in 2009?
- Joined
- 13 Mar 2006
- Posts
- 6,712
That's an efficient notification system! Yes, originally started years ago and sat unfinished under a table for around 10 years as I was regularly moving around for work around that time - been renovating and finishing it over the last few years (polished, anti-corrosion lacquered all the copper, fixed the radiator manifold boxes and veneered them and the wall/back panel with walnut, converted it to vertical GPU and added a pump dampening bracket and PSU bracket)Just had a notification on this tread, is this the same build that started in 2009?
Associate
ahh well, back on with the thread pics then 
Man of Honour
Fair point .Thanks! The yellowy tube is/was a cream coloured norprene tube that runs to a little ball valve hidden behind the front aluminium 'leg'. It looks a little ghetto with the zip-tie - I'll replace the 1/4" brass barb there at some point with a 8mm brass barb so the 1/4" ID tubing can stretch over and be held without a zip-tie It has yellowed a little (though looks more yellow in the photos than in person)....! A tube makes draining very easy - I'd had a swivel ball valve there before but that looks ugly and I don;t like straining the ports with swivelling if I don't have to! I could replace with a clear tube, though then you'd see the brass barb bits, and I went for norprene to avoid the risk of plasticizer leaching from the tubing into the loop over time, so swings and roundabouts really.
Personally I think your sacrificing functionalality over assestics and on such a stunning build a valved drain 90° elbow pointing out the back is a simplistic /better looking solution.
Then just attach a tube when needed.
Look forward to seeing your solution.
Last edited:
- Joined
- 13 Mar 2006
- Posts
- 6,712
Fair point .
Personally I think your sacrificing functionalality over assestics and on such a stunning build a valved drain 90° elbow pointing out the back is a simplistic /better looking solution.
Then just attach a tube when needed.
Look forward to seeing your solution.
I'm probably biased by needing to drain the loop half a dozen times over the last few days (I got a spare EKWB FLT80 to have for the future in case anything happen to this one - thought I'd use the newer one as it's new without smudge marks etc, only to find the O-ring on the front panel doesn't seal! EK also replaced the CNCed aluminium pump to reservoir ring/bracket with a plastic injection molded one - looks like cost-cutting measures). That's a good suggestion though - if/when I put some castor wheels on and can just swivel the case around then a decent looking drain tap pointed backwards would would look clean and be easy to use.
Last edited: