Tron themed wall build.

Soldato
Joined
23 Mar 2005
Posts
3,782
I finally have almost all of the pieces together, so it is time to start the build. I have been looking to put together a nice wall build for some time now, and this is the perfect opportunity to move into hardline after years of soft tubed watercooling. What could possibly go wrong!?

The rig so far it:
  • AMD Ryzen 5800X3D
  • ASUS Crosshair VIII Dark Hero
  • 4x8Gb 8Pack RAM
  • Innochill Frostbite 3080 / EKWB Quantum Vector RE
  • Samsung 990 pro 2Tb
  • Corsair HX750i
Watercooling:
  • 2x Alphacool ST30 X-flow 360mm
  • 2x Helix reservoirs
  • Alphacool AMD CPU block
  • Eiszapfen Pro 13mm Hardtube fittings (many and various)
  • 13/10mm satin PMMA tubing
  • D5 Pump
Lighting:
  • Deepcool SC700 12-port ARGB hub
  • Deepcool SC790 2-in-1 PWM & RGB fan hub (6 port)
  • 12x Airgoo ARGB PC LED strips (13.8" x 42 LED each)
  • 1x Tron Lightdisc

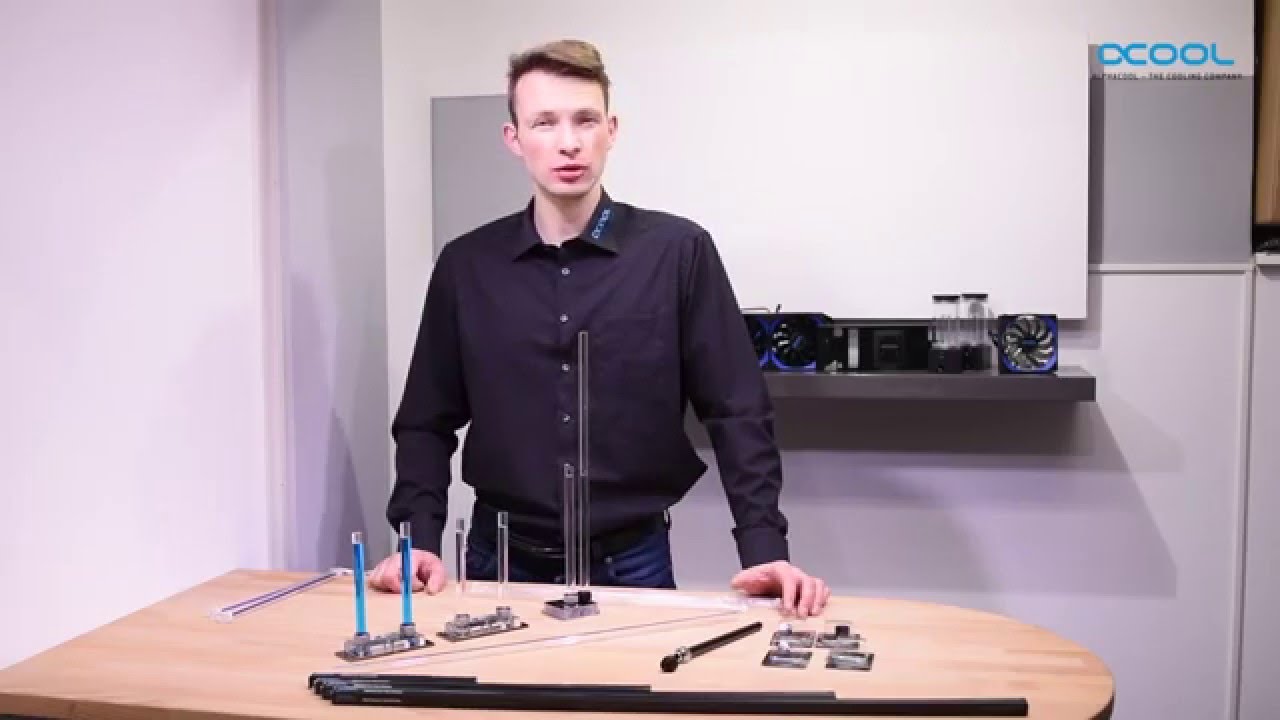
We went through several iterations for the layout and settled on a simple design with just enough tubing to showcase the hardline, but nothing that requires complex bends.
Almost all the kit has arrived - always makes a surprisingly large pile in the beginning!

Equipmentsmall.jpg


The basic mock up looks like this:

Wall-mockup.jpg


Each of the components will be mounted on 10mm acrylic, cut at 45° to give a nice warm glow around the edges. The background will be printed vinyl, and I've gone for a 65kg wall mount that comes out 30cm and swings through nearly 90° to make mounting and working on it slightly less fraught!
 
Associate
Joined
24 Jan 2012
Posts
898
Good idea on the swinging wall mount! Am I misinterpreting the tubing or are you planning to run under the motherboard for the CPU - GPU connection?

Interested to follow the build!
 
Soldato
OP
Joined
23 Mar 2005
Posts
3,782
Good idea on the swinging wall mount! Am I misinterpreting the tubing or are you planning to run under the motherboard for the CPU - GPU connection?

Interested to follow the build!

Yep! It looked messy and cluttered with the standard run up over the mobo to join the GPU / CPU so that run is going behind (I also want access to the NVME slots). I need to put in a drain port so I though I'd combine them both behind the board to keep it neat. I am toying with inverting the card so the ports are at the bottom, which may look neater, and ensure the drain is the lowest point.
 
Last edited:
Associate
Joined
24 Jan 2012
Posts
898
Yep! It looked messy and cluttered with the standard run up over the mobo to join the GPU / CPU so that run is going behind (I also want access to the NVME slots). I need to put in a drain port so I though I'd combine them both behind the board to keep it neat. I am toying with inverting the card so the ports are at the bottom, which may look neater, and ensure the drain is the lowest point.

Nice! Yeah that'll look very neat indeed. Also I just put together your username being 'caveman' and the build being Tron themed :p made me chuckle.
 
Soldato
OP
Joined
23 Mar 2005
Posts
3,782
Got to move with the times :)

Had a little play - the card being upside down could look a lot neater - cables will all go outboard, matching the mobo and the tube run would be super neat. In an ideal world I'd use the rear of the port so you wouldnt even see it, but that is asking for trouble as I'd have to build the tubing ino the board, in place

Reversed.png


Can't think of any reason why I can't run the card this way round - the PCI-e extender will have to be carefully routed as it will be going down and then back up through the same hole, but should be fine.
 
Last edited:
Soldato
OP
Joined
23 Mar 2005
Posts
3,782
Had a chance to blow the dust off the Ender and see if it still works... Success! Turns out the auto-level add on is still the best upgrade I ever bought:)

Had a go at a scale version of the tron light disc that will cover the PSU and it came out rather well - turns out the Ender is just big enough to do the size I want, so will get it printer up as soon as I get some PLA that is actually clear.

Parts.jpg


Disc.jpg
 
Soldato
OP
Joined
23 Mar 2005
Posts
3,782
Quick update. Order for the acrylic is in. The holes should be pre-drilled, and the sides will be set at 45°. Unfortunately, they were unable to router the light trough in the base, so I'll have to do that myself. I have a test piece of acrylic so I'm going to have a play to work out what shape best refracts the light.

Had a play with the layout on the board - gave me serious "school arts and crafts" flashbacks :)

Layout.jpg


The pieces are sized to the back of the acrylic so I can get the spacing between the components right. I needed to move the radiators to even them out and ensure a suitable gap between the plates. Adding in the components and the watercooling fittings meant I could get a more accurate position for everything. As soon as the pump top arrives I will finalise the pieces and can then start cutting :eek:

Parts.jpg


Just about to order the vinyl backing (got to play with VanceAI to upscale the image from the 1080p desktop I'm going to use - surprisingly painless for a freemium piece of software.
 
Soldato
OP
Joined
23 Mar 2005
Posts
3,782
Well, I finally picked up a router and had a go at cutting the light-troughs on some spare acrylic I picked up to practice on... glad I did!

Acrylic-cuts.jpg


The 3 on the left are using a 45° bit. Left most was a single pass at 5mm depth - made a complete mess so ran over it again to try to clean it - we'll say no more on that one. Third from the left was double pass, trying to cut it in 2 goes - the acrylic did not like the high speed on the router and simply melted back into the trench - not a lot of light going to get through that. Second from the left was a single pass at the slowest speed - came closest to working, but still not great - it may actually be fine as all I'm trying to do is break up the light from the LEDs and get them to refract out the side of the acrylic - the roughness may actually help! Last on the right is using a straight bit - it was the cleanest cut of all, but given it has 90° sides I'm not sure it will work - will test them tomorrow.
 
Last edited:
Soldato
Joined
13 Mar 2006
Posts
6,712
Well, I finally picked up a router and had a go at cutting the light-troughs on some spare acrylic I picked up to practice on... glad I did!

Acrylic-cuts.jpg


The 3 on the left are using a 45° bit. Left most was a single pass at 5mm depth - made a complete mess so ran over it again to try to clean it - we'll say no more on that one. Third from the left was double pass, trying to cut it in 2 goes - the acrylic did not like the high speed on the router and simply melted back into the trench - not a lot of light going to get through that. Second from the left was a single pass at the slowest speed - came closest to working, but still not great - it may actually be fine as all I'm trying to do is break up the light from the LEDs and get them to refract out the side of the acrylic - the roughness may actually help! Last on the right is using a straight bit - it was the cleanest cut of all, but given it has 90° sides I'm not sure it will work - will test them tomorrow.

Bit speed is too fast for the acrylic there.

Are the troughs for LED strips to have just the edges light up? If the troughs won't be seen, and no access to a milling machine or bench drill (for a succession of drilled/endmilled holes for the troughs) an abrading bit for a dremel set at low speed might work...

Nice project btw!
 
Soldato
OP
Joined
23 Mar 2005
Posts
3,782
Bit speed is too fast for the acrylic there.

Are the troughs for LED strips to have just the edges light up? If the troughs won't be seen, and no access to a milling machine or bench drill (for a succession of drilled/endmilled holes for the troughs) an abrading bit for a dremel set at low speed might work...

Nice project btw!
The troughs will be completely hidden, so not too much of a drama if they are a mess - but I will know and it will always annoy me if I don't get them right! I am going to be trying on a mate's bench this afternoon, so hopefully that will solve the problem. I will also have a play with the shaping of the trough to work out what gives the best refraction and edge glow.

I'm considering fluids for the loops and think I have settled on a clear fluid that glows blue under UV. I thought the Mayhems X1 did that - but the OcUK team tell me it is blue all the time (even though the photos show clear??) - any other recommendations for hardline fluid that meets those criteria? Really needs to be long lasting and maintenance free.
 
Soldato
Joined
13 Mar 2006
Posts
6,712
The troughs will be completely hidden, so not too much of a drama if they are a mess - but I will know and it will always annoy me if I don't get them right! I am going to be trying on a mate's bench this afternoon, so hopefully that will solve the problem. I will also have a play with the shaping of the trough to work out what gives the best refraction and edge glow.

I'm considering fluids for the loops and think I have settled on a clear fluid that glows blue under UV. I thought the Mayhems X1 did that - but the OcUK team tell me it is blue all the time (even though the photos show clear??) - any other recommendations for hardline fluid that meets those criteria? Really needs to be long lasting and maintenance free.

Can't help much there - only used distilled/deionised water plus a few drops of biocode for years, as I always found dyed fluids coated blocks etc with dye sediment and staining.

UV reactive hard tubing maybe?

 
Associate
Joined
13 Sep 2010
Posts
1,996
I'm considering fluids for the loops and think I have settled on a clear fluid that glows blue under UV. I thought the Mayhems X1 did that - but the OcUK team tell me it is blue all the time (even though the photos show clear??) - any other recommendations for hardline fluid that meets those criteria? Really needs to be long lasting and maintenance free.
Not sure if there's a bit of a mix up there, but they do both 'UV Blue' and 'UV clear blue' SKUs of the concentrate (the latter, I believe, is as you describe), I have a bottle of the clear blue ready for an upcoming rebuild but haven't got around to it yet so can't confirm for sure
 
Soldato
OP
Joined
23 Mar 2005
Posts
3,782
Not sure if there's a bit of a mix up there, but they do both 'UV Blue' and 'UV clear blue' SKUs of the concentrate (the latter, I believe, is as you describe), I have a bottle of the clear blue ready for an upcoming rebuild but haven't got around to it yet so can't confirm for sure
Great news if that's true - quite like Mayhem's stuff - is it clear in the bottle? (Looks it in the photos - hence I was a bit confused when OcUK said it was blue)
 
Associate
Joined
13 Sep 2010
Posts
1,996
Great news if that's true - quite like Mayhem's stuff - is it clear in the bottle? (Looks it in the photos - hence I was a bit confused when OcUK said it was blue)
It's still sealed....and while I have no reason to believe it would spoil, I don't really wanna open it until I'm ready to use it, but I held it up against a ceiling light (edit: the bottle is opaque white!) and it looks very clear through the bottle, so at worst I'm guessing a slight blue tinge.....

The one I've got is the XT-1 though:

Hope that's some reassurance :)
 
Last edited:
Back
Top Bottom