Tron themed wall build.

Soldato
OP
Joined
23 Mar 2005
Posts
3,782
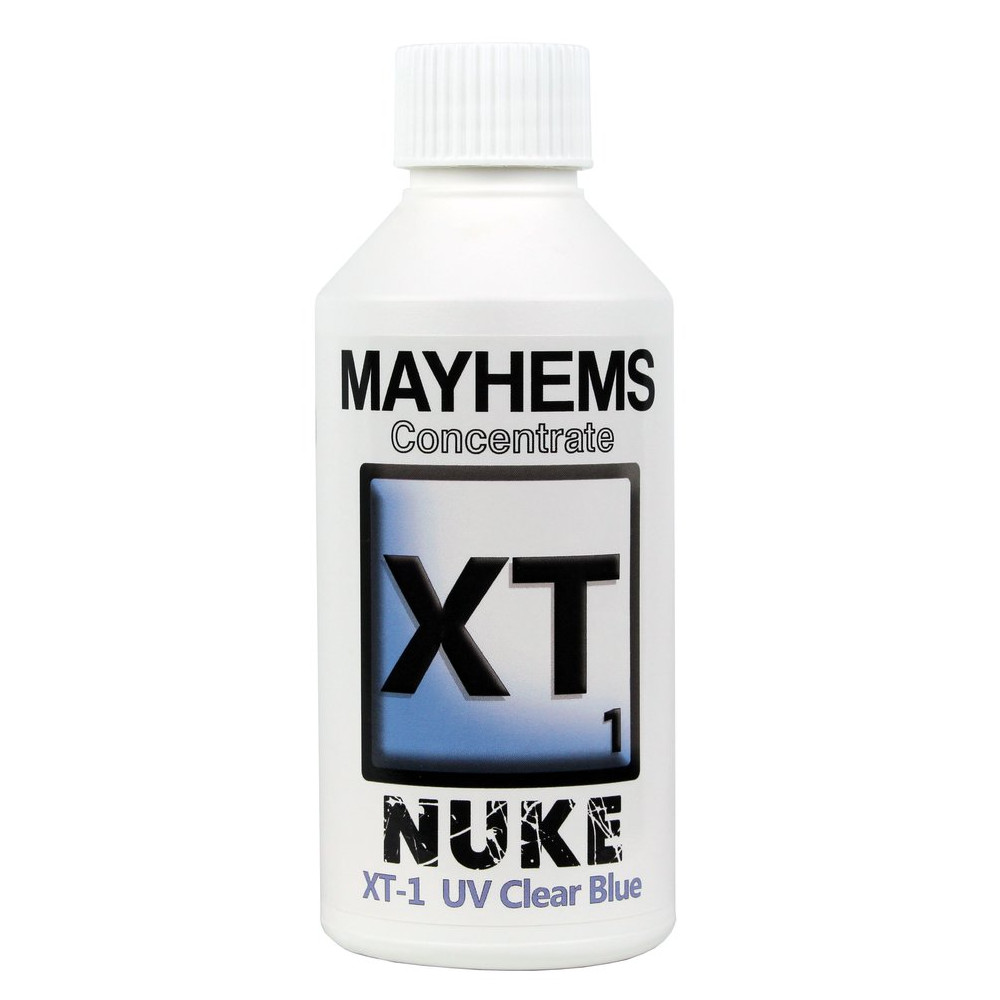
It's still sealed....and while I have no reason to believe it would spoil, I don't really wanna open it until I'm ready to use it, but I held it up against a ceiling light (edit: the bottle is opaque white!) and it looks very clear through the bottle, so at worst I'm guessing a slight blue tinge.....

The one I've got is the XT-1 though:

Hope that's some reassurance :)
Found a clip on youtube - the Mayhems UV Clear Blue is definitely clear under normal light! Will pick up a few bottles.

This looks amazing, have you got a pic of the finished product?
As always the build takes far longer than planned. I'm still waiting for the acrylic to arrive, and the suppliers are being extremely slow. Good news is the vinyl has arrived and looks great, and we have a plan for the routed light troughs that seems to work - even if it is painfully slow :(
 
Soldato
OP
Joined
23 Mar 2005
Posts
3,782
Well, the acrylic is ordered and should be with me by Friday - I would be excited, but I'm still only 50% sure I'm going to get what I asked for - confidence is not high! Did give me a nudge to crack on with what I can do. Set up the wood base and cut it to size:

20230908-091313.jpg

High tech workbench this is not - I ended up setting 2 guide boards and ran the jigsaw down the middle. Turns out that even that wasn't enough to prevent the cut going awry - it ended up with about a 2mm bow towards the middle which means Ill have to plane out the ends.

I had a play with the pump and top now that I have them - unfortunately it just looks ugly, and the connections are not aesthetically pleasing:
20230908-101427.jpg


But I had an epiphany, and realised that with the orientation of the pump and top, I can simply sink the pump into the board, and only the square top will be visible - being acrylic it matches the build far better, and the tube runs should work nicely. I have a play using a holesaw, and it was surprisingly easy to put a hole in the acrylic for the pump.

20230908-101500.jpg
20230908-101449.jpg


Even better news - I set up my super-high tech bending center, and it turns out that having the proper kit actually makes bending a breezy! I have planned the whole build with no more than a single 90° per run - so nothing too taxing.

20230908-141809.jpg
20230908-141821.jpg


I must confess that it wasn't perfect - even with the fabulous alphacool bending kit, the first try bent slightly more than 90, but I'm pretty sure I know why and it shouldn't be an issue on future bends.

The board is painted black (to protect it from damp, and to hide the cuts). So as soon as the acrylic arrives I can put it all together!!
 
Last edited:
Soldato
OP
Joined
23 Mar 2005
Posts
3,782
I finally had a chance to get back into this build. All the pieces are here. Confidence was not high - after a lot of back and forth I finally got the order in for the acrylic, but was not convinced I was going to get what I ordered. But it arrived, and was exactly as I needed!!

20230914-103747.jpg


They even polished the edges, which I wasn't sure they were going to do - bonus. I popped everything in place, leaving the blue card underneath to avoid scratches and it looks exactly as the design - another little win, who knew powerpoint was the new CAD.

20230914-115010.jpg


The acrylic is beautifully cut and cleaned and fits perfectly. The bolt holes are a bonus, one less thin for me to mess up. The only thin I need to do is drill the standoff holes and one big hole for the pump and the acrylic work is done.

20230914-115017.jpg


Next job was the light troughs for the LEDs. I was hoping to make it nice and neat, but the router (my unsteady hands) was a bit wobbly. I did consider using guides, but given it is all hidden under the vinyl and the acrylic I was happy to live with it. The troughs are 1cm wide, just wider than the LEDs, and deep enough that they are below the level of the board so the acrylic sits on top of them.

20230915-093530.jpg


Cutting the cable holes was a little trickier. Ltots of trail and error on a rough piece allowed me to work out what combination of arbor, wood drill, and jigsay worked for each of the different hole sizes. I have rubber grommets for them so it should looks nice and smart when installed - I noticed a lot of other builds just left the open holes, but I've never liked that and much prefer using cable tidies. I spend a lot of time cursing the chipboard, as it has a tendence to flake if you are over-enthusiastic going through the board. Again, not too fussed as the vinyl will cover all sins, but I did at least use some filler to level off the worst offenders and leave a smooth surface.

20230915-163135.jpg


I put off attaching the wall mount as I was pretty sure some of the bolts for the arm and the VESA mount would be poorly placed and interfere with the PC side of the board. I marked it all up, and decided on the horizontal mounts to give it a bit more strength - it is going to be holding a lot of weight once the build is all in place! Drilling complete and it turns out that for once, I was lucky. Everything is clear and nothing interferes. One of the LED holes is hidden, but it is only the end bit that is loose anyway, so will simply tuck in nicely. I have initially set it up with 4 bolts, which should be enough, but I am seriously considering using another 4 of the holes and taking it to 8 - mostly because I can!


20230915-101425.jpg


I'm leaving it overnight for the filler to cure, and will then repaint to cuts (I'm using a waterproof paint as it is going in the garage which is currently uninsulated, so I don't want moisture rotting the board. Frustratingly, I can almost see the finish line now. As soon as the vinyl is on I can build and mount the rig. Unfortunately, I have a mate who is a deft touch with vinyl coming to save me from myself, but he is away at the moment, so I will see if I can wait for his return, or give in and just have a go.
 
Last edited:
Soldato
OP
Joined
23 Mar 2005
Posts
3,782
Quick update. Filling, sanding and painting is complete. I did give in and drill another 4 holes for the bracket so it should be stronger than the wall now! My impatience has won out, so as long as I am still free tomorrow, I'll be having a go at the vinyl, and then the build begins in anger... sweepstake now open to guess which vital part I have forgotten that scuppers the final switch on :cry:
 
Soldato
OP
Joined
23 Mar 2005
Posts
3,782
Finally had a chance to get stuck in again. 2 days' worth of work - it has been slow going, but I've actually enjoyed the relaxed pace. I was nervous putting the vinyl on the board - I assumed it would be a nightmare of bubbles, folds and ripples like trying to fit a phone screen protector. Imagine my surprise when it when on first time and with no fuss!! I was pretty chuffed with the overall finish.

20230921-102841.jpg


I cut the slots down the middle so the pattern goes down into the holes, and the effect is quite effective. The rubber grommits are super snug in the holes, so I had to glue them in place to stop them from bowing - it took a while, but at least they are secure, and I don't have to worry about them popping out when I start pulling cables through them. Speaking of which - the led strips are in place and the back of the board looks like something out of Dune.


20230921-110451.jpg


Had one final check of the spacing and positioning before drilling the light holes in the acrylic. I though I had a massive problem, as the two radiator blocks on the left were clearly not level with each other, and I did not want to have to redrill everything - turned out that I just had one of them the wrong way round - phew!!

20230921-111506.jpg


The original plan was to use a V-shaped router bit to create a light canyon above the LEDs in the acrylic to scatter the light and create a glow around the edge of the acrylic. Results were not good. It was time consuming and gave an extremely poor finish. I was thinking about it last week and realised that it I just use the router bit in my drill and put an individual cone over each LED it would give a neater solution, be far quicker, and refract the light far more effectively. The result was rather pleasing.

20230921-112437.jpg


Checked the fit for the LEDs and it was all correct.

20230921-120624.jpg


Side view has a great Hall of Mirrors effect.

20230921-120858.jpg


Having to rotate one of the radiator acrylics did have an impact on the placement of the cones - it will be hidden under the top layer of vinyl, which is a relief, but the less said about it the better :)

20230921-123917.jpg


Because the vinyl went on first try, I still have the spare sheet, which meant I could use it to top the acrylic, and it means the pattern fits - which was a win. I thought it would be tricky to work out where to cut the vinyl, as it goes over the top of everything, but it turned out that just using the back of my thumb along the edges created a neat mark I could then cut along.

20230921-130235.jpg


Quick tidy up with a blade and they were perfect! I love the fact that the pattern now matches top and bottom.

20230921-131831.jpg


I have started attaching the hardware. Because nothing is ever simple in these builds, each piece has to be fitted differently as some screw down into the acrylic, and others need to be attached from underneath. Which means the way the acrylic is attached to the board is different for each - fun! Hope to have all the pieces fitted tomorrow, and then I'll see if there is time to start on the tubing.
 
Associate
Joined
7 Jan 2012
Posts
1,922
Location
Liverpool
the PCI-e extender will have to be carefully routed as it will be going down and then back up through the same hole,

Use a small metal bar on the backside to hold the cable in place and to prevent it getting creased / folded.
Does that make sense?
 
Last edited:
Soldato
OP
Joined
23 Mar 2005
Posts
3,782
Use a small metal bar on the backside to hold the cable in place and to prevent it getting creased / folded.
Does that make sense?
I may actually put a small cage over it - with the whole unit able to swing free of the wall on the mount - the last thing I want is for it to get caught or snagged. They are not cheap!
 
Soldato
OP
Joined
23 Mar 2005
Posts
3,782
Quick update - Managed to get all the pieces mounted on the board and it seems to all fit perfectly!

20230926-160523.jpg


I was concerned that the cable holes might not be big enough, especially for the PSU, but with a bit or rerouting they seem to all fit!

Had a go at all the pipework - short, straight runs were a breeze as expected.

20230927-113656.jpg


Short curves were OK for the most part.

20230927-122230.jpg


Did have an interesting crease in one of them, which seems unusual using the inserts, and I found the acrylic does bubble a bit if you overheat it.

20230927-121318.jpg


Almost finished the pipwork, then managed to cut the wrong end of the last piece - decided to break for the day.

I wasn't quite sure how I would use the bulkhead fittings for the through-board runs - turns out that the holes I drilled were the perfect size for the threads on the fittings, and they screwed straight into the board - result - actually looks a lot neater than I though it would.

20230927-124532.jpg


Tomorrow I just need to recut the last tube, and then it's done! I will take it all apart and was out the tubes - pretty sure there are acrylic chips in some of them from the cutting, and I don't really want it gumming up the blocks. Once that is done it will be pressure testing and then filling :eek:
 
Soldato
OP
Joined
23 Mar 2005
Posts
3,782
Well, that was entertaining. Leak test was a disaster - luckily I was using a pressure tester, and not spraying water everywhere. Initially it held no pressure at all, but a quick check showed I hadn't tightened one of the compression fittings. That let it build pressure, but it was still suffering a slow leak. I needed to disassemble everything to clean out the tubes anyway (loads of acrylic dust in them from the cutting / sanding) so I did that and had another go. The tube between the side res and the pump was not quite vertical, so I recut that to ensure the seal had the best chance... still leaking!

I had no choice but to go old school and do a proper leak test:

20231002-130449.jpg


Turns out it wasn't my pipe work at all - I was using an old skool fillport/res on the back to fill the system and the main port seal wasn't :rolleyes:

Sorted that and gave it a good run up and it is all good - hugely relieved that it is watertight!

I tidied everything up and was going to mount it, but thought it would be sensible to do a full powerup first - just in case... and nothing - little squeak from the PSU but no more - plugged it into my DrPower PSU tester and the PSU is dud - as annoying as it was, I'm actually quietly relieved as I wanted an 850w, but a mate had the 750 going free - as much as I like free - I'll be glad of the bit of extra headroom - I've gone for the identical unit but 1 up (HX850i - so I'm hoping the screw layout underneath match and I won't have to redrill the attachment points.

I also took the grill off the GFX card - serves no purpose in the current configuration, and I think it looks far cleaner without it - but it does look wrong somehow - think I'm just so used to seeing it - hoping it feels better over time :)
 
Last edited:
Soldato
OP
Joined
23 Mar 2005
Posts
3,782
1ocrfs-1220250150.jpg


I have to confess - confidence was not high - lots of opportunities for things to be dead / bent, but against the odds it lives!!

20231009-100455.jpg


Looks like all the LEDS are working properly, and the PC itself is reporting all present and correct - even the NVMe drive (I have had no luck with them in previous builds, to the point that I specifically ensured I would have easy access post build to replace as required!)

The build was designed to be filled / emptied on the wall, which I though was quite forward thinking of me - but it did make filling it flat quite challenging as the highest point in the loop is the inlet to the pump - never let it be said I am not willing to take the high ground.

20231009-100432.jpg
:D

I let it have a good run to shift what I could have the air, but it did leave the res looking like a bad pint:

20231009-103731.jpg


Should clear nicely once it's on the wall, and the fill port is actually the highest point in the loop.

I'm going to be spending the afternoon installing all the software, and then hopefully it can go up this evening - starting to get excited. Was trying to decide what to play on it first - open to suggestions - obviously the least appropriate for this beast of a machine gets the vote! (I'm thinking tetris!)
 
Associate
Joined
13 Sep 2010
Posts
1,996
Looks great! Is that the clear UV fluid you were asking about before? Looking forward to seeing it in situ with the full lighting effect :)

Suggestion for inappropriate game, while still being fun - Prison Architect (I used to play it on a system with an e8400 and integrated g43 graphics, running on Ubuntu)
 
Soldato
OP
Joined
23 Mar 2005
Posts
3,782
It is indeed the clear UV - will dig out my UV torch and have a play when it's dark later.

Funnily enough - I actually do have prison architect on steam, so will fire it up!

Windows install went without a hitch, so just need to pop it on the wall and it's pretty much done. I'm still in 2 minds about a sheet of acrylic over the whole thing to act as a cover - might see how it looks in place and then decide. The original plan was to have the sheet, with and invisible ink design that only glowed under the UV.
 
Associate
Joined
4 Oct 2021
Posts
156
Location
Uk
wowzers - thats some build.
did you have any problem with airlock given the cpu is the highest component? or does that top res take care of that?
 
Soldato
OP
Joined
23 Mar 2005
Posts
3,782
Top res covers almost all ills. I have a couple of bubbles in the GPU block that look like they are there for life, but otherwise all clear. I am probably going to top up the top res to full for the look of it, although I am quite enjoying the fact that as the water is currently right along the outlet line, every time I move the machine, a stream of bubbles go racing round :D
 
Soldato
OP
Joined
23 Mar 2005
Posts
3,782
As promised @TrojanWhore :D

20231010-083938-1.jpg


The build is at 95% - last piece is the light disc which I'll print up and wire this week. Also need to wire in the power button. Frustratingly, I'm using a Dark Hero Viii (Asus) and I have absolutely no control over the aRGB. It is looking more and more likely that the onboard controller is fried (it won't accept any drivers, and the Asus software doesn't even recognise it's own motherboard). I've tried all the different software options - but it looks like unless I can get the onboard driver working it'll be stuck in rainbow :mad:

Driver-Fail.jpg


Still - it's up and nearly done - I almost like the ghetto setting, but that will be converted into a proper room at some point in the future! I need to do some "artistic shots", but you get the idea. The dashboard on the tablet took a little effort, but I'm pretty happy with it.

20231016-161128.jpg
 
Last edited:
Back
Top Bottom