***The Pond Discussion Thread****

Update.. blockwork almost complete.
kFam5la.jpg

I had the fiberglasser come around today so will see how much they're going to charge me :) Also discussed options for mounting the window and separating the two chambers - so that's now understood (fibreglassed marine ply).

Got a skip coming mid week to break the back of the soil sat in the garden.
 
Shaping up nicely. The storms have been an interesting experience - we now have a lean too cover that, following some adjustments and water bailing, provides enough protection. Tonights storms and rain - just checked and it's bone dry.

E9ub8T3.jpg

Got filtration?
sK5gOFE.jpg

One 110mm skimmer line, two 110mm returns, two 1" air pipes and a 2" pumped return that will be used for the water blade.

So a grand total of about 45-55,000 litres per hour capacity. Or in another way - low impedance 10-15,000lph for airlifts and the option of switching the water blade on or off..
 
Shaping up nicely. The storms have been an interesting experience - we now have a lean too cover that, following some adjustments and water bailing, provides enough protection. Tonights storms and rain - just checked and it's bone dry.

Are you still fibreglassing the pond or have you found a waterproof render, years ago you could build a concrete pond and treat it by painting on in various strengths a product called Cilglaze not sure on spelling. It had a chemical reaction to the sand particles changing then back to silicon and making the surface impregnable.
Cannot find anything like it anymore, pity cause I built many ponds this way, used to love sculpting them with shelves etc.

Yours is looking like a hefty project now, at the start I could not envisage this at all. I'm very interested in your filtration ideas, keep posting progress :)
 
Are you still fibreglassing the pond or have you found a waterproof render, years ago you could build a concrete pond and treat it by painting on in various strengths a product called Cilglaze not sure on spelling. It had a chemical reaction to the sand particles changing then back to silicon and making the surface impregnable.
Cannot find anything like it anymore, pity cause I built many ponds this way, used to love sculpting them with shelves etc.


Did Silglaze not get discontinued and was replaced by G4?
 
Yours is looking like a hefty project now, at the start I could not envisage this at all. I'm very interested in your filtration ideas, keep posting progress :)

It will be interesting to see - on 58 watts of air power (ie 80lph) how good this will be. Others have had 15,000 lph water flow through a 110mm airlift so with two airlifts it shouldn't have a problem with 80lph. This is also why I have two 110mm returns to limit the water resistance for the airlifts. Typically a 20,000lph pump is about 150-200W. So it shows the design for operational efficiency!

Just a quick update - we're into the last week or so (although we're then waiting on the fibreglasser + window). However still todo:
* final piping, lay into garage (builder + me)
* backfill (builder + me)
* Outer rendering (builder) and two coats of exterior paint to waterproof (me)
* fibreglassing (fibreglasser)
* final water pipe check (builder + me)
* window install (me+4 other)
* coping stones (builder)
* wash down (me)
* electrics to garage (electrician)
* MPDE water laid to garage and insulated (me)
* construct airlifts and connect up. (me)
* fill (which will take a while). (me)
* move fish (me)
* move filter kit (me)
* drain/rip out/backfill old pond (me)
* auto-top up
* water blade (this can be delayed until next year) - this will use the laid 2" pipe return and existing pump (that has a 2" connection ;) (me)
* anoxic filter media (that will be done next year or progressively during the colder months) (me)
* sort out garden (me)
* put in raised garden beds blocks (me)

Water overflow (ie when it rains etc) will be handled by the water level being set by the waste chute of the drum filter. The pond is designed NOT to have a constant water trickle (that would be expensive), so I will have to install a top up float that adds water should the water get close to the bottom water level mark. That way the water level should vary a little but not too much and it will cope with evaporation and rain without a problem.
 
Pipework in.. 80% done - I've tapes some off to finish to allow backfill and to allow Phil the builder to get on to repoint and render the outside

GaU98Sr.jpg
 
So the top coat is on and we've now put in the return pipes through the wall, the base is sealed with G4. The upper tarps have a couple of drip holes so we hung a second tarp to divert drips. This will allow everything to dry out completely whilst we wait for the fibreglasser.

0VGgz2K.jpg

Still a lot todo but the emphasis is now on me to finish the garden/garage bits whilst waiting.
 
So.. latex concrete smoothing compound down:

HuJ9qE9.jpg

And finally I managed to check the bottom drain to see if everything is good (it seems to be):

The water that we had in there to test the 110mm pipe with the pipe bung in for a couple of weeks:
f9QrrXj.jpg

This means the BD itself isn't leaking, nor is the 1" pipe attached to the centre air supply (this passed 2 bar air pressure test previously too).

Removed the bung and the water is still in there, the level didn't drop so we're looking like there's no leak in the piping :D

MqiJ1rI.jpg

I'll leave this to see if there's any drop but I don't expect any.

Just waiting on the fibreglasser.. then I can order a window too. In the meantime I have a garden to get back to normal and a filter to finalise the pipework.
 
I've dug out the trench in the garage.. ordered some parts including the massive 110mm ball valves.

The first package has just turned up - the HiBlow XP80 air pump. Surprised it's made out of metal alloy and heavy plus has a reputation for reliability. Only 58Watts too - this will replace the water pump and 8W 8lph air pump I have currently. A little noisier than the old pump but it will be running in the garage. Enough oomph to run the air lifts and anything else I hope.

Now waiting on the other parts to arrive then I can get to work on finalising the pipework. I can't do anything without the valves etc to dry fit.
 
Comedy value time..

sSwb1SA.jpg

A 2"/63mm valve compared to a 110mm valve (there's two in this build). What you don't feel here is the mass/weight. I think I'll probably have to put some concrete to support the 90 below it.

I have almost completed the filter pipework. The two additional swept 90s are a little slow in the post. End of today I should have everything either glued or dry fitting pending the 90s. I'll also setup temporarily have to borrow the bio and drum from the old pond to measure and fit. Bio bacterial will be ok for a few of hours and the position inside means they're not left cooking in the sun. By mid week I want everything glued and the pipe work supports concreted along with some backfilling. This includes the drainage too. This leaves a couple of terminating points, a few connectors etc that I need to order for delivery during the week but the big stuff is done.

The fiberglasser is away getting married so he's not going to be able todo this until September. So I will have to jerry rig a stretch of guttering to reduce the rain going down the sides so the render/blockwork has chance to dry before then. I also want to put in a drain just in front of the pond so any surface water doesn't get to the render as easily, it will then feed off into the flowerbeds as a soak away.

Half tempted to give the dry blockwork under the covers a lick of external paint. It needs to dry out but that has been bone dry since the day it was laid but that's probably pushing what I can get done in the week.
 
Finalising the measurements, including the position for the bends/valves - I have about 5-8cm of room as the pipe and the positions are dictated by where the drain pipe sits under the pipework and the water level within the drum filter. Also stuck the 1" pipes together for the air. Leaving overnight to harden and then I'll continue with the 2" and 4" final outside pipework.. leaving just the valve pipe bends to put in.
 
Just broke for lunch, with the air lines connected and the 2" pumped return laid to the point of just connecting in the garage, it's time to dry fit the final returns, measure back and mark out spacings for connectors, bio, more connectors, drum and more connects. I have a template made out so I can setup the drum connections and show the position of the valves.

The remaining long 90s have turned up so I can finish the garage and get some concrete down to support the pipework.

OE7gULO.jpg
 
Gave it two coats of paint, will give another two coats once these have had a couple of weeks.

PR9Evwt.jpg

I think today it's going to be filter fitting day then do some gluing to the point of having the uprights, pressure test and then put in concrete to support the big valves and close off the garage hole.
 
Once you get above ground the more rubber connectors you use, the better. It may be a little more expensive outlay, but by the time you make 1 modification to the setup and dont have to throw away solvent joints etc youre quids in.
 
Wow there are some very cool projects in here. Mine is very modest in comparison, but I'm really enjoying learning something new and having a little project to tend to that doesn't require too much effort.

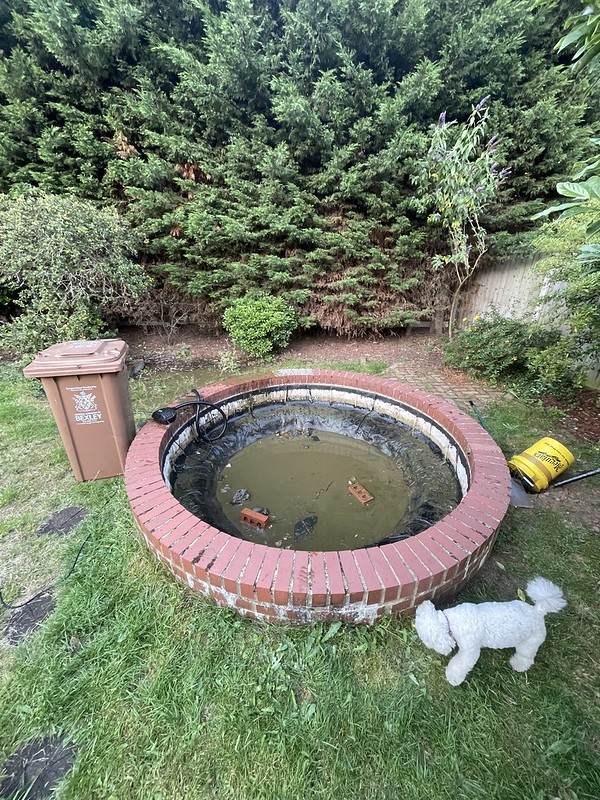
I bought my new place in April this year and with it, I inherited a pond full of soup. According to my neighbours, there were fountains and fish in it once upon a time but they don't think it's been maintained for a good 15+ years!

Untitled by mikehhhhhhh, on Flickr

My dilemma was that it either needed to be removed or revived. We came close to removing it as I think the brickwork is quite ugly, but it was cheaper to try and revive it.

We went to our local Aquatics centre armed with the capacity of the pond (2000L) and came away with an Oase 10000L Pressure Filter, air pump and stones, fountain, tap, pond bomb and some blanket weed treatment.

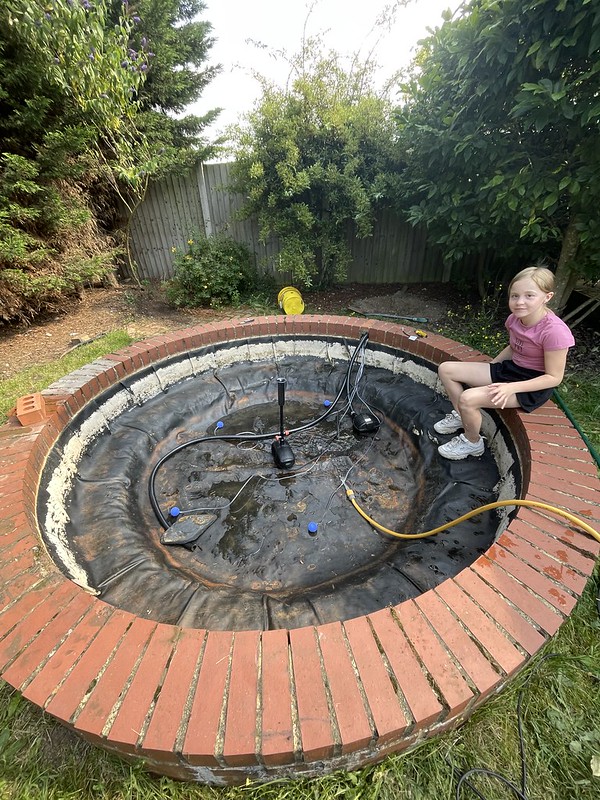
Then it was time to set about cleaning it out. The pump only got us so far and the job had to be finished with buckets, a wet vac and a shovel. It was so grim, I was actually unwell for a few days after :(

Untitled by mikehhhhhhh, on Flickr

It cleaned up OK, though and the liner seems to be in good condition!

Untitled by mikehhhhhhh, on Flickr

I got the filter partically buried and all the pump and pipework laid out before starting to fill. I'd pass the filling time by doing the wiring.

Untitled by mikehhhhhhh, on Flickr

Untitled by mikehhhhhhh, on Flickr

Untitled by mikehhhhhhh, on Flickr

Next step was to start getting some plants in:

Untitled by mikehhhhhhh, on Flickr

It was then a wait for the pond to establish it's self before we could start adding fish.

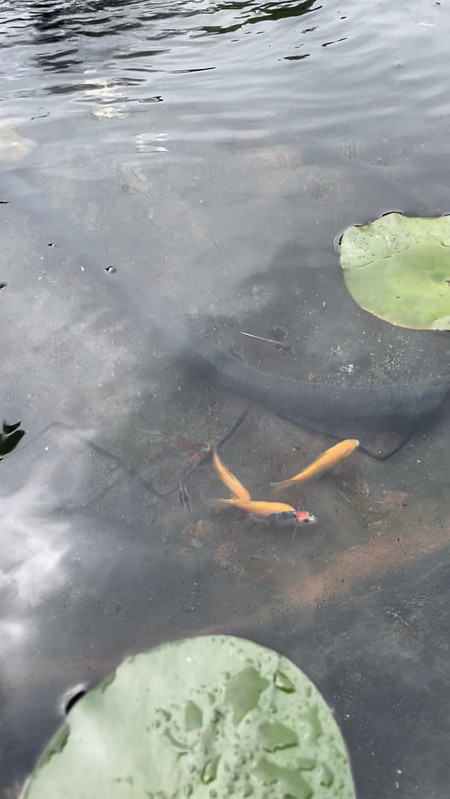
We started with 3 Shubunkins and 3 Canary Goldfish

Untitled by mikehhhhhhh, on Flickr

Once they'd been in the pond for four weeks without issue, we took a water sample to the aquatics centre to make sure all was well and came away with another six fish;

4 Sarasa Comets and 2 Gold Fish

Untitled by mikehhhhhhh, on Flickr

They are only small, but the pond is looking a lot more lively now!

Untitled by mikehhhhhhh, on Flickr

Untitled by mikehhhhhhh, on Flickr


I think that's it for fish this year. We need to get some more plants in there and also look at how we can tidy up the brick work.
 
Looking good.

One option if you want change the look/feel during a renovation would be to render, paint and use coping stones. if you do that in future I would like at refreshing the liner.
 
Friday was a full on day - try fitting and measuring & marking.

First the fun of draining and disconnecting the drum and bio, then moving it into position at a rough height to confirm.

4n1ZcTe.jpg

Luckily I have plenty of room for the valves, although I have run out of 32mm connectors. Annoyingly I switched inside the garage to 32mm as it's easier to mix and match connectors.. but the only connectors locally are waste ABS. It would work but they tend to break easier than PVC-U.

Accuracy - well initially I had laser lined everything, including the height of things. So the time to prove it is now. Essentially the pond walls set the maximum water level, then there's a minimum water level based on the lowest point the skimmer will pull water (the bottom drain will happily continue). The 110mm return tops are 50mm under the wall level, so the gravity feed will work to the point of 160mm below the wall top and lower should the returns have a down pipe in the pond (syphon effect).

So rather than trust the old lines set out initially, better double check with some new ones. The laser is the same level, setup to be about 30cm above the old water max level/wall level. The laser is auto-levelling so the line is true level regardless and as water will also sit as a true level it's a useful way to check. The LL marks are the new laser lines). The measurements are then down from the that line, so the lower the water level/deeper the larger the number.

First check the waste pipe chute as this acts like an overflow pipe. water over this will simply overflow down the drain pipe, thus preventing the pond from over filling and either overflowing the walls or the window..

0esLKVV.jpg

295mm. Ok so if the water raises and the measurement goes less than 29.5 then the water will overflow into the drain.

q1JCr8t.jpg

297mm wall height at the returns. So the maximum water level we will be 2mm below the wall height at this spot. Pretty accurate.. :D

I measured a number of locations around the pond - they are between 290-300mm from the laser line. Now the 300mm wall is the concern. It would overflow at this point (well it would almost be overflowing but there will be coping stones). Once the FGer has done the FG, the cement bed and the coping stones are laid then sealed - this is probably not an issue.. except the window. This will be an infinity style.. so in reality the level of the water will be set by this.

So in short I will probably set the drum and bio up so that it sits at 300-310mm below the laser line, the bio would also then sit a little lower. All within the existing pipework min and max and it should sit with the water never being able to overflow the window unless a large fishy splash occurs.
 
Back
Top Bottom