DIY Battery/Solar installation..

Making some progress :)
1000044504.jpg

Had to cut away more of the wood on the right, moved the fan/cat5 trunking right, added some 50mm trunking for the battery cables, class T fuse and bus bars added.
I have the shorter 30cm cables for connections to the bus bars and mrbf fuses for each battery too.
Blue Sea battery isolator arrived today, i did accidentally buy a cheaper knock off one, but changed my mind after seeing the quality of the class T fuse holdsr from blue sea, so went with the known brand.
Just waiting for some 10.5mm terminal lugs to let me make up and crimp some shorter cables for the new setup.
 
Looking good.

I removed my Victron isolator, it was getting rather hot, had about 180 amps going thorough it. I've got isolator's on the batteries, and the PV can be turned off via isolators/MCB's as well, so no need for it really.
 
Some were unsure of the value, but I added MBRF fuses to the posts of each battery:

Solar133.jpg


You can see the original terminal cover fitted here, these required a little persuasion to fit over the new fuses:

Solar134.jpg


Vs the original

Solar132.jpg


Ok, now to get the positive side lined up. You can see if flipped the fuse on the right battery to aid with reducing cable strain on the cable to the bus-bar:

Solar135.jpg


Now the negative:

Solar136.jpg


Close up
Solar137.jpg


Annoyingly, the existing 110cm negative cable I have has connectors for 70mm2 cable, and are slightly thicker than the 50s I am using on all my other cables:

Solar138.jpg

This means I cannot fit it through the gland into the inverter, without some considerable faffing

As such, I have had to leave the original cable, and run it over the front of the panel, and not through the trunking yet.

Debating if I will clip this back, and re-crimp the correct connector on myself, cut down the tab itself make it thinner, and fit through the gland, or just suck it up, and buy a new cable.

I was also thinking of adding a second blue sea isolation switch to the negative from the battery, after the class T, like the Positive, so might wait till I have made my mind up before taking further actions :)

Mostly buttoned up!

Solar139.jpg

Solar140.jpg


I decided I wanted to add some cable separation behind the batteries and closer to the inverter. Just to help protect against any potential rubbing of the cables.
So I designed and printed some simple separators or varying lengths/orientations:

Solar141.jpg


With the trunking covering fitted, and some of the isolators in place.

Solar142.jpg


I re-added the third fan to check its affect on peak temps, and it did seem to bring it down a good 5 degrees on the terminals of the class T. It is running on the same timer as the ones on top of the inverter, and looking to secure that to the wall just to the right of the battery units to blow over the bus-bars and fuses. I like the idea of at least having a little air movement during peak times to aid longevity and move any heat away and into the rest of the garage. Might help a little with keeping the garage warmer in the winter too...

And that is where we are up to. This was done 2 days ago, and things are just ticking along as per normal for now.

This is pretty much the last set of steps now till I start on the solar side of the project!
 
Last edited:
An excellent read through, as I've considered doing similar myself, as (like you've said), the material vs installed cost difference seems a little extreme.

A couple questions if you don't mind:
  1. How hard did you find it getting a sparky onboard to sign off the work? Can any standard sparky signoff solar/battery systems, or do you need to find someone with specific extra qualifications?
  2. How much do you think it's cost you in total for the whole system? What's your payback period like?
The first sparky I asked did it for me :)

He has recently contacted me about helping me add solar and offered to get my install certified via his MCS, which was not actually part of my initial plan.

Anyone who is a qualified/msc solar/battery installer would be sensible from a skills perspective.

Total is a shade under 4k, but some of that was spent on other works done whilst the system was being comissioned.

Payback (without solar) is working out to be just under 24 months based on my current projections.
It would likely work out about the same when I add the solar, perhaps stretching it out by another 6 months depending on time of year/generation, and maybe less if I get a MCS cert and paid for dumping batteries/excess solar!
Excellent, thanks! I think I definitely need to look into it in more depth then. If I can get a similar payback period, it seems a no brainer really.
 
Does your inverter have UPS mode? - looking at the current specs for the Sunsynk 8.8 hybrid inverter it can do full house backup as standard.
It has a load port that can be used to power specific circuits, if there is an issue with the power supply. I am not using this at the moment.

It is also compatible with an Automatic transfer switch, so it can be used for whole house backup, but this is additional hardware. I am considering using this at a later date also :)
 
Last edited:
I have been slacking a bit, but then it was Xmas, so it was a LITTLE busy.... BUT we have panels, and things are mostly done and tidied up :D

The day of the install, and weather was looking good! We actually had a nice day forecast, the days before and after were all a little pants, but this was perfect for a 19th of December installation!

Solar144.jpg


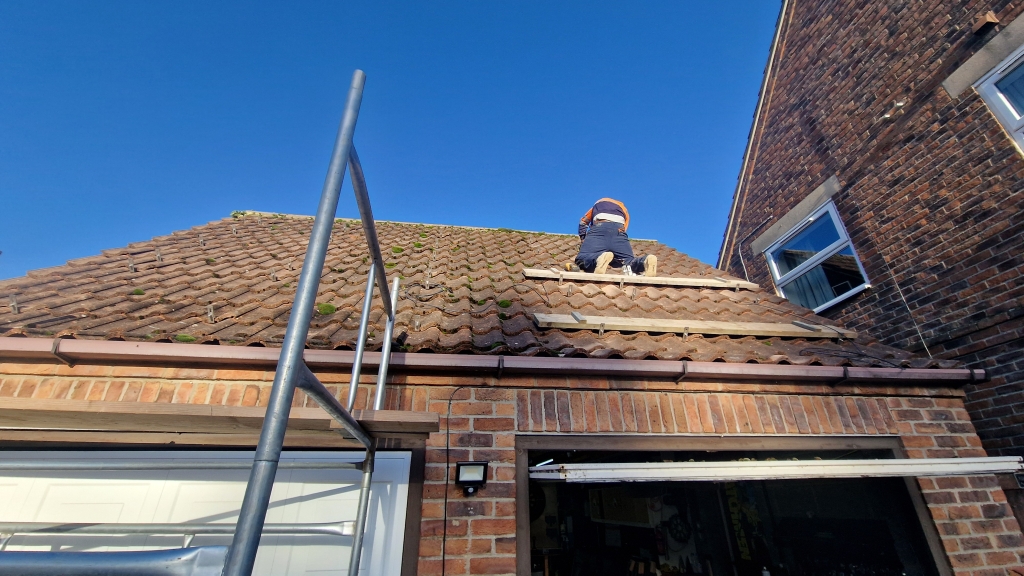
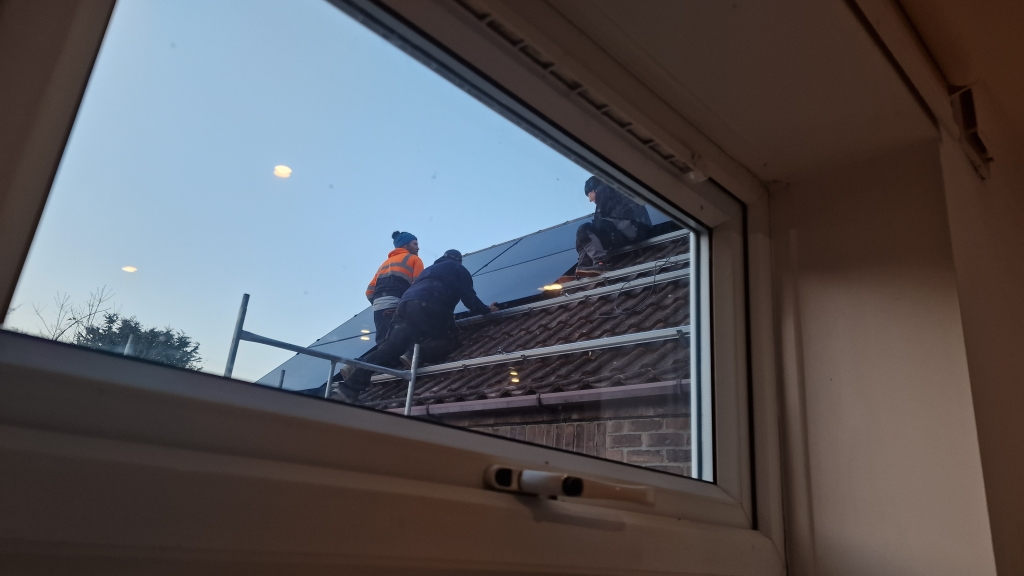
Roofer turned up, and got cracking, and was soon bathing in the sunlight that I was not yet able to capture!

Solar145.jpg
\

A few hours later, the panels were going up... The roofer even cleaned the moss off whilst he was up there, and removed some pesky ivy that had been a little too out of each for my own ladder. Legend!

Solar146.jpg


As you can see, they are BIG panels, and I am so glad that I did not attempt to do this on my own. I was relegated to tea-man, but I did get to tighten up some of the brackets on the left most panels, so as a result, I can claim this as a DIY project... Right?

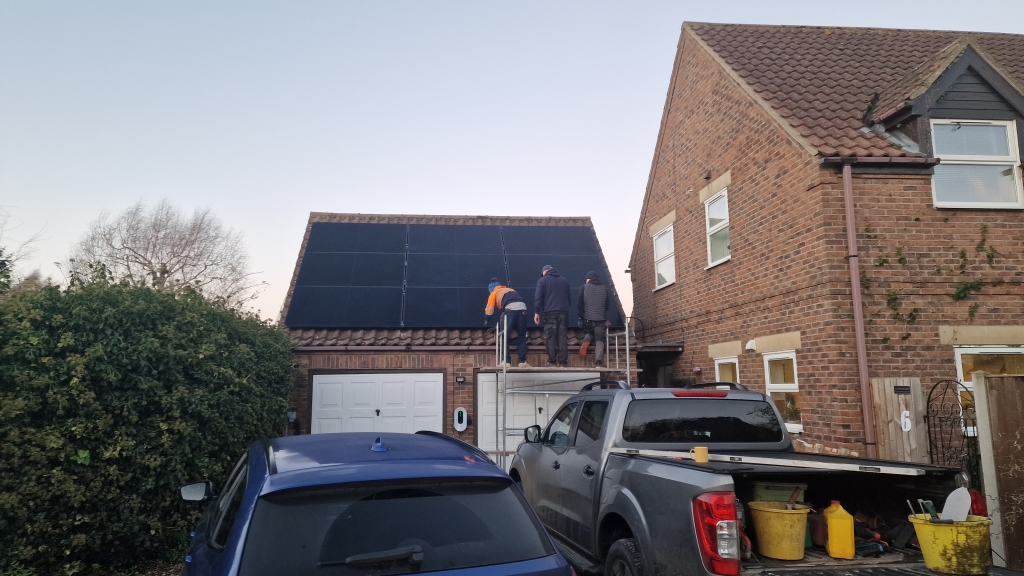
A lot of time was spent getting the rails perfectly flat and true, and as a result of this the panels flew up really quickly after what felt like it was going to end up as a two day job...

Solar147.jpg


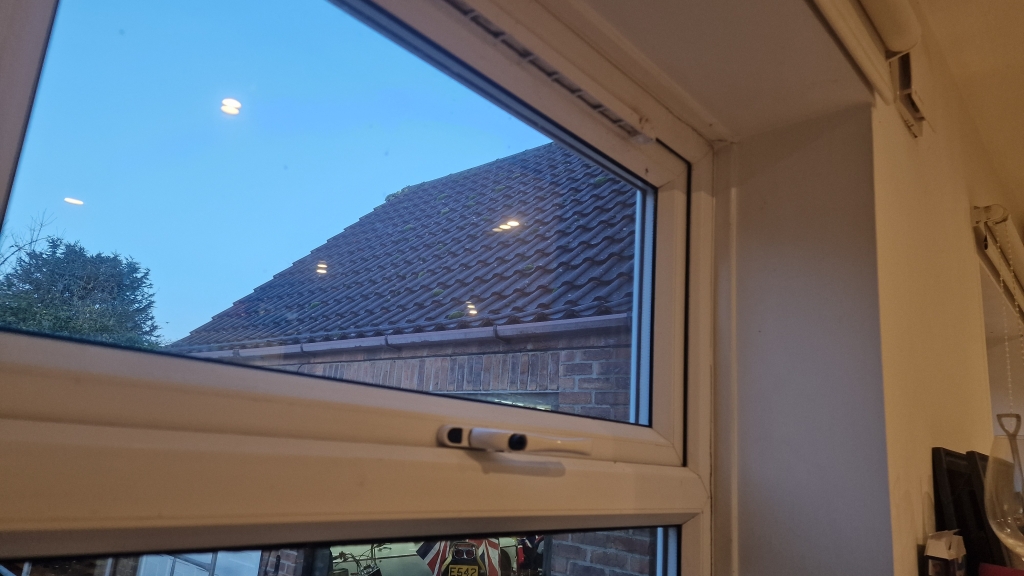
Nearly all buttoned up... As you can see, I have a little bit of left over ivy to remove on the house.

Solar148.jpg


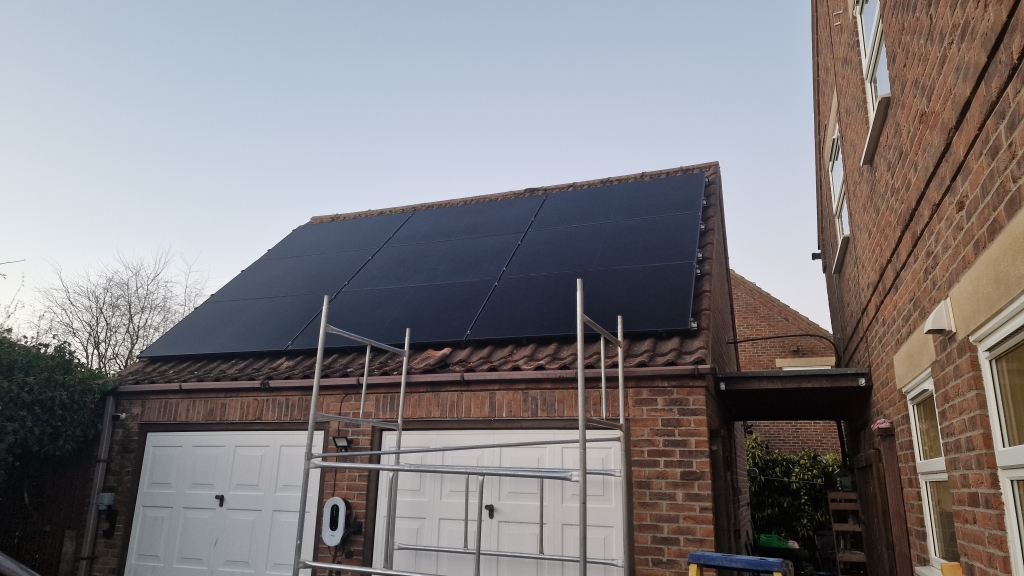
All squared away by about 4pm, and we saw a few watts of power over the MPPT before the sun dipped away soon afterwards.

As you can see I was REALLY keen to get as many panels as I could on this string to leave me with some headroom for another string (Location/orientation TBD). So this was as close to max roof utilisation as possible..

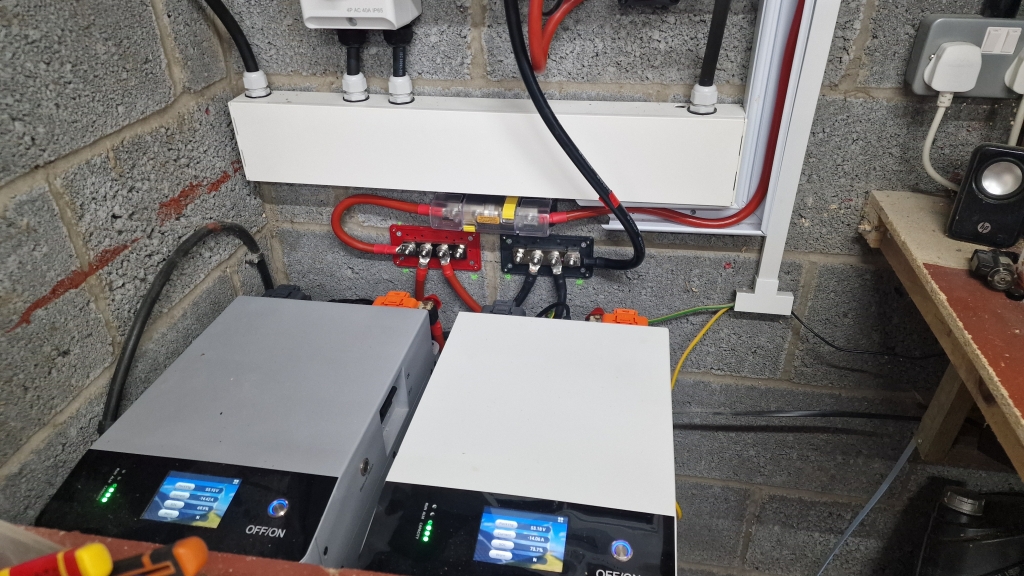
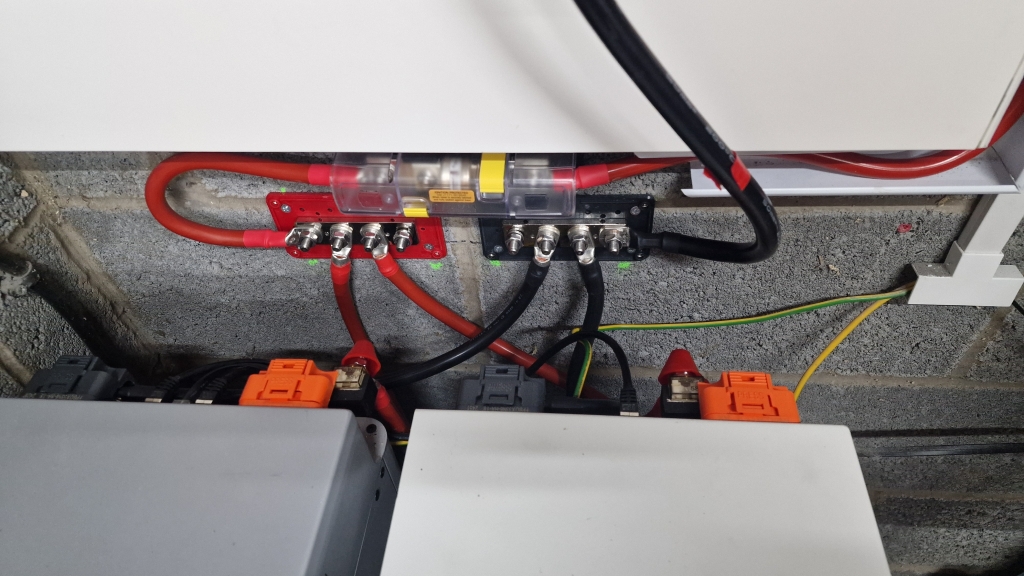
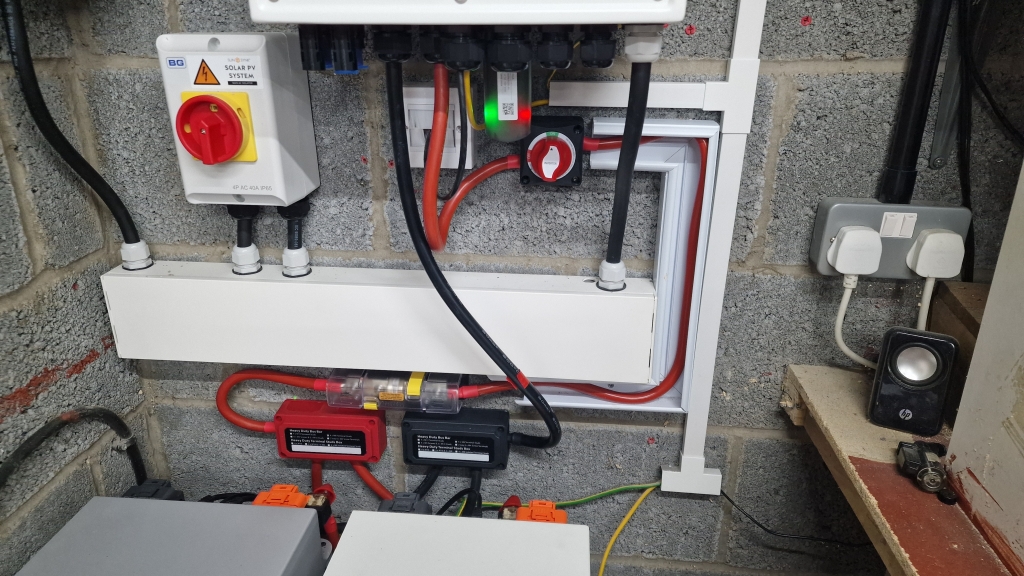
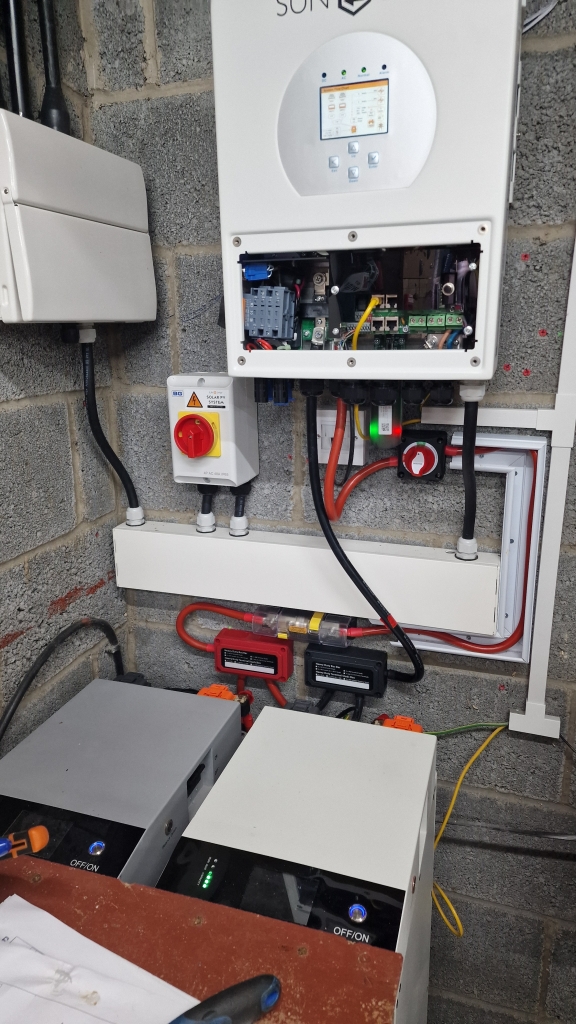
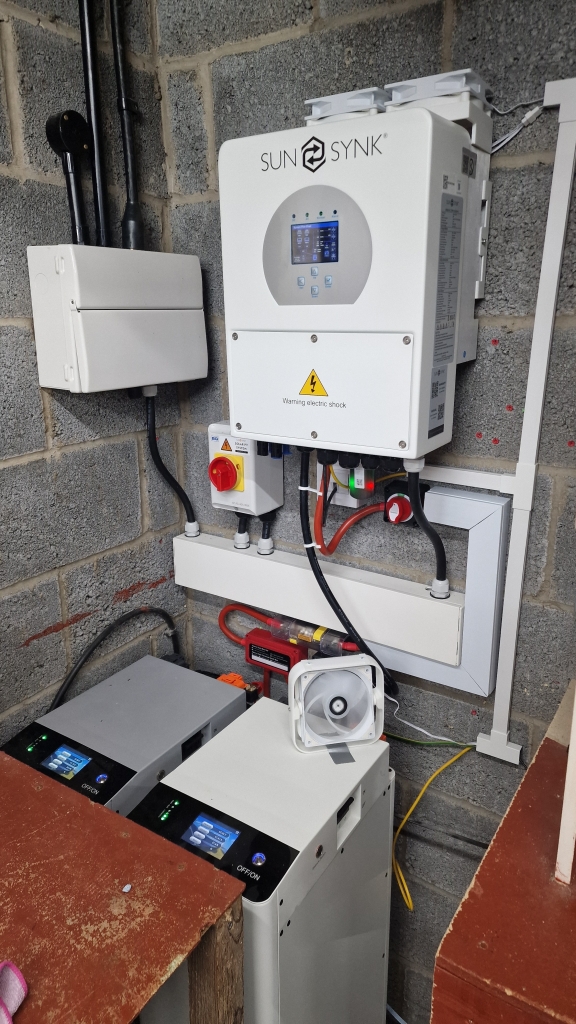
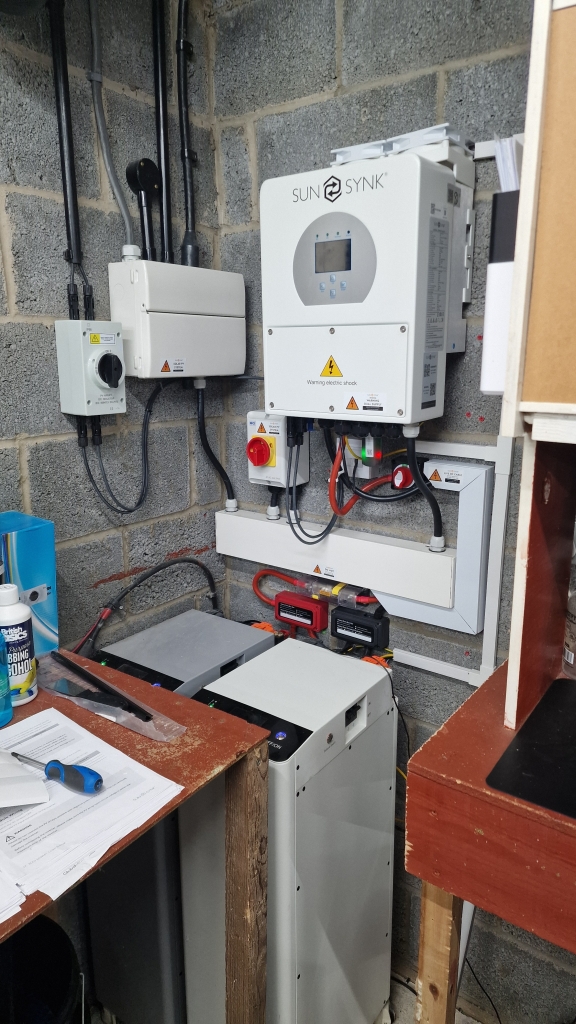
Away from the glamorous panels, the business end was essentially done, but not as neat as I would like, but this was as was agreed. I was due to do the trunking myself afterwards :)

Solar149.jpg


I have left space to the left of the isolator for a second for futureproofing, and have order some mid-size ducting and fittings to run around the corner, under the consumer unit, and down between the AC isolator, and the Network wall-plate. Sadly Evri have managed to lose this large length of plastic in their delivery centre... So until that turns up, that's how things will stay!

I was away for a few days, and was watching with interest to see what it would generate!
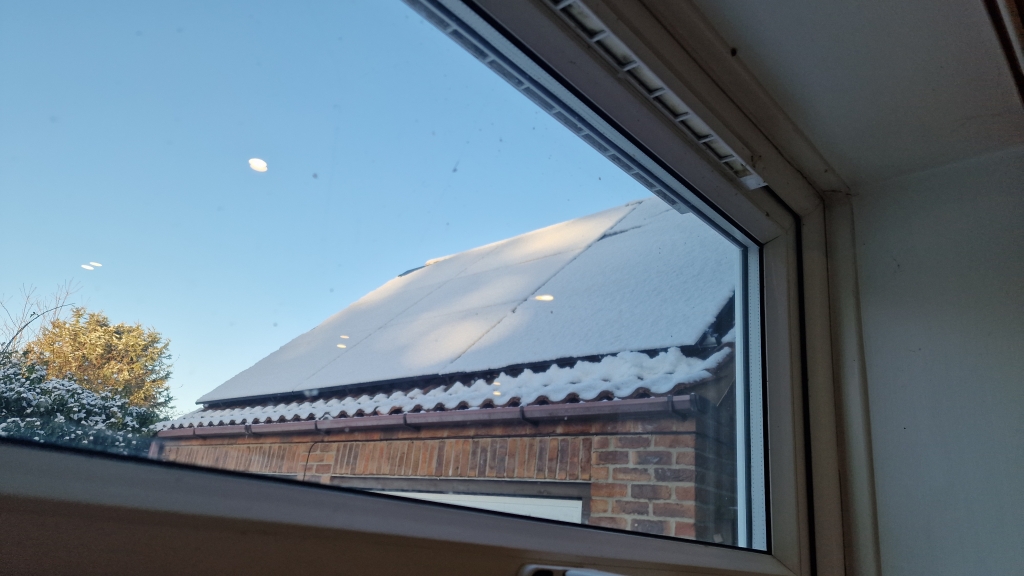
Days like these were less fruitful, as the snow took till about midday to melt away, at this time of year, they do not ALL get full sun until about 10am, but this gets earlier and earlier as the sun rises higher each day!

Solar150.jpg


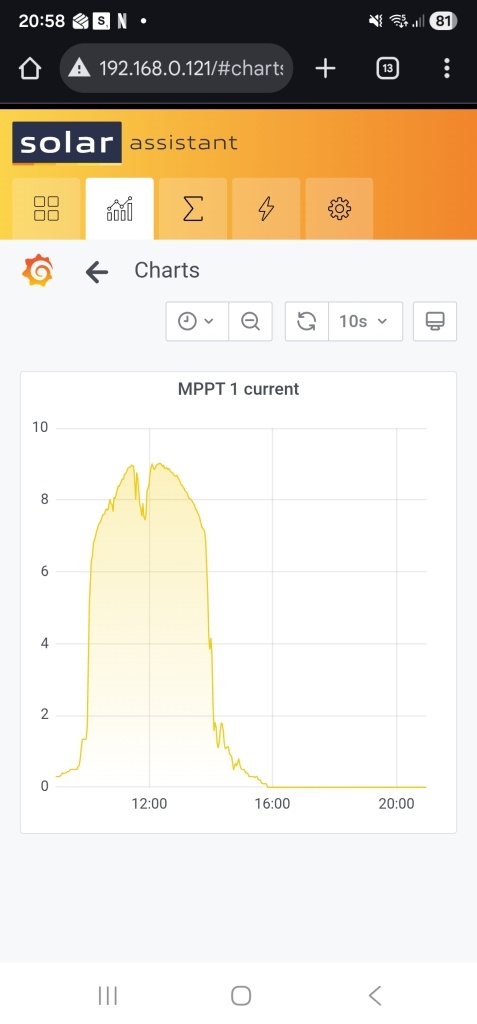
This is a fairly typical curve at the moment on a mostly sunny day:

Solar151.jpg


The dip around lunchtime is actually a very large single conifer that the sun is just slightly blocked by whilst it is so low at this time of year.

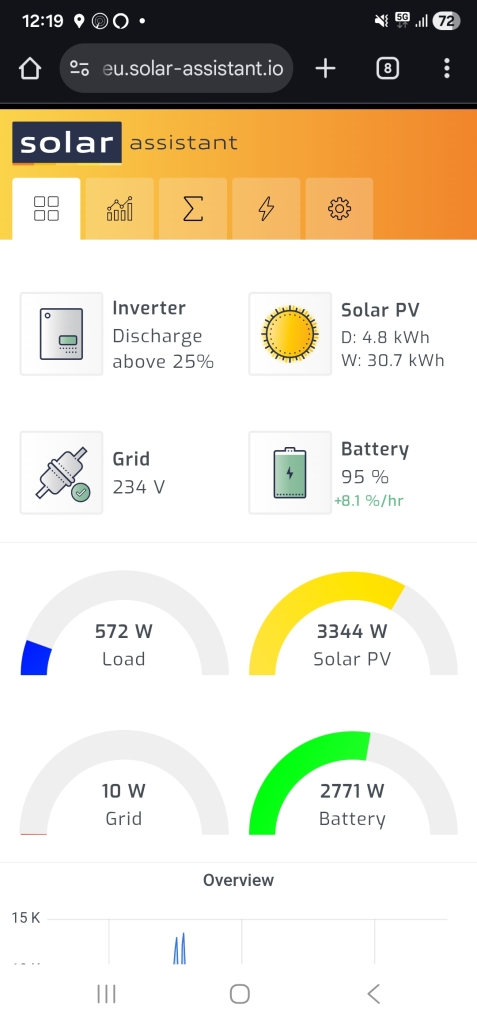
This is about the peak I am getting on a good day, shortly after midday. Keen to see if this rises much more in as the sun rises higher in the spring/summer!

Solar152.jpg


Best day has seen us grab about 11kwh on a lovely sunny, no clouds situation, and lows of 0.3kwh when the weather was simply terrible.

Not run my battery down past 15% once yet since adding the panels (and been slow charging the car during the day!), so still debating if I add another battery, or more panels next... But I will see how we do going into the summer before I decide!
 
Last edited:
Back
Top Bottom