Midlag Crisis

Associate
Joined
1 Nov 2008
Posts
1,222
Midlag Crisis

Story behind the name, :D my main current project is called Lean & Green or LAG for short, I was midway through & I had a hissy fit over something stupid which made my progress come to an emergency stop so had a little timeout to regain my sense, or at least some of it :D could call the project anything since I never have it in writing on my projects, great story... :D

But I’m using this one to get me right back in motion to continue LAG straight after this. :)

It’s a small practical HTPC I'm making for my dad as a present, he's in Australia until the 8th of February & I aim to have this project completed well before then.

It holds an SFX PSU, mini-ITX mobo with support for regular height expansion card, Internal IR receiver, Internal 3.5" e-sata HDD dock which can be switched on/off & 1 3.5" HDD & 1 SSD & 1 140mm custom fan, 1 of the parts of the custom frame is the front panel too, got all the hardware covered already & this is my first rig without an optical drive.

Some concept shots.
MidlagCrisis1.jpg


MidlagCrisis2.jpg


MidlagCrisis3.jpg


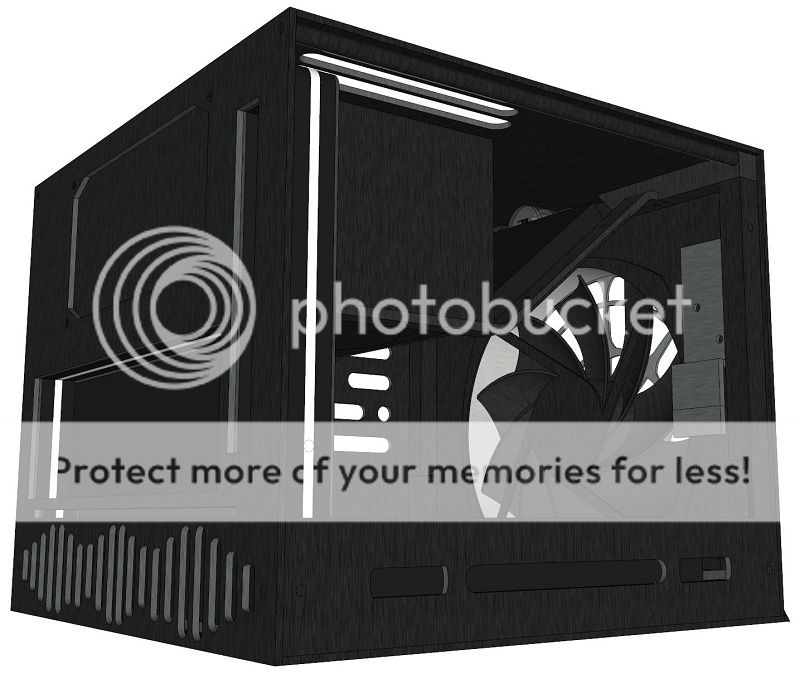
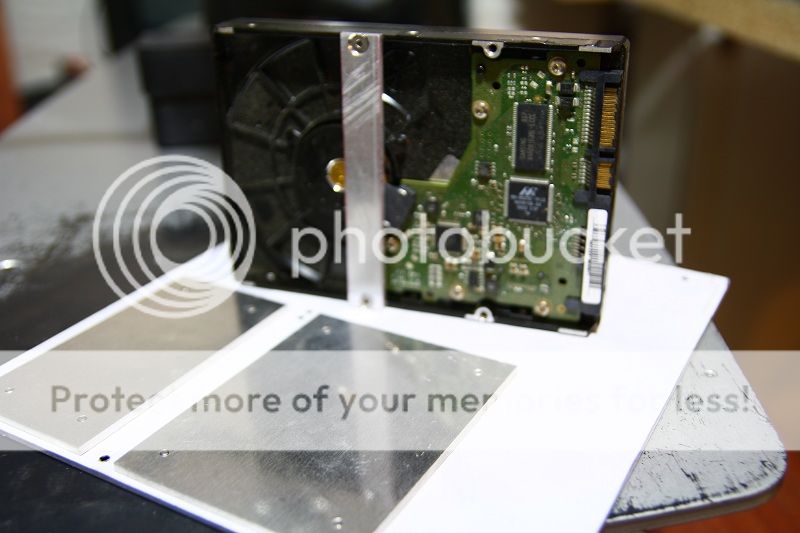
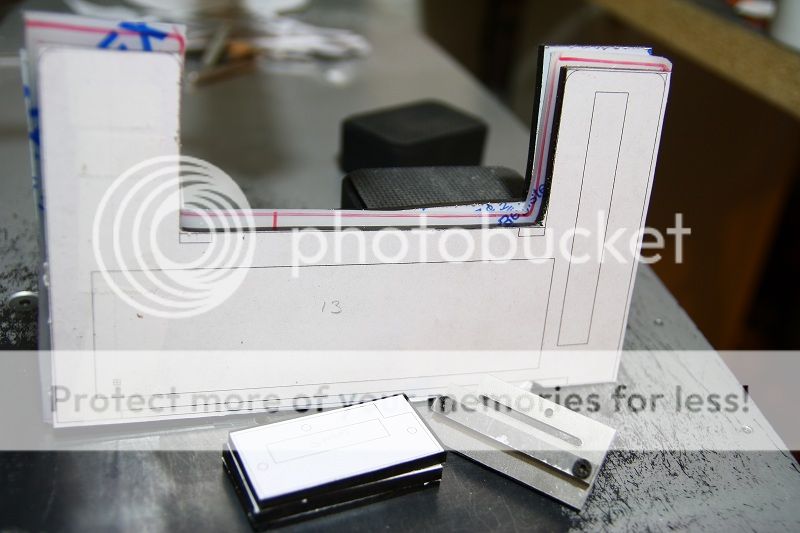
The internal custom e-sata HDD dock has a sliding piece which 3 rods guide it so it goes forward/back nice & straight that has enough room to free the drive & then the HDD clips in/out of place with it's own little side panel for quick access.
MidlagCrisis4.jpg


MidlagCrisis5.jpg


MidlagCrisis6.jpg


MidlagCrisis7.jpg


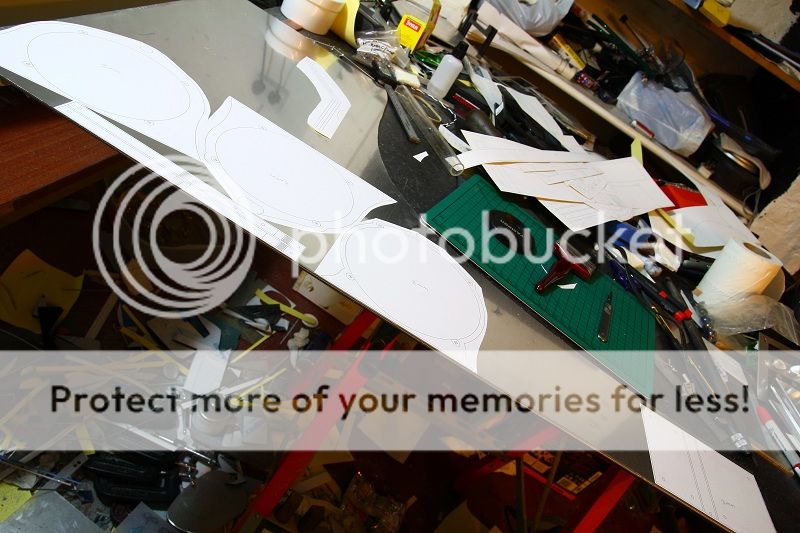
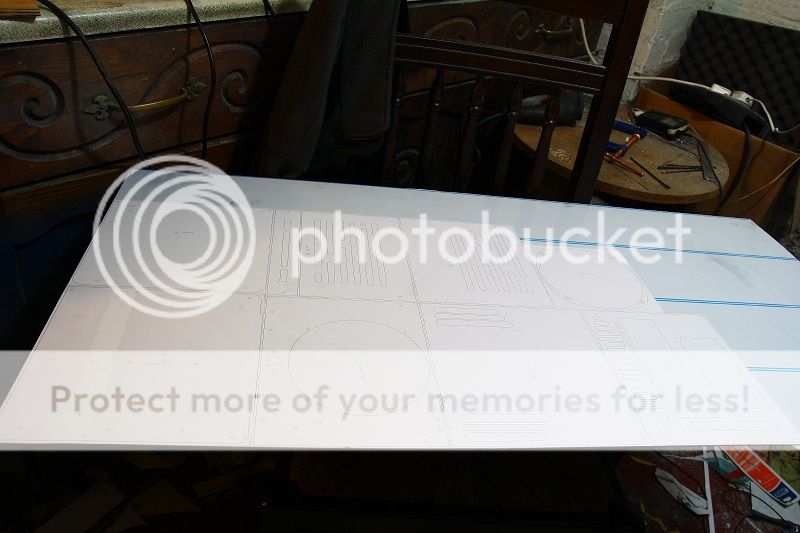
After making it all printer ready.
MidlagCrisis8.jpg


The only material I had to buy was the 2mm panel & an acrylic tube with 16mm ID for the marble power button, everything else is scraps.
MidlagCrisis9.jpg


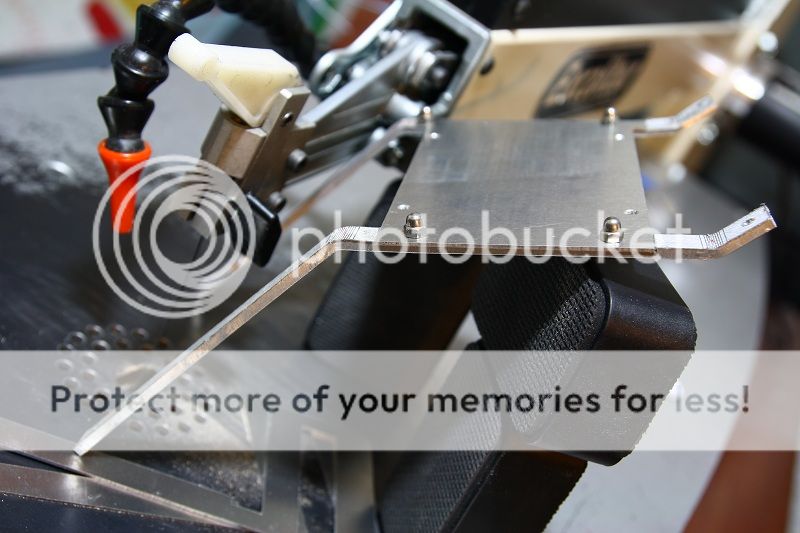
Cut into manageable pieces.
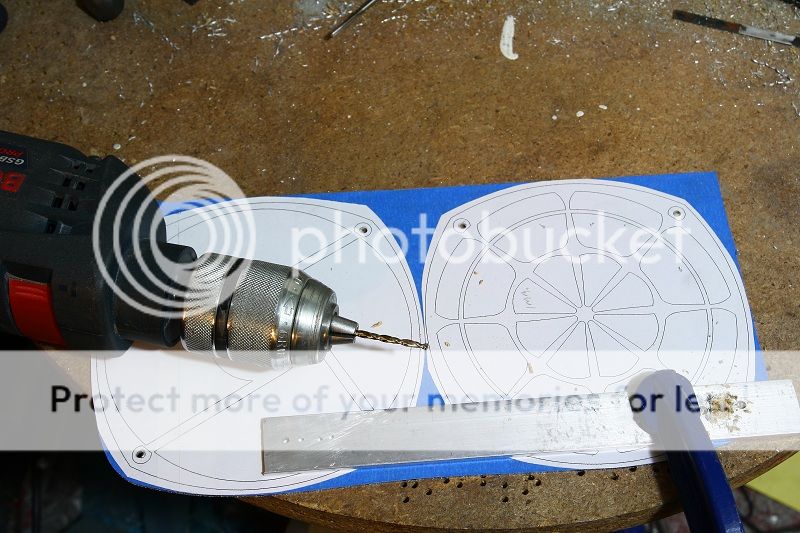
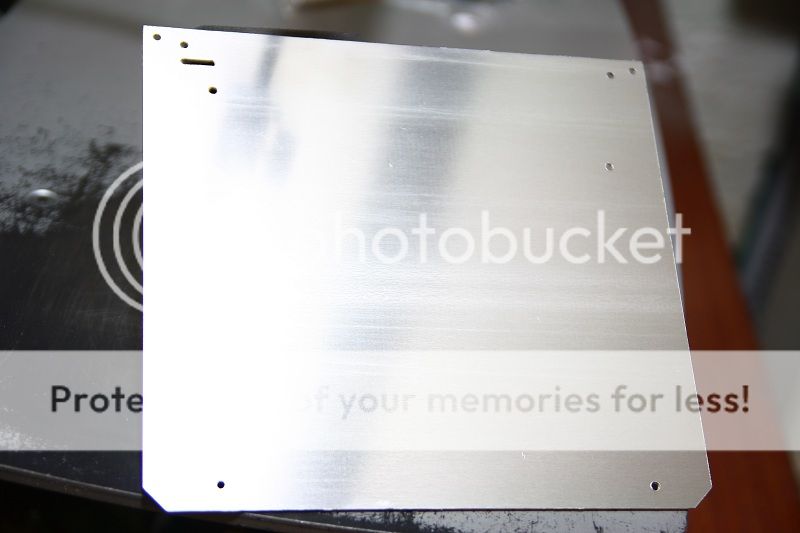
MidlagCrisis10.jpg


Drilled.
MidlagCrisis11.jpg


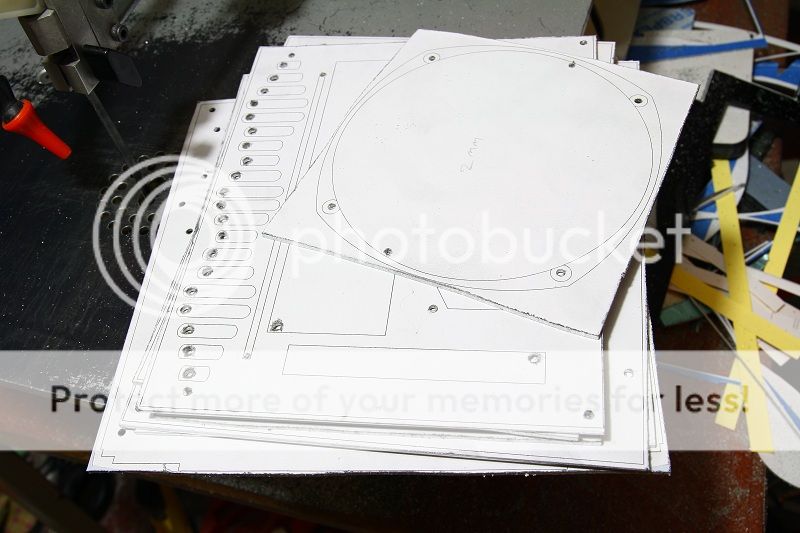
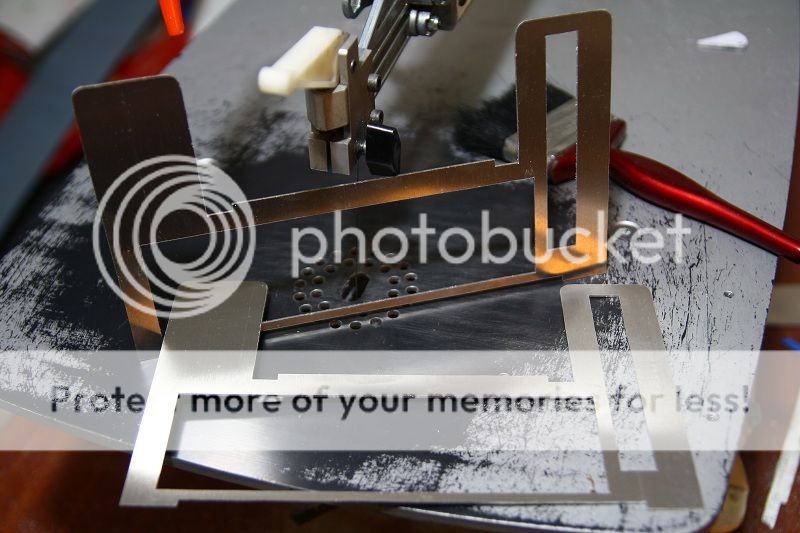
Cut & undressed after a nicely productive 10 hours, so that's the front, back, top, bottom, both sides, mobo tray & most of the HDD dock pieces & back IO piece but all the acyrlic bits need the adhesive before I can complete them. :D
MidlagCrisis12.jpg


MidlagCrisis13.jpg


MidlagCrisis14.jpg


MidlagCrisis15.jpg


MidlagCrisis16.jpg


MidlagCrisis17.jpg


MidlagCrisis18.jpg


MidlagCrisis19.jpg


Also cut some acrylic pieces but I can't find my tensol 12 adhesive so I'll have to order a new bottle & get it on Tuesday but this lets me complete everything else in the meantime.
MidlagCrisis20.jpg


This project should be a quickie.

Feels good to have done some modding after such a big timeout, I'll do more tomorrow. :D
 
Associate
Joined
22 May 2011
Posts
1,173
Location
Manchester
First thing I thought without looking at the username who had posted: "This must be one of Waynio's!" :p you always have fantastic projects, looking forward to seeing this one come to fruition :)
 
Associate
OP
Joined
1 Nov 2008
Posts
1,222
You sir, have some serious talent :)
Thanks shahpor :o:)

Blown away by that. What did you do all the cut-outs with? Looks like you have a drill and a bandsaw. That takes some skill and patience.
Thanks DampDog, yeah I use normal power drill but also have floor pillar drill too, for the cuts I bought a nice premium scroll saw late 2011 after trying a budget one, been a great tool. :)

That looks great, i can't wait to see this.

You could be my inspiration sir. :)
Thanks Doomedspeed & for once I think people will be pleased with how long it takes :D really should be a quick project this one.

Are you trying to monopolise my subs :)

Subbed - but only because your main build is on hold and I need my fill of your projects ;)
:D Thanks Tattysnuc, shouldn't be long before I'm back onto it.

Looks good, looking forward to see how it turns out.
Thanks kitkat :)

First thing I thought without looking at the username who had posted: "This must be one of Waynio's!" :p you always have fantastic projects, looking forward to seeing this one come to fruition :)
LOL :D Thanks Rooster.


3MM day doing the PSU support bars, HDD dock slide system & extra trim bits for the front fan & wow what an awesome mess, :D I intend to clean up very soon.
MidlagCrisis21.jpg


Drilled & cut, peeled the templates off with messy glue left on the aluminium, I only stick them on the protective stuff if it's laser film because that doesn't come loose & when pulling it off it comes off in 1 piece showing perfect surface, wish all sheet aluminium sellers used laser film.
MidlagCrisis22.jpg


Wiped them all with thinners on a sponge because tissue leaves loads of fluffy bits difficult to get off & gave them all a wash & assembled to see what it looks like, also put a 16mm marble in place but.

I thought why doesn't the rear 3mm panel have symmetrical curves, what the heck went wrong? looked at my design again & yep, I some how forgot to mirror the left side to the right side for that piece so they are odd, oh well lol had to have a hiccup somewhere, not doing another unless it bugs me & I find myself waiting for the adhesive delivery & I get bored. :D
MidlagCrisis23a.jpg


MidlagCrisis23b.jpg


MidlagCrisis24.jpg


MidlagCrisis25.jpg


MidlagCrisis26.jpg


MidlagCrisis27.jpg


MidlagCrisis28.jpg


This was a job for my big countersink bit, lot better than filing for these marble button holes.
MidlagCrisis29.jpg


MidlagCrisis30.jpg


Another bit of the 3mm stuff, part of the HDD dock piece that lets me slot the drive in place, works perfect, the plates fixed to the bottom panel are tapped but I need to shorten the 6mm screws & where I put the thin piece mounted to the HDD will let me dunk it into normal HDD docks. :)
MidlagCrisis31.jpg


MidlagCrisis32.jpg


MidlagCrisis33.jpg


MidlagCrisis34.jpg


MidlagCrisis35.jpg


Up to 16 hours in now, yes I'm measuring how long this one takes me for a change, started late on this progress though, 7PM until 1AM. :D

More soon. :)
 
Associate
OP
Joined
1 Nov 2008
Posts
1,222
Coming along nicely....
Thanks Tattysnuc. :)

1mm Day & I skipped posting last night.
MidlagCrisis36.jpg


Drilling with a clamped aluminium flat bar with 3mm holes pre drilled into it for perfect targeting. :)
MidlagCrisis37.jpg


Cutting.
MidlagCrisis38.jpg


Peeled, just need the 4 rod pieces & to fix a fan inside to complete this fan.
MidlagCrisis39.jpg


MidlagCrisis40.jpg


IO pieces but they are twins, they shouldn't be, the main rear IO hole is meant to have a 2mm smaller diameter to the acrylic & external hole, so even with printing your designs, the same old rule applies of measure before marking lol, I'll re-make the wrongly done piece along with the wonky curve front 3mm piece & also make very sure I take off the wrong acrylic guide & put the right one on, that would have made a time consuming mistake. :D
MidlagCrisis41.jpg


Back to 2 of the 3mm strips I cut & drilled on last session, had to drill mill 1mm depth for the SSD tray so it sits flush to the strips, it's not perfect but not bad at all considering it's not a mill.
MidlagCrisis42.jpg


Didn't take shots of me bending the strips but I placed them in the vice & used a chunky piece of aluminium to bend them to shape so the bits I wanted to stay straight stayed straight, slight problem with the bends though, in the design they are more of a round curve rather than sharp bends so it's about 1 to 2mm stretched out too long, I'll work it out though & the bends line up with the guide I printed, I'll just have to extend the screw holes on 1 end into a line & grind some of the end down or relocate the front mount points to the right distance & grind the excess off.
MidlagCrisis43.jpg


MidlagCrisis44.jpg


MidlagCrisis45.jpg


MidlagCrisis46.jpg


Not sure how long sank into this session, didn't keep tabs on it so I'd have to take a wild guess, call it 5 hours lol which brings me up to 21 so far, probably another 20 if including the design part & so far I'll be re-making 2 pieces which I'll include on my next session along with the bar pieces & acrylic sticking because the adhesive came today, had to order some 5mm aluminium rod though so hopefully that will get here this week.

Ordered some bits for experimenting with surface finishing too, may or may not work out how I'd love it to but I'll post my findings either way when I try it out on scraps, if it works though it'll be a pretty sweet addition for finishing choices in modding for people on a budget &/or don't like to outsource.
 
Associate
OP
Joined
1 Nov 2008
Posts
1,222
New update.

Idea I hope will work.
I'm hoping this is something new lol, got these concentrated dyes & metal lacquer, going to try for an anodising alternative & will be able to make any colour, makes sense it would work, I'll test on scraps ASAP, I used metal lacquer all over stealthlow & it's great stuff hard wearing & invisible so should be a great alternative to anodising enabling more creativity. :D
MidlagCrisis47.jpg


PCI/IO mobo tray
2 1mm alu panels & I re made 1 of them because I did them the same on first go & 1 was meant to be 2mm diameter smaller for the IO shield (mixed the templates up accidentally), 2 5mm & 1 3mm acrylic piece which is fully stuck together with tensol 12 & then cut & I drilled & added brass inserts for the bent PSU support & SSD mount strips & inserts for the connecting to the mobo tray & the expansion slot, I'll be using 10mm female to female spacers, this would have been easier logging for me & easier reading for you if I took step by step pictures with brief descriptions lol d'oh.
MidlagCrisis48.jpg


MidlagCrisis49.jpg


MidlagCrisis50.jpg


Marble vandal switch
Stuck the acrylic bits together for the marble button, it's 2 3mm pieces with 1 of them having a 4mm larger hole so the 16mm ID 20mm OD pipe fits into it, 1 3mm piece & a 1mm piece with an OEM Lian Li switch inside held firm, I added brass inserts to it to mount to the front panel also, it's a bit rough looking but I don't care, it functions spot on & is smaller than I intended it to be with the front being countersunk deeper than intended which is a nice bonus, I'll have to get a side by side shot of this switch & a vandal switch for size comparison, also re made the 3mm panel which had mismatching curves.
MidlagCrisis51.jpg


MidlagCrisis52.jpg


MidlagCrisis53.jpg


The HDD dock connector piece.
Mix of 4mm alu for the grip piece, 3mm alu for a strong cover & 1 5mm layer with pass through & somewhere to mount the cables & then a 3mm & 5mm piece below for solid support, this piece isn't complete yet & hope it goes to plan, requires real high accuracy to work right but it all seems on track.
MidlagCrisis54.jpg


MidlagCrisis55.jpg


MidlagCrisis56.jpg


MidlagCrisis57.jpg


Cut a 140mm akasa apache fan frame away ready for fixing to the custom frame, I'm keeping the 4 legs for extra stability, these custom fans I had to make 1mm deeper than a normal fan so they are all 26mm.
MidlagCrisis58.jpg


Apologies for the slack logging on this update, I just got on with making it & took pictures after which makes it more difficult to explain what I did lol, I'll try to get back to regular step by step logging from now but things like using tensol 12 acrylic adhesive I don't mess about because it dries fast & is very toxic so messing about with the camera while doing stuff like that isn't a good idea.

I think I'm going to be gutted this isn't for me lol, it's really turning out pretty sweet I think. :D
 
Last edited:
Associate
OP
Joined
1 Nov 2008
Posts
1,222
Oh my lol not used to much response to my modding on here thanks everyone. :D

I would have kept doing more of a step by step project log but I've been getting demotivated since late last year, still as keen as ever to mod but the logging part has been slipping but I will show all the parts individually & do any needed explaining on final assembly, I suppose it just comes together faster if I focus more on making things. :)

Bars & rods cut to size & given perfectly flat ends.
MidlagCrisis59.jpg


Even templates on rods seemed a good idea & it was. :)
MidlagCrisis60.jpg


Done, and that guide tool I made for drilling the center of rods I did the same for square bars & it works awesome. :lol:
MidlagCrisis61.jpg


Fixed things together, need longer screws for the fan.
MidlagCrisis62.jpg


MidlagCrisis63.jpg


MidlagCrisis64.jpg


MidlagCrisis65.jpg


MidlagCrisis66.jpg


MidlagCrisis67.jpg


MidlagCrisis68.jpg


MidlagCrisis69.jpg


MidlagCrisis70.jpg


MidlagCrisis71.jpg


Bye for now. :)
 
Associate
OP
Joined
1 Nov 2008
Posts
1,222
The egg has hatched & the chick has stumbled out & I name that chick Salamick, Salami mixed with a lick. :D

Firstly this is just some basic experimental colour finishing looking for an alternative to regular methods that can be done quickly & easily without need for a special setup or special conditions, I took quite a bunch of shots to show how it looks from different angles too because it does look not too far from perfect on some & very imperfect on others depending on how the light catches it.

Could have just shown the best view points of it to blag everyone but I'd rather show how it really is.

About 30 drops of black added to a bottle of metal lacquer & shaken, gave 1 coat & also masked a few strips for a 1st attempt, gave it some adidas stripes on a shark fin lol.
Salamick01.jpg


Salamick02.jpg


Then emptied the whole bottle in & shaken, become far more potent.
Salamick03.jpg


Salami, or even black pudding that's what this dotty finish reminds me of lol.
Salamick04.jpg


Salamick05.jpg


Salamick06.jpg


Salamick07.jpg


Salamick08.jpg


Salamick09.jpg


Then applied a 2nd coat & the trouble with 2 coats is it needs to be applied perfectly or it can look messy.
Salamick10.jpg


Salamick11.jpg


Salamick12.jpg


Salamick13.jpg


Salamick14.jpg


Salamick15.jpg


Salamick16.jpg


Salamick17.jpg


Tried green, emptied the full bottle in & gave a shake.
Salamick18.jpg


Salamick19.jpg


Salamick20.jpg


1st coat covered better than the black but still had dots, just not as many.
Salamick21.jpg


Salamick22.jpg


Salamick23.jpg


Salamick24.jpg


Salamick25.jpg


2nd coat produced some interesting effects but they can only be appreciated on a macro shot with direct light bouncing off it otherwise it doesn't look so good.
Salamick26.jpg


Salamick27.jpg


Salamick28.jpg


Salamick29.jpg


Salamick30.jpg


Not sure what to make of it, on one hand it's kinda like flip paint with how different it looks from angles, on the other it's not quite as awesome as I imagined but it is hard wearing & the theory does work just not as nice looking as I imagined, as it stands it's no comparison for a good anodising job but I should give a scrap piece a brush finish to see if that helps, this was all done on freshly peeled aluminium scraps without any prep work.

Ideally I would like to get this technique so it's doable with 1 coat so the surface texture of the aluminium is visible like anodising but with a solid consistent colour so I'll have to continue playing with this idea to see if I can improve on it, it's already proven to work, just needs perfecting.

Opinions are very welcome on what you think of it, awful or has potential so worth persisting to get the method perfected?.


My dad got back today 2 days earlier than I was told of the 8th & the 2 days before that I was cleaning up the house, the screws still haven't come so I'm going to get everything else done tonight so it's ready for assembly tomorrow "if" the screws come, ordered a load of countersunk & button head screws.

During the night if there is time I'll also try some other ideas for anodising alternative.
 
Associate
OP
Joined
1 Nov 2008
Posts
1,222
Super fun happy ramble.

Well I've really gone & found an anodising alternative & the most difficult bit is mastering applying metal lacquer in 1 coat (something I'm working on perfecting), had a glob bit but that's due to the brush I used for applying dyed lacquer so still had some green in there lol & had 1 blank dot which I don't know how that happened but the result compared to brushing dyed lacquer is infinitely better, I think this is as close to anodising as I'll get without anodising.

Here is what I done.


Roughed up a piece of 5221 grade aluminium with 150 grit wet'n'dry paper.

Cleaned it with the t-shirt I'm wearing lol.

Applied 1 quick brush of metal lacquer on all sides & edges.

Cured fast with heat gun.

Picked out the shabbiest source pan hopefully no one would miss :D filled it with water & brought to the boil & got it to simmer.

Then dumped some black dylon clothes dye powder in the water which I bought quite a while ago for dying plastics, gave it a stir, threw the aluminium strip in & left it for a few seconds, pulled it out & it was taking the dye so put it back in & let it continue for 5 to 10 minutes checking on it now & then to make sure it was getting darker, it sure was, yipeeee. :eek::D

It didn't look very black & more of a burnt colour but gave it a wipe with tissue, it didn't come off which was an awesome sign :D & still looked a burnt colour so then took it to the sink to rinse off any excess dye & the piece turned nice & black like magic :D I was rather joyed & still am, dried it & tried scratching it to see how resistant it is & it is very resistant to scratching, even more than just metal lacquer so this is just perfect.

I'm showing all the pictures I took of the coloured piece, because this is a breakthrough for die hard no outsource modders who want to anodise but won't due to it being hazardous & many other types I believe, dying aluminium without anodising it WTH. :D
Lacqodising01.jpg


Lacqodising02.jpg


Lacqodising03.jpg


Lacqodising04.jpg


Lacqodising05.jpg


Lacqodising06.jpg


Lacqodising07.jpg


Lacqodising08.jpg


Lacqodising09.jpg


Lacqodising10.jpg


This is pretty big for modding I think, I'm pretty chuft I found an alternative environmentally nice solution for something I've been wanting to do for a couple of years but never put much effort into it not thinking on enough whenever trying & all because I'm a cheapskate who isn't keen on outsourcing lol :D wouldn't have been looking for the solution without that, it's not just nicely coloured but still maintains the texture of the aluminium & it's even scratch resistant, awesome.


To do the bigger panels on lean & green I'll have to use a big deep baking tray but this is that awesome I think I might be dreaming & I'll wake up any moment gutted it was just a dream lol, was expecting when I gave it a wipe for it to just fall off or crumble off or something but it's hard, definitely a true alternative to anodising.

Anodising makes a super thin film much like metal lacquer so it just kinda made sense it would work as long as the lacquer would stay on in the hot water, luckily it does & clothes dye gets into it, my unwillingness to outsource has really paid off nicely on this one, it also doesn't prevent heat transfer too, I know this due to Stealthlow, the HDD bays collect the heat from them & even warm the side panels & everything is brushed with metal lacquer on it so does nothing bad for heat transfer, I don't think I'd use this method for water blocks though. :D

You can't dye aluminium without anodising, reheheally. :p

Only further testing I'll need to do now is getting times needed for different shades & establishing the perfect temperature but man I'm really pumped about this, the monkey with cymbals in my head is going nuts doing back flips. :D

I'm calling this method Lacqodising. :D
 
Back
Top Bottom