Unlocking 2.G iPhone to 2.1 - PwnageTool and Quickpwn - Mac and Windows.

Soldato
Joined
12 Aug 2004
Posts
6,105
Unlocking 2G iPhone to 2.2 - PwnageTool and Quickpwn - Mac and Windows. (UPDATED)

Now updated to 2.2, the methods are the same apart from the files and versions of Quickpwn required. PwnageTool for Mac has been updated. But Winpwn has still not yet been updated.

Quick note to 02 users on the 2G iPhone, if you have PAYG, Simplicity and certain contract SIMs, you can activate the phone legally through iTunes. You can either then jailbreak for Installer or Cydia or avoid this guide altogether!

ALL THESE METHODS ARE NOT PERFECT, I ACCEPT NO LIABILITY FOR PEOPLE GOING WRONG! FOLLOW THESE GUIDES AT YOUR OWN RISK!

IF YOU HAVE ONE OF THE NEW MACBOOKS OR MACBOOK PROS, DO NOT USE IT TO UNLOCK EITHER 2G OR 3G IPHONES. FOR SOME REASON, IT CAN INTEFERE WITH THE PROCESS

Mac Guides

PwnageTool Part 1
PwnageTool Part 2
Quickpwn

Windows Guides

Quickpwn

3G Guide

3G Guide

Mac

PwnageTool

PwnageTool - this method creates a custom firmware of 2.2 which can then be uploaded onto your iPhone using iTunes 8.

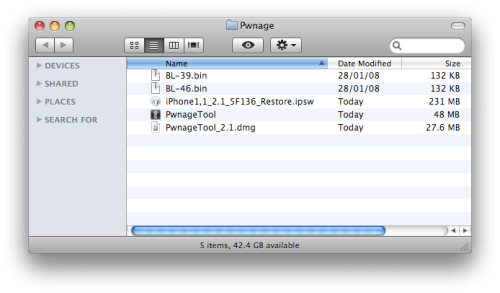
First you will need, PwnageTool 2.2, this is a torrent file so will require a torrent client. Also you need to download the 3.9 Bootloader and the 4.6 Bootloader. Last but not least the 2.2 firmware can be downloaded here.

Put all these in the same file and install Pwnage tool as you would install a normal application but drag it into the Pwnage file. It should look like this:

7897-500.png


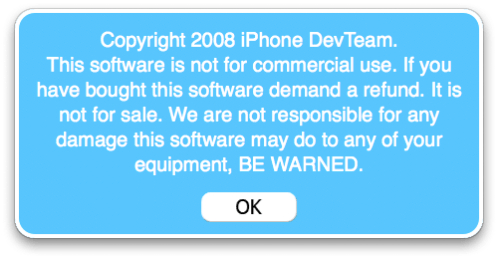
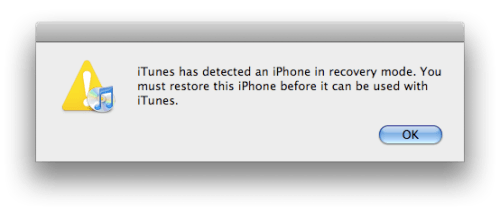
Open Pwnage tool, and click OK at the warning.

6661-500.png


There are two options for creating the firmware, Simple and Expert. Expert allows you to fully customise your firmware but isn't necessary for most users. Therefore I will stick to the simple method. A guide to the Expert mode will be made at a later date.

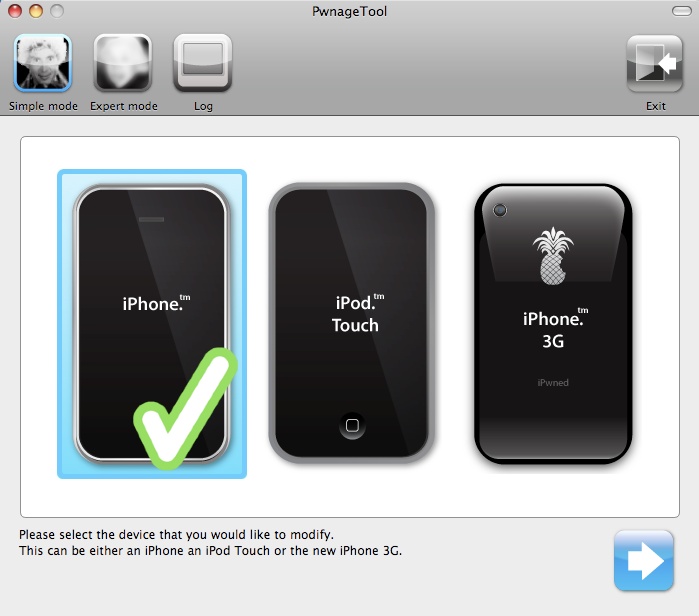
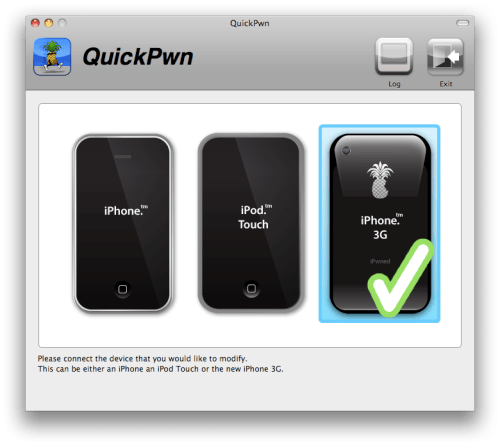
You will be presented by this screen, click on iPhone.

step-1.png


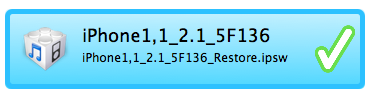
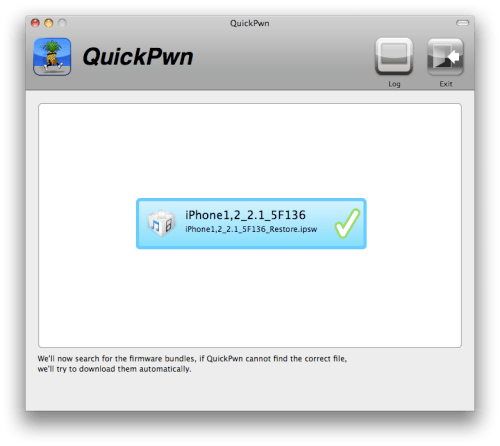
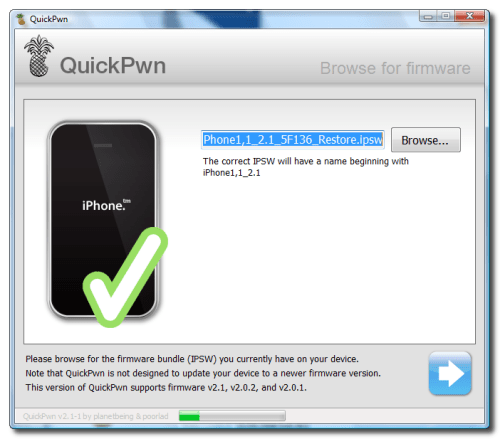
PwnageTool will then search for the correct firmware. You should be presented with this:

7892.png


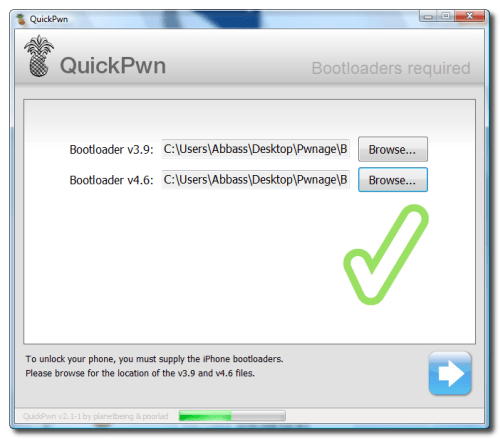
You will then go through the same process with the bootloaders. If PwnageTool cannot find them, choose them from the Pwnage file created earlier.
Once both bootloaders have been found you will be presented with this message. Click ‘YES.’

step-9.png


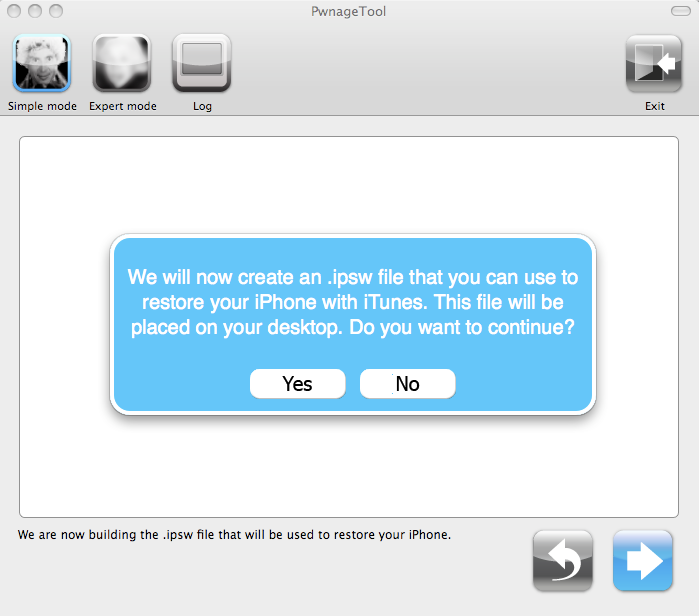
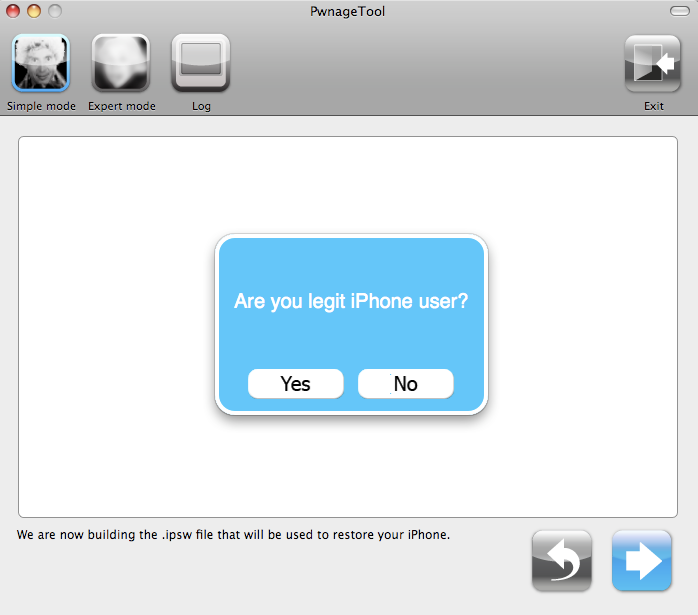
This message will then appear, click ‘NO’ so that the phone, is jailbroken, activated and unlocked. If you click ‘YES’, it won’t be unlocked.

step-10.png


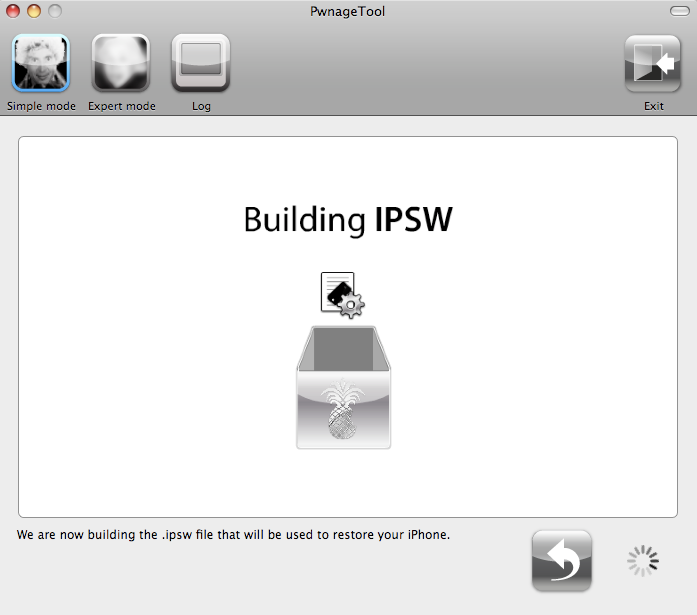
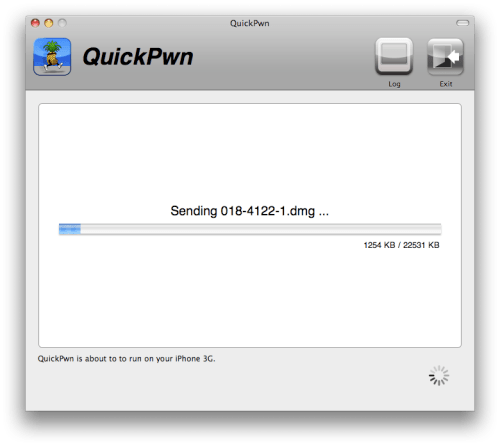
You will then be presented with this screen, it should take about five minutes.

step-11.png


You will then be asked to enter your administrator password and press OK as if you are installing an application. If you don’t use a password press OK.

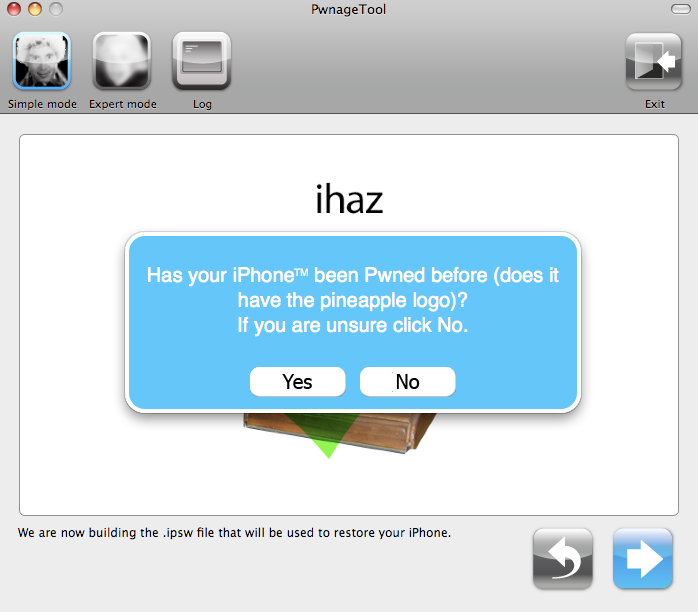
PwnageTool will then ask you if your phone has be pwned before. Click ‘NO.’ Even if you have pwned before, still click ‘NO’ as it allows a better and more thorough restore.

step-13.png


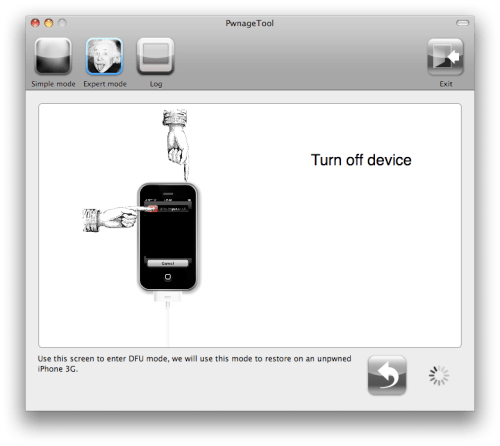
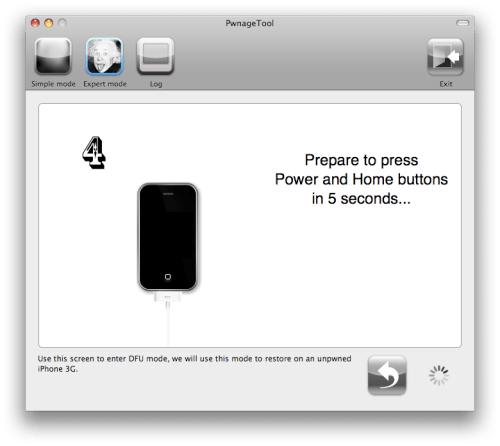
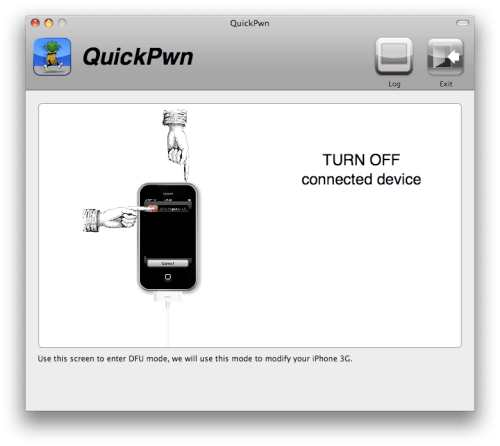
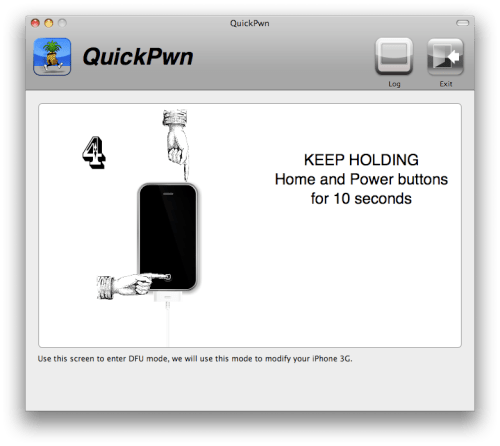
Make sure your iPhone is on and attached to your computer. You will then see this screen.


6721-500.png


Continued in next post due to image restrictions.
 
Last edited:
Continued...

It will ask you to hold the home button and the power button for 10 seconds. Then, you will have to release the power button and hold the home button for 10 seconds.

6722-500.png


If you fail, it will show you a message. Click ‘YES’ and then unplug the iPhone from the Mac. Turn it off, then turn it back on while it is not plugged in. Plug it back into the Mac and turn off the iPhone when asked by PwnageTool.

6723.png


If you are successful you will see this message.

step-15.png


iTunes will then recognise the phone in DFU mode. You should see the dialog box below.

6725-500.png


You will then have to click ‘Restore’ while hold down the ‘alt’ or option key. Then navigate to the custom firmware which should be on the desktop.
The phone will then be restored using the custom firmware. The phone will then restart.

The phone will then launch BootNeuter.app to unlock your device. Do not touch your phone or interrupt it in anyway! It will then restart again and your phone will be pwned!
 
Last edited:
Mac

Quickpwn

The better solution, much easier to do. You will need to restore to 2.2 beforehand.

1. Make sure iTunes 8 is installed and open.
2. Switch off your phone.
3. Hold down the home button and plug in the phone.
4. Keep holding down the home button until you see an iTunes logo and cable.
5. Click restore and iTunes will download and update your firmware.

Once the 2.2 firmware is on your iPhone, you can run Quickpwn.

Like PwnageTool, create a file called Quickpwn.

You will then need to download Quickpwn here, and install it into the Quickpwn folder. You will also require the 2.2 firmware which can be found here which should also be put into the Quickpwn folder to make the process easier.
You will also need the 3.9 and 4.6 bootloaders.

Quickpwn will then present you with a warning, and then ask you to connect your device.

You will be presented with this screen (in these photos a 3G is being jailbroken, but the process is the same. 3G jailbreaking will be outlined later.)

7905-500.png


Quickpwn will then search for the 2.2 firmware, it should find it automatically. If not then you will have to direct it to the Quickpwn folder.

7906-500.png


The next dialogue box will ask you if you want to replace your boot logos with the Quickpwn icons. Not worth it, can cause problems, so best to click 'NO'.

MAKE SURE iTUNES IS QUIT AT THIS POINT OTHERWISE IT WILL MESS UP THE PROCESS

7907.png


Quickpwn will then build the custom firmware and you will be prompted to enter your administrator password.

You are then required to make your phone enter DFU mode following the onscreen instructions.

First switch off the phone:

7914-500.png


You will then be asked to hold both the power and home buttons for ten seconds.

7915-500.png


You will then be prompted to release the power button and continue to hold the home button for ten seconds.

7916-500.png


If successful, Quickpwn will then start uploading the custom firmware to your phone.

7917-500.png


Don't disturb your phone through this process, and it may take some time.

Once complete, your phone will be ready to rock and have Installer and Cydia.
 
Last edited:
Windows

There is only one way to get 2.2 on your iPhone on Windows, WinPwn, the Windows equivalent to PwnageTool has not yet been updated so for the time being Quickpwn is the only method, but in most cases is the best.

Winpwn 3.0 is due for release soon, so a PwnageTool style method will soon be avaliable for Windows users. A guide will be available as soon as possible.

Quickpwn

First you will need to restore your phone to 2.2.

1. Make sure iTunes 8 is installed and open.
2. Switch off your phone.
3. Hold down the home button and plug in the phone.
4. Keep holding down the home button until you see an iTunes logo and cable.
5. Click restore and iTunes will download and update your firmware.

Once your iPhone has version 2.2, create a new folder called 'Quickpwn' on the desktop or somewhere accessible.

You will need Quickpwn 2.2 which can be found here and install it into the Quickpwn file.
You will also need the 3.9 and 4.6 bootloaders.
Finally you will need the 2.1 firmware, here.
Put all the files into the Quickpwn folder for ease of access.

Make sure your phone is connected then open Quickpwn.

8044-500.png


You will then be asked for the 2.2 firmware file, click 'Browse' and find the file in the Quickpwn file. You will then be presented with this screen.

8047-500.png


You then have the option to install extras.

1. Installer – a definite for third party apps.
2. Cydia – again very handy source.
3. Replace Boot Logos – replaces the Apple boot logos with a pineapple. I wouldn't bother, can create problems.
4. Unlock Phone – unlocks the phone to any carrier. A must for 2G iPhones unless you have it activated on 02.

Select what you want and click the blue arrow.

8048-500.png


You will then be asked for the bootloaders. Select them from the Quickpwn folder and you will be presented with this screen.

8051-500.png


Quickpwn will then ask you to make sure your iPhone is connected.

MAKE SURE iTUNES IS QUIT AT THIS POINT OTHERWISE IT WILL MESS UP THE PROCESS

8053-500.png


Quickpwn will then put your phone in recovery mode. You will then be prompted to:

1) Hold the home button for 5 seconds.
2) Hold the home button and power button for 10 seconds.
3) Then release the power button and hold the home button for 10 seconds.

You will be prompted to do the above steps by Quickpwn, if successful, the phone will then be jailbroken etc and you will see this screen:

8055-500.png


Your phone will run bootneuter.app, do not touch or interrupt the process. It should last about 5 minutes, then the phone will reboot. This is the final screen.

8056-500.png


Process complete!
 
Last edited:
iPhone 3G

Currently as it stands, the iPhone 3G cannot be unlocked to other networks so the only option for 3G users is a jailbreak to take advantage or Installer, Cydia and OpenSSH. However, the dev team has hinted at a possible software unlock on the 2.1 firmware.

If you want a possible 3G unlock or use a TurboSIM or other piggyback SIM, do not update to 2.2

The reason for this, is that 2.2 changed the baseband on the iPhone, making an unlock unlikely at this time. The 2.1 unlock may not to come to fruition but that option could be in the pipeline. Downgrading is not possibe without removing the phone's ability to make calls at this time.

In relation to the guides, the Quickpwn methods are the best, the program will recognise the phone and will only allow a jailbreak which will require the 2.1 or 2.2 firmware.

iPhone 3G 2.2 firmware.
iPhone 3G 2.1 firmware.

You will not need the Bootloaders, this are only for the 2G unlock.
 
Last edited:
Excelent guide could do with stickying

Just to clarify if I don't need to unlock (on o2) I can just leave unlock phone unticked?

Will do this when I receive my 1st gen Iphone tomorrow (hopefully it will be better than the horrid N95 :D)
 
Excelent guide could do with stickying

Just to clarify if I don't need to unlock (on o2) I can just leave unlock phone unticked?

Will do this when I receive my 1st gen Iphone tomorrow (hopefully it will be better than the horrid N95 :D)

I think it is best to unlock it as well. Just in case, will do no harm! Bootneuter.app only takes 5 minutes anyway.
 
I think it is best to unlock it as well. Just in case, will do no harm! Bootneuter.app only takes 5 minutes anyway.

Will do :) Ill let you know how I get on shame I missed the postman today now a 48hr wait til I get my phone! Grr!
 
Tried doing the above steps although cydia and installer is on there its saying Waiting for activation this may take some time.

Any ideas? I upgraded quickpwned using files listed had problem restored quickpwned again and its just saying the same thing.
 
Tried doing the above steps although cydia and installer is on there its saying Waiting for activation this may take some time.

Any ideas? I upgraded quickpwned using files listed had problem restored quickpwned again and its just saying the same thing.

Mac or Windows?

At what stage is it saying awaiting activation?
 
Main phone menu?

Have you put the phone in DFU mode and Quickpwn has uploaded the custom firmware?

Then the phone isn't unlocked? iTunes wants you to activate it?
 
Quickpwn uploaded the custom firmware then restarted the pineapple screen appeared and finished boot neutor started working and finished it then restarted to the screen with the text calendar etc screen appears and asks to wait for activation.
 
Quickpwn uploaded the custom firmware then restarted the pineapple screen appeared and finished boot neutor started working and finished it then restarted to the screen with the text calendar etc screen appears and asks to wait for activation.

I had the same thing, the phone was clearly unlocked but definetly not activated, soon as you pug it into iTunes it give me the incorrect sim error

Back on 1.1.4 until this mess gets sorted
 
Back
Top Bottom