Another model finished.

Fabulous work John, the GR4 in particular looks awesome.

Are there any reference sites regarding modelling and painting techniques you could link to? Building kits isn't a problem for me, it's just the painting side of things that i inevitably screw up :o
 
iv-tecman said:
I’ve got a massive display in my house of completed models. Many detailed as same as you using PE parts, and some with metal turned components.

Where do you get the extra parts from? I've got a kit of a mk1 MR2 to build up when I get around to it and wouldn't mind getting an idea of anything that might be available before I start.

I know it's a long shot but the kit is of a jap spec supercharged version, if I can get hold of an N/A engine cover and european spec rear lights I might be able to try and build it up as a replica of my own car :D
 
Goliath said:
Fabulous work John, the GR4 in particular looks awesome.

Are there any reference sites regarding modelling and painting techniques you could link to? Building kits isn't a problem for me, it's just the painting side of things that i inevitably screw up :o

Thanks goliath.

These videos by Brett Green from Testors Scale Workshop are about the best reference I've found in a long while,

http://www.scaleworkshop.com/workshop.htm

Needless to say an airbrush is a must-have, but they go a long way in explaining the techniques.

John
 
Wow, impressive…!! You are doing some very nice back washes there. I see you are using future floor wax. I use the same to clear my models, as it’s so easy to work with. It also doesn’t destroy decals, as it can be a little risky applying clear over them.

I use a trusty old badger for shooting large surface areas, and I’ve got an IWATA duel action. Sorry to say though, I’m using a lot of Automotive Lacquers, and ALCLAD II lacquer, so vapour masks and well ventilated areas are a must for my hobby. My gf doesn’t like the smell too much, but she does like to see them once completed. She says they “look cute”.

I do use Tamiya Acrylics to try and keep the smell down, but for a true showroom shine on a model car, it has to be fast evaporating lacquer paint and needs to dry hard as I then compound and polish the paint to a mirror like shine. So lacquers are the best choice.

I can only find these images at the moment, as I’m at work. My image host has gone offline, for good I think so I can’t link to my gallery at the moment, but this should give you an idea of my work. Sorry to say, these aren’t the best pictures I’ve taken, as I normally take them with white card in the background etc, but I’m eager to show you some of my work, as it is nice to share creative work, and this hobby is about sharing. These are builds I did a while ago, I’ve got many more, too many to post on here, and these are no way my best works.

p40600700kr.jpg


p72201554gr.jpg


p62103143um.jpg


pictureparking415470ns.jpg


pa3101283du.jpg


Keep up the great work, and I also agree that Hasagawa are certainly up there with Tamiya. But Tamiya do release some very nice kits.
 
kaiowas said:
Where do you get the extra parts from? I've got a kit of a mk1 MR2 to build up when I get around to it and wouldn't mind getting an idea of anything that might be available before I start.

I know it's a long shot but the kit is of a jap spec supercharged version, if I can get hold of an N/A engine cover and european spec rear lights I might be able to try and build it up as a replica of my own car :D


Have a look on www.hlj.com. Or search google for mediamix.com. Who produced the kit?
 
u need to do what i did with all my airfix models, once built its time to test fly them!!

que moi throwing plastic planes out of bedroom window.. i wont tell you how well they fly, but try it its ace fun!!
 
chopchop said:
u need to do what i did with all my airfix models, once built its time to test fly them!!

que moi throwing plastic planes out of bedroom window.. i wont tell you how well they fly, but try it its ace fun!!

After two months of his time to build this stunning replica, the last thing he'd want to do is try and make it fly for real... ;)

Modellers build to try and have the real item in miniature. It's hard to explain, but it can be addictive..
 
chopchop said:
u need to do what i did with all my airfix models, once built its time to test fly them!!

que moi throwing plastic planes out of bedroom window.. i wont tell you how well they fly, but try it its ace fun!!

I might have to do that with mine :p . The models shown in this thread has made me ralised how pathetic my efforts are. I think an 6 year old could make a better effort than mine :o .
Nevermind, life goes on.
 
STUNNING work Techman - how did you achieve that mirror-smooth finish on that Boxter ? I ask with interest as I'm looking to do a High-gloss Royal Navy FRADU hawk in a gloss black paintjob soon.

John
 
Very nice mate, I'd say about the right level of weathering too, (models I've seen in the past tend to be overdone in that respect). I've just remembered, I've got a luftwaffe F4 phantom and Douglas Skyraider in storage in one of our bedrooms. When I can get our camera working (needs batteries), I'll post some pics if you don't mind.
 
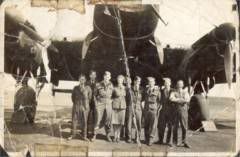
My old school teacher flew Lancasters during the war
lancaster1.jpg


Later they flew moded ones with no bomb doors as it just carried one huge bomb to blast through the U-Boat pen's concrete bunkers
 
Skii said:
STUNNING work Techman - how did you achieve that mirror-smooth finish on that Boxter ? I ask with interest as I'm looking to do a High-gloss Royal Navy FRADU hawk in a gloss black paintjob soon.

John

The boxster, in fact all my car models are painted the same old tried and tested method I’ve used for a long time.

I always prime the plastic first using a good plastic lacquer primer. Halfords sell good plastic primer, as it will protect the plastic from melting, as once I’ve primed I then use automotive lacquer paints or sometimes Tamiya TS lacquers, and lacquers can sometimes etch or even melt plastic. Tamiya Lacquers are formulated to work directly on styrene, but I always prime anyhow.

I sand the primer with good automotive 1200 grit, wet n dry. This means the primer has small scratches, but it’s smooth, allowing the lacquer paint something to bite into, but not etch the plastic, as the primer gives a good barrier against the hot lacquer solvents.

Once I’m happy that the primer is smooth and even I then wash and allow to dry. I also use a pre coat of white or red etc primer for lighter colours. Yellow for example needs a cream primer, white needs white, whereas red needs a pink primer. You need to gauge the paint you are using. Yellow for example is less opaque then black. Black covers anything, so grey primer is fine.

Apply two – three mist of top colour. Allow to dry, then a slightly wetter coat. Allow to dry, cut back with 1500 to smooth the orange peel out. Finish with a further two wet coats. Last coat so wet it almost runs. Then allow to cure off for about a week. (this does depend on type of paint used, drying conditions etc. Auto Lacquer dries within a day, but takes a week to fully cure off, Tamiya TS paints take a little longer, Acrylic nearly a month to fully cure and enamels forever)

Now with the paint cured, you need to fully inspect the final finish. Look for orange peel. This is where you need to decide, do you need to flatten the paint with 2400 grit or can you get away with just using a good compound polish and then wax. It’s hard to explain, but to get a mirror finish you need to ensure the surface is smooth like a mirror, as any dimple in the paint will reflect the light at the wrong angle, and reduce the shine. You get the surface smooth, by sanding and compounds, but too much and you run the risk of sanding to the primer.
 
kaiowas said:
It's a fujimi kit.

Hmm... Not a lot out for that kit, sometimes can you can make your own P/E parts, or use P/E parts intended for another kit. some even have lathes and make their own metal turned parts.

I don't have a lathe, so I tend to buy aftermarket parts.
 
iv-tecman said:
The boxster, in fact all my car models are painted the same old tried and tested method I’ve used for a long time.

I always prime the plastic first using a good plastic lacquer primer. Halfords sell good plastic primer, as it will protect the plastic from melting, as once I’ve primed I then use automotive lacquer paints or sometimes Tamiya TS lacquers, and lacquers can sometimes etch or even melt plastic. Tamiya Lacquers are formulated to work directly on styrene, but I always prime anyhow.

I sand the primer with good automotive 1200 grit, wet n dry. This means the primer has small scratches, but it’s smooth, allowing the lacquer paint something to bite into, but not etch the plastic, as the primer gives a good barrier against the hot lacquer solvents.

Once I’m happy that the primer is smooth and even I then wash and allow to dry. I also use a pre coat of white or red etc primer for lighter colours. Yellow for example needs a cream primer, white needs white, whereas red needs a pink primer. You need to gauge the paint you are using. Yellow for example is less opaque then black. Black covers anything, so grey primer is fine.

Apply two – three mist of top colour. Allow to dry, then a slightly wetter coat. Allow to dry, cut back with 1500 to smooth the orange peel out. Finish with a further two wet coats. Last coat so wet it almost runs. Then allow to cure off for about a week. (this does depend on type of paint used, drying conditions etc. Auto Lacquer dries within a day, but takes a week to fully cure off, Tamiya TS paints take a little longer, Acrylic nearly a month to fully cure and enamels forever)

Now with the paint cured, you need to fully inspect the final finish. Look for orange peel. This is where you need to decide, do you need to flatten the paint with 2400 grit or can you get away with just using a good compound polish and then wax. It’s hard to explain, but to get a mirror finish you need to ensure the surface is smooth like a mirror, as any dimple in the paint will reflect the light at the wrong angle, and reduce the shine. You get the surface smooth, by sanding and compounds, but

too much and you run the risk of sanding to the primer.

Great stuff - many thanks for that, the end result is VERY impressive !
 
Ah, my hosting is now back online. I can show you some of my work. These are some of my better models, some of which took months to complete. I’d never sell them, as they were built for my own collection. I’d had offers on some of these, but as tempting as a quick few hundred sounds, I just cannot part with them. The sentimental value is priceless.

Nissan 350Z – Tamiya kit. 3 week project

img.jpg


Shelby Cobra 427 AP – Revell kit. 3 month project

img.jpg


Honda RA272 F1 – Tamiya kit. 3 month project, many P/E and metal upgrades

img.jpg


Nissan Skyline R33 JGTC – Tamiya kit. 1 month project

img.jpg
 
Nissan Skyline Z Tune Skyline – Tamiya kit 1 month project

img.jpg


Richard Burns Tribute – Tamiya Subaru Kit currently in progress, many more hours required.

img.jpg


Ok, thanks for viewing all and thank you to the OP for allowing this thread to be so creative. I’ve enjoyed this little indulgence. It’s been a lot of fun, and for those who wonder why I spend so much of my time building these models, don’t ask. It’s an addiction.
 
Back
Top Bottom