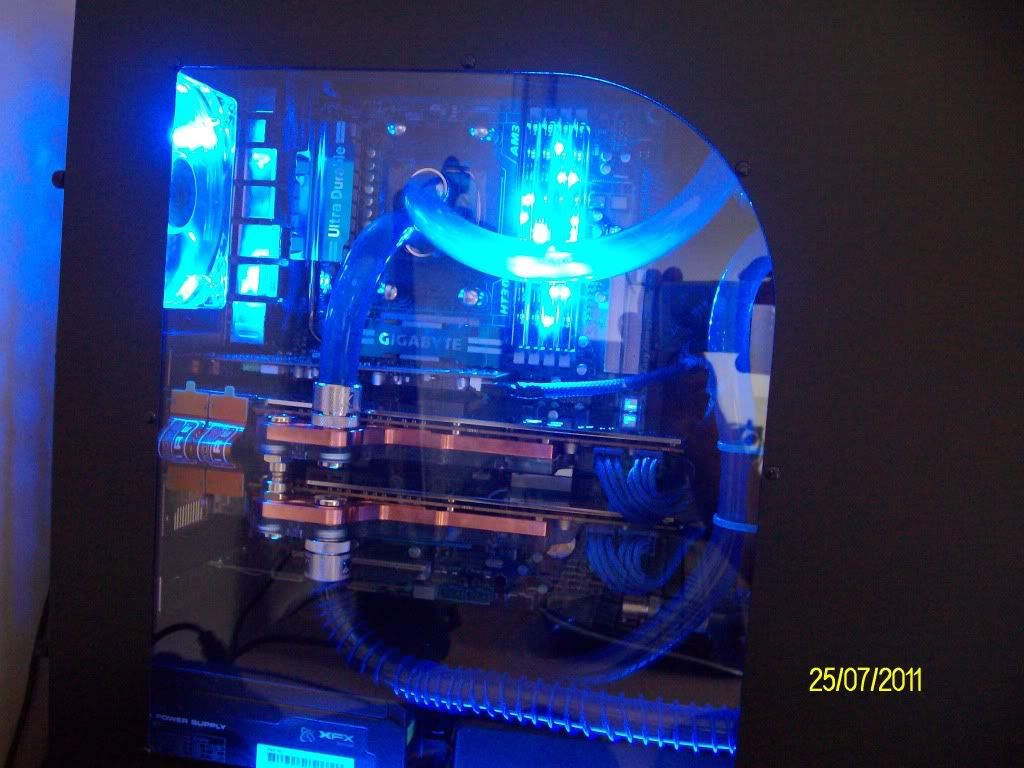
CM 690 First time water cool

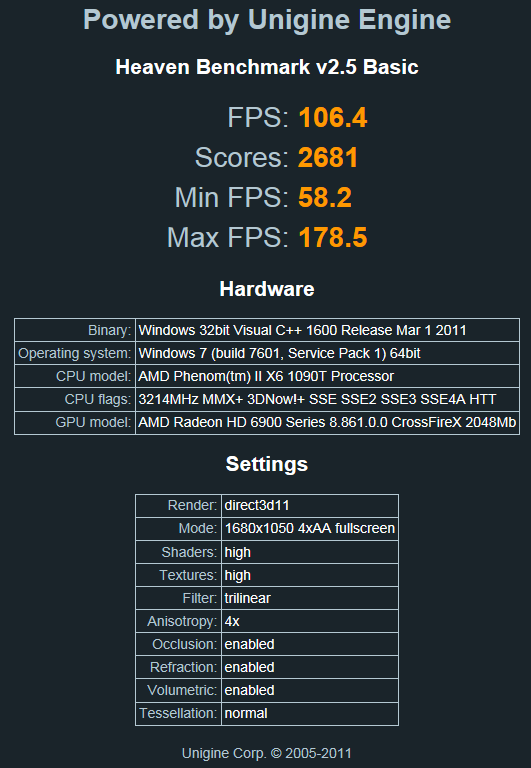
now for the tech stuff a few benchies and temps.
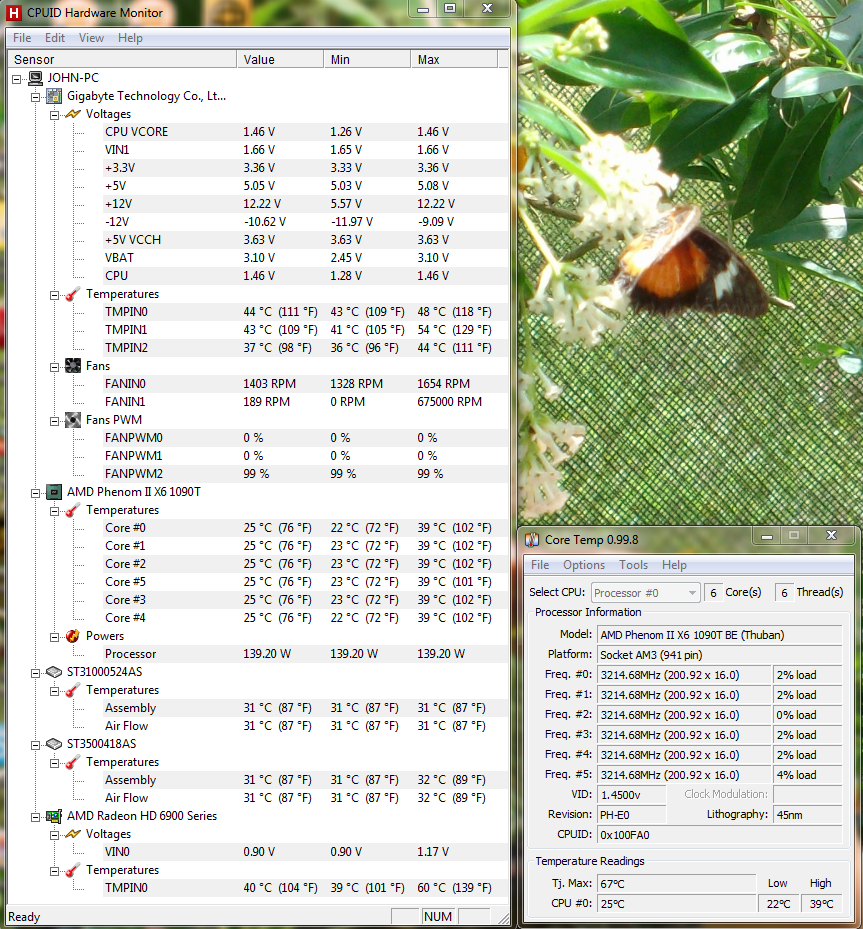
25072011.png

temps250711.png

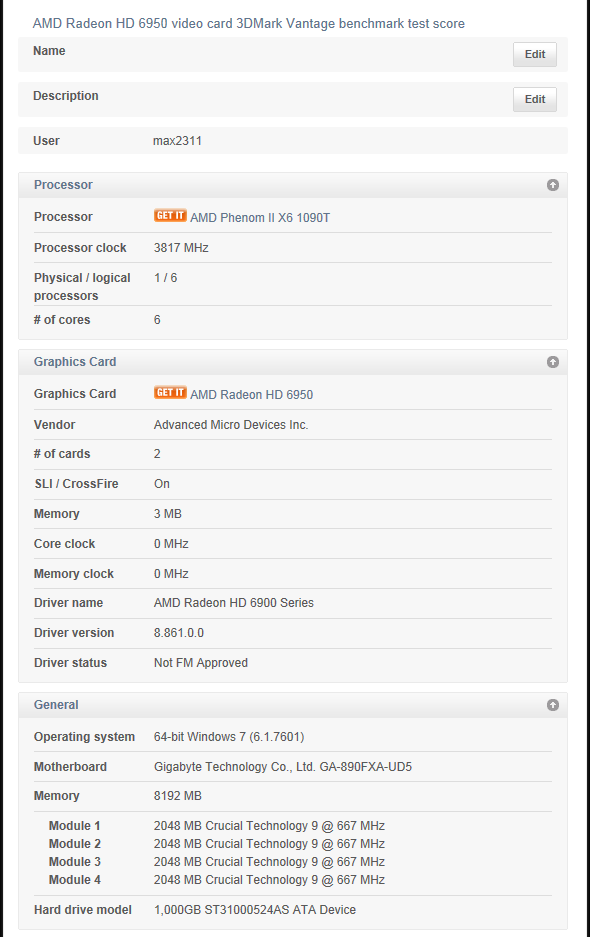
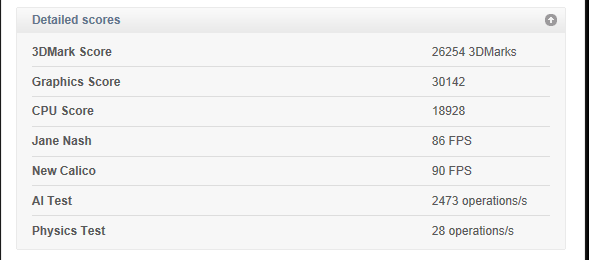
3dmarkvantage1.png

3dmarkvantage2.png

3dmarkvantage3.png

3dmark11.png

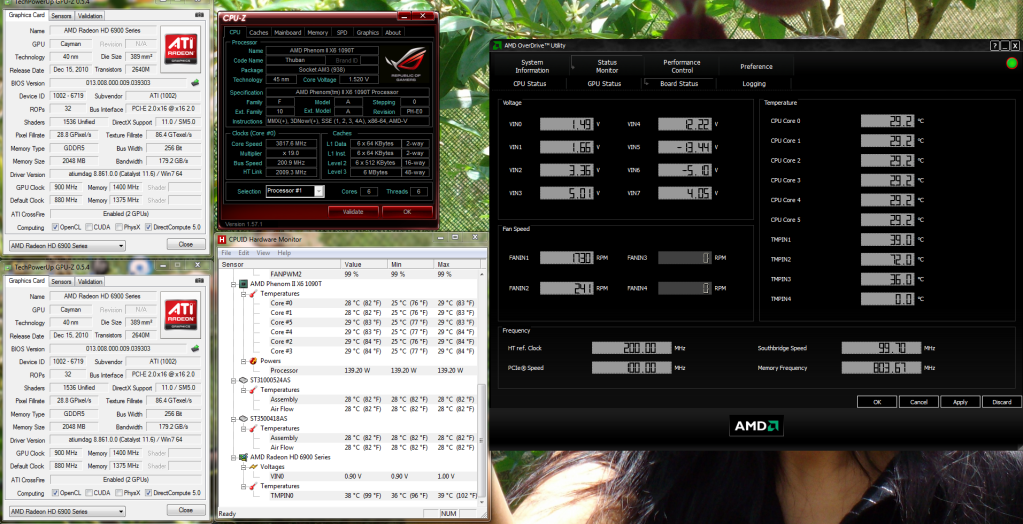
38ghzoverclock.png

I am very pleased with how the system is working, all seems to be running very well. Even with a 3.8GHz overclock did not break into a sweat.
Even with the fans on 100% it is nice and quiet.
 
Looks very nice mate.

One thing I'd point out is that the tube WITHOUT the anti-kink on at the bottom (The tube that's cable tied to the HDD caddy) looks quite harshly bent round to the point where it looks like it could kink, perhaps you could loosen the bend on it slightly?
 
Looks very nice mate.

One thing I'd point out is that the tube WITHOUT the anti-kink on at the bottom (The tube that's cable tied to the HDD caddy) looks quite harshly bent round to the point where it looks like it could kink, perhaps you could loosen the bend on it slightly?
Thanks for that. It is ok but i have put some anti kink coil on to be on the safe side.
 
Cheers guys. It was a bit daunting at first alex2k10. I have been working on air cooled PCs for some years now , so had the basics and with an engineering background i found it went together quite easy. Just took my time and looked at all the other systems on here for ideas and a guide, asked a few questions and away i went.
 
Cheers guys. It was a bit daunting at first alex2k10. I have been working on air cooled PCs for some years now , so had the basics and with an engineering background i found it went together quite easy. Just took my time and looked at all the other systems on here for ideas and a guide, asked a few questions and away i went.

Yeah i have been looking to go into the w/c world just saving up the money now for all the bits and bobs shouldn't be long hopefully.
 
How thick is the acrylic sheet?
Did you cut it with your dremel?
Also noticed that there is a 1200mm fan in the other side of the case, did you cut that with dremel as well?
Hi Avathar77. The Acrylic sheet is 3mm and yes i did cut with the dremel. I used the original vented window as a template so i could use the original fixings as well. As for the fan on the other side panel, the vent is allready there on that case to put the fan. But it has to be a 80mm x 15mm fan as the standard 8ommx25mm will not fit.
Also that fan fits nicely into the GPU bracket that comes with the CM690 II Advanced case.
 
Last edited:
hi mate, i am thinking of changing the acrylic on my 690 II windowed side panel as well, can you give me some more details of the process plz :)

Yes i can do that for you.
First thing i did was messure and source some 3mm Acrylic, there are all sorts of colours and types you can get, including a very smart mirror finish which turns clear when you put lights on behind it ;)
First thing you have to do is remove the 8 plastic clips that hold the vented panel in place. They are simply removed by pushing from the back with a small screwdriver, put to one side and save for later or you could replace with some small anodized cap head bolts and nuts.
Important. make sure you leave all the protective film on the acrylic sheet until you have finished cutting and drilling.
The next job is to cut the new Acrylic to size and drill the new holes in it for the fittings. The holes are 3mm.
How i cut it to size.
I used the vented side panel as the template and clamped the new Acrylic sheet to the original side panel, making sure you get no movement (VERY IMPORTANT). G clamps or snap clamps are good for this making sure you put somthing on the feet of the clamp to protect the face of the Acrylic. I used tile fixing pads.
Next this is where my dremel came in using a side cutter and not the cutting disk as that just melts and burns the Acrylic. With a steady hand gently cut around the side panel then whilst the two are still clamped together drill the new holes for the fixings to be replaced. If you are not confident with this job, then there are places that will cut it for you for a few £.
Next either take the two parts of the plastic clips apart and put the bottom part into the new window and put against the side panel and replace the inner part of the clips into the holes or use the cap head nuts and bolts.
That should be job done :D
awesome mate - thanks

can you tell me if you used a special drill-bit to drill the acrylic because i;ve heard you shouldnt use a wood/metal one because it will melt/crack the acylic

also, what diamter drill-bit?

thanks mate :)
 
awesome mate - thanks

can you tell me if you used a special drill-bit to drill the acrylic because i;ve heard you shouldnt use a wood/metal one because it will melt/crack the acylic

also, what diamter drill-bit?

thanks mate :)
I used a 3mm/ 1/8 hss drill bit. just make sure it is a new sharp bit and you will have no problems. The only time it will melt or crack the Acrylic is if it is an old blunt drill, thhen you will have problems like that.
 
Last edited:
I used a 3mm drill bit. just make sure it is a new sharp bit and you will have no problems. The only time it will melt or crack the Acrylic is if it is an old blunt drill, thhen you will have problems like that.

ok - thanks- and did you drill a pilot hole? ive been told it is better to drill a pilot hole with acrylic :confused:
 
ok - thanks- and did you drill a pilot hole? ive been told it is better to drill a pilot hole with acrylic :confused:
I used the old side panel as my guide and pilot for the drilling, but if you feel more confident doing it with a pilot hole then do it that way. It is best though to drill straight through with the main drill as sometimes a pilot hole may offset the hole to a small margine, unless you have very acuratley measured the hole spacings and got the pilot hole dead centre.
 
Back
Top Bottom