Dripping with style or floody disaster?

Thanks for the kind words Cenedd, much appreciated :)

This has certainly been the longest build I've done. Apart from the Xbox 360PC which took a couple of days it never normally takes me more than an afternoon to have everything built and the OS installed, so watercooling was definitely a step up for me! Pretty sure the upgrade itch is going to start as soon as the next generation GPU's are released, but guessing they're going to be far too expensive for the first few months... Will order more beers and wait for em to drop :D
 
hope it goes well, looking good so far!

Cheers mate, all finished for now until the upgrade itch starts again! Tempted to clock the CPU, but as it's already smashing every game on Ultra I might just wait until I find something it struggles with & enjoy the cooler temperatures for a while instead :)
 
Finally got around to setting up some proper fan curves on the Aquaero. With the new radiators I'm now running the front fans at around 700rpm and the top fans at around 650rpm until the water gets up to 35°C, then the front gradually speeds up to around 1100rpm and the top to around 900rpm between 35°C & 39°C. Then between 39°C & 40°C the fronts spin up to the full 1300rpm and the tops to around 1100rpm. The rear exhaust never goes above 450rpm as I wanted to keep positive pressure in the case (the front fans also increase rpm before the top ones for the same reason :)).

So far it's only got to just over 39°C when properly hammering it and it's silent when below 35°C, so think I've got it somewhere near right even if there probably is still room for improvement. As long as it remains both quiet and under 40°C though I'm happy :)
 
Ah cool, will have to give that a download later :)

Haha mine was more along the lines of barely tolerable noise > full panic mode! Was lining up some better / quieter fans but glad I spent 20 minutes playing with the Aquaero instead, a far better solution than throwing £45 at 3 good quality fans :)
 
When it comes to looks I found a much cheaper way of improving them: Hide the Aquaero behind a cover made out of an old PC case :D

A flow meter is very tempting though, there's always that nagging thought about 'what if the pump stops' so may have to invest in one next time the loop is apart :)

Aqua Computer seem to have a thing for selling everything in bits though, even their LED strips come without the cables needed to plug them in... Very useful!!

How to solve a problem like Aquaero...
IMG_20160106_174129.jpg


Hide it :D
IMG_20160109_134111.jpg
 
No problems, those pics were taken before the loop was changed and the filter added :)

What sort of VRM temps do they usually run at? It's boxed in but does also get airflow from the PSU, which should help a little bit (that's partly why I left the gap around the top, apart from looking better). Will have to check to see what it's hitting next time I use it.

That's not a bad plan, mounting it behind the motherboard tray will also give you the added bonus of keeping it away from all the hot air from the other components as well as keeping it & the cables out of sight, so not a bad shout putting it there!

They are a bit of a joke doing that but EK definitely annoyed me more with the multi port top for the reservoir. "Oh, you actually plan on using it sir? Well you'll also need to purchase an internal tube. What's that, you want to use one of the top ports? That'll be a few more quid for an extender then please... Oh yes, and you'll also be needing a 9mm allen key if you plan on actually fitting the extender. We just so happen to sell one..." All the extra money was annoying, but the delays waiting for the internal tube and then again for the extender / allen key I didn't know I needed was beyond annoying!
 
Awesome, cheers mate, will fire her up later and see how hot they're getting. Could possibly improve it a bit by tidying up the cables to allow more airflow from the PSU though if it's getting too hot, unless it's boiling then a heatsink will definitely be ordered :)
 
Just checked and mine hit the mid 50's... Just going to assume that's OK and never look at it again! The temps did seem to go up and down very quickly as the fan speed changed though :/
 
That certainly sounds correct. I played the most stressing game I own for an hour to get all the temps up and air inside the case hot and then switched back to Aquasuite to check the 'worst case' temps. While the fans were still at a fairly high speed the temps were all high 30's to low 40's, but as the fans slowed the temps quickly shot up on all 4 channels.

Currently I've got it like this:
1: 1 x 120mm fan at 50% - 100% power
2: 2 x 120mm fans at 50% - 100% power
3: 2 x 120mm fans at 40% - 85% power
4: 1 x 120mm fan at 40% - 50% power

Will give the manual a read later and check how close to max they're getting :)
 
That's good news if they're fine running at over 70°C, plenty of headroom for when the ambient temperature (hopefully!) goes up another few degrees :)

Think if I had the 6 I would heatsink it as it looks a lot nicer, but not sure it'd be worth the effort on the 5, especially as it's now completely hidden. Will check again once we get a bit of sun in Wales just to make sure though. Very true about watercooling not being necessary, but it does look damn nice when it's done properly :D

On a completely different subject, if I chucked the PC up for sale how much could I realistically ask for it? Unless anyone on here wants to make me an offer :D

Got another build idea in my head that's 10 times as good as this one but would also completely drain my bank account 3 times over...
 
Unfortunately I think the only components that I could carry across would be the PSU, CPU and the 360mm radiator. Planning on building it in a Parvum ATX case and with hard tubing, so even the watercooling fittings would have to be changed :(

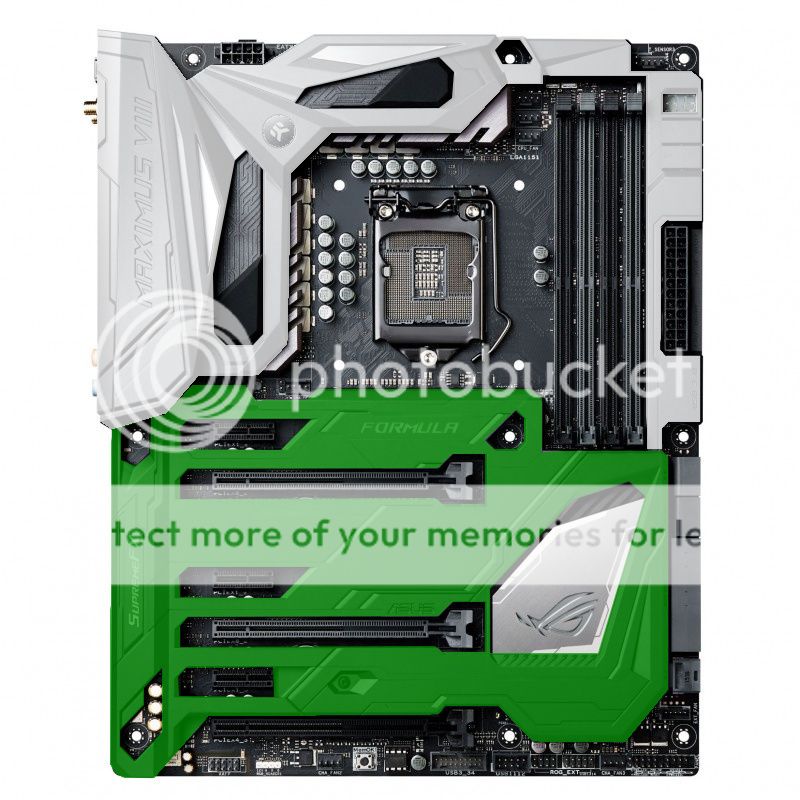
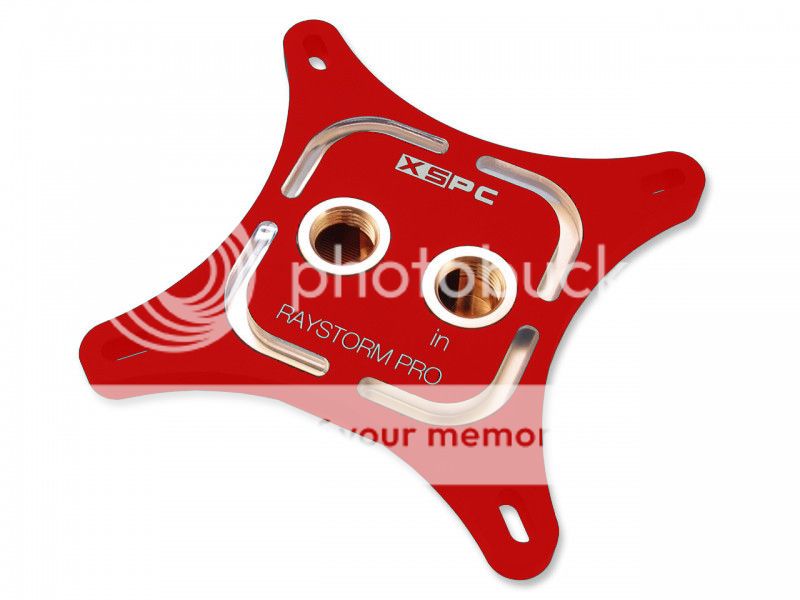
Won't give away some of my more random / daft / innovative ideas, but this should give an idea of the theme :p

AsusBoard.jpg


XSPCblock.jpg


That ain't a bad looking rad, reckon the 45mm thick one would look pretty sweet as a top mounted rad. Hopefully doesn't take an hour to flush all the crap out either! :)
 
Given your location, you're going with..... an Italian flag colour-scheme? :p

Silly question for you: I'm looking at an Enthoo Evolv ATX....but I want to stick a honking great rad on the off-side panel. I'm thinking a Mo-Ra 420 with 4x320mm fans...cos the only thing that beats overkill is absurd overkill :D
The thing that worries me is that the side panel (the cable-spaghetti side, not the window side) seems to be held on with only a couple of pins at the back and some friction clips to hold it closed. Is it stronger than it looks in the pics or if I hang about 8Kg of rad on it is it just going to fall off? :eek:

Yep, going for a pasta & meatballs based paint job, with a few slices of pizza thrown in :p

Well there's overkill, and then there's... Erm... Yes absurd overkill! :D

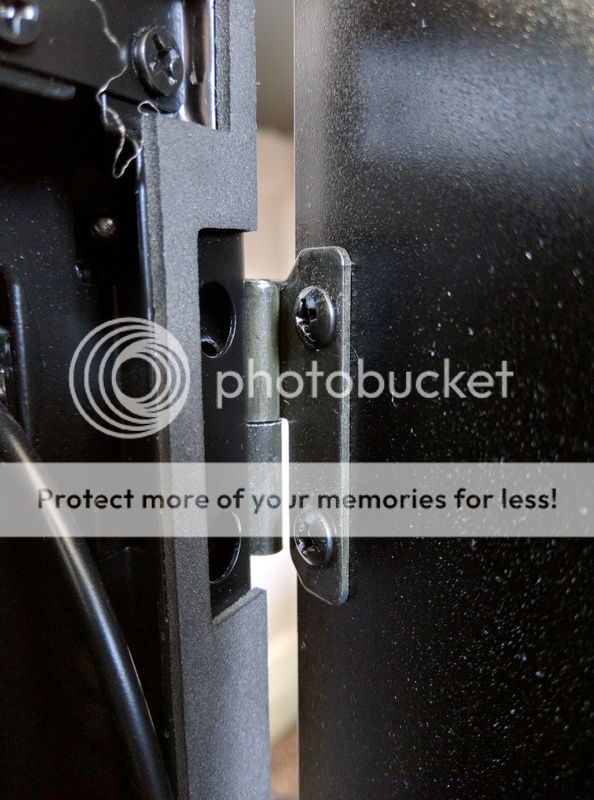
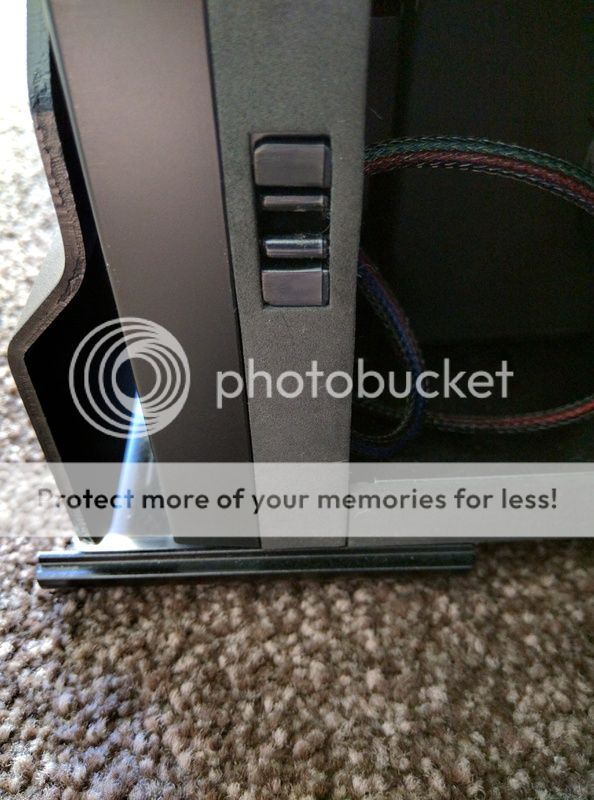
The side is a lot stronger than it looks, but the only thing that would worry me is whether the weight of the rad would be enough to keep un-clipping the top pins and pinging the door open. I just tried opening the door and putting a bit of downward pressure & twisting it and it's definitely sturdier than it looks so I personally reckon it could take the weight, just as long as it doesn't keep opening the door... You could easily add a tiny screw to the top and bottom of the panel at the front edge though to solve that, and also add a bit more strength to it.

The pins holding the door closed, a lot stronger than they look
IMG_20160225_091358.jpg


IMG_20160225_091425.jpg


These feel a bit 'loose' as you hang the door, but seem to be able to take a fair amount of force without any give
IMG_20160225_091549.jpg


Door also sits on a fairly long ledge on the feet, which should help take the radiator weight
IMG_20160225_091214.jpg


Could also add a screw into this panel to keep it closed :)
IMG_20160225_091414.jpg


Hope that was of some help, now I really want to see if it works!! :D
 
There's definitely got to be a build log, even if it's just to show off the mental cooling :D

That's another good option ditching the panel and mounting the radiator direct, although could be a hell of a lot of work to make it look right... Try mounting it on the panel first then go direct if it all goes **** up? :p Pretty sure anything is a legitimate business expense as long as you get away with it!

Be rude to go through all that trouble of mounting the rad and then not use hard tubing... <- excuse made ;)
 
Sooooo, very small update once again to project Went Better Than Expected But Still Tinkering: New fans for the front rad! Crazy I know...

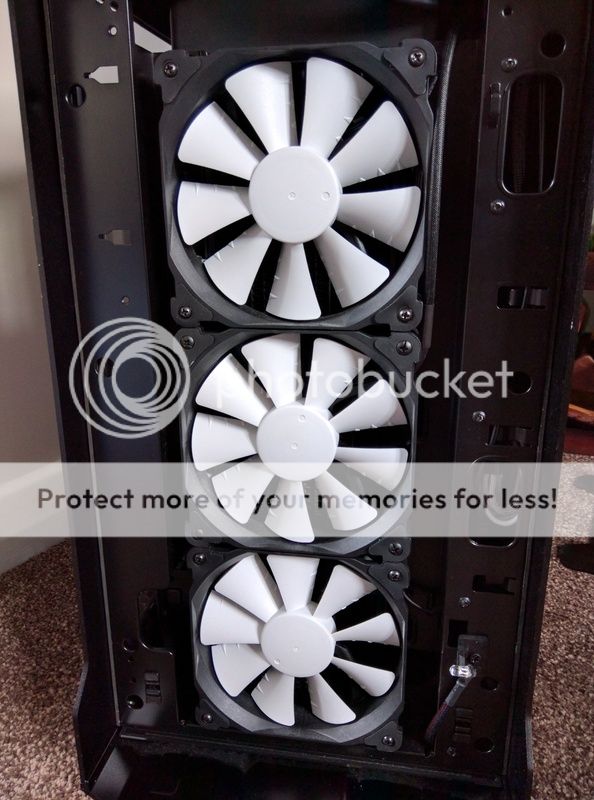
These fairly decent fans coming out:

My basket at Overclockers UK:


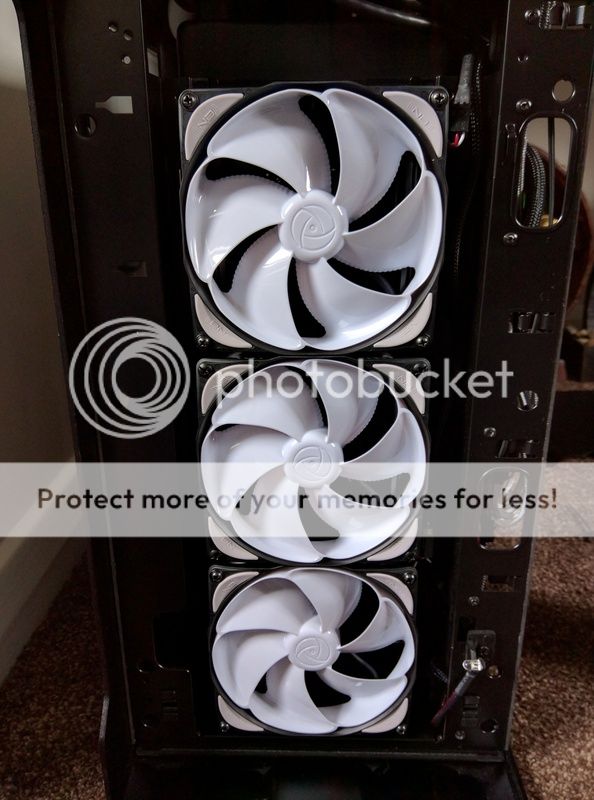
And these going in to take their place:

My basket at Overclockers UK:


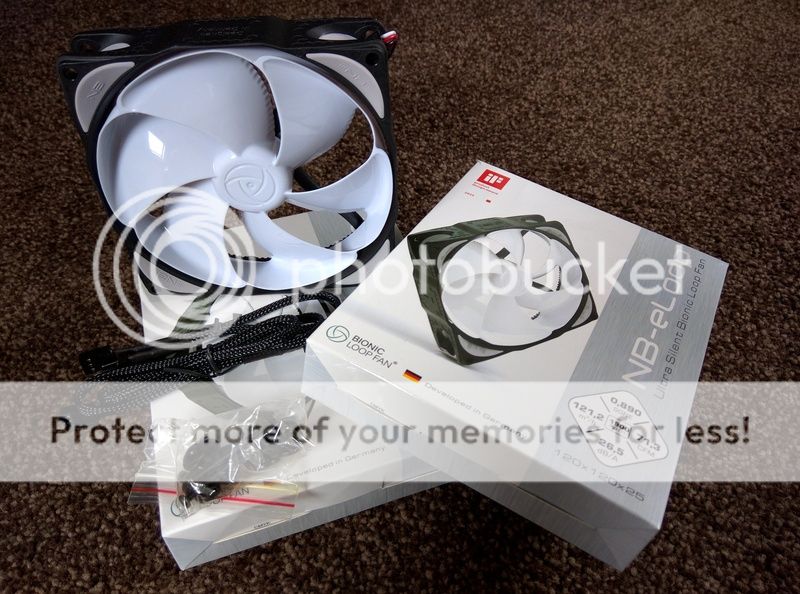
First impressions of the Noiseblockers is very good, especially liking the different length cables supplied. Makes no difference in this build but in a smaller case it's good to have the option.

IMG_20160421_141143.jpg


Time to switch em over :D

OLD
IMG_20160421_141303.jpg


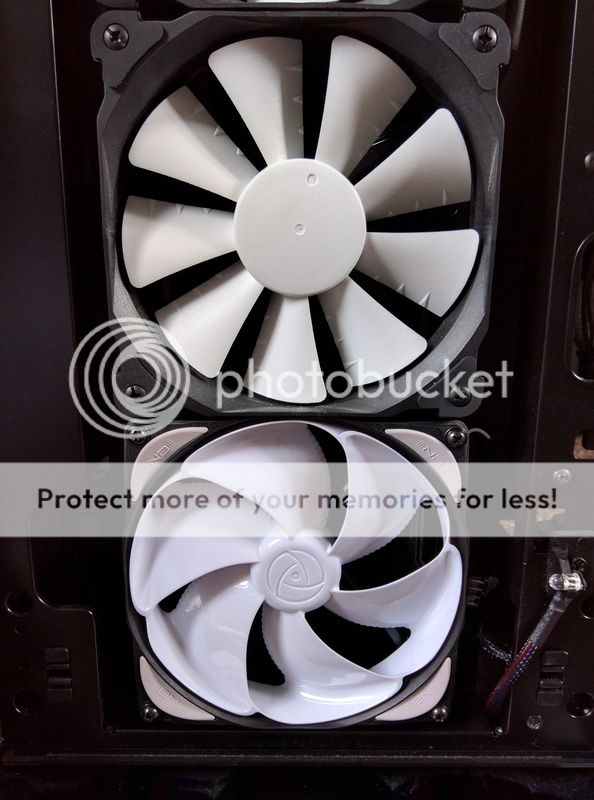
COMPARISON
IMG_20160421_142032.jpg


NEW
IMG_20160421_143641.jpg


So the million dollar question: What are they like?!

Well, with the fan curve set slightly lower to keep noise levels approximately the same as before, they push out A LOT more air. Yes they're still running a bit faster so they should, but the air / noise ratio is massively improved. Good times! :)

Maximum Temps

Temps measured after properly hammering it on Project Cars in a thunderstorm, the one game / setting I've got that absolutely smashes the temps up.

Water 41°C+ > 35°C
CPU 60°C > 54°C
GPU 40°C > 36°C

Also had the benefit of knocking a few °C off both the motherboard temps and the M.2, so can't complain at that!

The only slight problem? They do ramp the ol' Aquaero up to a not too insignificant 75°C! Oh well, I'll take punishing the Aquaero a bit more if it means the CPU, GPU, MoBo, M.2, my ears etc all benefit :D
 
Haha no worries at all mate, still a good 20°C to play with yet :cool:

I would LIKE to put a heatsink on it, but knowing where it's hidden I just know it's going to be an afternoon of hassle trying to get to the bloody thing to do it, then an hour of trying to cram all the cables in again!

Can't beat a bit of acrylic porn, just wish you'd hurry up with it so we can see how the computer attached to the radiator performs :p Haha that will look proper tidy though. If you're replacing the whole PSU shroud / floor have you thought about putting an EL panel underneath to glow through the built in pipes as well? Could make quite a cool light box... *Gives you more headaches* :D
 
I've always liked the idea of using EL panels as they're stupidly thin and can also be cut to shape, so just look stupidly easy to work with. Got to be worth picking up a cheapo one off eBay just to test it out, only cost couple of quid if you end up binning it and going LED :)

Damn, is there anything you're planning on keeping? Sounds like a proper 'lob it all out and start again' project! Liking the sound of those plans so far though, just trying to visualise it in my head whilst gormlessly looking at mine :D
 
Haha you're going to end up with enough spare parts to build him a little brother at this rate! Still, if you're going to go through the effort to get the acrylic custom made with pump tops etc built in then I guess every other little detail has to be bang on, otherwise it could let down the block of acrylic awesomeness!

Never bothered with taps on my filter as I guessed I'd just clean it when the fluid is changed, but after seeing some of the issues others are having on here it may get checked a bit sooner than that...

It's seriously annoying isn't it when something as daft as some 2mm pins can cause so many issues. Easier to get complicated parts custom made than get some simple 2mm pitch pins :D

Still, once it's finished you'll be happy you took the extra time to get it right :)
 
Back
Top Bottom