First Home - Renovation Project

Associate
OP
Joined
8 May 2013
Posts
280
Location
Cardiff
2e3v802.jpg


Came home to find the cabling was messed up :( The left and right speaker cable wasn't symmetrical and he boarded over the sub-woofer cable in the corner, good job he didn't plaster today! But apart from that, you are looking at a 5.1 Surround sound setup, power socket hidden behind tv, 3 X single sockets just in case the front speakers and sub are independently powered ;) and 3 X cat6 cable which will feed HD content from my centralised AV system under the stairs.

2d0f98o.jpg


Coming on nicely

2sb8kr6.jpg
 
Last edited:
Associate
OP
Joined
8 May 2013
Posts
280
Location
Cardiff
The builder is ****ed off, I've decided to take down a wall just before he was going to skim it :) The door lining is too small, I want a 30" opening to match the rest of my doors (as opposed to 26") + its not centered properly and will look out of place when I fit the kitchen. This will be rebuilt and plastered by Saturday, hopefully...

2r4mlj8.jpg


The rest of the room is taking shape now

ncxf7r.jpg


9740bb.jpg


This area will be rebuilt, I'm waiting for a bracket to arrive so that I can remove the supporting post of the stairs and open it up for my av system and server ;)

2yn1mya.jpg
 
Last edited:
Associate
OP
Joined
8 May 2013
Posts
280
Location
Cardiff
The kitchen doorway is now center and larger (a couple of inches make all the difference ;))

301euci.jpg


8x3lw9.jpg


ek54ex.jpg


erby4z.jpg


All the plastering will be finished by Tuesday, then onto to finishing the electrics, fitting the radiators and flooring
 
Last edited:
Associate
OP
Joined
8 May 2013
Posts
280
Location
Cardiff
Small update, was too dark to take pictures of the kitchen progress

dcwi9s.jpg


Frustrating issue with cable, the Cat6 is too long and the speaker cable is really limited - with either have to place the AV receiver high up to reach them, or terminate the speaker cable into a audio wall plate first...

9ftct1.jpg


on a brighter note, the gap under the stairs will fit a server rack perfectly ;)
 
Last edited:
Associate
OP
Joined
8 May 2013
Posts
280
Location
Cardiff
Coming along niceley here, i love the look of a room with a fresh coat of plasgter! I'm hoping to get my kitchen to where yours in within the next few weeks, im running out of space though, all my tools and things are currently in my living room which is due to be carpeted soon and dont know where to put everything after that.

Do you have an idea of a completion date for the full project?

I would have finished by now but ended up splitting from the girlfriend just before December which ate up some of my fund to finish the kitchen... so just another twist in the plot to keep me busy :) But should be back on track this month, hopefully another 2 months work before completion.

Bloody love threads like this. Currently saving like a mad man for a deposit for a house and have been toying with buying something that comes up that needs a lot of work for cheap as I like the challenge and freedom you get with something like this.

However the Mrs is fancying something that needs minimal work doing and just needs repapering/carpeting.

I can defiantly relate to this, so glad I went ahead with the renovation though, far more fun! Try convincing your Mrs that by renovating a property, you can avoid the risk of property developers who have more than likely cut corners in areas to maximize profit (basic kitchen quality, lack of fire-board under the stairs, high foc paint, bad plumbing blah blah ;))
 
Associate
OP
Joined
8 May 2013
Posts
280
Location
Cardiff
Any updates on this project?

Awesome so far. Need an update though! :)

Started painting the undercoat which has really amplified the sense of space in the rooms, I think I will focus on neutral colours throughout for now. Considering secondhand parquet flooring in the living room...

2gt51es.jpg


wwlv6b.jpg


Some of the bathroom furniture has arrived:

jjn1u8.jpg


mj4dgl.jpg


2mwbbwg.jpg


Took the bathroom wall away as it was unsafe, was so easy to kick down... will be nice and easy to fit the bathroom now :)

35kpz0j.jpg


2w4limr.jpg


2yxncpt.jpg
 
Last edited:
Associate
OP
Joined
8 May 2013
Posts
280
Location
Cardiff
Big update :p So quite a lot has happened since my last post...

10pzvch.jpg


17e647.jpg


We decided to go for 7" skirting for the rooms, using Ronseal Colron Knotting solution to seal the knots from leaking/discolouring and went with a egg shell white for the main coat - it took three coats due to the knot seal!

Coving, Electrics and Painting

20gxufs.jpg


10qhs9j.jpg


2wdqekl.jpg


2exu5fo.jpg


ng2368.jpg


2m44wax.jpg


21lk8bb.jpg


Kitchen,

aeb5oi.jpg


9sgj20.jpg


The 1st fix electrics were a total **** up, so I needed to butcher the walls and have the new sparky re-d the work. I'll post out kitchen designs in a later post.
 
Associate
OP
Joined
8 May 2013
Posts
280
Location
Cardiff
Damp issues!

In my first post I mentioned that I was going to start by dealing with the damp & water penetration, well this has come back to haunt me. I should have focused on that but instead it slowly went to the back of my to-do list...

2lsb6uh.jpg


21o6kgp.jpg


2zzrs7b.jpg


The guttering and fascia board was completely gone and needed replacing, it was even starting to degrade the roof plate!

wiwtnq.jpg


Guttering sorted, next job is to replace the rotten windows and sort the internal walls out

f3rz1d.jpg
 
Associate
OP
Joined
8 May 2013
Posts
280
Location
Cardiff
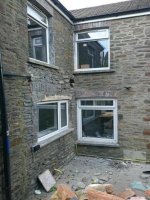
As you've seen from my other posts I don't do things by halves :) so my attention is going on the bathroom now... I'll start by drying out the walls; they are so damp the lime between the stone is like soil.

wjg85c.jpg


2093xhe.jpg


2584cie.jpg


I didn't realise how beautiful the stone work was behind the render, I'm considering turning one side into a feature wall.

2vsm1k8.jpg


Concrete rendered the damp wall using a SBR slurry and waterproofer.

ic09b4.jpg


k3kpwi.jpg


2yl2umo.jpg


New windows fitted, double glazing throughout now :)

21kj79k.jpg


oEOQ9WD.jpg
 
Associate
OP
Joined
8 May 2013
Posts
280
Location
Cardiff
You sir are a machine, kudos!

Haha thanks, it keeps me busy.

Stone wall,

14mayab.jpg


So me and the mrs have decided to keep the stone wall as a feature instead of tiling over it like previously planned. We are going to get it sandblasted and traditionally point it with fat lime putty motar.

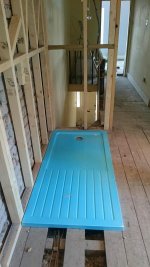
I stud framed the shower area for a few reasons,
1. The shower tray will fit perfectly for the cement board, seal, tiler etc
2. We want the shower mixer installed in the wall by the walk-in part to prevent getting caught by the dretcher as it warms up
3. I initially went with dab plasterboard which isn't ideal in a wet area or for holding up heavy tiles long term. It wasn't worth risking it with leaks

2ega9m9.jpg


33xv442.jpg


1zdpvd2.jpg


2eckh2s.jpg


As you can see, perfect snug fit now

binl6Dh.jpg


Mrs picked up the lime motar from Tŷ-Mawr in Brecon, we've gone for the chesire colour.

2v2uknn.jpg


voybue.jpg


Hopefully it will suit the stone work lol
 
Last edited:
Associate
OP
Joined
8 May 2013
Posts
280
Location
Cardiff
We prepared the room for sandblasting but it didn't make much difference - The company used a German grit called Cerablast (Mineralische Strahlmittel)

24y6978.jpg


bgcxp5.jpg


2s82p7t.jpg


2irnt4o.jpg


ezemx0.jpg


Outcome :) Hopefully getting it pointed tomorrow

snjjus.jpg
 
Last edited:
Associate
OP
Joined
8 May 2013
Posts
280
Location
Cardiff
We finally found a decent plumber that wasn't aiming for early retirement! One guy quoted us £2300 labour for 5 days work... At £460 per day I was tempted to drop my IT career and go study plumbing haha.

2qn9oo8.jpg


I always like to supply my own materials as I like to do my research and get high quality parts (and it still normally works out cheaper :p) For anyone doing their plumbing soon I highly recommend investing into decent fittings and traps, I went with McAlpine for the shower, bath and basin traps - The parts are heavier, better designed and far superior quality compared to the ones that came with the bath and shower. I don't want to risk any leaks as I'd have to go through the ceiling as I'll be plying and tiling the floor.

nps488.jpg


If you want TVR's on all your radiators make sure you install a automatic bypass valve to control the water flow through the boiler and to limit circulation pressure when other water paths are closed. I went with a Honeywell DU144.

ivbejc.jpg


noh4ep.jpg


2hqs8ir.jpg


2ni1cec.jpg


2wroncn.jpg


b3s8jq.jpg


2u7yijb.jpg


I really don't like the radiator between the window and door as it takes up the whole wall, so I'll be removing it and getting a 450 x 1400 P+ for under the window instead. I'll keep this one for my next project ;)

34940a1.jpg
 
Associate
OP
Joined
8 May 2013
Posts
280
Location
Cardiff
As we are tiling the floor, I decided to replace the flooring with 25mm WBP plywood (water and boil proof) and add noggins. The main reason for this was to minimise deflection that would disturb the tiles and prevent adding a step into the bathroom...

Tiling brands Mapei and Bal recommend sealing the back and edges of the plywood before tiling (this includes WBP version) to prevent any swelling from moisture but their products were far overpriced for this. I decided to seal ours with a polyurethane vanish which is a liquid plastic so it should do the job.

ngpnqc.jpg

s477m9.jpg


I bought classi seal for the shower tray which is a extra layer of protection if the silicone fails in a few years. I was hesitant that it might be a snake oil product but I was impressed with the seal once we fitted it. Highly recommended.

317e3cy.jpg

244qsd4.jpg

14kad21.jpg

118k947.jpg


Cleaned out the joists, they were full of gravel and dust from the sandblasting and building work and added fresh insulation after fitting the noggins and plywood.

5clt00.jpg

wuq69l.jpg

28s664h.jpg


150mm off the last piece of plywood :(

2mmvbev.jpg


Mixed reviews on magnetic filters, I know a lot of large companies like British Gas install them with the boiler these days so i figured they may have some merit? even if it just collects some gunk in the system from gravity. I went with the Sentinel Eliminator because its got a leak free filter design, whereas others such as Fernox have been reported to leak (from reviews online).

262kv94.jpg


I'll also add some X100 Inhibitor and X300 cleaner as a part of the service once the radiators are filled.
 
Last edited:
Associate
OP
Joined
8 May 2013
Posts
280
Location
Cardiff
Just read the thread, Great work! doing my own place up at the moment.

Also went for the classi seal and then also put a latex membrane over the plasterboard and classi seal for extra extra protection.

Stone wall looks awesome!

That's what I'm looking into next, what membrane did you go for?
I'm considering Everbuild Aquaseal or Mapei Shower Waterproofing Kit
 
Associate
OP
Joined
8 May 2013
Posts
280
Location
Cardiff
Missed this thread first time round, looking great. Love that you have decided to leave some of the brick work exposed.

What do you anticipate a completion date?

Right now without the kitchen installed (50/50) - We should have the majority completed before Christmas.

Used the Mapei stuff, Nice easy job to do. Just dont make my stupid mistake and wear some gloves or you will have latex hands for a few days :D

I've ordered the Everbuild product after watching the product review online, seems good value for money and looks very similar to the bal and mapei alternatives. Haha will do mate!

https://www.youtube.com/watch?v=hpoOHm4LiUE
 
Associate
OP
Joined
8 May 2013
Posts
280
Location
Cardiff
That classi seal is good for bathtubs I tend to buy showers with up stands if possible though. Also would have been worth chipping away some of that aquapanel for the shower tray to dig into.

Always a good idea, our shower tray went in before the boards went on so they rest on the edge of the tray.

I was tempted but without the uprights built in, I'd be at risk of the silicone failing under the tile/board? I needed a flat surface for the classi seal to bind to and combined with the Everbuild aquaseal it should be suffice (I hope!).

You've got me over-thinking again now... haha
 
Back
Top Bottom