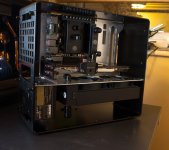
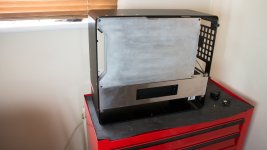
[In Win 901] Celestial

In other news....

IM OFF TO TAIWAN!

prodWKW.jpg

Im taking Dave too....not sure why other than he has working knowledge of Taiwanese jails. And he can allegedly make tea like a boss.

Im not sure what they are going to make of the longnoses tbh....
 
pff, my tea making skills are tragic. However, I can cuddle you when we get sent down.

I think you will do well in a Tai prison,bet they luuurve the Big Bear look......

Side note: Justin Ohlson is up for bevvy,I think some dye bombing of beer is very much game of the day....or the old faithful of biocide in the beer,gives them the roaring sphincter of doom for 3 days.....
 
2726198


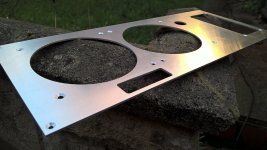
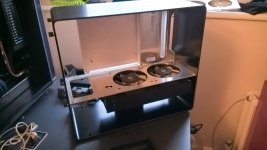
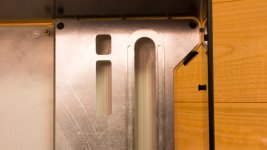
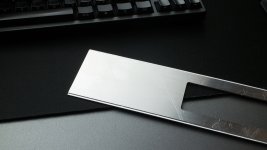
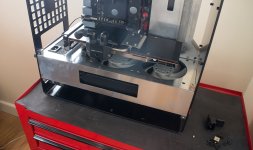
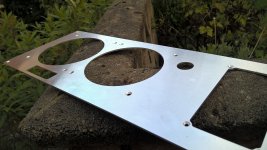
While the house was quiet I thought I would push on and cut the midplate after ruining the first one as the badly made video will explain.

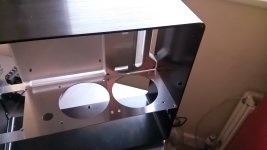
I used 2mm Alu and I will be mounting the assembly using PARVUM's modding cubes.There is another plate for the underside ,together they will be the mounting points for the covers that will mimic the Celestial door sills.

I apologize for the poor photo's....

Ae5pOBw.jpg

IUeRTOt.jpg

0WNbcD5.jpg

A1XMuTs.jpg

hVn61H1.jpg

NfsHIZm.jpg

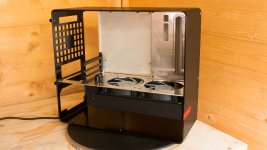
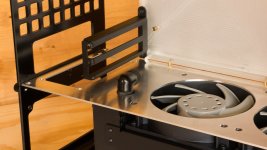
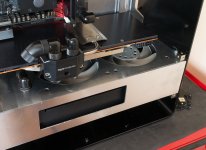
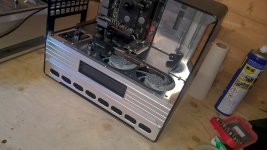
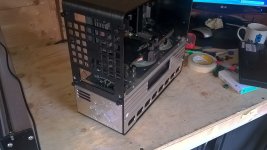
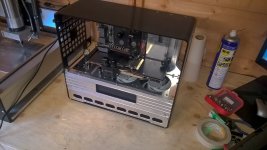
The whole rad section will be enclosed,there will be the end of the PSU exposed but the wiring will be routed up into the midsection,it will stay nice and clean to look at.

Here is a poorly made video for you to laugh at.

https://youtu.be/HG5Cw_3-IKc
 
Last edited:
pJU7ZWq.jpg

I couldnt leave the last post like that.....I had to bolt it in and see whats what.

First things first,while the tray was out,I added a fill port on the leading edge of the acrylic .

xeMxeT0.jpg

Nice and unobtrusive.

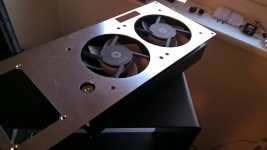
Then I drilled out the panels,added inserts into the acrylic and bolted it all back together.

pOoKvTg.jpg

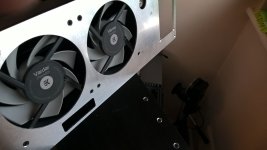
I flipped the Vardars over as no one wants to look at fan hubs,I wanna see dem whirly bits!

2 Things in this pic,I didnt allow for the skewed ports on the Predator so the fitting is slightly over. The other is that Im going to have an awesome time trying to get that PSU screw in....

You can see the inserts in this pic really well too.

R83Gqrd.jpg

The res feed to the pump will be coming out at this point of the res..

khXD6Fr.jpg

Not a lot of room but enough to get the job done.

So.....well......I couldnt resist getting some hardware shots in too....

W1gJ0ZI.jpg

TSKs6Ug.jpg

a9kGs5K.jpg

Now I have to make the bottom section of the midpanel and the two side covers,everything is run inside that and it will also form a structure for the aforementioned Celestial sill bits.

I think its taking shape really well,as always comments welcome!
 
Just a small update,a Silverstone SFX 600w has arrived....

And the PSU fits nicely with enough room to get the cables in!
Tight tho.....very tight indeed! More machining this weekend,bottom panel,PSU cover plate and hopefully the sides of the 'rad box' too!


NW11MzS.jpg

All of this is hanging off those inserts,only 3 for the midplanel! Im converted!
 
ndNpmLU.jpg


Machined the sides of the rad box today,these are the base structure pieces,there are more decorative pieces going over the top,there is also rebated acrylic windows going in the hole,they will be back lit with LED's instead of EL paper like the mobo tray.

Made a 2.2mm rebate in the back side to locate everything nice and square,the finished panel will be mounted with external 5x12mm L section. The modcubes are PARVUMs version and are very handy,I chose the mounts to be external to the box so I can double them up as door mounts too!

UYBCZ5D.jpg

J5wZiyb.jpg

6DfyOQb.jpg

gdpQBFJ.jpg

Im cramming as much in now as I have a build for Corsair to do which is going to take up a pot of buildtime in the next few weeks,looks to be interesting tho!
 
The system is evolving nicely, you're right about the Pavrum modcubes as they don't draw too much attention to them either so the system is still the main focus of attention.
I also love how everything is made to precission on this build. It truly goes with the Rolls Royce mentality of nothing but perfection :)

And although it might be difficult, I'm glad about the Corsair project as it means more updates of Celestial for me to look at :D

They were the easiest way of doing it tbh. :D
Once its painted you will hardly see them.

Really starting to shape up well. Enjoying seeing the progress you've made so far :)

Thanks,its making good progress!

Yes, Goodwood :)

Great job on this enjoying watching it come together.

Dont sue me! :D

I could never own a Rolls but I can certainly stand for a good while and stare....

Looks crap and I am not jealous in any way shape or form of your machinery and cad skills. =(

You are jealous of all my base...which belongs to me.

Hey...is it me or is he copying my Aquaero mounting idea bit with better tech?! ;) Can you copy my idea of mounting massively overkill rad on the side so I can see how you deal with the tube routing problem and copy you?! :D

I dont copy.
Im not using an Aquaero.
Passive rads made of Alu are not my thing.
Mounting a rad on the side or indeed,the Aquaero mount are not new ideas.

If i was you,I would make a manifold to do all the hardwork on your build.
 
It's the rectangular hole in your PSU shroud that I meant. That's where I've just finished filing a hole to mount an Aquaero on my build. For clarity (which is sometimes difficult on text forums), I wasn't seriously suggesting you were copying me and wouldn't mind if you were...slightly annoyed that you're doing it better, but that's my problem ;)
The rad on the side isn't a new idea but my current difficulty is getting the coolant connected neatly by going through the 'spaghetti space' rather than going fully external. Hence my suggestion that I'd be pleased if you happened to solve that issue for me! :D
For the record, I AM jealous of both your CNC and your ability to do impressive things with it.


Im posting short as Im nursing flu.

If you have time and talent then try acrylic tube and bulkhead passthrus. Or knock something up in Sketchup and ask the PARVUM guys to make it for you?
 
Time: not so much but at least the first stage of this can be done without disrupting what is basically my work and games (for the time I don't have) machine.
Talent: no but I've done the basics and I'm learning on the job :D

Planning to use acrylic for most of it but need some soft tube to allow some flexibility to open the side door. Did come up with a devious way of making a hinge with four 90 bends but almost certain that three points of swivelling for each of two hinges would have enough resistance that things would break before the door opened.

I'd love to do some custom stuff with Parvum but unless I completely reimagine the design, there just isn't the room.

Raw acrylic would work fine but having trouble finding a grommet that'll fit the 3mm thick panel. Grommet preferable anyway but now a necessity as the pass through hole that isn't visible is perfect and the one that is, isn't. Sods law really. Got a few ideas on the drawing board but it's going to be a case of what's available and what fits.

Main thing was to apologise for coming across like I was having a go. Certainly not what I intended (big fan of your projects) and I ought (from past bitter experience) appreciate how easy it is for text on a forum to have a completely different meaning read into it.
Hope you get over the man-flu soon. If it's any consolation, I'm up next...my wife has it currently - obviously the lesser lady-flu ;)

I didnt take it like that,im just f@:ked from flu. :D

Im not known for beating around the bush,I certainly say what I mean,dont worry about that.
 
khrS4Np.jpg

In a small update,both rad box panels are nearly done,along with the exhaust panels!
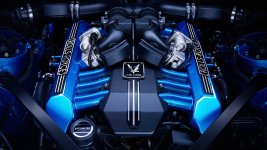
The rad box has detail work mimicking the rocker covers of that amazing engine. They will have mesh backing I think to finish the look.

Here is a view of that amazing engine,you can see what I have run with,coupling that with the door sills gives me a nice bit of detailing to add substance.

qL4nW0U.jpg

8fWRtHe.jpg

SoOSkqr.jpg

I have made a booboo...I thought the engine was a v16.....and it isnt,its a v12 so the design of 8 ports per side needs to be changed to 6 ports per side... :rolleyes:
So...I have ordered more Alu to recut the lower panels and cut the replacement top door section.


I really should check things more often.....
 
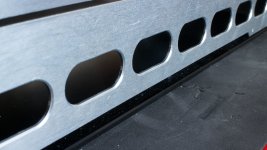
It's the quality of the finish on the bevels of the ports that gets me. What have you got to do that with? ...just so I can look at one lustfully and not be able to afford one :D

CNC mill,this was a 2 stage job with a tool swap. 3mm endmill for the contours and a 6mm chamfer mill for the bevelling.
 
As much as I love your design and the Rolls Royce this is completely unacceptable, go and tell them to put the V16 in their car so this magnificent work can stay :D

Seriously though, the pannels look great and I'm sure they'll look great in V12 design as well. Just remember to get the photos up ASAP :)


Im looking to get all the major panels done by Sunday then I will be spending time truing up everything on the midpanel,namely the PARVUM mod cubes so the shut lines look good. A poor shut line will show up and look gopping.....so not RR!
 
e3VmwRL.jpg

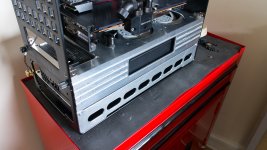
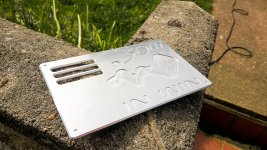
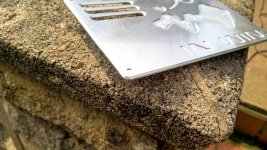
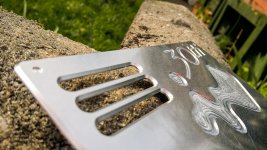
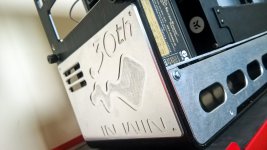
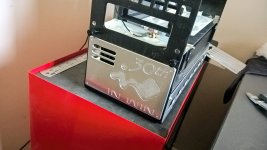
Today was all about the PSU cover now its a defunct mount and seeing as its In Wins 30th Anniversary I thought I would mark the moment....

Some slot work to promote some airflow and a nice machined 30th Anniversary logo!

CYjmXc6.jpg

nI9BAUu.jpg

txpmxye.jpg

Some lovely chamfers.....everybody loves chamfers right?

And the article in place,I still have to drill out the bolt holes and trim the case near one of the slots tho.

c7I5fhf.jpg

cndgsjQ.jpg

The idea is to paint these then flood fill the recess with clearcoat,when its dry,sand it right back and you are left with the visual cue of depth but it will be flat to the touch.

The rest of today is going to be spent truing up everything and getting the door panel planned and maybe cut....
Hopefully anyway....
 
Last edited:
Outstanding. And yes, lovely chamfers. Certainly look better than my simple de-burring! Like the sound of the paint finish, can't wait to see pics.

Those chamfers look sublime, also the channels for the paint to fill are a great idea as it should give it a unique look. I can't wait to see them painted as I'm interested to see the actual finished effect/depth it will have :)


I do like a bit of paint.....Im looking forward to it as it will tie the build together and make it 'real'.

A dark blue metallic with massive particles is the plan.
 
AgPcGVD.jpg

A small update,the res has been tapped and the whole structure has been trued up ready for me to cut the top panel,after this im on to the storage. The original idea was to have the bottom bay open and the storage mounted in there,however nothing ever stays to plan so Im mounting inside the main compartment instead. I also used 13mm angle to fixthe side panels to the main structure,those screws are not staying tho,looking and some nice CSK with cups
for that job.

After a few pointers from the guys at PARVUM Im also ready to start machining the acrylic parts of the side panels and the window for the main section. Soon I will be taking a small break from this as I have another build to do with a short deadline,normal service will be resumed shortly!

wcnOqBX.jpg

h4hU6mt.jpg

roJ5Ckv.jpg


This is going to look so slick once its painted,just waiting for money to clear before splurging on EL kits and lovely lovely paint.
 
Absolutely beautiful work, man. I wish I had the money spare for a good CNC.

They are not as expensive as you may think,all in including the spindle (ebay) and all the other junk I added to it,you are looking at about £1500. Tooling will come to around £60 for semi decent carbide of various sizings and profiles.

The real investment comes in the time you are willing to lose learning CAD/CAM,its isnt overly difficult but it will require you to have a 'Need to Know' kind of attitude. I know what Im doing with it but im not a trained machinist,I just spent a lot of time in machine shops and have a father with 40 years+ experience to call on when I need something specialist/overly technical to discuss,normally about the best tooling for the job or a technique for certain operations.
 
Back
Top Bottom