MGB GT Restoration

MG Bronze Yellow

kP9XizI.jpg
 
Loving the project Task! Planning to do something similar over the winter, as soon as I've cleared out the current project to make room in the garage.

I was at Silverstone last weekend for MG Live, and came across one of the original pair of Sebring MGCs:

MGC_sebring_front.jpg


MGC_sebring_rear.jpg


The engine developed 285hp from 3 litres in 1969. I guess it was fairly un-drivable away from the race track, but I do wonder what could be done today with modern cams, fuel and carbs - the Cs do have a slight rarity value over the Bs, which is (unfortunately) reflected in the price.

Decisions decisions...
 
Awesome work! Puts mine to shame :D

I am about 3 years into mine, and only just getting down to some of the nitty gritty :(

Will try and get a thread up for mine today!
 
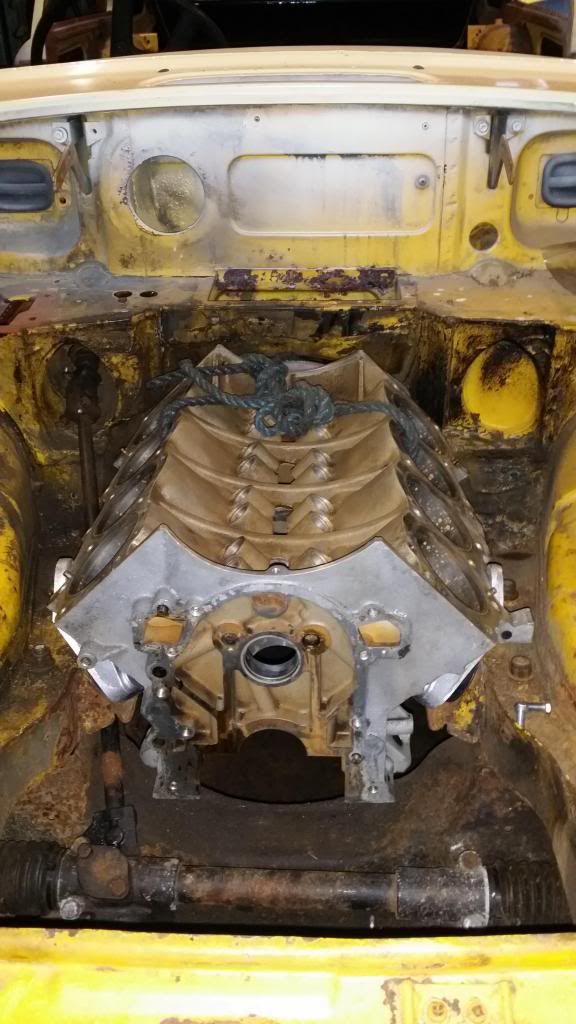
How is it coming along?!
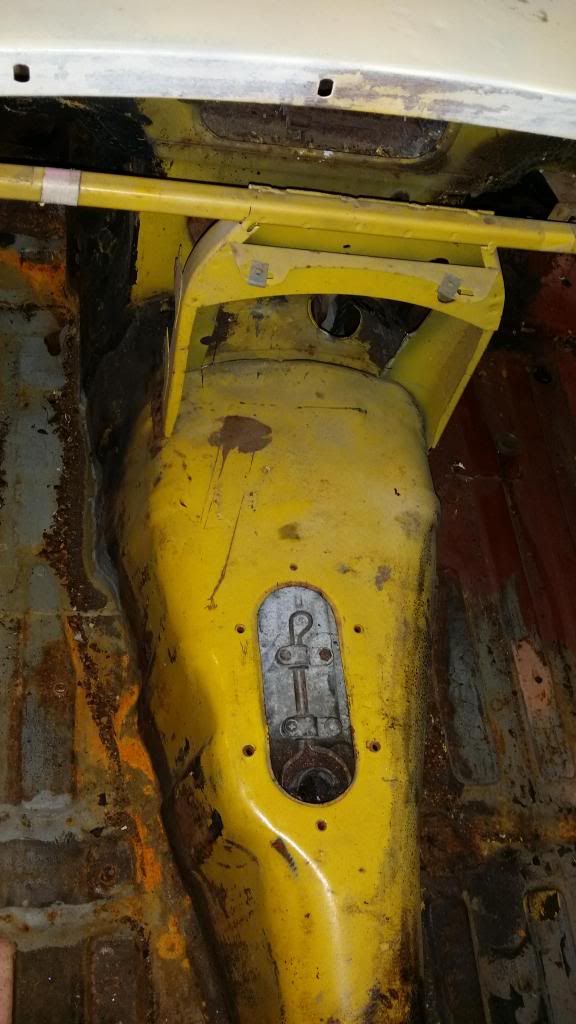
Hey, I must have missed this post, it's coming along slowly.

I've been profiling the doors to fit the profile of the wings and just generally doing bodywork, a process I hate.

I haven't had a great deal of time recently, we spent 2 1/2 weeks driving the CSK to the south of Romania and back up.

Hopefully the work should pick up again soon though :)
 
It's been a while since I updated this thread, life got in the way a little!

We took the CSK down to the bottom of Romania and back, via the Transfăgărășan, but that's a story for another time. I also bought a caravan for shows and holidays which needed some work.

Back to the MGB though, finished the welding underneath other than the gearbox tunnel to clear the LT77 so covered it in some underseal;

DSCN2426.JPG


DSCN2425.JPG


Then stripped all the old paint of the scuttle panel and roof before giving it a spray over in some acid etch and then some left over paint to keep the moisture off the metal over the winter.

DSCN2427.JPG


Moved on to the back axle, which I stripped back and then painted. I'd bought a V8 ratio crown and pinion so fitted those and also fitted new bushes, shims and seals.

20131124_121636.jpg


Which brings us up-to-date as of this morning, today I've done a bit more work and reached a little bit of a milestone, more to be revealed tomorrow :)
 
As promised here's an update from the weekend;

Saturday morning I attached the rear springs and the rear axle was bolted in the place. Stub axles fitted and hubs bolted on.

The front sub-frame was bolted in and then with the help of the engine lift and some family it was lowered back on to the wheels for the first time in just over a year!

DSCN2506.JPG


DSCN2507.JPG


DSCN2508.JPG


Sunday I re-fitted the steering rack and column to the car so I could push it around the yard and onto the ramps.

I then started to fit the rest of the rear suspension parts, I decided to go with the following setup;

lowering springs (no idea how low till I get it built and settled)
polybushes
SPAX adjustable telescopic damper kit
anti-tramp bars

DSCN2512.JPG


next up will be the trial-fir of engine and gearbox so I can adjust the transmission tunnel, finish of the welding and get the engine bay primed and painted.
 
Progress has been a little slow of late but I've done a few jobs on the BGT.

Fitted the scrap block and my allegedly OK gear box to adjust the tunnel for size and modify the gearbox crossmember.

20140112_153643_zps0e87d414.jpg


Seems to fit quite nicely.

Gearstick looks like it might be a little far back though

20140112_153716_zps1aa5e6da.jpg


Finished off the anti-tramp bar mounting and then went inside as it was a little cold outside!

The LT77 gearbox needs a new output flange which I seem to be having some trouble finding :(
 
Cheers :) I aim to drive this one all year round too. If you're ever near Derby pop in and say hi!
 
Epic resto I'm well impressed although I still love the jig more than the car but then I'm sad like that. :o
 
Back
Top Bottom