Modding a Coolermaster ATCS 200

Soldato
Joined
21 Oct 2002
Posts
7,425
Location
Bexhill on sea
Right I've been looking at modding one of these cases for while and I've finally bitten the bullet and got hold of a CM ATCS 200, the one with the black anodised bezel surrounding the drive bays. I chose this case due to the bezel enabling the use of a black Bluray DVD drive, and I'm hoping to get me hands on a pair of aluminium drive bay covers.
What I going to try to do is bring the case up to date as it were and improve the cooling performance by creating more internal space and adding a AIO watercooler, an H55, for the GPU which atm is an MSI 290x 8gb. I might, if the situation calls for it, fit another for the cpu, but also I want to have the option to fit a large cpu air cooler as an alternative. This will dictate wether or not I have to move the psu to the bottom of the case, otherwise the cables might interfere with the fitment of the top panel mounted H55 for the cpu.
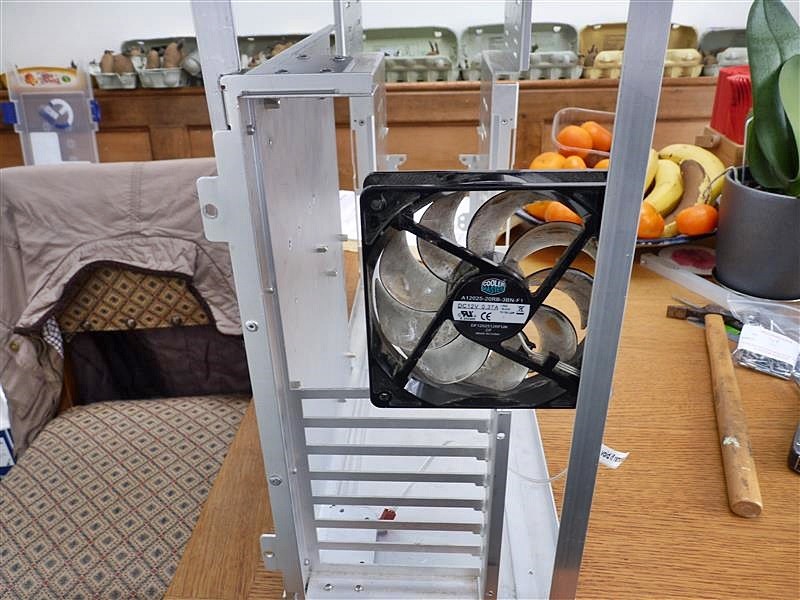
I've taken the case apart as far as I can and the next stage will removing the rivets where required and so further disassembling the case.
Allwork is going to be done inside the case I want to leave the externals alone as much as possible, and the front panel will NOT be touched at all, though I might replace the on/off switch, but thats it.


I'm also going to repositioning the sliding mobo tray further away from the rhs of the case to try and give as much height as possible so enabling the use of a fairly tall cpu cooler

Now i don't know at this stage if any of this possible but I'm going to give it try so it might take me a while but I'll post up pics as and when decent progress is made. :)
 
Last edited:
Oh great, thats all I need, a CM rep watching me butchering one of his cases:):D

Any chance you could source me a pair of those aluminium drive bay covers/ blanks?

One thing that becomes apparent from the off is just how well made and "over engineered" these cases are. The mobo tray/backplate assembly is actually a number of sections of aluminium plates, cut and then folded, interlocked together and then riveted and my first issue is where do I separate the mobo tray from the backplate but still maintain the orientation of the mobo tray to the I/O plate aperture. If I get tis wrong, it means the motherboard sockets at the rear won't line up correctly with the I/O plate opening. I'll post up a pic when I've taken the plunge and separated these two parts.
 
Last edited:
Ok, got a bit of progress here. I've removed some of the rivets to release the the two rear upright support rods and started to modify the mobo tray so I can mount it behind the slider lower slider rail instead of in it. This means I can fix the tray further away from the case side and gain a bit of clearance. The pic shows how much I've gained already, about 25mm, not a lot but every little bit helps. Its looking like I'll have to replace both rear support struts with 15mm wide "L" section aluminium rod as trying to cut the originals would fairly difficult and very time consuming and shouldn't be too costly to do it.


As it stands I offered up a spare 120mm fan for a look see and I'm very close to getting the space I need but I want a little more to allow for the water cooling rad to have a bit of tolerance when mounting. At this stage I don't think theres a problem getting the height required which is 152mm in total as the rad is taller than it is wide. More pics to follow when a bit more is done. :)
 
Last edited:
Been doing some more calculations and I'll deffo have to replace the two rear support struts so I've ordered 2 x 500mm lengths of 5/8" L section aluminium rod at 1/16" thick. These should cope quite well at supporting the rear of the case until the new back plate is fabricated and riveted in place.
 
Last edited:
Unfortunately mate, none knocking about! Bit too legacy compared to the other parts we have.


Unsure which case you mean. Do you mean the Elite 110 or the Mini 110? Either or, any parts we have available can be purchased here http://cmstore.eu/

Think he means ATC-110 case

Have some silver and black drive covers here.

and the plane side panel.
 
Last edited:
Selling every thing soon atc-110 case with both plane and window side panels atc-610 htpc case.New cd drive covers in black and silver and drive covers for both in silver and black.
 
Righto, finally after an early shift, I'm able to get a bit done. The ally strips turned up a while ago so I was able to cut those to length, 450mm, drill and rivet into place. The left hand one (viewed from rear) had to a bit cut out with a jigsaw to enable the mobo tray sit further away from the rhs of the case. Now I was quite surprised that even with al that metal removed due to it still having a bit of the "L" section, it still retained a fair amount of strength and does not bend/ buckle and is quite rigid. I also had to remove a piece of ally underneath the mobo tray that was interfering with the fit of the tray relative to the l/h support strut as the tray fits "inside" the strut not against it. This means I'm able to get further width clearance to get the 120mm fan in position.
I've removed most of the backplate from the mobo tray which means I'll have to fabricate a new one but I knew I'll have to do this from the beginning.
Theres a load of bits of ally that was removed/ modified but they're too numerous to list here, its more a case ('scuse the pun) of trying to think about 5 stages ahead and predict what the consequences of what I'm doing will be. Heres a few pics with one of a 120mm fan in position:)


You can see here how much of the rear plate I had to remove


This pic shows I've manage to move the mobo tray really close to the side of the case, theres about the thickness of a molex plug there.


This shows the 120mm fan just hung in place. I'm mulling over the best way to replace the top section of the I/P plate opening which I had remove as there was no way I could do it with the tools I've got at hand.

Stay tuned for the next update.:p
 
Ok, next bit. Had a bit of luck here, I've just sorted out the psu mounting just using the stock rear mounting plate. I drilled and tapped the holes for it, banged the psu in to have a look to see how what I need to the internal psu mounting bracket and found that when the psu is bolted in place just using the rear plate, its so firmly in situ and strong theres no need to have the internal bracket fitted at all! In fact I tried to wiggle the psu whilst fitted and I couldn't get any movement at all to speak of and thats trying quite forcibly. This means if I decide to go watercooling for the cpu using ,say a Corsair H55, I've got more room to play with, so result there and I'm a happy bunny:) Check out the pics an you'll see what I mean.


This also means I can use a longer, and hence more psu in the future if I want to. Next job is to find a way to secure the top part of the mobo tray.
 
Really making some progress here. I've made two cutouts in the forward upright supports to accomodate a modern sized graphics card. The two slots allow for a card of up to 350mm which "should" mean summat like a GTX980/Titan/290X will fit without any clearance issues.


I've left enough room for two H/Ds to be fitted.Thers also plenty of room above the slots to fit a caddy for maybe another h/d and/or an SSD. I'm looking at fitting a USB.3./card reader in one of the 3.5" slots also.
 
Last edited:
Right, been looking at those two large internal plates and they look "naff", so I'm gonna take both out again and re-profile them and see if I can either make or buy a h/d cage to hang underneath from the upper section of the plates where where the c/d drives would be installed.

Edit: Decided to use part of the existing bracketry to mount the h/d but move to a higher position as I can see that I might have to instal at least one 80mm fan in the front to aid with the h/d cooling.
 
Last edited:
Back
Top Bottom