Modding a Coolermaster ATCS 200

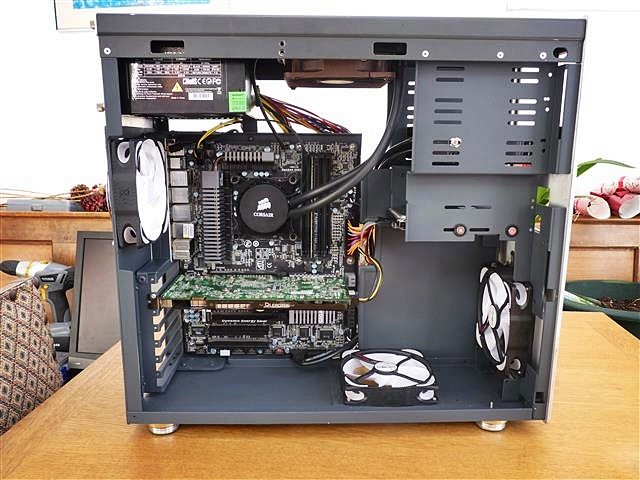
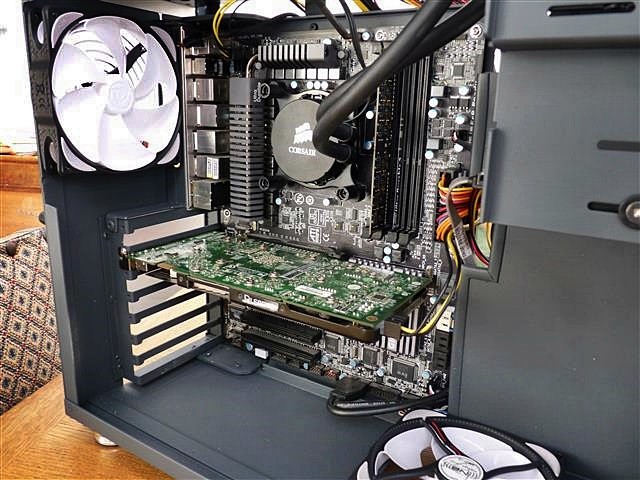
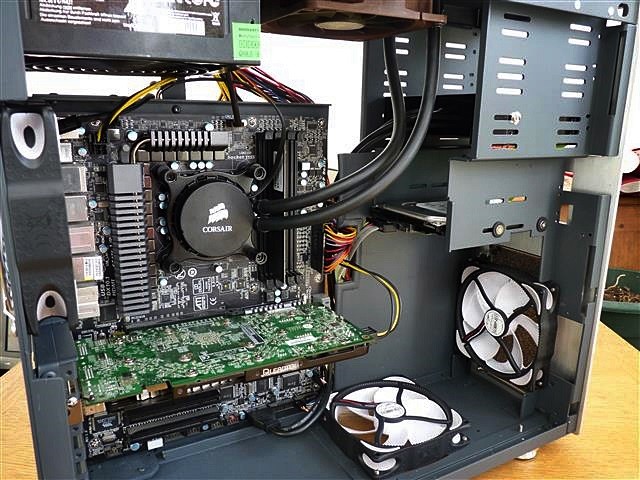
More to report here. I've remade the broken electrical contacts on the switch housing (common problem but easily sorted and I've got the front fan mounted on one side, but I'm looking at me options wrt the lhs due to the the position of the switch block. Its quite close to the fan edge and restricts the amount of space available to locate the other two fan mounting screws. Probably going to be another Heath Robinson affair but at least it'll be secure. You can also see the fan is slightly offset to one side, this due to the gap between the two side plates being a too big unfortunately and I can't do anything about that 'cos if I bring them closer together, the mounting holes for the front panel won't line up.

 
Ok, I've redone the G/D mounts and installed 4 grommets for anti vibration, no probs there. I also got the other mounts sorted for the front 120mm fan. I used the original 80mm "tangs", cut them to the appropriate size and riveted them in position giving me clearance from the front panel switch gear. Just gotta sort the usb.3, 3.5" wide front panel assembly from silverstone.


Right, I need some opinions here. I've hung in the DVD/ drive and installed the USB.3 front panel assembly and hung the bezel in place to check the fit. Now, its noticeable straight away that theres a colour difference between the accesories and the bezel. My question is:

"Do I respray the bezel a close matching satin black or do I leave it alone?"

Any opinions welcome.:)

 
Just ordered one of these:

www.overclockers.co.uk/showproduct.php?prodid=CA-606-LL&groupid=2362&catid=2792

I've decided to fit 2 x 120mm fans in the top panel for the cpu water cooling to increase the options for this case. Hopefully this'll mean the user, Me, can either have full air cooling or full water cooling, AIO. I couldn't get a single 120mm fan panel, but double 120mm will do just as well. I'm going to mount the panel externally (I don't know wether its for internal or external use but I'm assuming here you can do either). That way if I use brass screws to secure the panel in place, it'll sort of match the black front bezel hopefully. This means its looking more and more that I'll have to spray the fan panel semi gloss black to match the front panel bezel.

The other advantage of doing this is that if a more powerful, and hence longer, psu, is fitted the cables "might" interfere with the radiator installation as obviously space in this case is at a premium, so the second fan mount position could be used providing the w/c hoses will reach but I think they will, I'd just have to turn the rad through 90 degrees.
 
Last edited:
Huzzah, the aluminium sheet for the back plate turned up this morning, now for stage whatever it is, I forget. I've got to work out how to get that sheet to fit into the rear opening without obstructing the I/O plate space and get the hole made up for the 120mm fan taking into account that the H55 radiator will be require the hole to be positioned slightly higher than normal due to the rad height being 152mm and not 120mm, otherwise the radiator would never fit in the space available in a month of Sundays.


More pics to follow when the back plate is completed.

I'm also contemplating fitting a full coverage (ish) rear plate forwards of the mobo tray. This should allow the psu cables etc to be hidden from view if I decide to fit a window in the side panel. Would also mean I can cut a 2-3 slotted holes in it for cable routing which'll tidy up the appearance considerably. The black edging also turned up this morning with the aluminium plate so I can use some of the to protect any cable bundles routed through them.
 
Last edited:
Starting to size up things and doing some test fitting. I've hung the H55 rad in position to see
what room I've got and I'd say theres virtually nothing to spare at all! This means the backplate is going to have to be made in two pieces instead of one as I don't think I'll be able to make a tight enough bend in the aluminium to allow the rad to sit far enough into the opening. Again, no real problem but it does mean I'm going to have an "open edge" join where the two pieces join together. Strength/rigidity won't be an issue but aesthetics will.


You can see in the second pic the two rivets on the side of the radiator and these increase the width by at least another 2-3mm.
 
Last edited:
Right, spent the day so far knocking up a back plate in an attempt to generate a cavity to hide the cables from the psu. Not much to say really, flat bit of ally, cut to size, slot made for the cables to route through, bit of protective edging, access holes drilled and then riveted in position, job done.
Next is the rear backplate to mount the 120mm fan/ radiator.


The label will be removed before spraying!
 
Ok, Started on the back plate now. Took a long hard look at the best way to this and I came up with a two piece jobbie. So, I fabricated an elbowed section 1" wide, bent into shape and riveted into place. It also allows the fitment of the radiator so thats a result. This now means I can work out where the fan ghole should be, and make the final bit of aluminium up and rivet into place. That just leaves cutting the opening into the top panel to allow the use of an H100i or something similar.


On the final leg now. I've got the side plate around the I/O plate remade more accurately and its square not on the p*** now, and the I/O plate can be easily removed and refitted. I've had to drill two holes in the plate and file some cutouts in the rear right upright support as the rivets on the side of the radiator foul when trying to fit in position, Now its "snug" sliding fit! There is absolutely no more space available, not even a spare 1/2 mm so I'm quite pleased everything now fits, just got to make up the backplate and rivet it in position and that just leaves cutting the two openings in the top panel for the twin radiator grills.


Right had to modify the framework a tad. Once everything was riveted in position, I found the fan just wouldn't fit in the opening, the gap is was 2mm narrow! Somehow I've obviously miscalculated (though I think I know where I went wrong) Anyways, I had to remove a section of the r/h rear support strut to allow the fan to fit. Its a perfect fit with no overhang and strength hasn't been compromised as the thickness in that area is 4mm, so theres no flex at all. Funnily enough, the radiator is ever so slightly narrower so that fits a treat.


Right, thats it for now, I've cut the two openings in the top panel for the AIO water cooling (if needed/wanted) and fitted a Lian Li 120mm x2 fan adapter with a couple of grills. Not much to say really, just a test fit of components, adjustments if needed, clean, undercoat then top coat of Anthracite Grey.

 
Right, got everything rubbed down and cleaned where needed and gave it a coat of primer so I can see where the any errors are. I'll give it a good looksee when its cured and if all is ok, I'll slap a coat of anthracite grey over it.

 
Like the gun metal grey :D

Like I said in an earlier post, I decided on "Anthracite grey" which is a very good color match for a color called "RLM 66" which is the grey used by the Luftwaffe during WW2 which was used for the interiors of aircraft as well as other items like u/c legs, etc. Now that might give a clue with what I might be doing to the exterior of the case, just depends how I feel.;)
Heres a coupla pics of the interior sprayed in the anthracite grey, I'm now waiting for the paint to cure overnight so I can handle the case and correct any errors I've missed the first time round.


I'm in the process atm of testing the components in the case and sorting various things out, cabling, noise, etc.,I haven't as yet taken any pics of the parts installed, but I'll post up tomorrow after I get in from work. I'm using an old 600w psu, 9800gtx gpu, along with the gigabyte Z68Xp-UD4, 4gb of giel ram, and the H55 AOI. and the 3 x 120mm Noiseblocker fans (which when running flat out like these are atm, they're far from quiet).
I've got a 2500K in there also doing prime95 quite happily at 4.5 ghz on stock volts at an average of 44c-46c under the H55.
I'll be installing a GTX 780ti and 8gb of Kingston ram in the future along with the original h/d and Corsair HX620w psu.
I haven't even finished this build and I'm looking at where I can put a pump/reservoir assembly and how I'd route full tubing, etc!
Like I said, pics to follow tomorrow.
 
Right then girls and boys, got a few pics here of the build so far. Like I said in the earlier post I've got installed that I'm going to keep in the finished pc:

Gigabyte Z68XP-UD4
2500K @ 4.5ghz stock volts
Corsair H55
Three Noise blockers 120mm fans (1900rpm jobbies) These are going to be used with voltage reducing adapters to make 'em a bit quieter as they're quite loud when going at full pelt).

I'm going to install when ready along with the other components above the following:

2 x 4 gb Kingston 10666 DDR3 ram
Corsair HX620w psu (this will be replaced in the near future due to age, about 7 years old)
Nvidia GTX 780ti 3gb with reference cooler.

So far I've accomplished what I set put to do, get enough space to fit at least 3 x 120mm fans, and enable the case to accomodate more up to date and hence, bigger, hotter, more powerful components than were available 15 years ago!
Opinions on how it looks would be appreciated as this is my first foray into case modding, and I'm contemplating installing a custom water cooling loop as it appears I've got a fair bit of space at the bottom of the case, suggestions here would appreciated also as I know "nowt" about water cooling:):p


I really like the grey colour scheme, nice to see a change from the common black interiors.

As for watercooling I have a feeling that I have even less knowledge than you :D
 
Back
Top Bottom