OcUK & Cutters Rolling Road Day 19 @ Powerstation (Tewksbury) - Saturday April 25th 2015!!

I'd paint stuff and tidy it up if it was coming apart, not sure I quite get the fascination with flourescent green bits though :p. The paint may well chip easily over time too, I'd be inclined to use something like POR15, dries to a flexible and chip resistant surface and it will also have better anti corrosion properties too. I think the original formula was designed for painting the deck of yachts or something, properly good stuff.

Got the paint now, will use that. :)


Keeping an eye on this thread Gibbo.

I'd paint the steel parts and leave the alloy parts as is.


Yeah it's what I'm gonna do. :)
 
Customs still holding up the parts, took less time to come from US to UK than it is taking for customs clearance. :(


Anyway cleaned and gone wild with green paint. :D


1d0ffa357affbf5cde8a065b64d0ee3c.jpg


4a5387190b961e6dcfb2bca1429cf866.jpg


Looks great, did wishbones in silver in end.

Some other bits had the treatment also:-

e965bcd1317d92b6a341cab59deee369.jpg


92f432c62c6b6d22b6eeb67950d13656.jpg


431d1b9dfdb06f5db5f8abf18769da05.jpg


Also gonna do the front metal splashguard/support brace and drop links in green also. :D

Once the parts land will throw the shells and bolts in engine and also clean all the pan up so it looks like new also. The new differential is also same green and will also paint the rear subframe when diff comes out green as well. So all will look new underneath, just in silly green. ;)
 
The ties are a method of shifting the grime the the U.S. DIYers recommend. It seems to work in combination with a toothbrush and some tough thin rags.

All done now, back together & tested, started at 10:30 today and finished at 15:30. So 13 hours overall for me. I'm never doing that again.

It took a short journey & an ignition cycle for the electronics to be happy after putting the battery back on, it forgot what kind of parking system it had and thought the ESP was broken. But all fine now.

Can I feel the difference? All my butt dyno says is it's a really fast car still, will need another RR day to make a real judgement, I'm not the sort to fall into the placebo effect. In other words, hurry up Andy.


Mate blame customs, goods arrived into UK last Saturday and they are still awaiting customs clearance.

I even rang HMRC to ask what the issue was, the response was they have a huge backlog and hope to clear my parcel sometime next week. An absolute joke that it takes nearly two weeks for customs to clear an item. My response was if your backlog is so high maybe you should be employing more staff to help with UK employment statistics. Overall they were not that interested, it will be cleared when its cleared.

Done as much as I can do now and all of next week I am in Berlin, so I then have one week to sort this after that otherwise looking at mid-end June as first week of June I am off to Taiwan for over a week.

Customs ruined my plans, I HATE CUSTOMS! :(
 
Hi there


OK even though I am still awaiting for customs to clear my parts (yes taken them over a week), I decided today to remove the oil pan so I was not going in blind when it comes to actually doing it.

Glad I did this as I discovered I did need to remove power steering pump, well I did it actually by just removing one bolt to the PS pump and slackening the other so then the pump was still help up so no stress on PS lines but it was able to rotate giving enough clearance for the oil pan to drop down. Had to dash to Halfords though and buy a TX50 to slacken of the drive belt to be able to remove belt from PS pump.

Any some pictures, oil pan removed:

IMG_2603.jpg


IMG_2604.jpg


Looked real hard into the pan, cannot find any debris at all, no glitter or nothing, the black bits you can see are bits of RTV/Gasket.


I removed the oil pickup lines to give access to the rod bearings and I removed *ONE* end cap to see how easy it was to do and check condition of the shell:

IMG_2613.jpg


IMG_2613.jpg


On this one end cap I removed bearing looked worn but fine, the crank also looks unmarked and is a work of art.


To remove the oil pump you have to first of all remove this 17mm reversed threaded nut and must push the plastic, yes plastic chain tensioner out the way otherwise you will snap it:

IMG_2614.jpg


Gave the oil pan a good cleaning inside and out:

IMG_2616.jpg


IMG_2618.jpg


If one thing will come of this and that is my car is damn clean on the underside:

IMG_2620.jpg


For those interested here is a picture of the shell / end cap I removed, only taken one out as you have to do them one at a time, as Andy (Fuzz) keeps telling me. ;)

IMG_2622.jpg


Progress so far is good, taking my time and doing bit by day has essentially pretty much allowed me to remove the entire front-end of the car and every item removed completely clean it up and re-fit. I must also say a big thanks to Fuzz who has being very helpful in answering my text and sending me some good how to videos.

So now once the shells and new bolts arrive I can very quickly get the car back up in the air, subframe off, oil pan off in literally 20 minutes I've done it that many times. Still doing this kind of trainee session has helped a lot because now I know the perfect and quick way of putting the oil pan back on as it was fiddly, not an issue when your not in a race against setting RTV. ;)
 
All looks very clean for that age of car, I must say. Also looks like they use snapped off caps, which I love the idea of. With how light a tap that was I'd be surprised if you see anything telling, which is really a good thing.

Yeah there is no up and down play in any of them, no burn marks anywhere and no debris or sludge in the engine at all, exceptionally clean but it has had frequent oil changes and only Vpower in my ownership and also by it's previous owner as well who also tracked it and maintained it very well.

Hopefully with new shells and bolts all will be good and I'll sort a revisit to Powerstation so I can get mine on dyno for a health check once run in and you can see if your clean up has gained you the lost horses. :)
 
Hi there

New parts arrived finally, took customs nearly two weeks:

IMG_2627.jpg


Sump gasket
Rod bearings
Main bearings
ARP Bolts
KW front drop links (old ones had to much play)

Got the oil pump removed, used a cable tie to pull the chain together and then pushed the plastic tensioner out the way, it is reversed threaded but then the nut came off easily, also got myself some HEX sockets as the oil pump hex bolts are super tight. Oil pump and all return lines out the way:

IMG_2639.jpg


The new bearings are coated and clearly packaged as lower and upper, a picture of a new bearing in end cap, you can clearly see the coating:

IMG_2628.jpg


Now the fun started, first of all the upper bearings are so fiddly, not much room to get your hands up there, so takes a few attempts, luckily both the bearings and crank survived as I made sure to not touch them.

Plus Andy gave me an excellent idea of when end-cap is removed to then crank the engine until the piston is at the top and to then crank other direction bringing crank back down but leaving the piston dangling in the air, this worked very well.


ARP BOLT ISSUE!!

So all was good, I went to put the ARP bolts in and even though I have the larger 11mm ARP bolts (10mm is other size) they do not seem to torque up. They tighten up by hand just fine (only tried one) but when trying to torque up to the 50lb/ft as per instructions the bolt comes lose again.

Trust me when this happened I absolutely pooed myself as I thought I had stripped the threads. But the ARP bolt came out look fine, again it hand tightens but comes lose when trying to torque up. So one of two things is wrong, either the ARP bolts has stripped some of the thread in the rod end or they are too small. The stock bolts which are actually a 12mm bolt head go in and torque up just fine, no issues.

Tomorrow I am going to buy a new smaller range torque wrench as the wrench I was using was a Halfords big unit with a range of 50lb/ft - 150+ lb/ft so maybe it is not working quite so well and was trying to apply a lot more than 50lb/ft. Though the stock bolts were in extremely tight, took plenty of leverage to undo them.

So will give the ARP's one last try tomorrow with a smaller torque wrench but if that fails then I guess I will just stick with the BMW OEM bolts, BMW TIS says to re-use the bolts but I think I shall order new ones as you simply do not know if they are stretched or not?


A picture comparing the stock M12 bolt (left) to the ARP M11 bolt (right).

IMG_2633.jpg


IMG_2632.jpg


So you can see ARP use less threads and BMW use more, so it could have maybe stripped some threads in the ROD end but as the BMW uses more threads and has a lower tightening torque the stock bolt torques up fine.

Question is as I cannot really tell do you guys reckon the ARP bolts shaft/thread is actually 1mm less in diameter compared to stock or they both the same and only the head is different in size?


OLD Bearings VS NEW!


Anyway all the bearings were coming out and were all looking fine, I was beginning to worry that maybe I had another issue. But the last cylinder I did was number ONE.

As soon as I took the end cap of I noticed an issue, which was the end cap was quite a bit hard to get off and when it did come off the shell remained on the crank as did the rod side as well. :(

At this stage I though none of the others did this and feared they were maybe welded to the crank but I touched them and they did move they just seem hydrolocked to the crank with oil, yes oil another good sign.

I got them off and well they tell a story:

IMG_2636.jpg


IMG_2637.jpg


This was close, very close!!!! :eek:


I inspected the crank and much to my relief it looked identical to how the crank looked at all the other cylinders, nice and shiny with no marks, scratches, pitting:

IMG_2635.jpg


IMG_2634.jpg


That's a relief!! :)


So for now I've put it all back together, I am gonna buy a smaller range torque wrench from Halfords tomorrow and give the ARP's another shot, if they still just spin or if anyone here is 100% sure the ARP bolts do look smaller then I shall just stick the BMW bolts, but shall re-order some fresh ones from BMW as I have no idea if any of the stock bolts are stretched or not so don't particular want to chance re-using them, just to have a repeat of this issue down the road.

Based on getting new bolts it is just one more days work to get them tightened, sump back on and rest of the car put all back together. :)
 
The ARP looks smaller to me, but could be an illusion

Yeah gonna take them to garage tomorrow when they have an accurate ability to measure them.

Because if the ARP thread/shaft is also 1mm smaller in diameter and not just the head then they will never fit. Which leaves either re-using the BMW bolts or buying new from BMW, buying new is the only option just means more waiting until car is back on road.
 
The bolt head size doesn't matter, it's the thread size that matters.

Get them both measured tomorrow and go from there.

In the picture the ARP does look smaller, but it could be an illusion as it tapers in the middle.

The M11 ARP might actually be bigger, and therefore it could be catching the edge of the threads in the rod, but not tightening as it can't get in the hole (purely guessing).


Got a vernier, just found it, digital as well, will measure tomorrow.

Yes could be an illusion but the ARP bolt does go into the hole and it does hand tighten very tight without issue. It is when I torqued it which meant it was being tightened much further than I hand tighted that it just felt like it was coming lose again and spun. Stripping thread or because it was too small. I put the stock bolt back in and it initial torqued, torqued and angled with no issue.

Will measure the bolts tomorrow, but logic would suggest the M10 ARP set is probably smaller than the M11 ARP set.
 
I agree, but since when did logic come into it, when your modifying cars ??? :D

Seems they sent me wrong kit, the part code I have is 201-6102 which is the M10 kit (45mm), I thought it was the M11 kit as it uses an M11 socket.

So seems I need the 201-6103 kit which is as they call it M11 kit (47mm) and will no doubt use an M12 socket. ;)

Does anywhere in the UK stock ARP bolts? As could do with a fast delivery or being able to collect in person?
 
Well this virtual remap is most certainly costing you a shedload of time if not money.

Perhaps avoid in the future?

Lucky doing all this when you did though looking at that old bearing, explains all the filings in your oil filter etc!

Yeah but I've enjoyed it in a strange kind of way, all made the better as the car now lives again.

The remap is spot on and it's not virtual it was done on the dyno. The problem as stated previously was the RPM. The map shall be kept but rev limit reduced to 8000rpm. :)
 
Hi there

Well today has being a long day, 8am start, 9pm finish.

Started with:
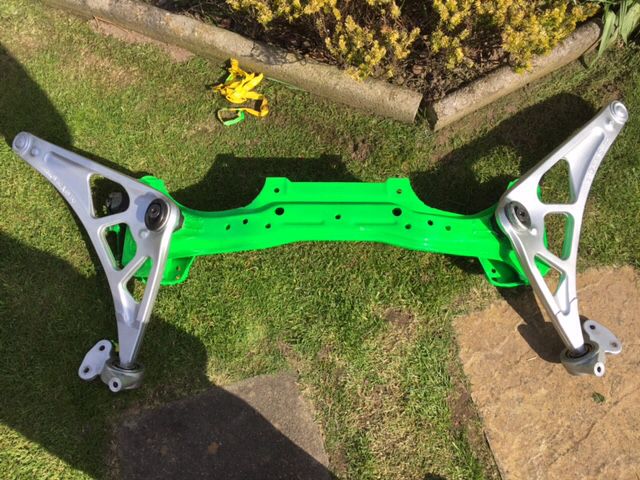
Remove front subframe
Remove oil pan
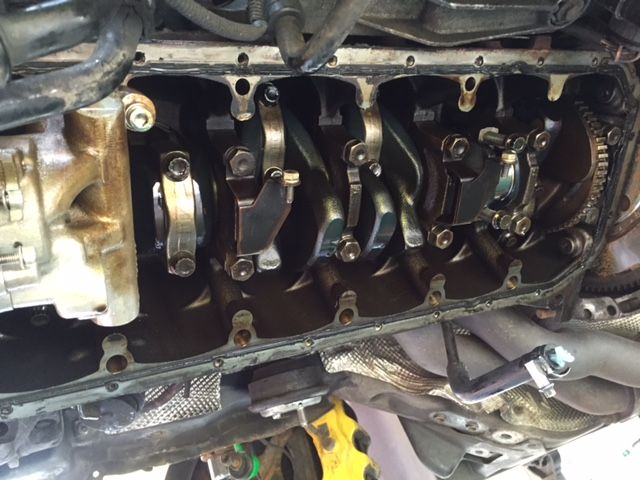
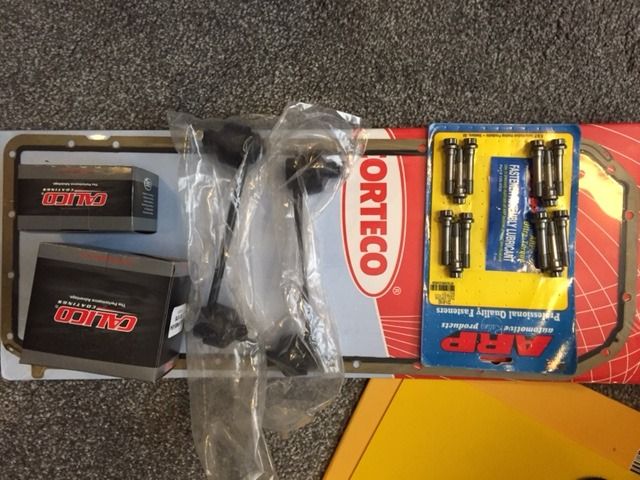
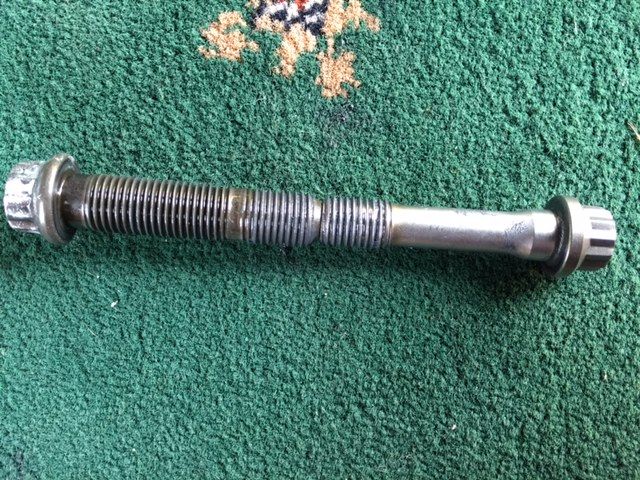
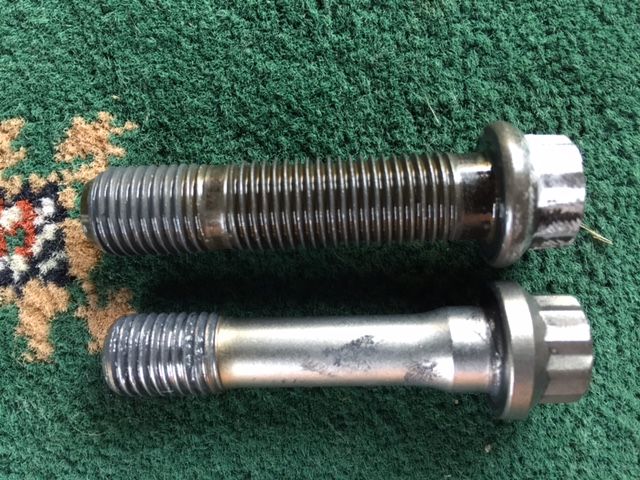
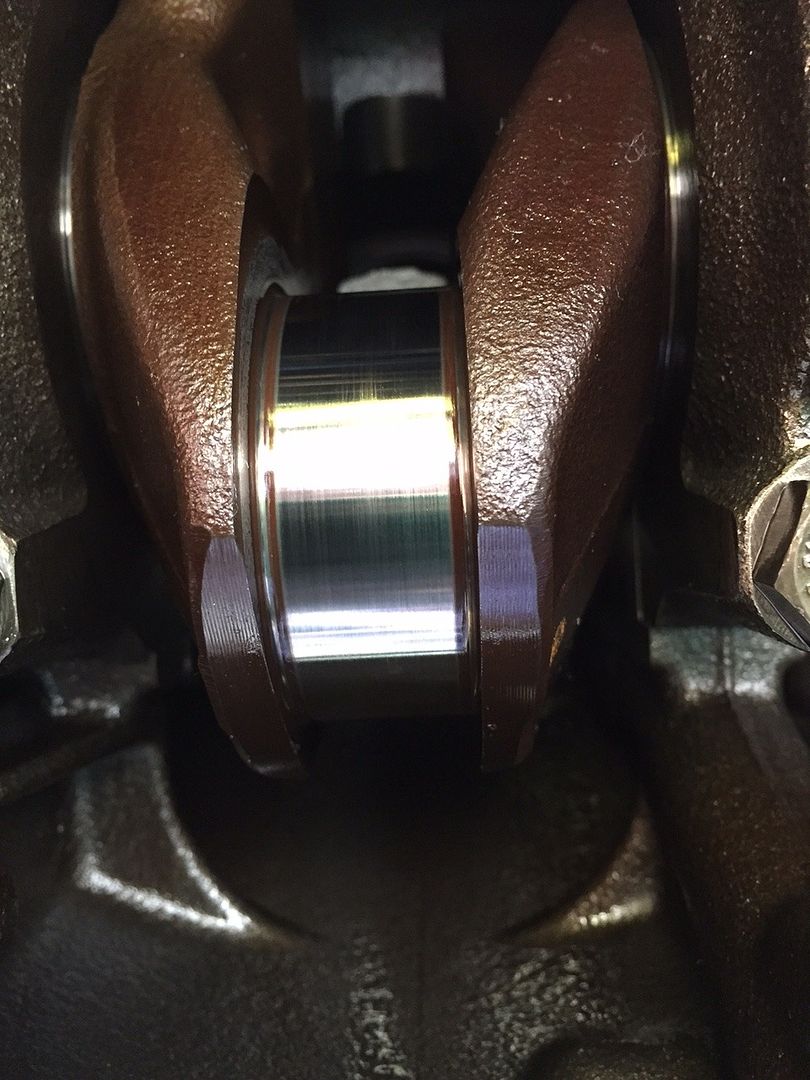
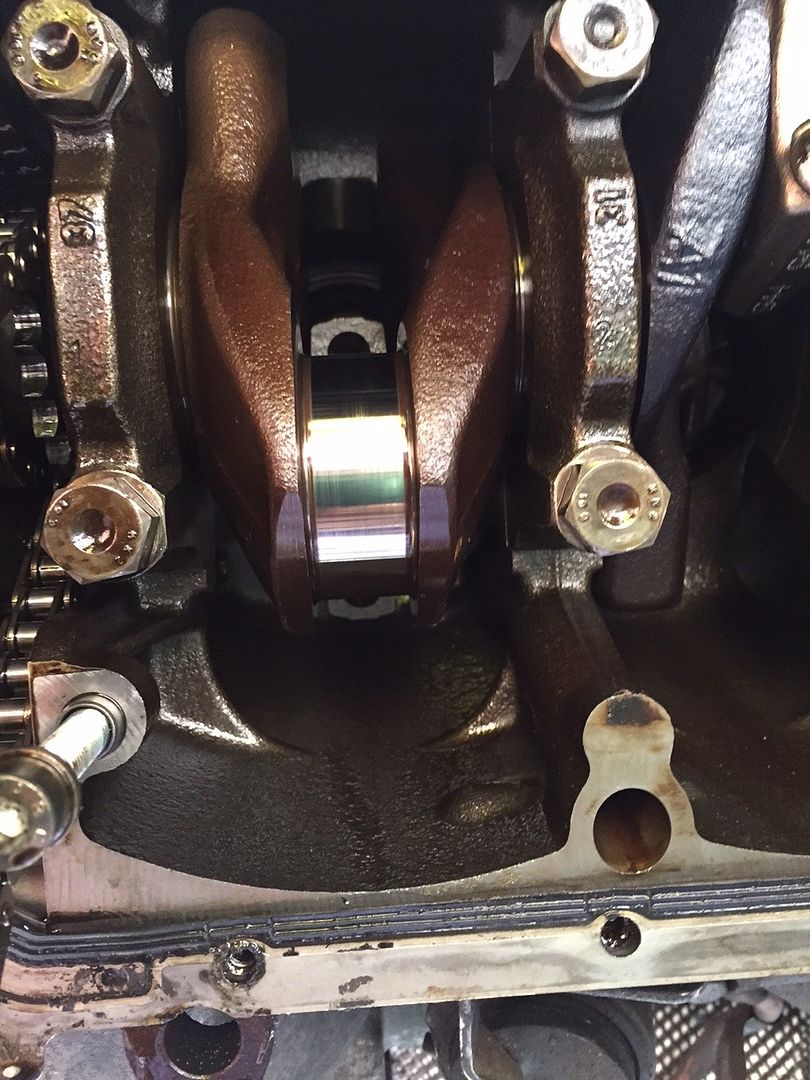
Install new ARP bolts and torque to 70lb/ft
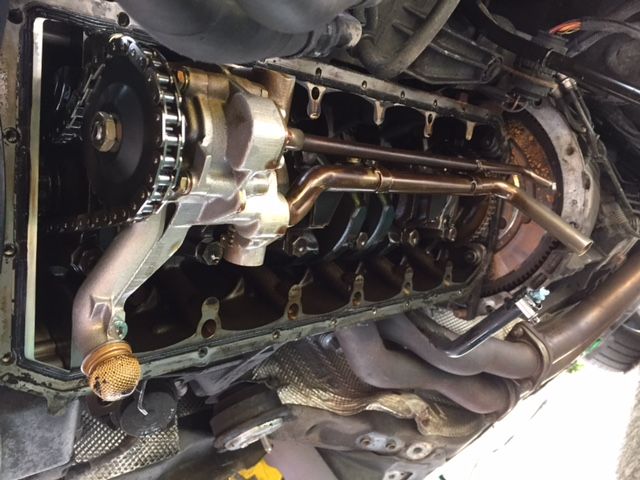
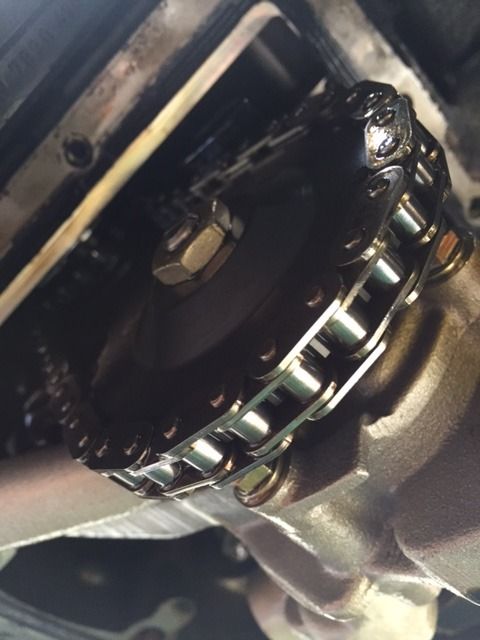
Refit oil pump and chain
Refit oil pickup lines
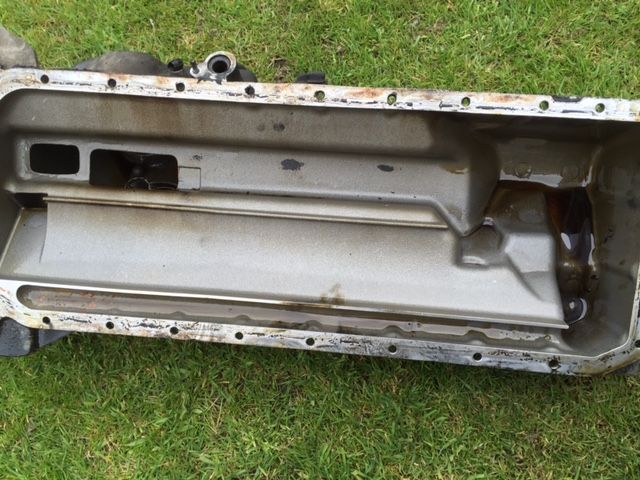
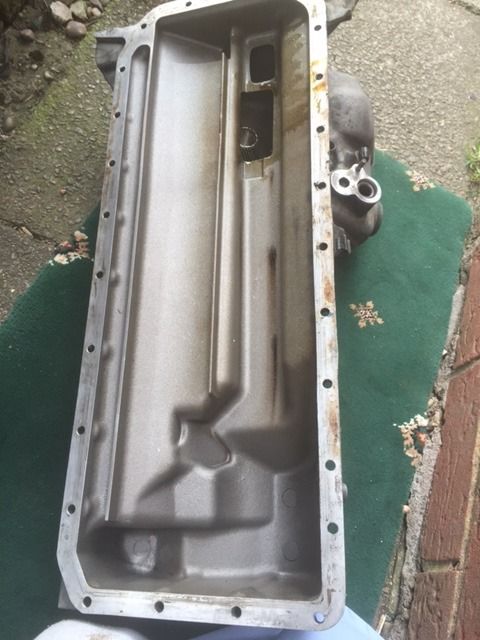
Clean up sump and gasket area.
RTV sump, add gasket and more RTV.
Refit oil pan, making sure dip stick is partially inserted, this was a royal pain in the ass and a lot of swearing happened.
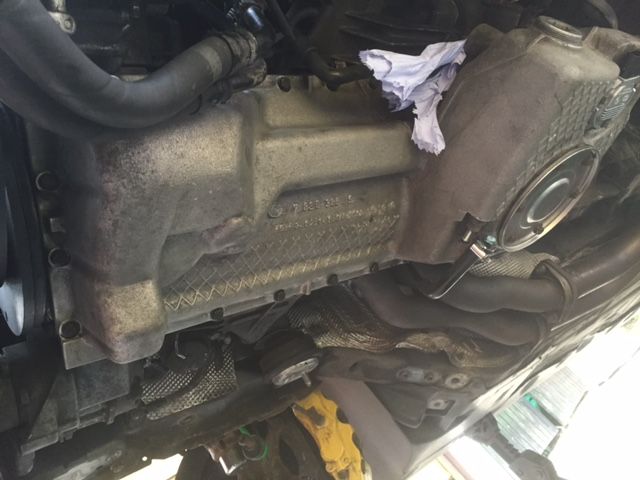
Tighten up sump starting from centre working outwards including all awkward bolts.
Refit power steering pump
Refit power steering pulley
Refit drive belt
Refit oil pipe and power steering brackets
Refit subframe, but do not tighten up much, say one turn.
Refit wishbones
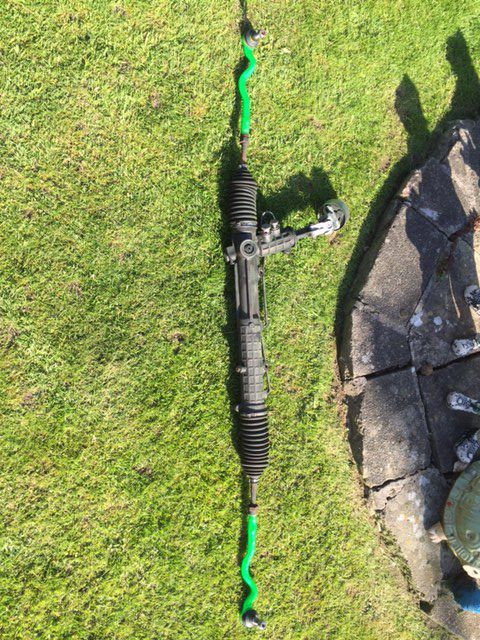
Refit steering rack, very tight hence reason for not tightening up subframe.
Now tighten up subframe bolts, steering rack bolts, steering guilbo, ensure wheels and steering wheel are centre before tightening.
Refit and tighten PS lines, make sure there is a washer either side
Refill power steering fluid, dextron 2/3 ATF/PS fluid for M3.
Tighten wishbones and track rod ends, use a pumpkin jack to prevent nut from just spinning.
Check oil return lines, oil level sensor, headlight sensor/levelling and any other plugs are all connected and re-check all bolts.
Fill with 7l 5W-30 running in oil.
Leave plugs and coils out, crank the engine 5-6 times for 5-8s to build oil pressure and check oil level.
Install plugs and coils.
Start the engine, oil pressure light should go out within 5s, turn steering wheel left to right to flush air out of PS system and leave to idle until warm (80c) oil temp and then give some gentle revs. Once 30 mins passes shut off and drain oil and remove filter for inspection.
If all OK refill with correct Castrol 10W-60
Refit chassis brace, all undertrays, air box, pollen housing, rocker cover, strut brace etc. and check oil level.
Test drive. :D

Probably missed loads.

The noise myself and others heard in the car park has gone, even after an hours drive so oil upto around 90c, did not get over 100c as keeping revs under 5500rpm but car sounds healthy and is driving fine.

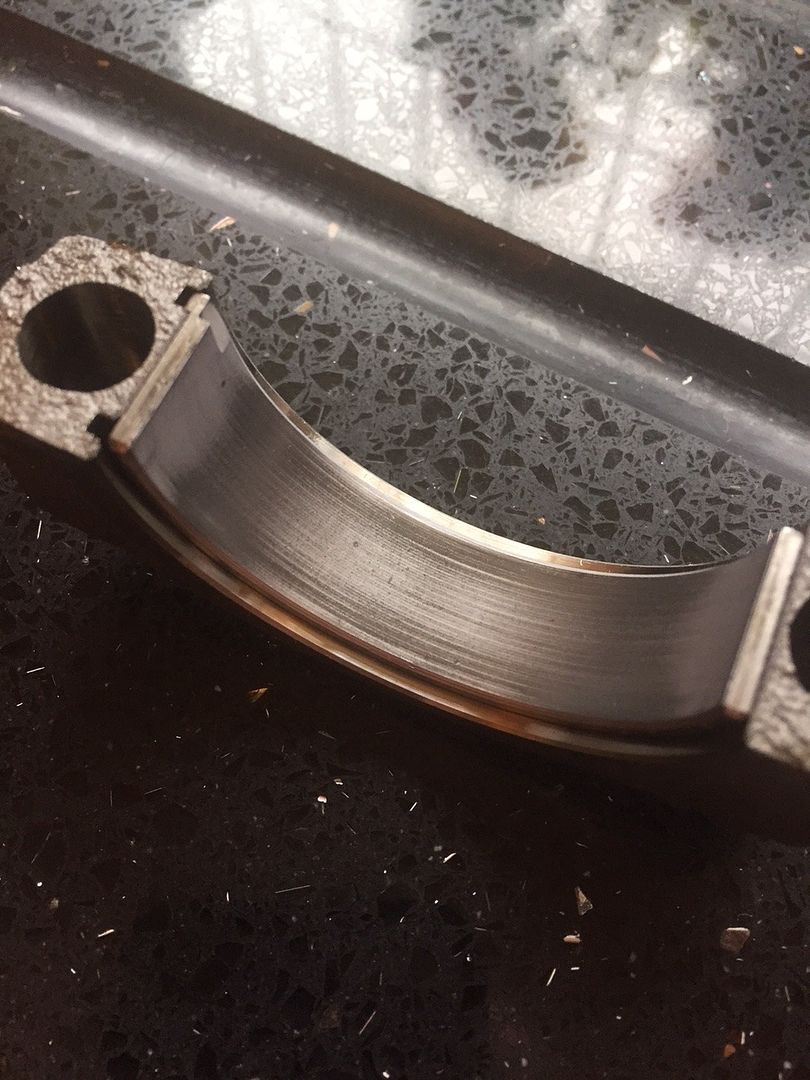
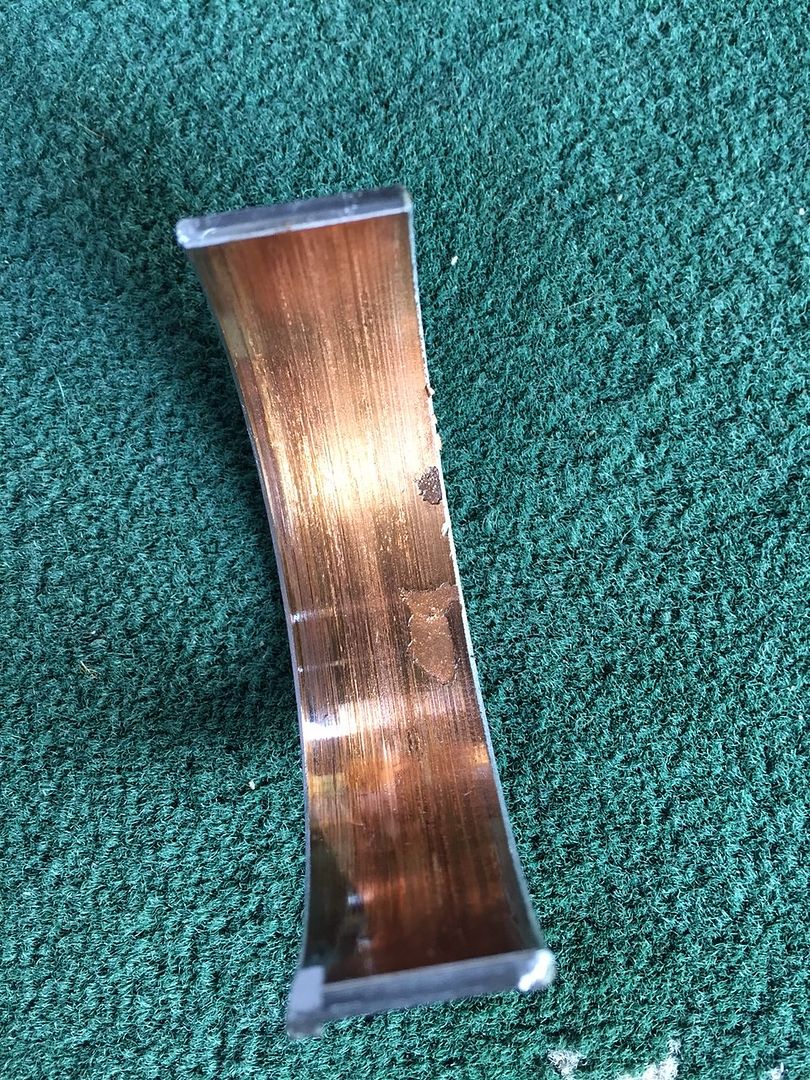
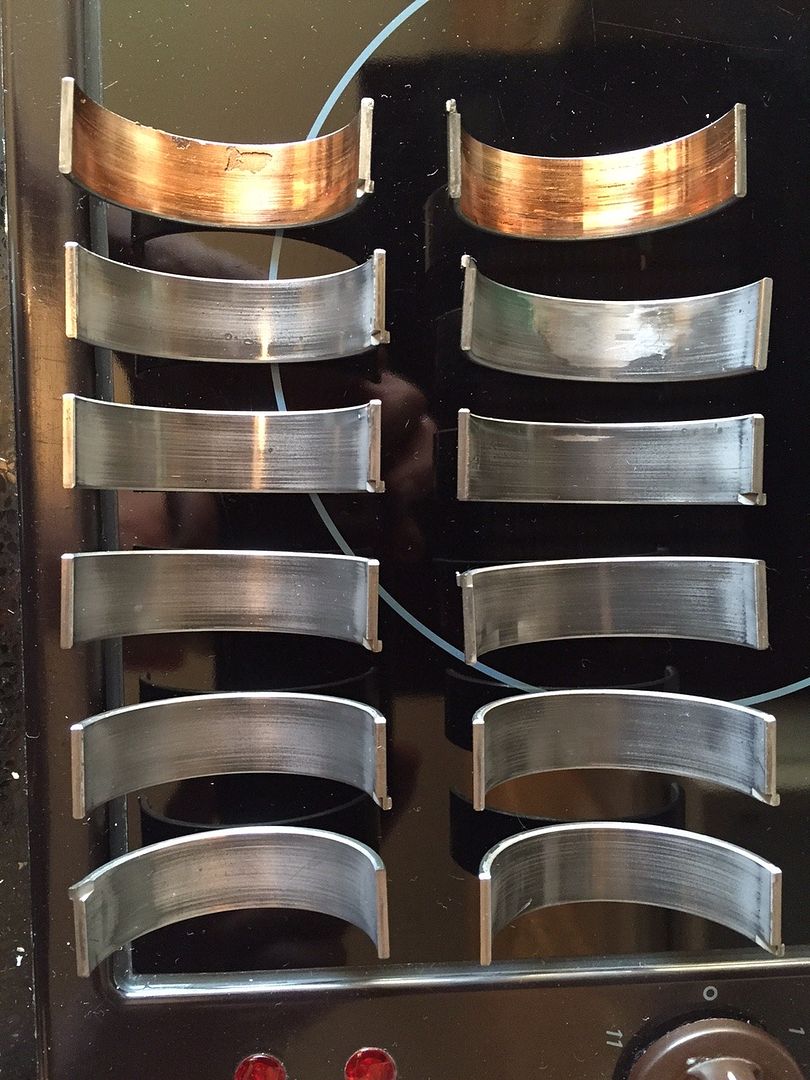
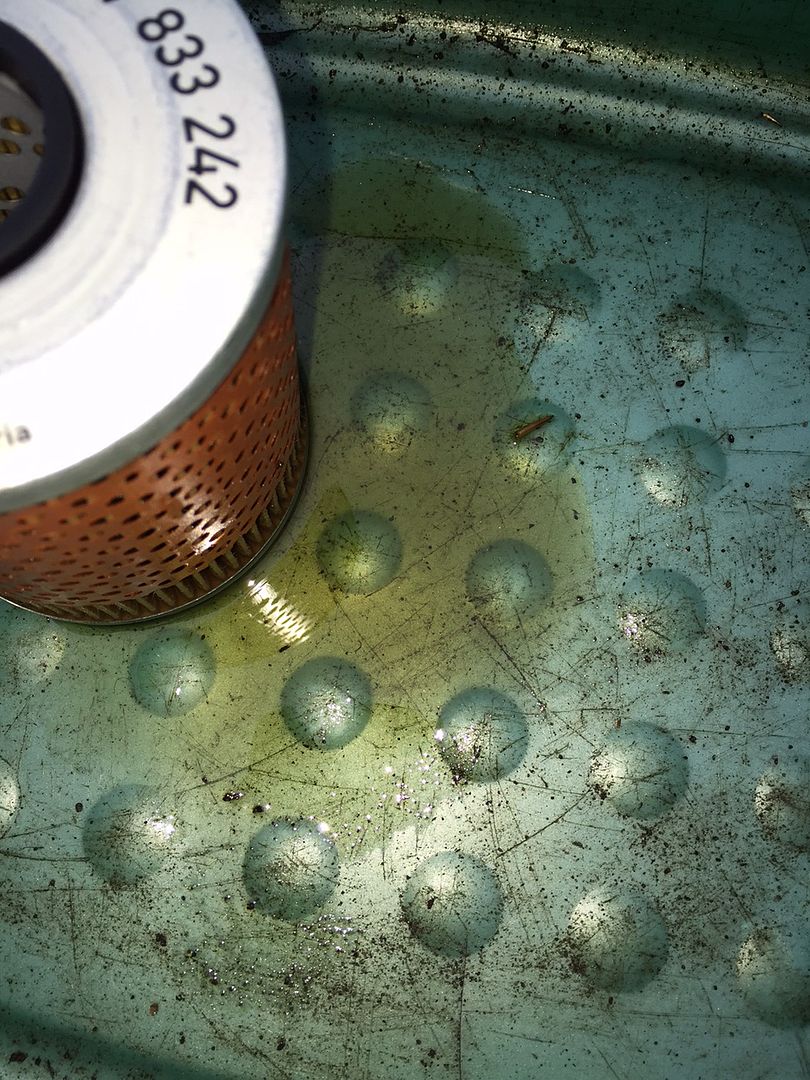
The oil from the filter from running in did seems to have a little debris but very hard to tell whereas before it was very clear, but this I suspect is what was left in the system, couple of picture:

81c41e19790ac2bb7634982a658d6d34.jpg


4ae0ff34f71b55a0396b91ef88f5638a.jpg


Hopefully that is the last of it, but shall check the current filter in a couple of days to see if anything is in that one, fingers crossed.

It's good to have the car up and running again, drives superb, sounds great with no knocks, but only driven for an hour so far.

I've always being quite willing to work on my own cars, but not done anything major like this since I super charged the Mustang. I've learned a lot completely dissembling the front end of the car and opening up the engine. Quite enjoyed it but hope I don't have to do it again. ;)

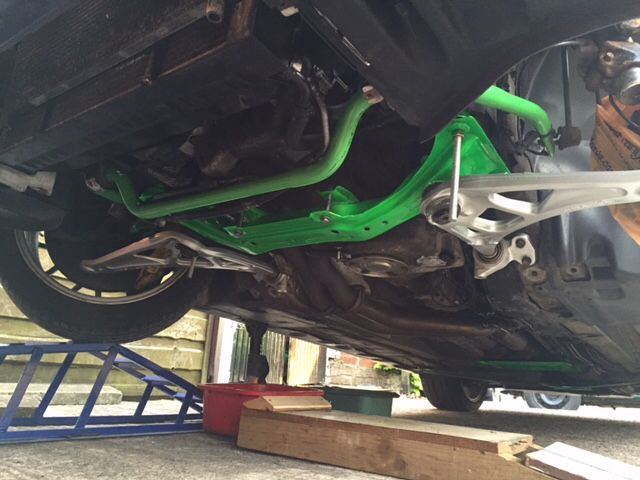
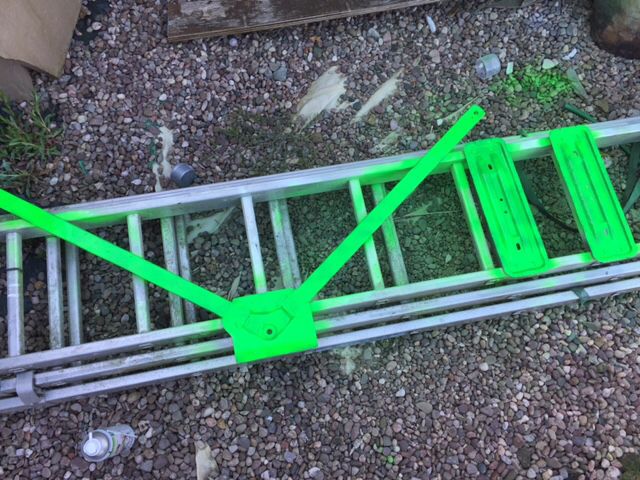
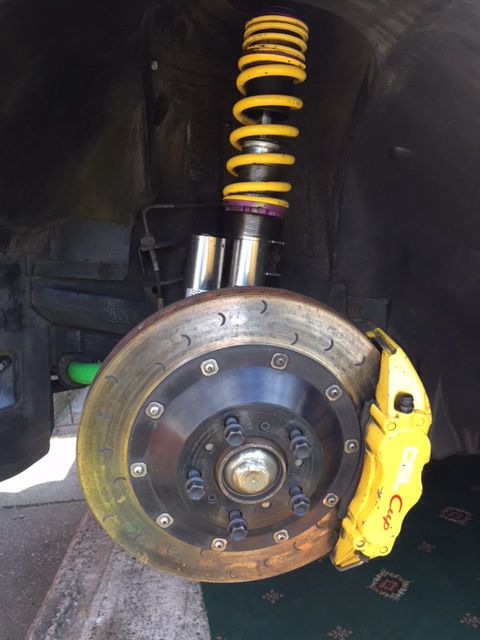
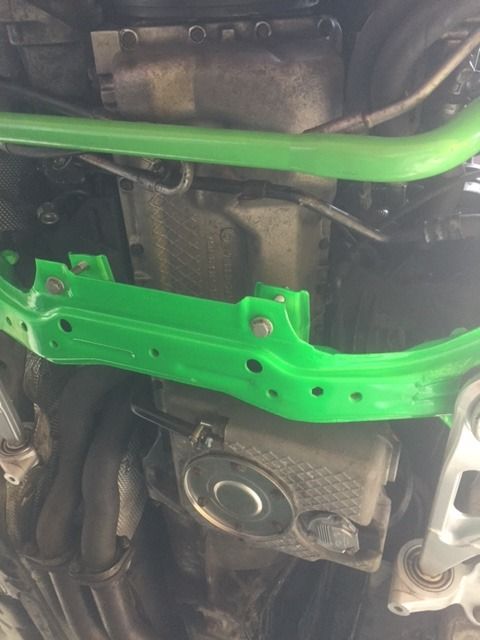
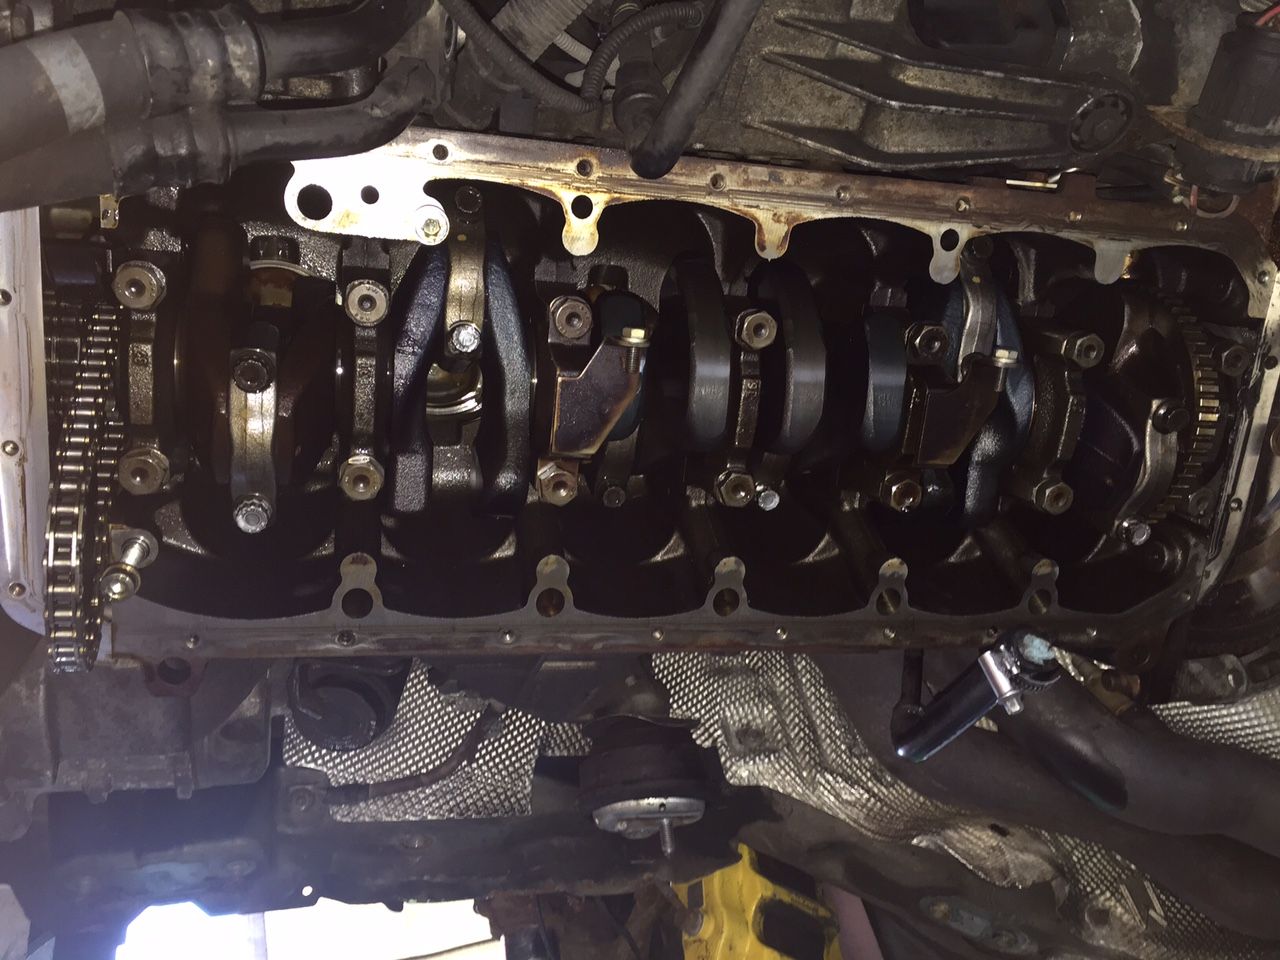
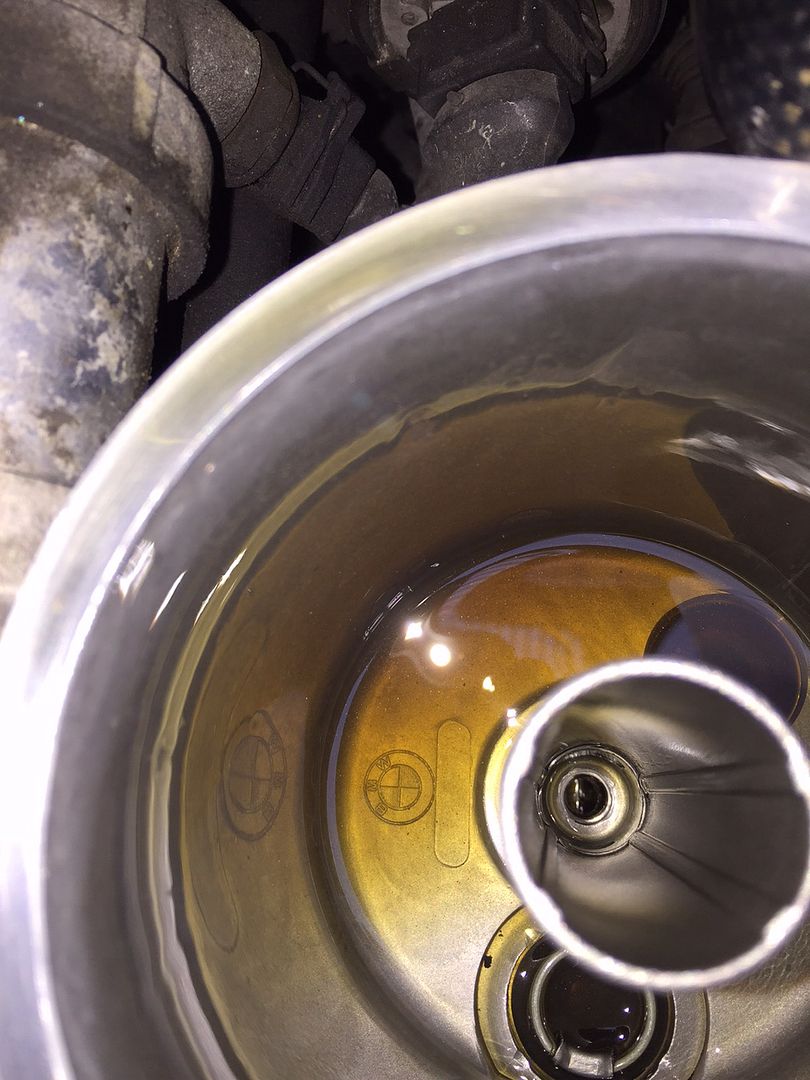
Finally a picture of some green from when it was all back together:

dac2cca50ffcf2e19bd20d436301b0a5.jpg


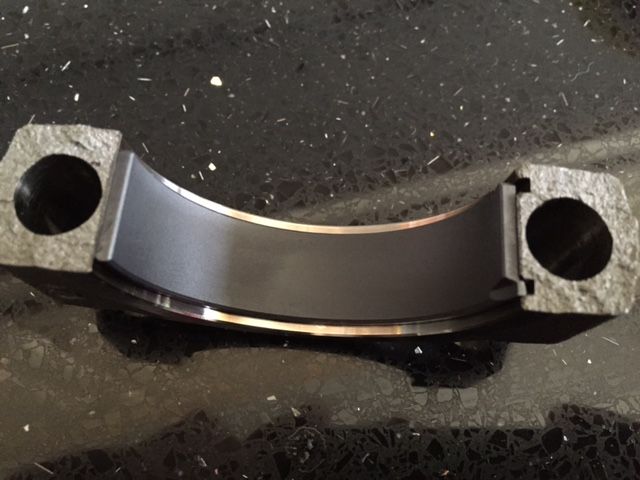
Will take the car to a couple of mates garages tomorrow who both build engines for them to have a listen, check the old shells out and inspect the filter in the car to see if they think it's all healthy. :)
 
Last edited:
Only the rev limit, not the ignition table or anything like that. And has Gibbo has said it was probably on the way out anyway, seems a common thing on these engines. Rev limit probably pushed it beyond the edge.

This, infact it's a brilliant map after it was custom done on the dyno. Shame they just set the rpm to high. :(
 
See if it were me I'd have just had the car taken to TGM and had them do the work. :D

I never realised these engines were so cheap. It'd be a great engine to shoe horn into an S2000. Nice power increase yet remaining NA.

An S2000 would be epic with an S54 with nearly 400 horses NA. :)


Sounds like it's all gone to plan!

Early days yet, time will tell. :)
 
The next few 100 or so miles will tell you everything, hope all is well with it fella!

Yep.

Took the oil filter which was in the car for the 30-40 minutes when it was idling on cheap oil to try and flush anything remaining out.

They said there is still copper in the filter and some carbon deposits. They said all cars will have carbon deposits in the filter, particular more so on a brand new car or new engine.

They said the copper deposits is bearing material but it is very light and is residue debris which the filter is collecting, they said not to worry, the filter will pick it all up and because it is such a soft material it will not do any harm.

They said change the oil and filter in a weeks time and bring that filter for inspection as they would expect to see same amount of copper or less if the problem is now gone and what I am seeing is just residue. If there is more then the car has another issue such as oil starvation causing excessive wear or a problem with the crank. They did say though they think I will be fine, they had a good listen to the engine and said it sounds extremely healthy as S54's are normally quite rattly by nature, mainly from the vanos and top-end but easily mistaken as bottom end noise.

So fingers crossed. :)
 
If you do want to do another at Powerstation, lets just say it's now £30 a car due to the fact it's me running the show now and there is no vat to pay (yet) :o
I got made redundant on Monday :mad:

Proper sucks man. :(
End of the day you know your stuff and can pretty much do any job on any kind of car. Sure you will be back in work soon. :)
 
It does seem that way..
I have wanted to run my own business since well, I kind of was when I was 18 during college. Like an immature pillock though, I threw it all away and went to work for someone else as the money was good (and easy) :D
I have two "get out" options definitely open to me at the moment..
Full / part time with Litchfield
Go back to the construction industry (in the same job and the same company I left to go to PS)
and one other not so open invitation from my brothers wind power generation company..
I think I have to bite the bullet here now though as everything "could" fall into place quite nicely...
At worse it all falls around my ears and I walk away with a credit card debt... No real change there though, as I've just spent the last 5 months clearing them :D :D

ARGH (and still have a bloody headache)


Litchfield! ;)
Talk him into letting us hold our RR days there, I did ask him but he was OK with just 1 or 2 cars turning up, but was not particular interested in holding RR days for groups. :(
 
Back
Top Bottom