One year on and my tubing and/or fluid is going green.

Soldato
OP
Joined
18 Oct 2002
Posts
4,713
Location
Kent
@pastymuncher

Mate, I really cant thank you enough for the offer, that’d be amazing.

I think what I’ll do is follow the advice from yourself and WantoN and give the cleaning a go myself and if I’m struggling I’ll see about send it to you if you’re still willing.

I’ve borrowed my dad’s PC so i can spend some time trying to clean the parts. After I’ve done blitz part 1 and flushed the rads manually a bunch of times I’ll hook them up to the pump/res and just let it run for a few days periodically changing the fluid.

I’ve ordered some PH testing strips to check the fluid after its been in the radiators for while. I’ve no idea how useful that information will actually be but I’m curious nonetheless.
 
Man of Honour
Joined
12 Jul 2005
Posts
20,535
Location
Aberlour, NE Scotland
Of course, that's no problem and I will be happy to help if you need it. If you get stuck just drop me a message, I am always around several times a day and my offer stands as long as you may need it. I have a big walk in cupboard full of tools and stuff including micro files, all of the stuff I suggested in my earlier post plus many other goodies and a mini tool with a gazillion different fittings so I am sure one method or another will get it coming up clean again. Don't give up, watercooling when it's working correctly is just brilliant.

With the Blitz kits you have to follow the instructions to the letter. Part 1 is for the radiators only and needs to be mixed as per the instructions so 250ml Blitz pt1 to 750ml distilled/de-ionised water and then fit your blanking plugs. Too weak and it won't do the job properly, too strong and it could eat your radiators. Time is also critical so it should be left in the radiators for 6-12 hours (no longer than 12 hours, this is extremely important). I tend to give the radiators a good shake several times through the day but you don't have to do this. Once the time is up empty the mixture straight down the drain and refill with distilled/de-ionised water (I always leave a air gap to get some movement of the water when shaking) and put you blanking plugs on the rediators. Give them a thorough shake (look up the shake and vac ad on youtube and you will get the general idea :D) then empty the rads again. Repeat this another 4-5 times.
Now you are ready for part 2. The idea of part 2 is to neutralise part 1 and to flush out any bits of debris that part 1 has loosened. To me this only really makes sense if you have a inline filter in the loop otherwise all you are doing is pumping the debris around to get stuck again. I have a filter in my loop anyway as my loop is massive and I had a lot of problems with plasticiser before using Mayhems tubing. As your blocks will have been stripped down and cleaned it's pointless putting them in a loop for flushing with part 2 and any debris from the rads is likely to get stuck in the blocks meaning you need to strip them again. What I do is put a short loop together with just the rads, pump, inline filter and a small reservoir I got hold of cheaply just for this purpose. I plumb the loop together so that the flow through the rads is the reverse of how you have them normally setup. My theory behind this is that any debris stuck in the rads from normal running should be flushed out when the flow is reversed through them. Part 2 is mixed by adding 25ml of part 2 to 975ml of distilled/de-ionised water. You can fill the loop in the normal way as you would if it was installed in your case. Be careful when filling though as it can foam up quite quickly. bleed the loop of air as normal. You can let this run for 12-24 hours. I normally give it around 20 hours. Oce the time is up dump the liquid down the drain and refill with distilled/de-ionised water, bleed the air out and run for 60 minutes. Repeat this another couple of times and you should be done. If you really wanted to you could refill just the radiators with distilled/de-ionised water a couple of times for a final flush.

If you haven't got part 2 of the Blitz kit don't run part 1. Part 2 is needed to neutralise the Phosphoric Acid in part 1.
 
Soldato
OP
Joined
18 Oct 2002
Posts
4,713
Location
Kent
@pastymuncher

I did actually use both part 1 and 2 when i first started putting this together a year ago. I followed the instructions and as you suggested i used an inline filter.

My best guess is that i never managed to completely get rid of the vinegar i used before finally deciding to get the blitz kit. That or I got the measurements wrong with the blitz kit.

I haven’t taken my gpu block apart yet but i can see a bit of what im sure is algae around the o-ring. Unlike With my cpu block the fins look fine which i guess is due to the nickel coating.
 
Soldato
OP
Joined
18 Oct 2002
Posts
4,713
Location
Kent
Even if you didn't get rid of all the vinegar the Blitz kit would have neutralised/removed it. When I did my pair of HW Labs GTX280 rads they were pretty clean to start with and not much stuff came out of them at all.

Yeah that’s what I thought too which is why i was shocked to smell vinegar when i took the loop apart.
 
Soldato
Joined
22 Apr 2008
Posts
3,875
Location
Bryn Celyn Wales
I have to say that in all the time I have been using Mayhems tubing and Mayhems X1 red I have had no problems at all. I recently drained the loop and stripped it all down after running for around a year and everything was looking the same as it did when I set the loop up with no staining to blocks, reservoir or tubing.

Asda sells 2.5Ltr containers of Carplan de-ionised water for only £1.50 and I have even picked it up on offer for as little as 50p per container. Some of Asda's larger stores also sell 5 Ltr containers for £2.50. It's cheap and perfect for flushing and even running in a loop with a suitable additive to prevent algae and corrosion.

@Goose If you get stuck you can send me your CPU block and I will clean it to the best of my abilities for you and fit all new O-rings. Same with the GPU block if you have one and it's in a similar state. Send the reservoir O-ring as well and I will try to find a replacement for you. I don't want anything for doing it, I am just offering to help a fellow forum member out. I would hate for you to have spent all of that money only to be disheartened and give up on it. Unfortunately I can't do your rads as I don't have a part 1 blitz kit. Let me know if you would like me to do this for you.
Top offer that mate!
 
Soldato
OP
Joined
18 Oct 2002
Posts
4,713
Location
Kent
@pastymuncher @WantoN

Me again!

I started Blitz 1 this morning and followed the instructions included with the kit (which are also printed on the bottle). The instructions state that you should add 50ml of Part 1 to 950ml of water, but the instructions printed on the Mayhems website says to mix 250ml of Part 1 to 750ml water.

Am i right in thinking that they simply changed the formula since i purchased the kit? The bottle i got is only 150ml to begin with.

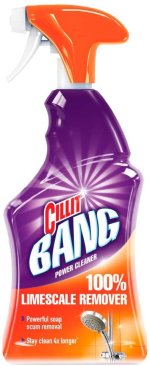
I found this (screenshot below) in Waitrose today. It doesn't say "grime" and the instructions say not to use it on copper but i'm assuming thats because it will attack the copper which is basically the goal for cleaning my cpu block?

6j4Zh2H.jpg
 
Man of Honour
Joined
12 Jul 2005
Posts
20,535
Location
Aberlour, NE Scotland
Not sure about the Mayhems Blitz. If the bottle is now only 150ml then it's been reformulated since the last time I used it. Just follow the instructions it came with and it should be ok. If something goes wrong then you are covered as you followed the instructions.

That's the stuff. It's been renamed now. It's ok on copper for short periods of time so around 30 minutes maximum and then thoroughly rinse it afterwards. As you only need to do the inside of the block you could sit the copper baseplate on a flat surface and spray the Cillit Bang onto the fins and channels of the plate so that they are covered and then agitate it with a toothbrush every ten minutes. Keep checking it and don't leave it for more than 30 minutes. As you have vinegar try that first as you already have it and it's a free possible fix. We used to put 2p pieces in vinegar overnight when we were kids and they came out looking like new the next morning even though they were badly tarnished.
 
Soldato
Joined
22 Apr 2008
Posts
3,875
Location
Bryn Celyn Wales
Not sure about the Mayhems Blitz. If the bottle is now only 150ml then it's been reformulated since the last time I used it. Just follow the instructions it came with and it should be ok. If something goes wrong then you are covered as you followed the instructions.

That's the stuff. It's been renamed now. It's ok on copper for short periods of time so around 30 minutes maximum and then thoroughly rinse it afterwards. As you only need to do the inside of the block you could sit the copper baseplate on a flat surface and spray the Cillit Bang onto the fins and channels of the plate so that they are covered and then agitate it with a toothbrush every ten minutes. Keep checking it and don't leave it for more than 30 minutes. As you have vinegar try that first as you already have it and it's a free possible fix. We used to put 2p pieces in vinegar overnight when we were kids and they came out looking like new the next morning even though they were badly tarnished.
I'd almost be tempted to use coke hahaha, that cleans everything, erver left a 2p or a penny in a glass of coke? Same thing absolute eats everything away, imagine what it does to our insides?
 
Man of Honour
Joined
12 Jul 2005
Posts
20,535
Location
Aberlour, NE Scotland
@pastymuncher

Quick update. I just emptied the rads of blitz 1. There were one or two tiny black specs and the fluid was green. :mad:

Give it a really good flushing and then I would be tempted to use a distilled vinegar and warm water mix to see if any more colour comes out before using part 2. I usually use a fairly strong mix of 200ml of distilled vinegar to 800ml of distilled/de-ionised water. I pour just the water into a kettle and heat it to almost boiling then pour 800ml into a measuring jug and add the 200ml of distilled vinegar. This will bring the temperature of the liquid down and I pour it into the rads when it's around 45 degrees C. Leave a air gap in the rads and fit the blanking plugs then do the "shake and vac". Leave for ten minutes and then give them a good shaking again. Repeat every ten minutes up to thirty minutes. Give them one really good last shaking and empty into a container so you can see what has come out. If clear give them a good flushing and proceed with part 2 of Blitz. If still coloured repeat the process until clear then do part 2.
 
Soldato
OP
Joined
18 Oct 2002
Posts
4,713
Location
Kent
@pastymuncher

What’s frustrating is that this is exactly what happened when i first got the rads. I bought them new and cleaned them with vinegar and then later with blitz 1 and the water would always come out green. Someone on another forum said this was normal as it was just the copper in the radiators reacting to the acids. I followed that persons advice and flushed them thoroughly with water then ran part 2 through the loop then water a few times.

Of course that didn’t end well as 12 months later things went green and i started this thread.
 
Soldato
OP
Joined
18 Oct 2002
Posts
4,713
Location
Kent
It is definately not normal and that guy was talking nonsense and now we know what has caused this. You are supposed to keep flushing the rads until the water is clear. Not doing so leads to problems later on as you have now found out.

When i flush them with deionised water it comes out clean but then it’s only been in the rads for a minute or so while i shake it. It’s when i leave them with vinegar water or blitz that its goes green.
 
Soldato
OP
Joined
18 Oct 2002
Posts
4,713
Location
Kent
I’m concerned that i may have caused corrosion in the rads when i first got them by using too much vinegar. I cant remember if I even diluted the vinegar or how long i left it in. I’m starting to think they may be beyond the point of salvaging.
 
Soldato
OP
Joined
18 Oct 2002
Posts
4,713
Location
Kent
@pastymuncher @WantoN

Quick update.

I’ve filled and emptied my radiators with an 80/20 water/vinegar mixture 4 times today and after the 4th empty the liquid that came out was just as greeny/turquoise as the first empty. :mad:
 
Soldato
Joined
26 Sep 2010
Posts
7,157
Location
Stoke-on-Trent
I’ve filled and emptied my radiators with an 80/20 water/vinegar mixture 4 times today and after the 4th empty the liquid that came out was just as greeny/turquoise as the first empty. :mad:
You're just eating at the copper now.

An acid solution is always going to come out blue because it's reacting with the copper, that's how this works. The point is the wash through to remove crud, but don't keep on doing it. Suffice it to say you've washed through enough now, mix up a little bicarb solution to neutralise any remaining vinegar and then give a throurough rinse with your distilled water.

The radiator is done, trust us.
 
Soldato
OP
Joined
18 Oct 2002
Posts
4,713
Location
Kent
You're just eating at the copper now.

An acid solution is always going to come out blue because it's reacting with the copper, that's how this works. The point is the wash through to remove crud, but don't keep on doing it. Suffice it to say you've washed through enough now, mix up a little bicarb solution to neutralise any remaining vinegar and then give a throurough rinse with your distilled water.

The radiator is done, trust us.

That was my understanding when I first put the loop together 12 months ago and as you can tell things didn’t go well.

I can also see a little corrosion on the threads of some of the ports. I’m not sure how to clean them as I cant really soak them in vinegar/water.
 
Back
Top Bottom