

You are using an out of date browser. It may not display this or other websites correctly.
You should upgrade or use an alternative browser.
You should upgrade or use an alternative browser.
PARVUM LIGHTNING
- Thread starter JR23
- Start date
More options
Thread starter's posts
As LIGHTNING is just a little on the large side it will probably be a little while before I can get final photographs taken, I just need to find a big enough space to light and photograph it, then make sure there is two people present at all times just to move it and get all of the equipment to hand! For those who didn't make it to insomnia I came across these pics on the multiplay flickr, I did take some myself but with someone else's camera, when I find them i'll upload them, I believe MakiRole has some on the way too.


JR
I suppose the time has come to stop with the teasing and take some photographs myself outside of the incredibly warm lighting of the NEC. I'll try to cover some of the details missed between the last update and the build being completed without revealing everything to you guys just yet. Not that I don't want to show everything now but I don't want overlook the 6 days of insane paced work and getting something this big into neutral surroundings is quite challenging.

Most of my time went into sleeving the two immense PSU's, a 24-pin, 8x 8-pin PCIe, 8-pin EPS, 4-pin EPS, Auxillary PCIe molex and all of the annoying little cables needed for an Aquaero 6 with 15 fans were made entirely from scratch in the space of 3 days. They are all 3.1mm OD 16 AWG PVC insulated wire, black under the black and grey sleeve and yellow under the yellow. All of the little supplies came from Shakmods, Teleios sleeving from E22 and tri-rated wire from RS-Online.

To keep all of the cables in shape without lacing or combs the holes in the motherboard tray were all cut the perfect size and spacing for ATX spec connectors. Originally I had planned to cut individual holes however the OD of 16AWG sleeved wire is too big and there is no chance they will fit past each other anyway. Each cable was assembled in position and the tolerances worked out just right such that the cables hold neatly but aren't damaged by the sharp edges.
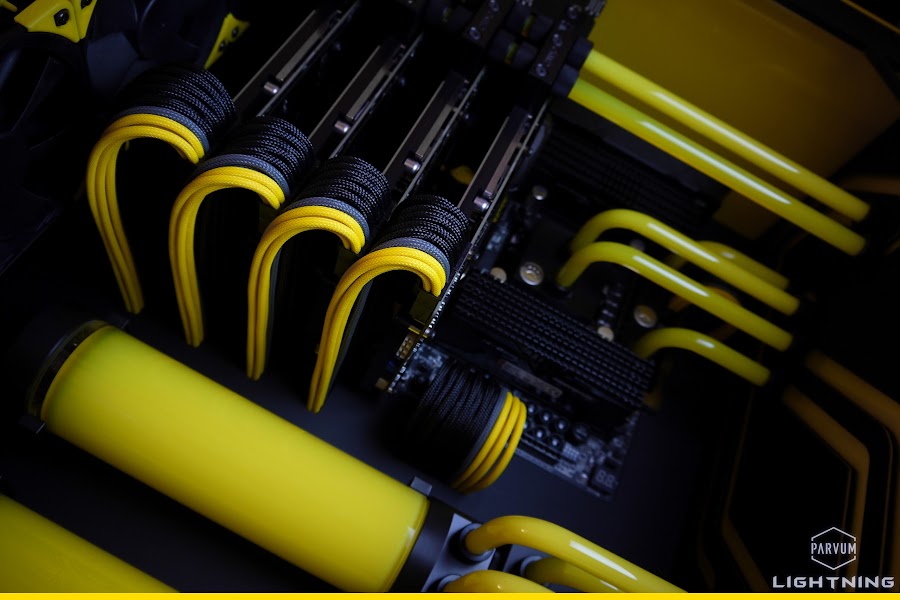
Noctua very kindly sent some (well 120!) press samples of their new Chromax vibration dampening corners and mounts. For the radiator fans I went with the extremely vibrant yellow and in the front panel where the A14's are set against a gloss yellow panel I opted for black to maintain the harsh contrast. They give a great functional accent to the fans really setting off the Neutral all black iPPC's.

Aside the physical assembly the other main time consuming process was bending all of the acrylic tubing. I used Shakmods 10/12mm Crystal Clear tube which was incredibly well priced (check out the 10m pack UK guys!) the quality was great and it took the heat very nicely making it quite straightforward to achieve incredibly consistent bends. I used monsoon mandrels and primochill bending cord. I find it's very helpful to have multiple bending cords just incase the tolerances between silicon and ID don't match up, to get a parallel bend without any flat spots or kinks it needs to be a tight fit.


HyperX also kindly set two 4x4GB Predator kits, rated at 3000C15, incredibly as soon as LIGHTNING booted for the first time all 32GB fired straight up at it's optimal XMP of 3000MHz. Although that may have something to do with the 4.5GHz i7-5960X OCUK lent to me for insomnia.


Thanks for all your kind comments everywhere guys, it's been a busy few weeks but i'll try to respond to everyone now I have a little PC time with my own rig again. In the next update I shall get someone to help turn it around and show you some details in the back!
JR
The amount of work and level of detail going into this build is stunning... and the rear looks incredibly clean, amazing work dude...
Thanks, I put quite a lot of work into the rear and everything about it is just a little different from conventional Parvum. It would be great if they all could all look like Lightning but for some reason not everyone uses 780/780Ti Lightnings with only the displayport exposed. From a structural point of view it performs well too, the cards are very flat even without the tubing considering the huge size of the blocks.
Excellent work and judging from the photo on KitGuru, you made it in time! I love those new Noctua coloured anti-vibration pads. Finally, they make their fans look good!
I think I got it filled and sealed at around 2PM on the day I left for insomnia, ran upstairs packed an entire setup, cleaned and prepared 3 other rigs, quickly packed some clothes and then ran straight back down and powered everything on. Straight into the BIOS observed all was good, M.2 showed up, all 8 DIMM's already sat at 3000MHz, OCUK's 5960X was running at 17°C. Cracked straight on with an OS, installed Aquasuite popped the fans to 30% and loaded everything in the car. I forgot what time I arrived, around 8PM I think.
Noctua always looked good, you just weren't ready
")
I miss them already
I'll bring them over to play with one day!
I haven't checked this part of the forum in over a year and the first thing I see is this.
This is some masterclass stuff here well done!
Thanks, it's a great time to check it out again good sir! I went to the other part of the forums once, bit mad

This is absolutely awesome!! Very original cooling arrangement, masterfully implemented...
I doff my hat
Thank you!
More updates please!
Updates are here and more are coming!
As always, fantastric work JR23. I love the manufactured water channels in the actual case as it looks much cleaner by removing a lot of potential piping from the system. Also the fact that there is two loops in a relatively small ATX case with four GPUs is quite brilliant as many would struggle to design and build such a loop in a Primo so something like this is quite rare.
Smashing work
Well it adds a lot of runs but takes away a lot of bends and a lot of fittings, using the really slender EK-HDC's does help to keep it from being a total overload but it's a busy build for sure. Admittedly it is quite fat, but compact for an overkill setup.
Can you please NOT post any more pictures, getting extremely jealous over here! Channels in the case is definitely the way forward
I already broke that promise, so, no... sorry.
That is absolutely incredible!
Thanks!
That pic needs a NSFW warning, some hardcore pc pron going on there!!
I wouldn't post them if they didn't
Amazing as ever.... How does Shakmods tube compare to E22, do you know?
It's difficult for me to give you the answer I would like to on these forums. But lets just say when I needed it before insomnia, E22, EKWB and Bitspower were out of stock at OCUK. A supply problem was resolved and I was not disappointed and consequently neither were OCUK.
JR
Although Lightning is complete and running much post arrived from afar, what could it be?


Time for Filco.


But also from Washington state USA, lots and lots of Signature Plastics DSA PBT keycaps.

Although I got lots of spares i'd already figured out exactly what layout I was going for to complement the build.
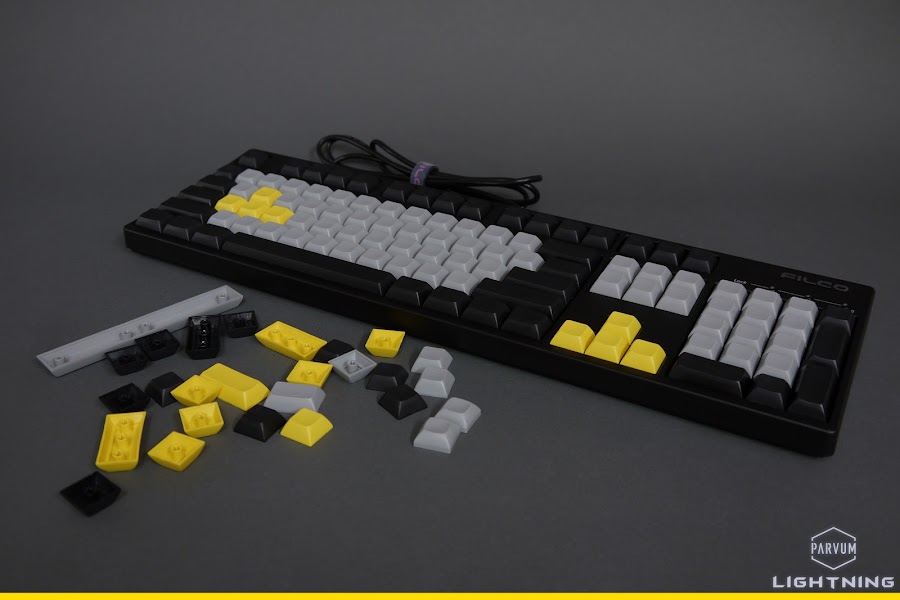


I'm not sure I actually wanted MX-Blues however the board came with 3 tiny blue LED's which pleases me greatly. I already have MX-Reds and MX-Greens, I don't like MX-Blacks so it seemed like a logical choice.
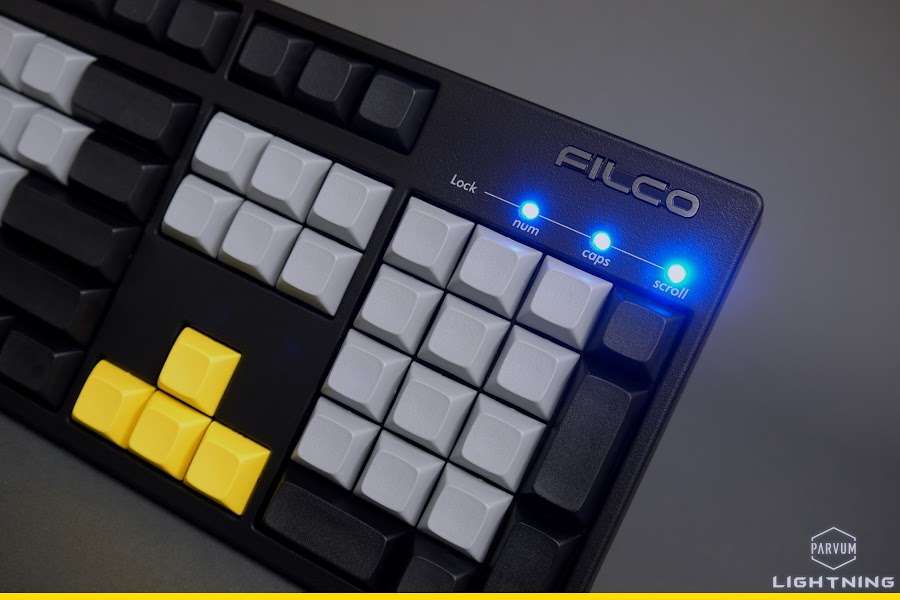

Really very pleased with how everything looks together!

Hopefully soon a very swaggy Filco cable will arrive from Pexon sleeved in the same black teleios as the build and my plans shall be complete

JR
Associate
- Joined
- 22 Jul 2015
- Posts
- 1,241
- Location
- Aberdeen
the whole build is neat and impressive. well done.
Another little detail on Lightning to be addressed was the SLI bridge, the motherboard didn't come with a quad bridge and we had just been using a plain black PCB style one and so decided to make a cover. 'LIGHTNING' or the jet would have been way too small on a bridge but the 'OC' logo had just the right amount of detail.

Obviously it had to be an inlay, just like on the front of the case the yellow piece is chamfered on both edges and stands slightly proud of black as it appears to in MSI's graphics.

Each piece is an individual piece of acrylic with the inner OC being held in it's original place. The reverse is area cleared so that the bridge sits inside it and the PCB edges aren't exposed.

All assembled together.

It looks very at home with the motherboards original accessories.


But even more so mounted to the Lightnings.

Hopefully over the weekend I have another little job to do so that the Aquaero heatsink can be fitted to my weird mountings without removing it from the case and then it will be ready for final pictures.
JR
Associate
- Joined
- 22 Jul 2015
- Posts
- 1,241
- Location
- Aberdeen
That SLI bridge will definitely add to the beauty of this build


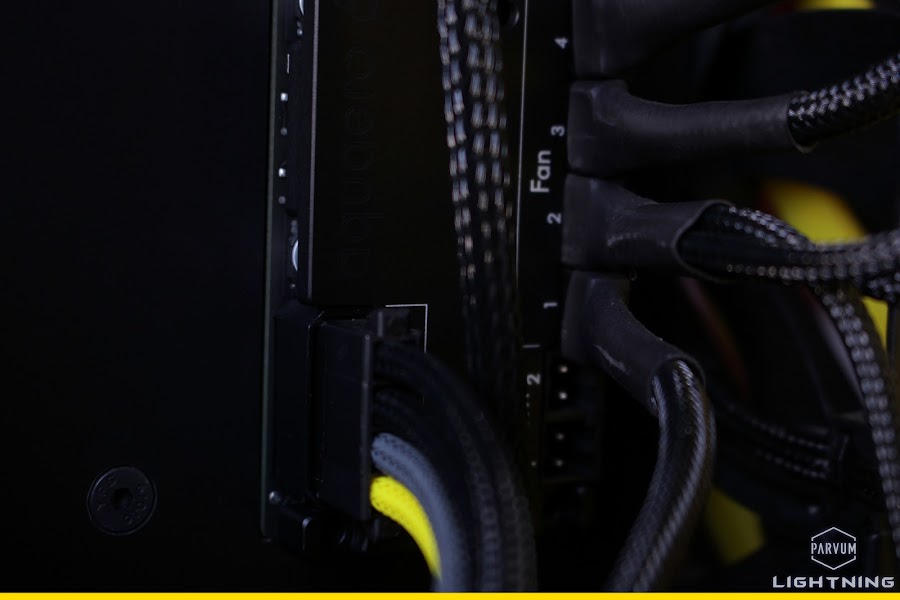
I got another small little task out of the way yesterday, the way I had mounted the Aquaero 6 in order hide hide screw heads in the front meant that the heatsink wouldn't fit.


Although it's not really needed to dissipate heat unlike on the Aquaero 5 it does look really clean so I wanted to find a way I could still fit it. The main issue was that the standoffs couldn't sit up to the PCB where i'd put nuts so I milled them all off flush with the heatsink.


It wasn't worth attacking them with any serious precision as they will no longer touch against anything hence I just end milled them off by eye with a small mill which cut really nice and didn't mark the rest of the part during the process.


It fits really neatly onto the Aquaero and makes it look a lot neater hiding the inside face of the connectors from view. At the moment it's just resting in place but i've ordered some adhesive thermal pads as used on memory to hold it in place.


Just a quick check to see all the fans are still operational after rummaging around with cables, all looking good
")

JR