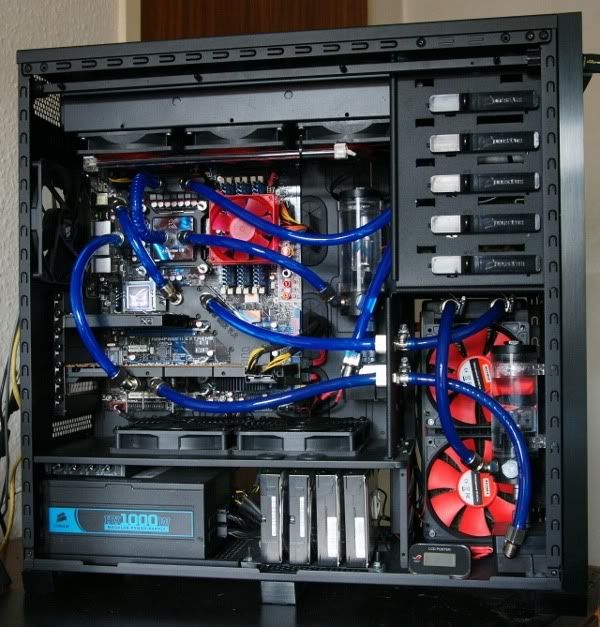
Project: 972 Rebuild

love the "warts 'n' all" rebuild project so far mate!

keep it up

PS

Perhaps another solution to the hole fill problem would be to re-use that mesh from the plate you removed? Snip it out carefully and use a little clear epoxy to "glue" it to the underside of the case? Just a thought :)
 
love the "warts 'n' all" rebuild project so far mate!

keep it up

PS

Perhaps another solution to the hole fill problem would be to re-use that mesh from the plate you removed? Snip it out carefully and use a little clear epoxy to "glue" it to the underside of the case? Just a thought :)

Nice suggestion - I'd like it to sit within the hole and not proud of the bottom of the case - I don;t intend to re-do this again in 12 months because I know there's something not quite 100%. I'll definitely be re-using the removed shelf - thanks for the suggestion :)
 
Project: 972 Rebuild - Part 12

More goodies have arrived today!

I picked up some QuikSteel which this looks to be the same sort of thing as JD Weld...
picture.php


My radiator and a brown box arrived....
picture.php


I'm not sure how other rads stack up, but I've had stunning results on the one already in the rig, so what could possibly be better than a 360 C-Changer radiator? Yes - 2 G-Changer rads...

Wonder what's in the boxes...
picture.php

Oh I remember - radiator mounting brackets.

And there's my new rad - Phobya have changed their branding since I bought my first one - it's now a stuck on embossed sticker instead of a "pressed" logo - oh well, it wont be seen anyway.
picture.php


No building tonight - too busy cooking Paella for the masses! Tomorrow night's looking promising though. Think I'll start with filling that hole. Any tips on preparing the surfaces, or how to use QuikSteel?
 
Last edited:
Update on the CPU - status has changed to "Awaiting Customs Charging" - looks like I'm going to have to pay a contribution to her Majesty after all. Ah well. Should be here soon....
 
JB Weld is pretty damn strong, you won't be able to push it out if you seal it completely, it drys rock solid which is why its a pain in the rear end to sand.

You could also solder a piece of ally, soldering kits are a very cheap....

Not sure about welding, I'm sure it can be done but I don't have any welding experience.

I've a gas and electric soldering Iron, but they wont get any where near hot enough to braze the two surfaces together.

I wonder If I can get a high power PSU (30a) that I have, connect one terminal to the case, the other to a welding rod and then weld using it. At worse I'll trip the electrics.... :) Probably. :D

I'm thinking about tacking a plate into the gap, at the corners, then fillering the gap round, before sanding back...
 
Last edited:
CPU is at Parcel Force's national depot - It's attracted £42.75 worth of customs charges...

I can't wait for it to arrive! It feels like that piece is preventing me going forward, and we all know that's not actually the case as I have an i7 920 I could use in the mean time.
 
Custom charges paid. Custom charges broke down to:

VAT: £29.25
Handling charge: £13.50

If VAT is 20% of the value of the item , that means that customs have my 980 valued at 5x29.25=146.25

I bloomin' wish you could get a 980 for that!!!! That would be about the right price in my opinion...
 
Duhuuuude, didn't see this untill now.

Loving the mobo!

Won't your psu be blocking all the airflow coming through the rad or will you turn the psu so it suck it all in and blow it out the back?

I have ideas for your build but seeing how you already spend money on stuff I will keep them to myself ;)

I will be following this!

Air will come in through the rads, and then i'm making mesh PSU plate for the back so that any air not immediately pushed into/through the psu can also be vented naturally out the back. To be fair, I don;t normally have the side on so I don't believe it'll be an issue, but I'm also open to having a mesh on both sides of the lower compartment. Will see how it goes...

I just popped into the local Taskers and happened to spy that they had a dremel versaflame on sale for £19.99, so I picked one up


One of these...

It says it can weld, so for £20 I've either fixed my welding problem, or I've got a hell of a cigarette lighter should I ever fall foul of the dreaded weed again ;)

EDIT

PS - Thanks :)
 
Last edited:
Nice to see another 700D sacrificed at the altar of a water cooling project. :)

This is what I did with mine. I did the rad like that cos I looked at how the mobo and bottom partition were like siamese twins, with a operation to separate just as complex. BTW I've gone for a one pump loop since I took that photo, kept the pump in the main case, and also gone for a 680GTX full cover.

DSC0084a1.jpg

I like.... :)

It's amazing what you can get into these cases really, but I suppose that they are bloomin' big. I know mine weighs a tonne when fully installed.

Thanks for sharing yours... :D
 
OK - time to start modding.

I'm limited by what I can do of an evening because I'm doing all this in my man cave - and I live in a residential area, meaning that if I want to stay friends with my neighbours, then using rotary tools after 9pm on metal, which is surprisingly noisy, is a bit of a no-no.

Anyway, on with ruining a perfectly good case.

This is the shelf that I want to relocate...
picture.php


In order to move it 20mm up, I'm going to cut off the section to the right, and then cut off the lower section of the motherboard tray and the back part of the partition -ALL becomes clearer with photos... I hope...

picture.php


Finally I get to use my colouring in crayons!!!
picture.php


Hmmm. Time to cut....
picture.php

It took me AGES to cut through these parts of the steel case - I had lost the spanner that is used to secure the dremel cutting wheel in the chuck/collet, and as soon as I got going, the rotary tool would seize. Doh. I did find it eventually and then the fun began...

picture.php

As straight as a dogs... I'll never criticise another shoddy build detail again. I promise folks. This is more difficult than it looks!

picture.php


Yay - it fits! The flange at the back of the shelf is next to be removed, but that'll be tomorrow at this rate...

Next - how to attach the end...
picture.php


Remember these?
picture.php

PSU support rails from the bottom of the case. Handy U shaped channel that I can re-purpose...

...Dremel takes another victim!
picture.php


and now the U shaped channel makes a nice end piece for the partition that I can tap and screw into...
picture.php


That left over off-cut gives me an idea...
picture.php


I'll see if I can cut out a cover for my botched hole, and filler the cap.

Nice to be able to re-use bits of the same case to make it fit my needs.

That's all I had time for tonight. Dentists tomorrow, and chasing up the i7 980. Grrr. Parcel Farce!
 
Back
Top Bottom