Project Alternate

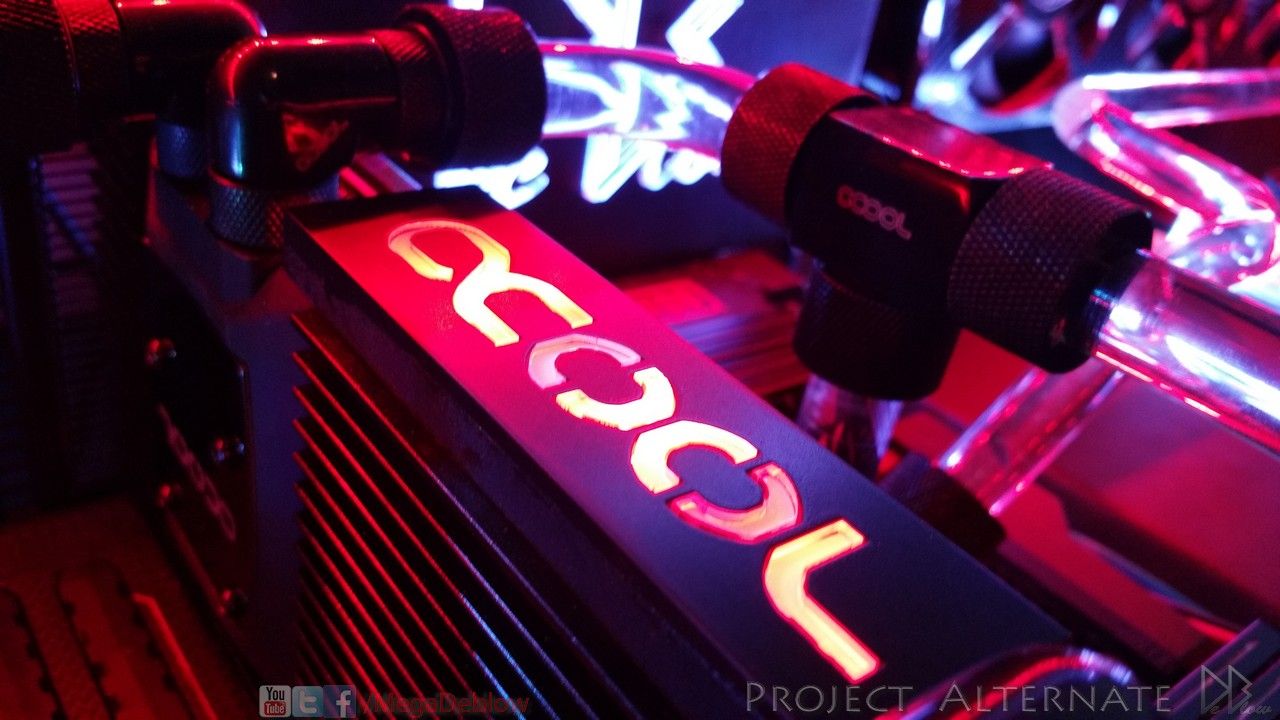
That logo looks awesome!

Saw this at the start, just got the idea myself to want to make one of these and got linked back here :)
Looks difficult and, skills and LOTS of time are needed, both of which, in the last year of school (GCSE year :p) are pretty much
gonna be non existent... Maybe a few years i shall give it a bash ;)
What would your advice be to start off with? Maybe not as extravagant as yours, but something that still carries that WOW factor,
I love the look of this, but will have to start my apprenticeship and start full-time before i can think about it :D
Looks awesome though and cant wait for the final product haha, bet you and a hundred others cant either!

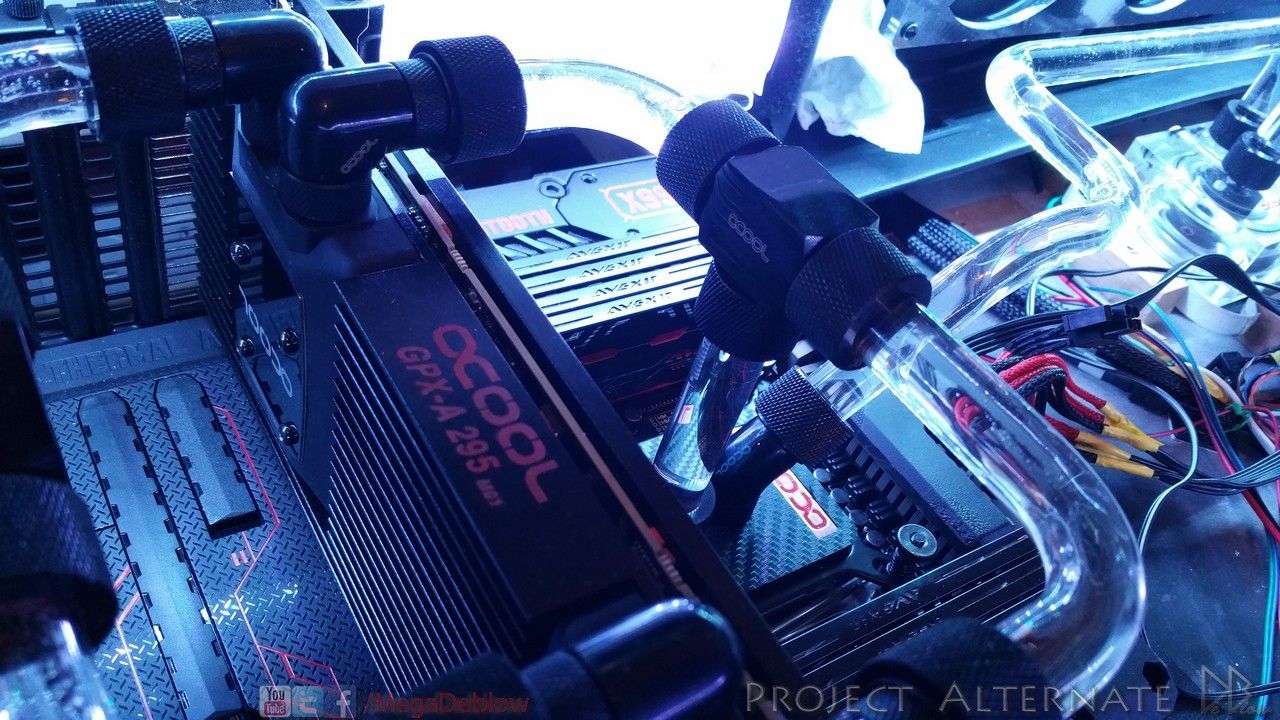
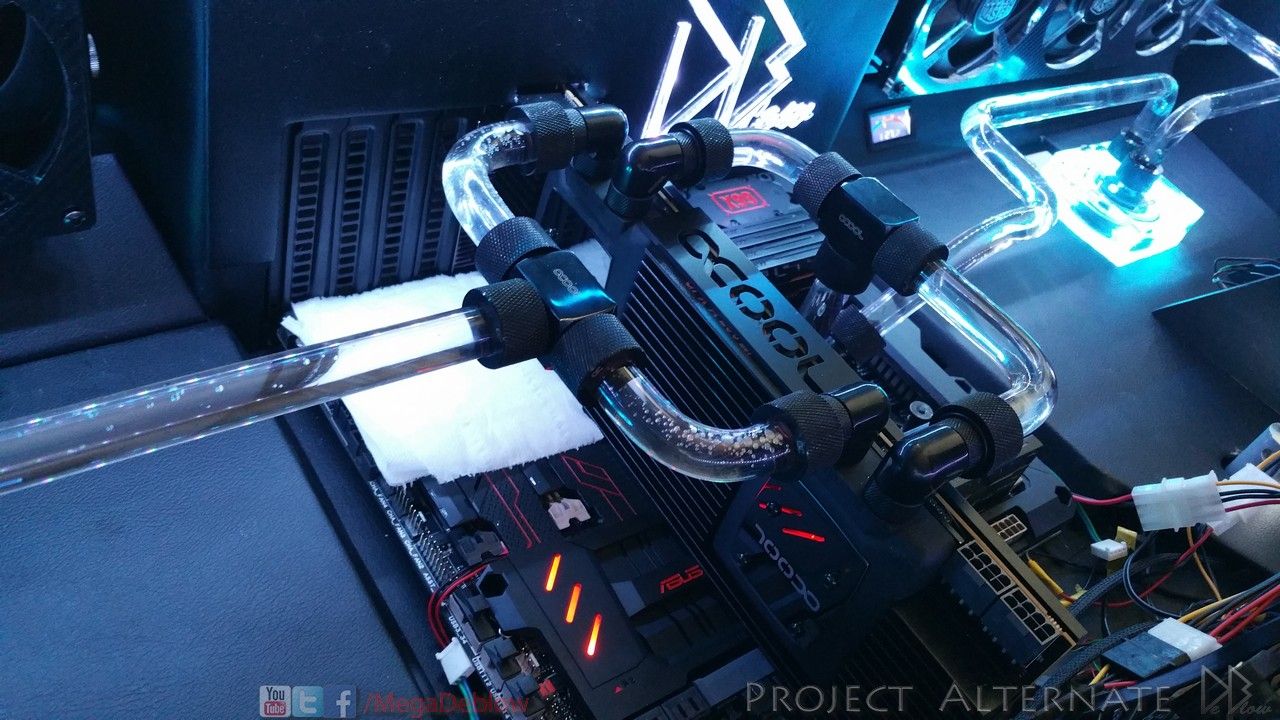
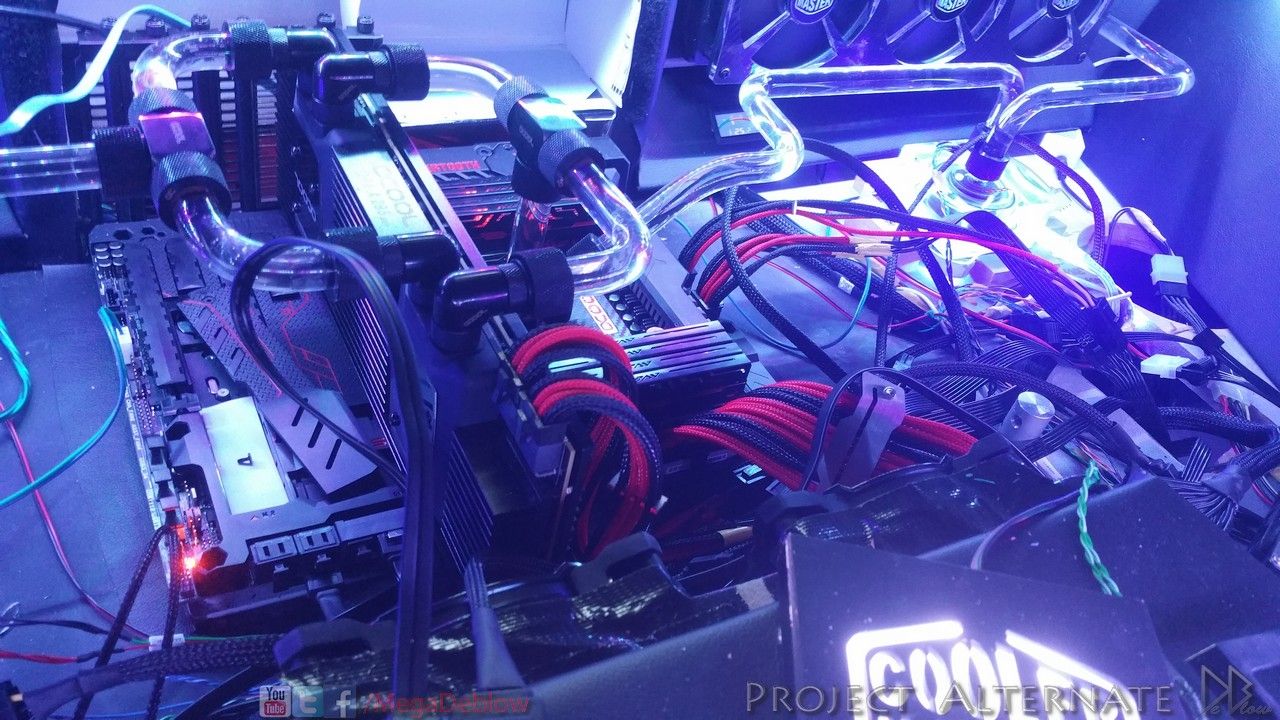
I did my 1st desk back in 2001, it was very basic but still was a great feeling to know I made it, I did one more
with extra bling in 2013.
( big gap = work, collage & a wife)
I started of with what im conformable with & could afford to do.
skills improved & my ideas have gotten bigger & bigger, this by far is the hardest thing I have
built for myself, but the reward at the end makes it worth all the effort & time.

GCSE's are so very important & I wish I listen more at school lol
so yeah, get them out the way 1st & start of small & easy, you can always add to the build
later or start a new one like I did :)

good luck with you GCSE's!
msg me when/if you need any advice, via FB is best if you have it.

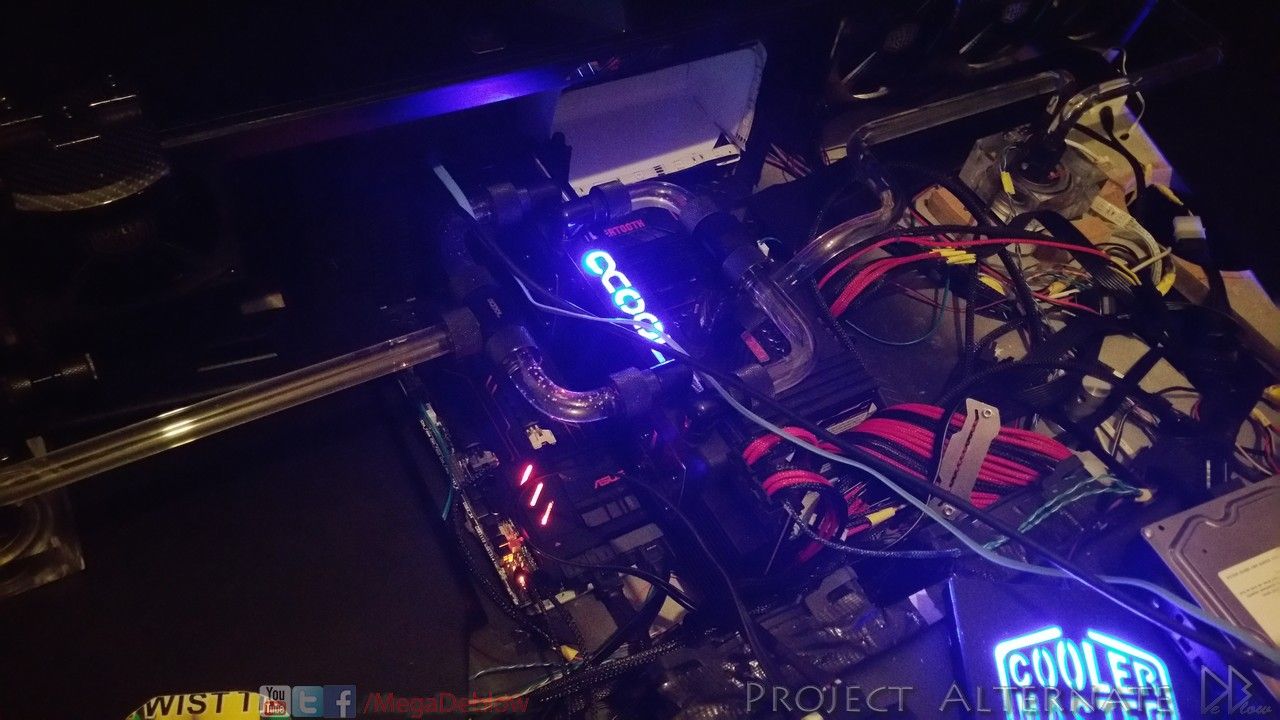
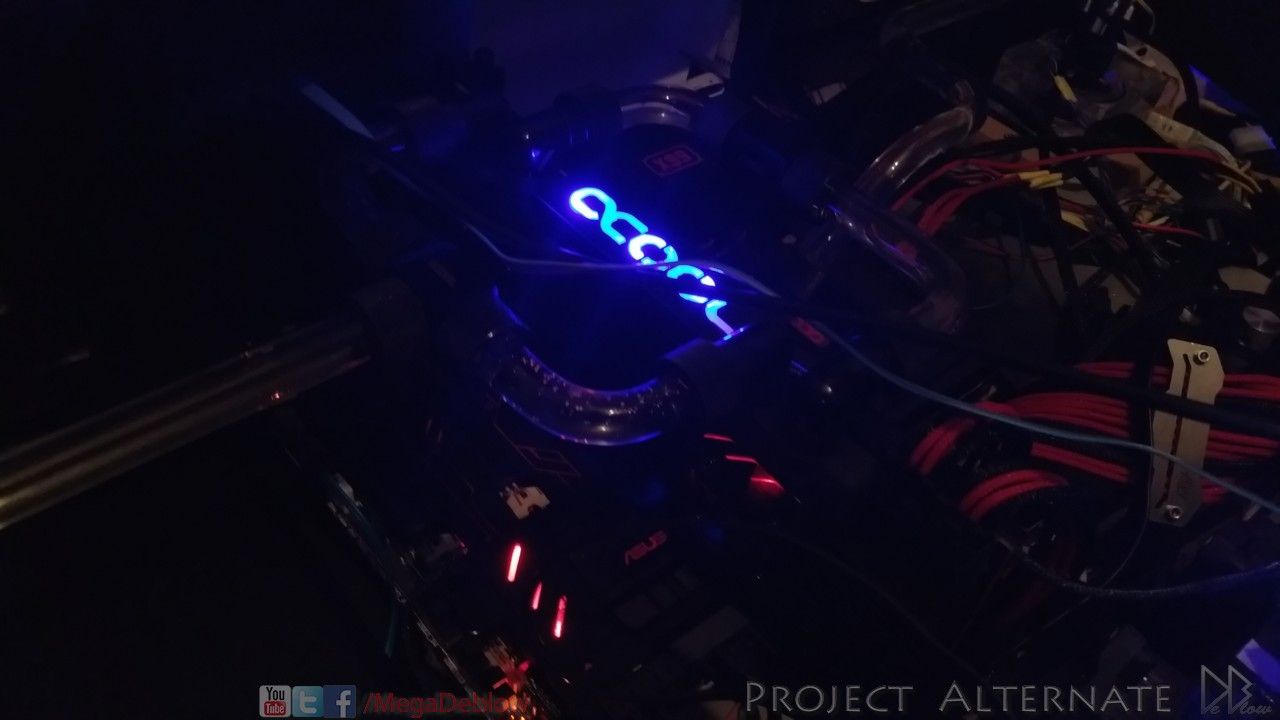
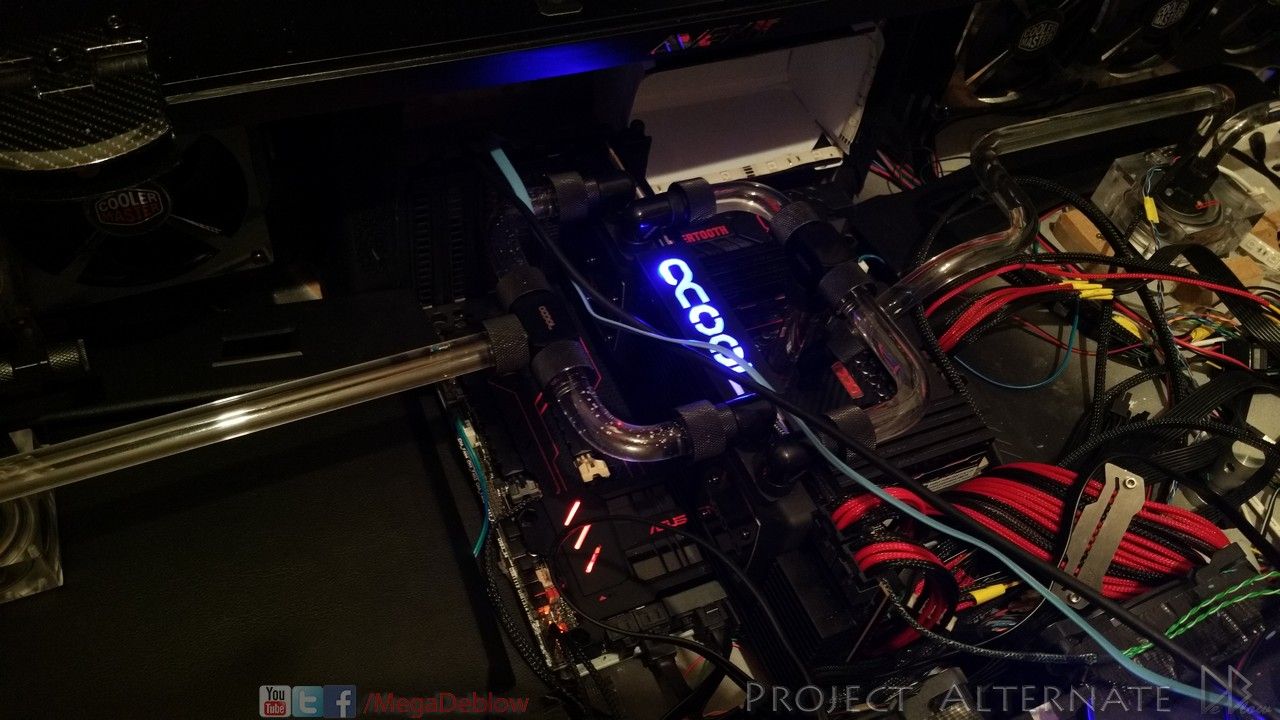
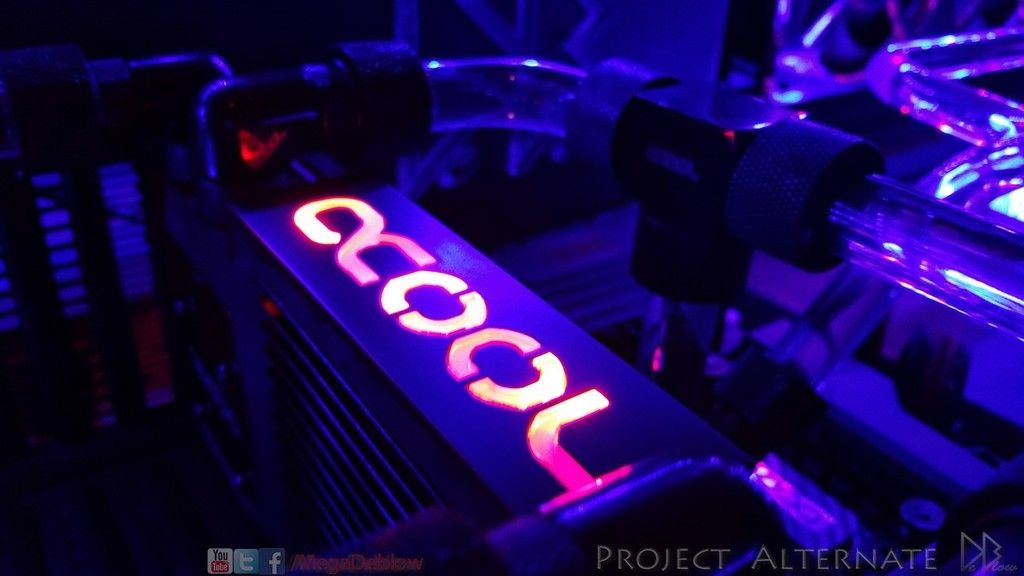
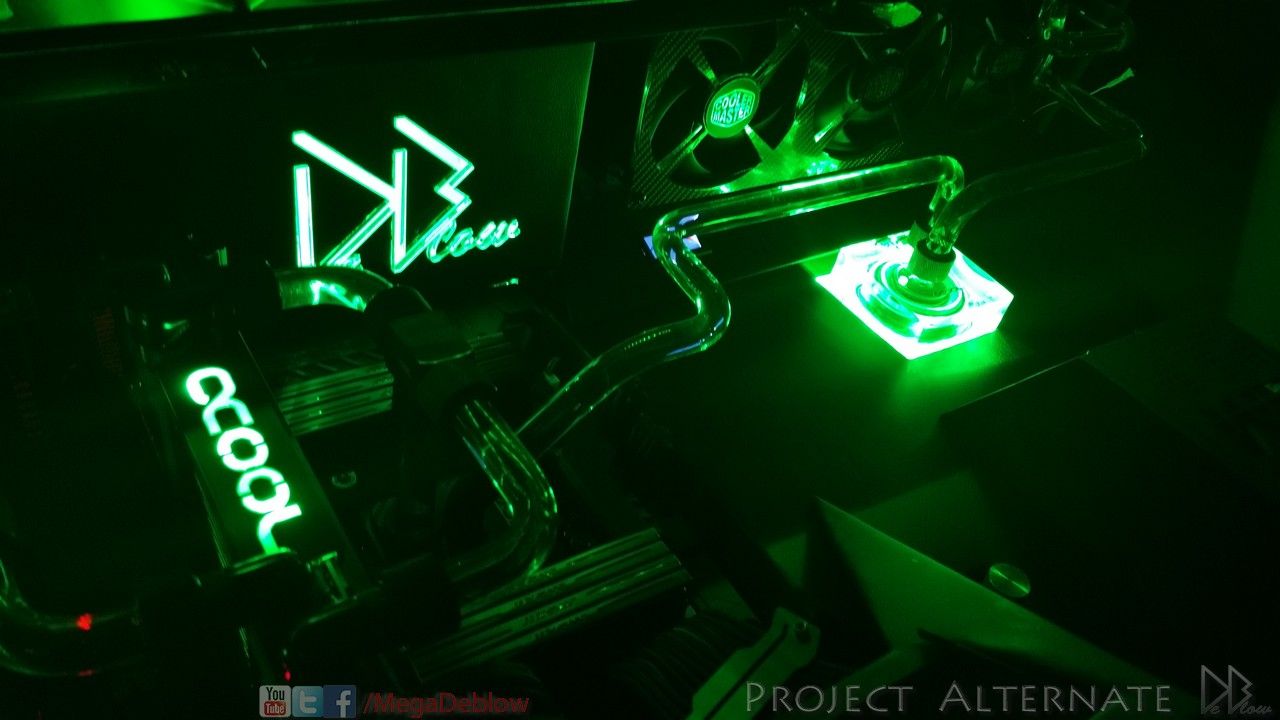
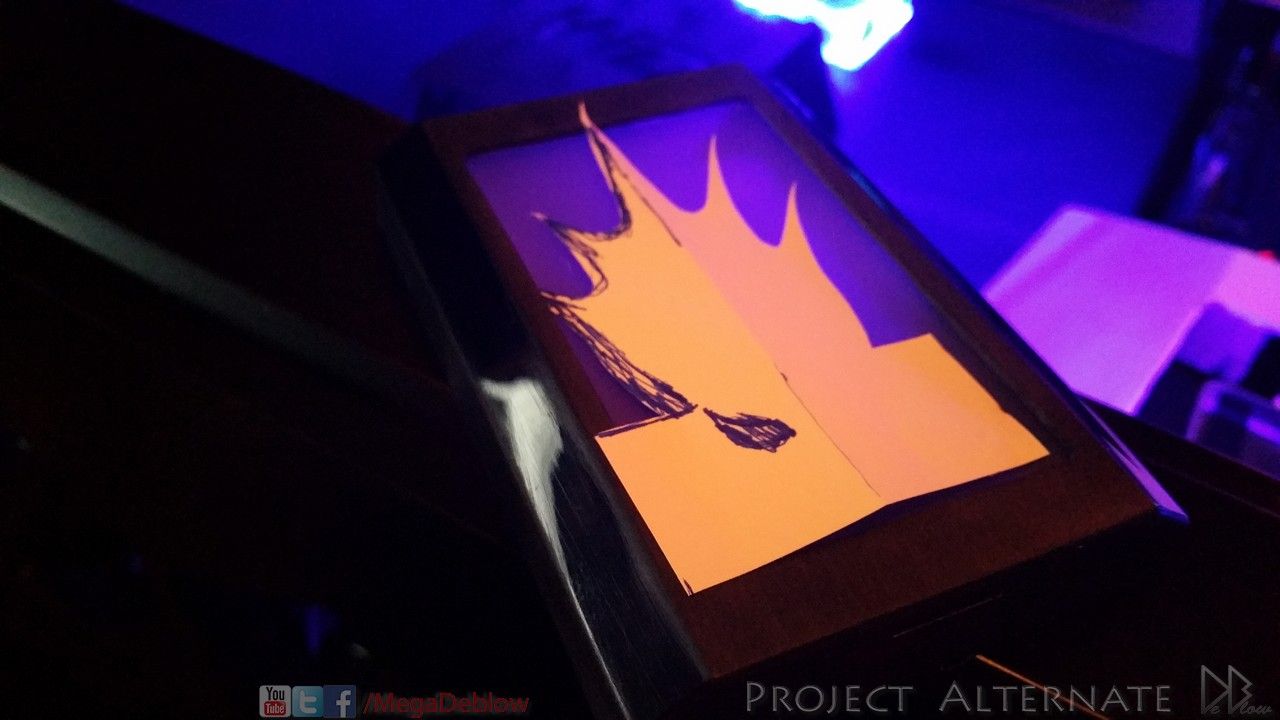
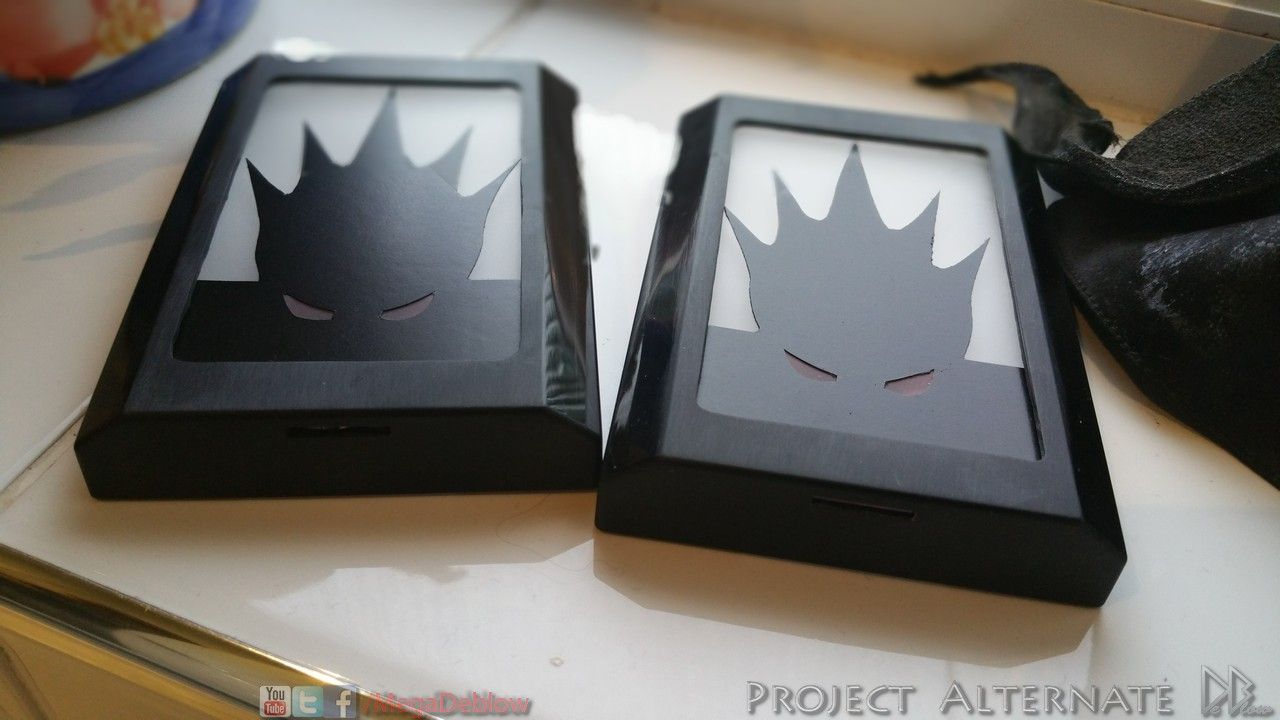
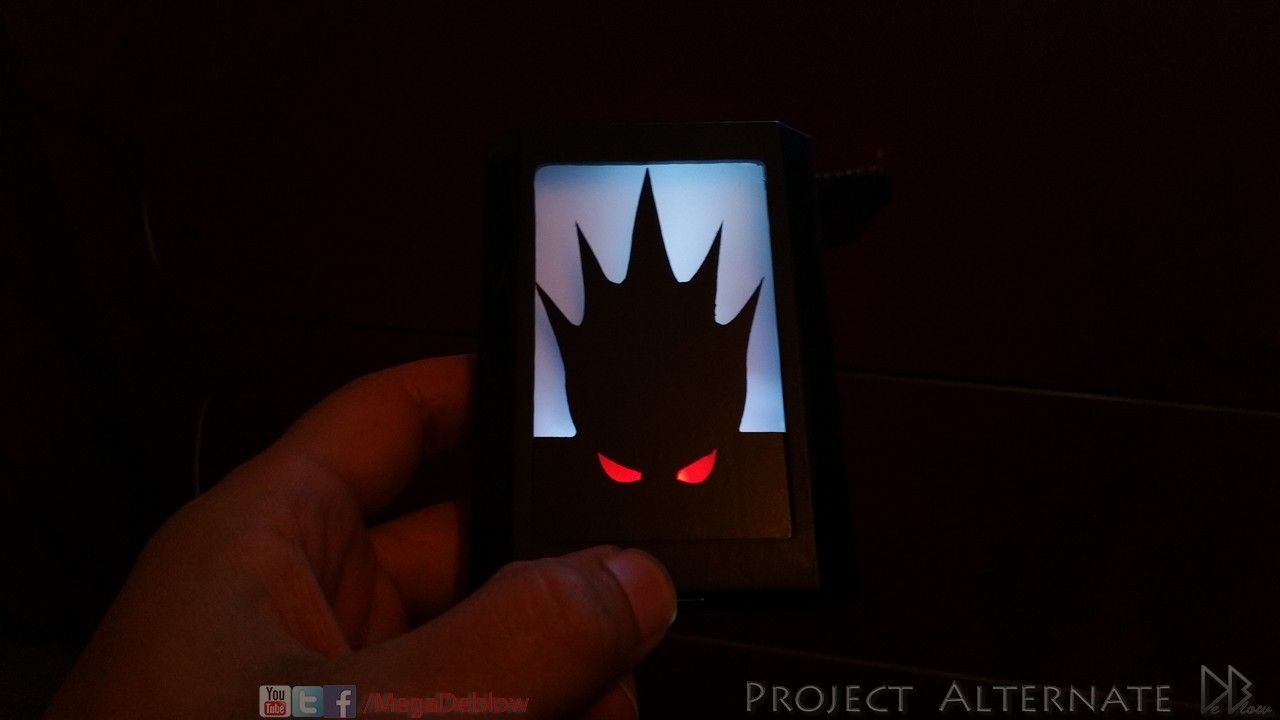
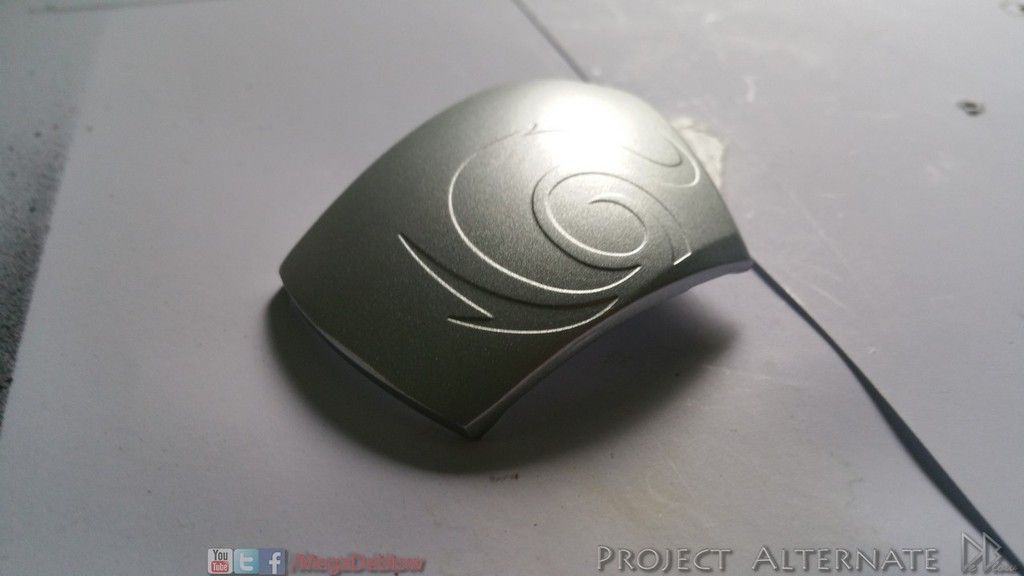
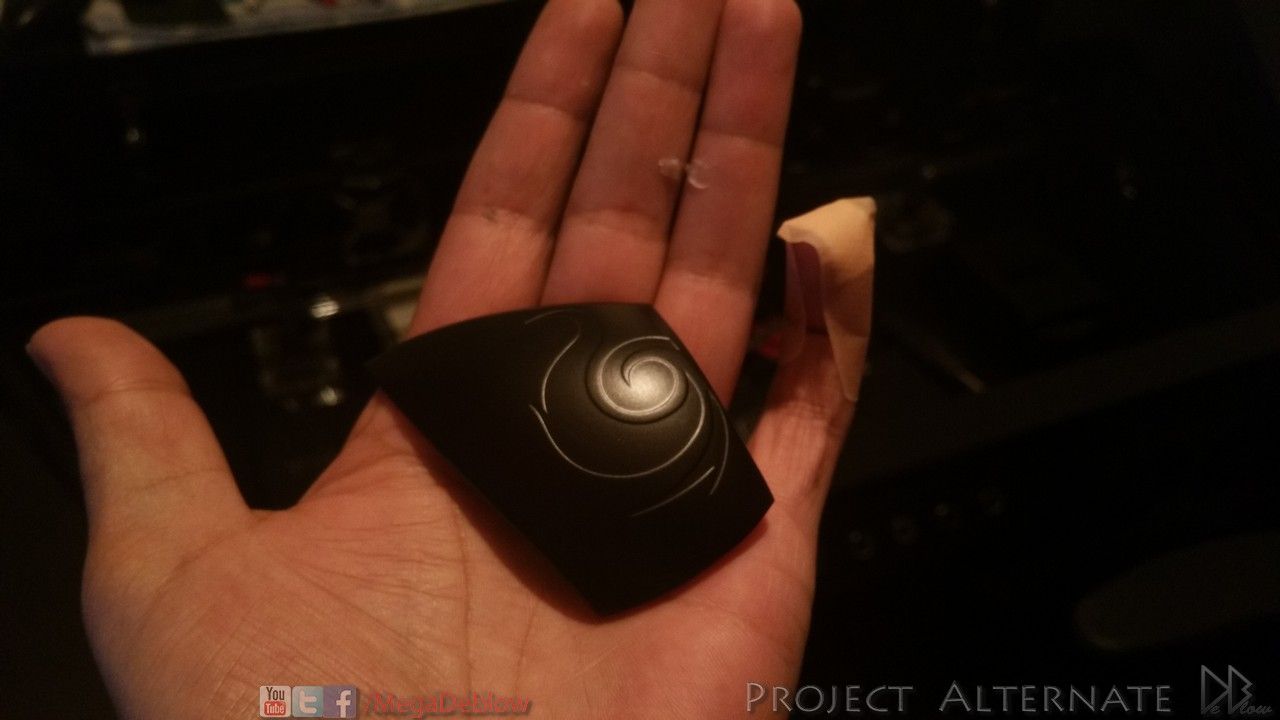
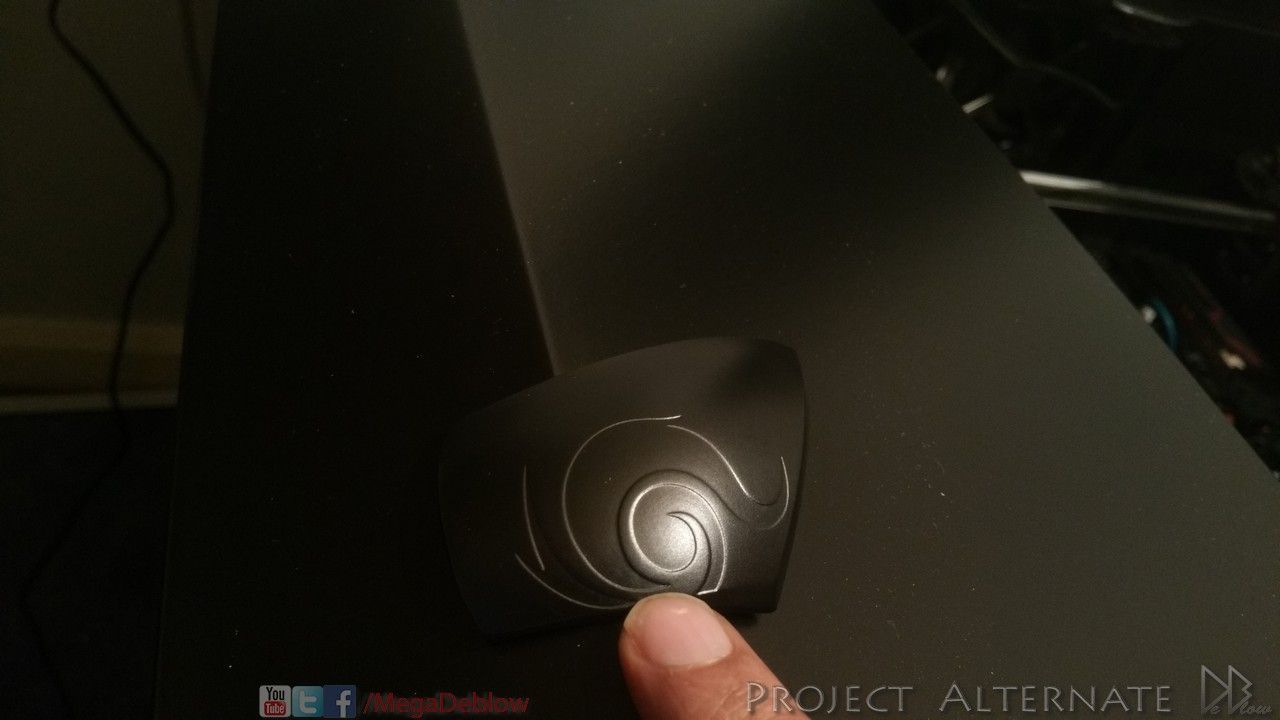
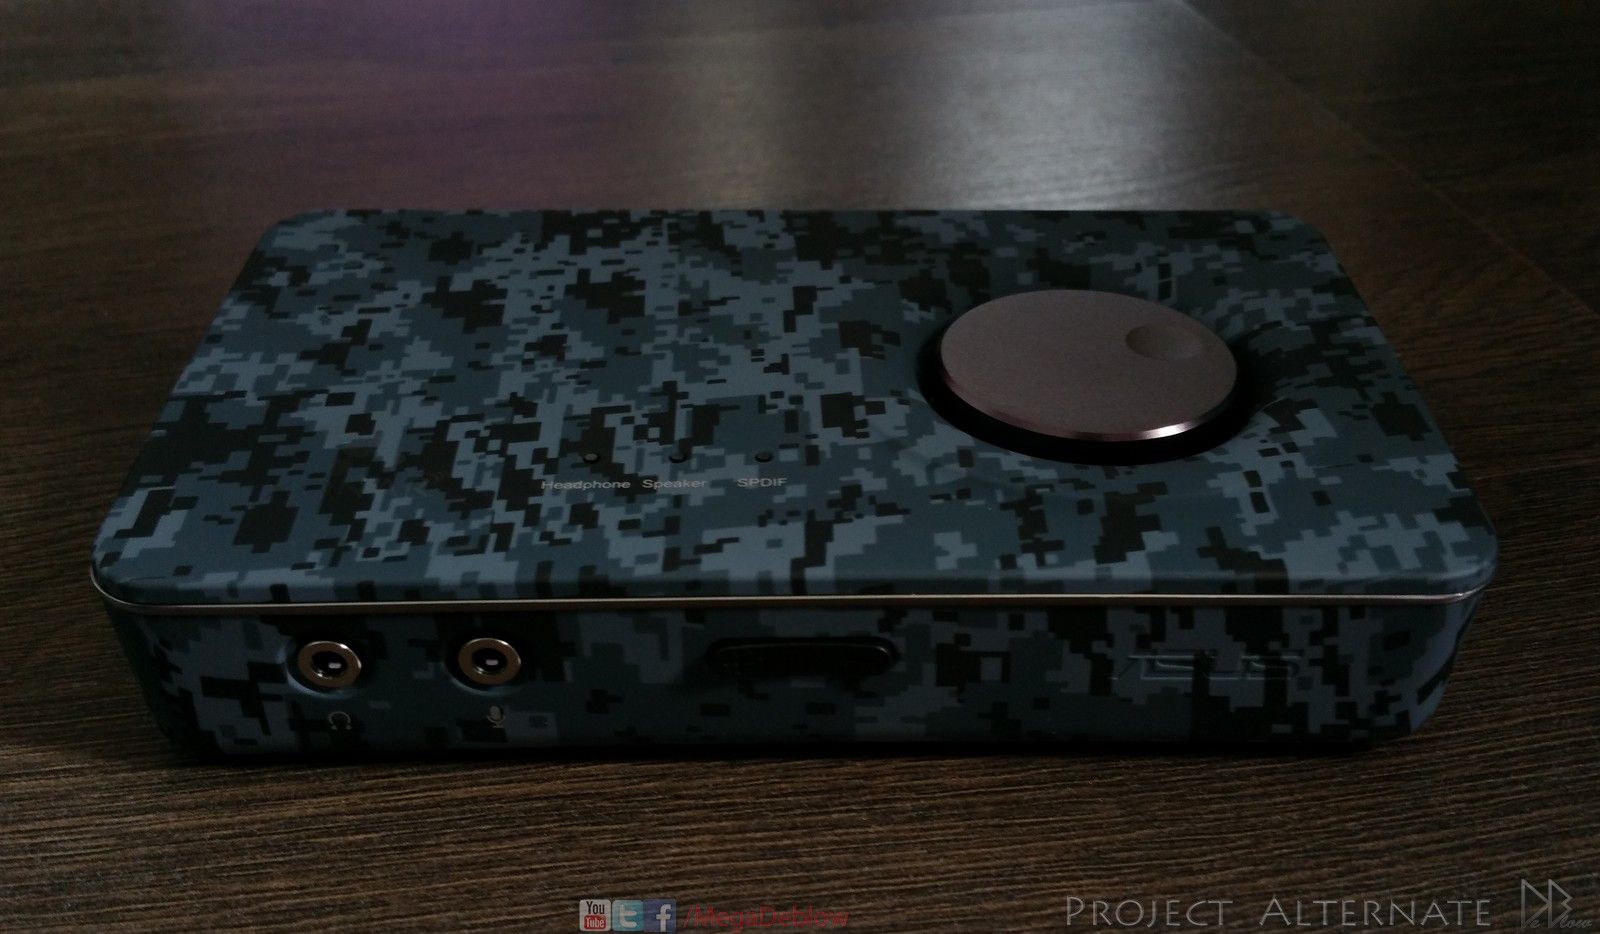
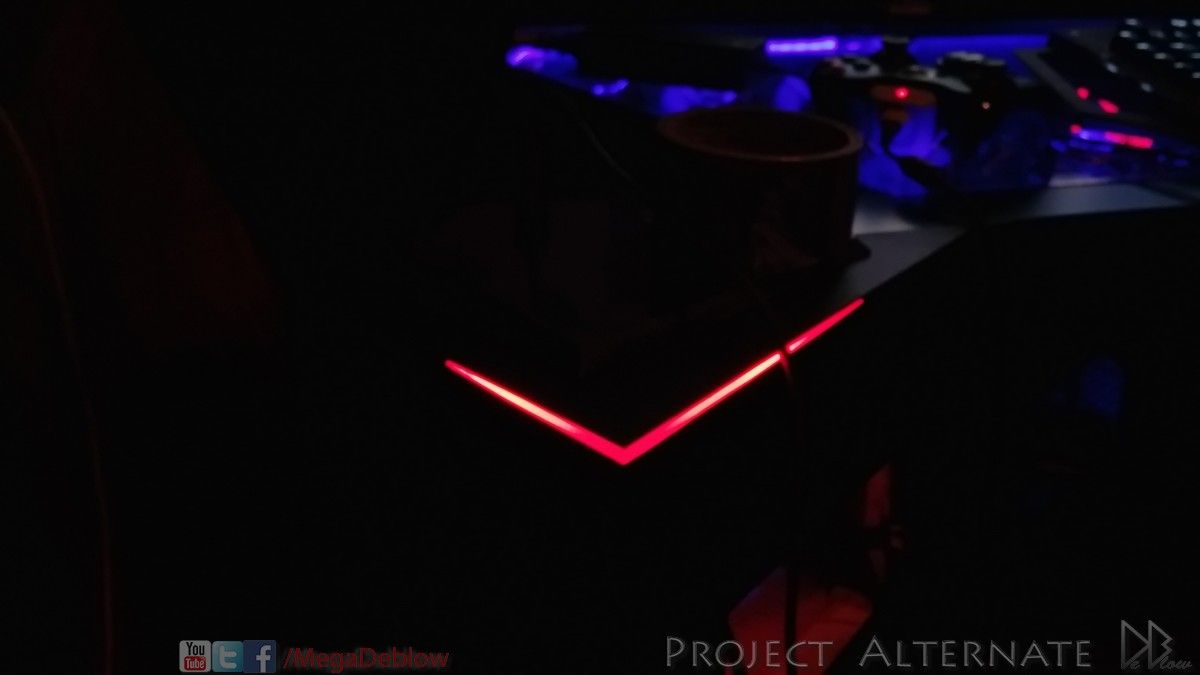
Nice update! That logo looks sweet :D

that logo is a jewel in the crown. well done mate
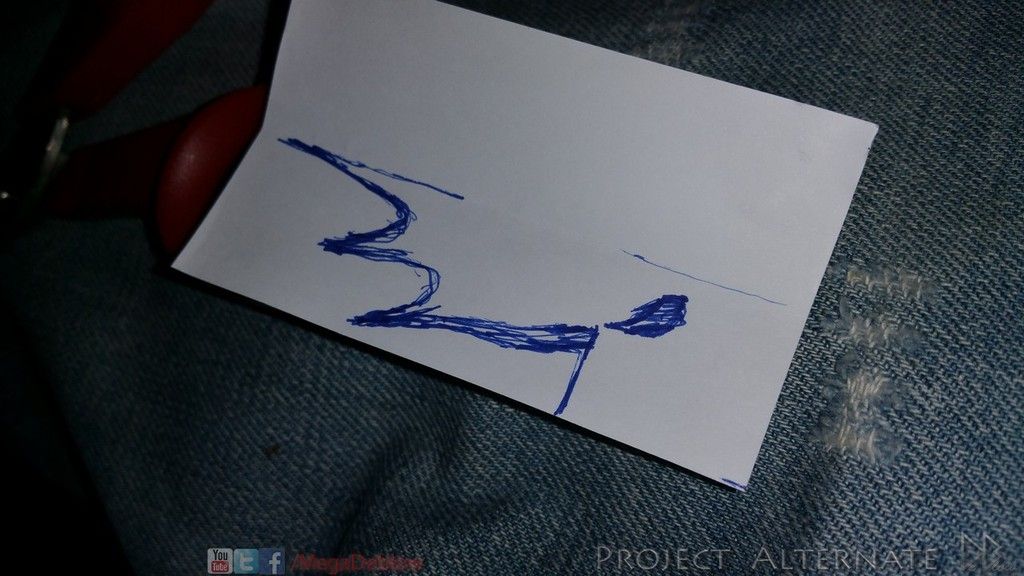
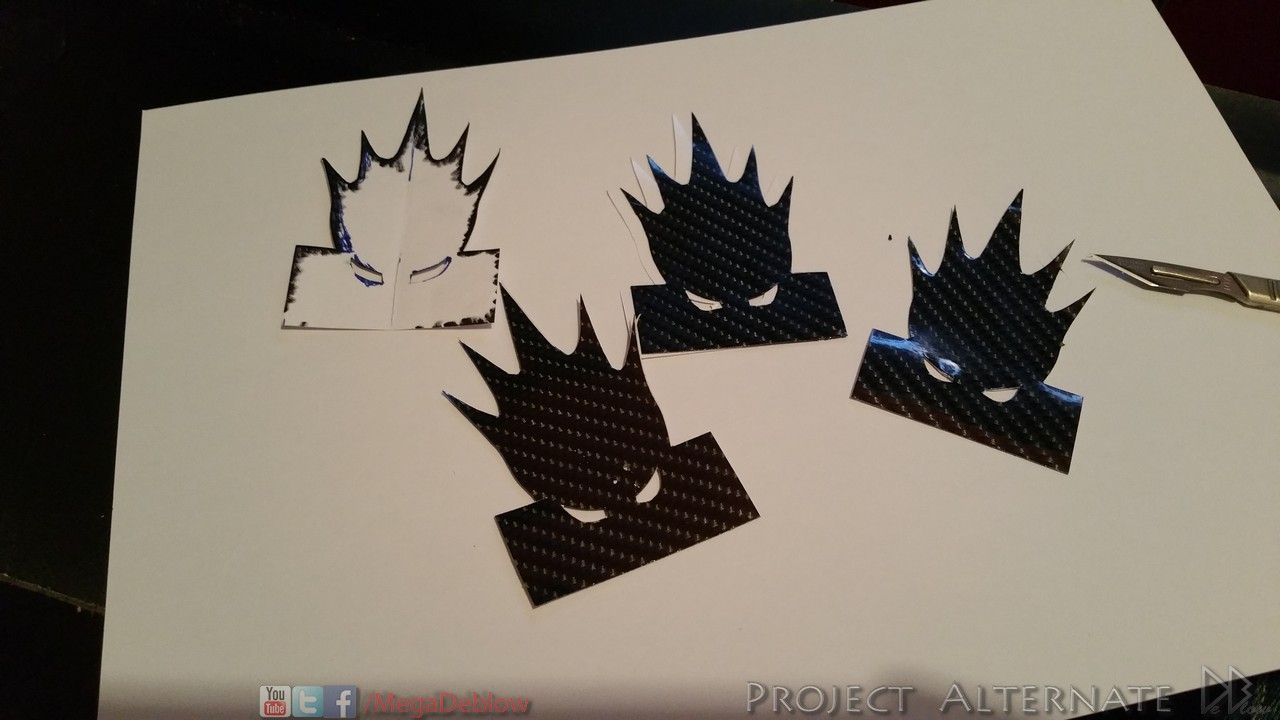
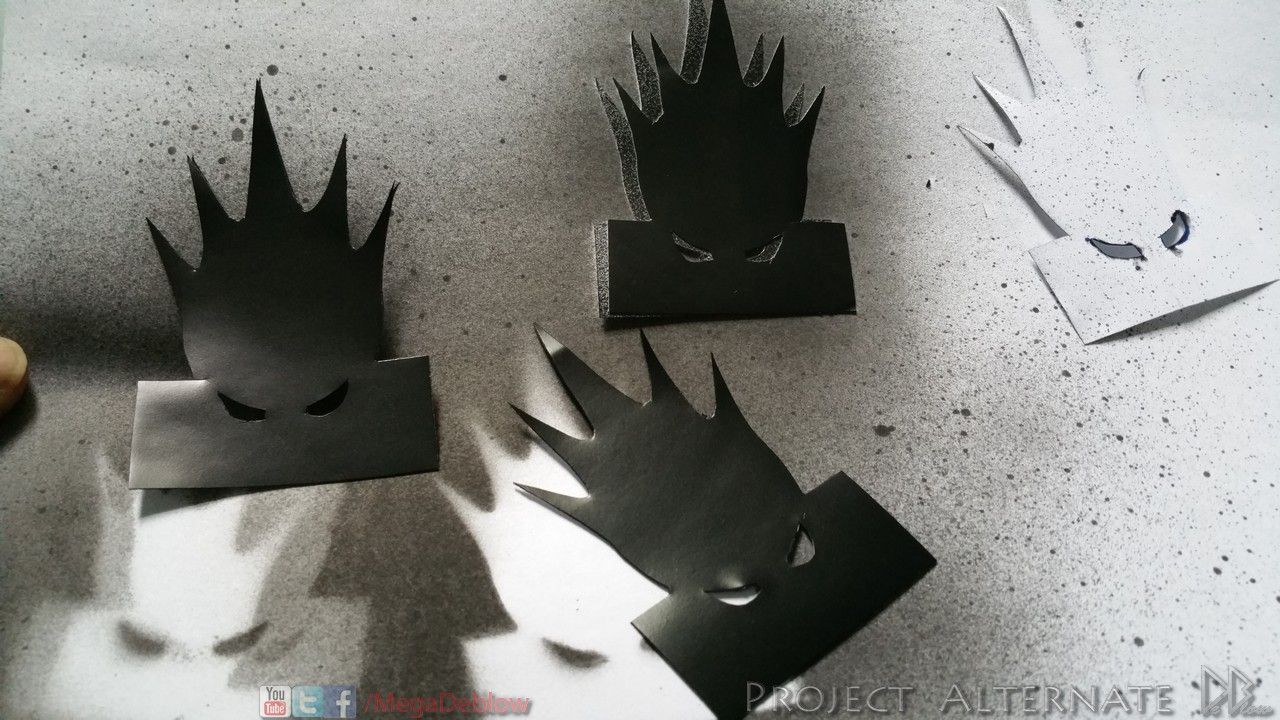
Thanks everyone :)
glad you like the logo, I changed it about 4 times in total, took me ages to
get it how I wanted lol
did you notice the other versions? well, I will post them again at some point
to show how some things changed.
glad its soon over :D
 
Played around with a couple of loop options, 1st was the standard CPU > GPU1 > GPU2
then I tested how it performs going from CPU> GPU1 & 2

My temp on GPU 2 was slightly better & it looked cooler so im sticking with that option :)

Im still getting temps around 3c to 5c hotter on my GPU2 compared to GPU1.
could be I need to redo the paste again or tighten the plate up a bit more
will mess with it a bit more if the temp on GPU hits 60c or more when hardcore gaming.

20150808_231305_zpsf9gdqxwn.jpg


20150809_011851_zpsf8sbqaud.jpg


Used lots of bog roll lol


20150808_202635_zpsjbnw0puw.jpg


20150808_202644_zps6qrt9hii.jpg


20150808_202700_zps1kjcjfog.jpg


20150809_094250_zpsml2jmef9.jpg


Also completed the Alphacool logo, RGB controlled, so far I like RED & BLUE, hard to get some good pics of the reds though :(

20150811_195708_zpslwf2rggs.jpg


20150813_162656_zpsqvlmjjf5.jpg


20150814_025830_zps8axpqeku.jpg


20150814_025841_zpsvzhofajh.jpg


20150814_025907_zpsfjpqkj6j.jpg


20150815_024430_zpslaff4s5z.jpg


20150819_013403_zpsnqqcmann.jpg


Replaced the 2 fan controllers for 1 duel bay, Phobya MaxGuide 6

20150820_134429_zpsnrdd9cvb.jpg


20150820_134441_zpsxykohtou.jpg


The new controller has 6 temp monitors,
I plan to just use 3 for now, room temp, desk temp & GPU backplate temp

20150820_150121_zpsz5m7kbss.jpg
 
Very nice build! That pump lit up like that is awesome

Thanks, they do look very nice, so glad I went with RGB as I was originally
only going to use red LEDs on the pumps & push them in the spare screw holes.

I know it is gonna feel wrong, but yet so right to have a desk as my background.

Incredible work. Really really impressive.

Maybe a mod could change the title to include [EPIC desk/PC build] or something?

Haha thanks, Im not the best at naming things, im dyslexic so anything to do with text is a problem :(
thank god for spell-check lol

Loving the look of that loop and the LEDs.. so sexy :D

Thanks mate, trying to keep it as simple as possible & look as symmetrical as I could..
going to fill it with blood red, hoping it will look black under some light like real blood?
if not I guess ill try something else

That fan controller also ;o Damn!

didn't want to use a controller with display, but glad I had to now :)
needed to extra power it has so I can control big groups of fans/pumps from one
knob.


BTW, for anyone who remembers the RED vs CARBON speaker discussion from earlier posts
I went with carbon (black) :)

If I had more red on the desk I think id have gone with the red for the speakers, but the carbon blends in nicely
as it stands now.
 
Last edited:
So much time and skill have gone into this one off desk , cant wait to see the end result .

p.s When can you build me one ;)

Looks like its going to look awesome

Thanks both,

Ricky, thats some nice specs you have :)
was umming and ahhing over the 5820k, 5830k

how you liking it atm? I got the 5920k, might upgrade mine at a later date should I add another GPU
 
Thanks , i just picked up the Philips BDM4065UC 4k monitor to justify the hardware.

i think i got a quite average chip , I cant seem to get much more out of it.
I only went with the 5830k for the extra pcie lanes . At some point i want to get pcie based storage.

It would be great to see a video tour of your set up when it all done.

Yeah thats the reason I would be getting a 5830k or similar, for the extra lanes.
due to the R9-295x2 just using 1 lane I went with the cheaper option lol

not had chance to properly mess with the overclcoks on mine yet, but its stable at 4.6ghz & will do 4,8ghz, but don't think I stress tested it at 4.8
as i didn't like the volts I was having to use "1.38 or 1.39"

I got ahead of myself & couldn't resist overclocking lol
just going to concentrate on finishing the little bits I have left to do on the desk now.
 
what voltage does your chip need to be stable at 4.6?

ive left mine at 1.28 for 4.4 stable . I dont know if its worth going over 1.3v to see what i can get .

also when can we expect the next update ?

I did read that anything over 1.3v is not great for the lifespan, so trying to stick to 1.3v or as close as possible.

my saved profiles are
4.5ghz 1.295v
4.6ghz 1.3v
4.8ghz 1.36v

I have stable settings saved at 4.4, 4.5 & 4.6ghz

4.8ghz - don't remember what I did with this settings, i.e games, bench or what ever, but remember
wanting to drop the volts again so not to risk damage.

1.3 is fine, maybe with some extra time spent on the other options I could drop from 1.36 to below 1.35.
its nice to see what you can get out the overclocking, but as with the i5-2500k I tend to drop the overclock
a bit unless I see a real world difference in gaming or other programs thats CPU dependant.

Was going to do the updates today but my brother just took me to the cinema to watch a crappy film.
so will have it up tommorow now :(

P.S. I got MGS5 yesterday so that's been distracting me lol
 
That looks utterly horrible, you should be ashamed of yourself.

The only course of action I can suggest is that you finish it asap and then ship it to me, to, um dispose of, yes thats it!.

Awesome work, I wouldn't have the 1st idea where to start on something like that!

lol, good one, you had me upset during the 1st sentence :(
Some1 on twitter called it a gas barbecue,
although, TBH Iv seen some really nice barbecues :rolleyes:
 
Have a couple of updates today, missed some days this week due to Metal gear Solids release :D
been anticipating its release for years!

anyway, before I head back to Afghanistan to capture sheep heres some updates :)

Wanted to make some covers for the SSDs, by modding some old 360 HD holders
I can now cover SSDs without having to mess-about taking my new drives apart & losing
the warranty.
also means should I upgrade them later & can just keep using the same covers :)

Decided to used the Phobya logo as its dark & mean looking "like the desk"
& is one of my favourite sponsor logo.


20150817_223246_zps013rcpee.jpg


20150817_223531_zps9c4lhg5e.jpg


after drawing & cutting the logos I then painted with the same flat black used on other parts of the desk

20150817_231618_zpsxewgukx1.jpg


20150818_121955_zpska8vnky7.jpg


20150818_192256_zps6y9ne9pk.jpg


20150818_192520_zps39kzlhhg.jpg


20150818_200622_zpsv8awhhwo.jpg


Modified the centre cover to now have an extra blow hole, this is the cover I made to help direct the air towards the GPU.
the air also travels along the bottom of the cover, will show that when I do the final photos.

20150818_171750_zpssobouz0y.jpg


20150818_171755_zps2auipkes.jpg


Not a great photo or RGB selection, but this is to show the SSD covers in place along with the blow hole cover that you
can just about see above the SSDs

20150819_013356_zpslehvz528.jpg


A year or two ago I painted the CM Reaper mouse (white & black)
so for this desk iv decided to paint it again but just plan flat black to match everything else

Standard.
20150818_122015_zpsqopqtae0.jpg


1st mods


New
20150818_212726_zpsshfj8bss.jpg


20150818_212839_zpsgqevttvf.jpg


Redone the covers, the carbon I originally used was reflecting too much light for my liking, making it look slightly messy,.
so, as with the other re-works I went for a more plane & slick look, yep!
flat black again :D

20150823_144759_zpswgtlpq9a.jpg


the tape aroud the centers are covering the clear, iv sanded to clear to help with lighting, plan is that they will be RGB.

20150823_144815_zpsmz43dhym.jpg


one last update,
Today ASUS has kindly sent me some goodies, the main one is the xonar u7 echelon edition sound card..
really nice finish on the xonar so I don't want to flat black it if I can help it.

20150903_125107_zpsfi40obss.jpg


20150903_133803_zpsk9one5sl.jpg


20150903_133853_zpslwghdeyy.jpg


20150903_133911_zpsn9x2grra.jpg


20150903_133942_zpszfv1mqal.jpg


20150903_134028_zpszeyih1nn.jpg
 
This build log is amazing. I wish I finished mine now :)

Thanks Samy, I had the time to spare for this one & just enough cash to keep out the red, maybe you can complete yours at a later date?
good luck with it if you do ;)

That digital camo looks prety cool , it's a shame to covered it

true, once I had seen it irl I decided it would be a mistake to paint it.

I'm going to try place it under the top left side, this will still allow me to adjust the volume & get to the HS & mic sockets.
 
Getting all the air bubbles out of that loop must be a right pain! Lights really set it off well, I love it!

One day, but for the time being, I'll stick with my kitchen side screwed to a wall :D

The 1st time I filled the loop it must have taken me 24hrs on and off, was getting so mad lol
cant tip the deck upside down or bend the tubes :(
Iv drained/filled it about 5 times now, have it down to a fine are :D
I even did a small vid of the last bubble lol, will add that to the next build log
vid I do.

Oh I? Always working on your top! :p

Great build man! :D

Thanks Rus :)
 
Forgot to post some pics of the glass top fitted, surprised myself how well I managed to get it to fit.

6mm toughened clear glass top

20150803_214611_zpscaeepndp.jpg


20150803_214308_zps1ogyqmiv.jpg


20150803_214211_zps6gtb3ych.jpg


20150803_213921_zpsz0azlo8z.jpg


20150803_213851_zps0cpawed2.jpg


20150803_213834_zpsnfw4xeal.jpg


20150803_213818_zpssnwyxmv8.jpg


20150728_005540_zps3kbm8zly.jpg


20150728_005531_zpsksjy2gsl.jpg
 
Wont look like it, but i spent hours making the final progress log vid lol
check it out & let me know your thoughts so far,
its 99% completed now, just a couple more updates to post then the final pics will be up shortly after.

You will have seen more than is shown in the vid, but also some things you wont have seen yet :)

 
Last edited:
I don't have words for this project.

Very, very nice work here Deblow. Absolutely love the entire look of it

amazing video man. well done.

Well done to you as not only is this build beautiful and technically outstanding, it seems like this is a massive achievement for you.

Stunning.

Stunning build OP :) Video shows off what you've accomplished very well.

WOW, thanks all :D
my head size has just expanded 1", going to need some new hats lol

The desk is now 100% complete, just have to post some last updates, hopefully tomorrow.
Then its done and dusted :D
Oh, I'm also waiting for my keyboard, its due out on the 17th.
 
stunning desk and log mate, very impressed. it looks the nuts. i wish i had a 5th of your talent. the batman figure and car finishes it off a treat. really good stuff :)

Thanks a lot mate :D
I have some artistic talent/skill but I lack in many other places i.e English & maths
we all have our sweet spot, mine is making the house a mess (in an artistic way) & playing with PCs lol


One of those logs that I've enjoyed coming back to every time I see it, truly excellent build. I wonder how heavy it is?
Well done mate it's nerd porn of the highest order :D

Glad you liked the log so far, always good to know my posts are getting looked at :D
without all the components id say its about as heavy as a average fridge freezer, maybe a bit more lol
ok to move in a 2 man team but the wife & kids struggle to lift :(

Looks rubbish m8, gimme your address and ill come take it away for ya. :D

Seriously though, looks amazing....i think your really gonna struggle improving on this one, unless you can somehow integrate a jetpack into the next one.

I enjoyed the video, i like the fact your building the desk with one hand and filming with the other :) thats just showing off.

OMG, did wikileaks leak my jetpack plans :(
cats out the bag now, better think of something new lol

Glad you liked the vid, I dint want to film anything as its hard & a bit dangerous for my fragile new phone
but some people was moaning that I only had photos when I started to post the progress vids
so I had to try slip some live footage in for them.

The wife said im not allowed to make another desk lol
But I can always make improvements to this one when I get more time :D

Had a crap day, so thanks for cheering me up everyone :)
 
excuse my language.

but what a ***ing beast!!
well done *shakes hand* on your amazing project...

id REALLY REALLY love to do this, as my desk space is extremely limited, but i dont know where to start haha..

Thanks Dude, thought you said "Snakes Hand" at first glance, I have MGS5 on the brain atm lol

start simple if your going to have a crack yourself, not so hard to make the standard box shape desk, only tricky parts will be fitting the parts
but you can make it as simple or hard as you want.

or you could just get yourself a standard desk & mod it to save some time.

If you ever do want to start one then feel free to MSG me for any advice, desk builds are becoming more & more popular nowadays.
if I had more space I would try make them for others :(
 
Outstanding work of the highest quality mate, simply staggering how much effort has gone into this build.

How many miles of led strips are in here? lol

As your previous build looks amazing :D


Thanks both, hmmm at a guess id say about 6 meters of LEDs, the longest go all the way around the top opening,
then I have another 2 lengths over the RES, one as a backlight & the other for lighting the front/tops.

now i think of it, id say about 7 to 8 meters lol
 
This is the side compartment completed, redone the leather cover & added extra carpet to the sides, also has
its own LED lighting to help see whats inside
I have a USB port for the ASUS TUF Detective & a 5 port USB 3.0 adapter.

20150826_213012_zpsumm5t8xe.jpg


20150826_213041_zpsuu4nma1k.jpg


I originally only had super bright white LEDs on the 2 corners, after seeing how it looks all completed & decided to add RGB option, It looks great!
should have added them from the start, still keeping the super bright white LEDs as there great for back/room lighting.

20150828_024337_zpspaz1oosz.jpg

20150828_024345_zpss62tnobf.jpg

20150828_024430_zpssctblvaq.jpg
 
Back
Top Bottom