

You are using an out of date browser. It may not display this or other websites correctly.
You should upgrade or use an alternative browser.
You should upgrade or use an alternative browser.
[Project] Black & Blue
- Thread starter shadowscotland
- Start date
More options
Thread starter's posts- Joined
- 31 May 2006
- Posts
- 7,564
- Location
- West London
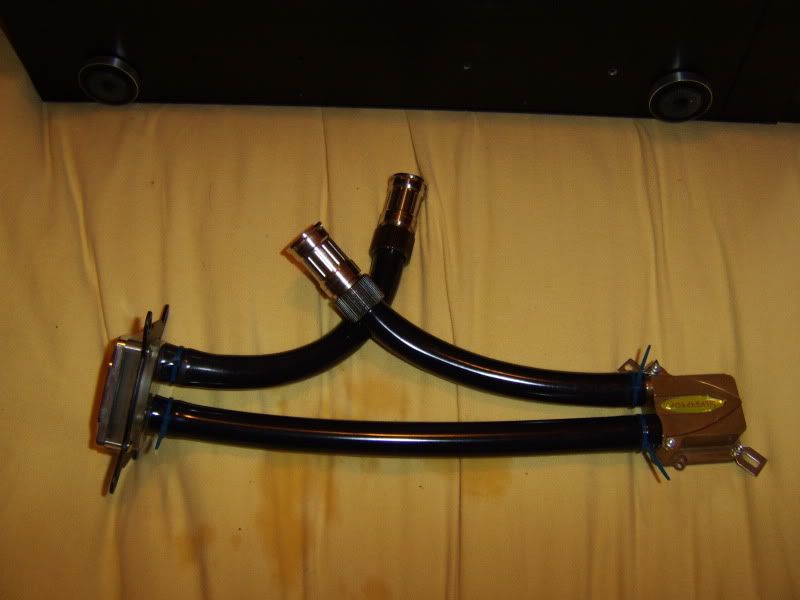
Good work with the extra sata connectors. Are you still using the completely passive PSU?
Not sure on the spiral wrap though tbh - tight, larger multi-stranded braid looks much nicer.")
Yes I'm still using my Yesico - and I agree, the spiral wrap is not as neat as the braid - but the heat shrink really spoils it imo.
Was thinking of using copper collars in my EP45T-extreme build, but ran out of time and sandybridge arrived.
Looks similar to when I pulled apart an IDE cable and wrapped it tightly in insulation tape to make it take up less space... wouldn't bloody bend easilly though LOL
The wrap isn't sticky so bends are no problem - you just see more wire.
hehe im the same really cant be arsed to braid..i think ive spent about half hour doing it in total in about 5 builds, Nzxt cables
If you want the look but not the hassle, that's the way to go - especially if you have a large case and need the extension cables anyway.
- Joined
- 31 May 2006
- Posts
- 7,564
- Location
- West London
Ok a bit more for you guys
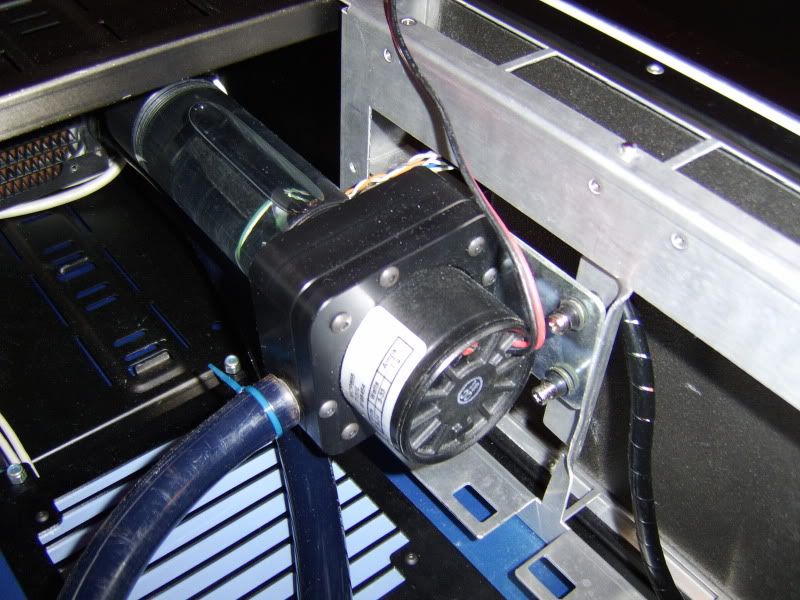
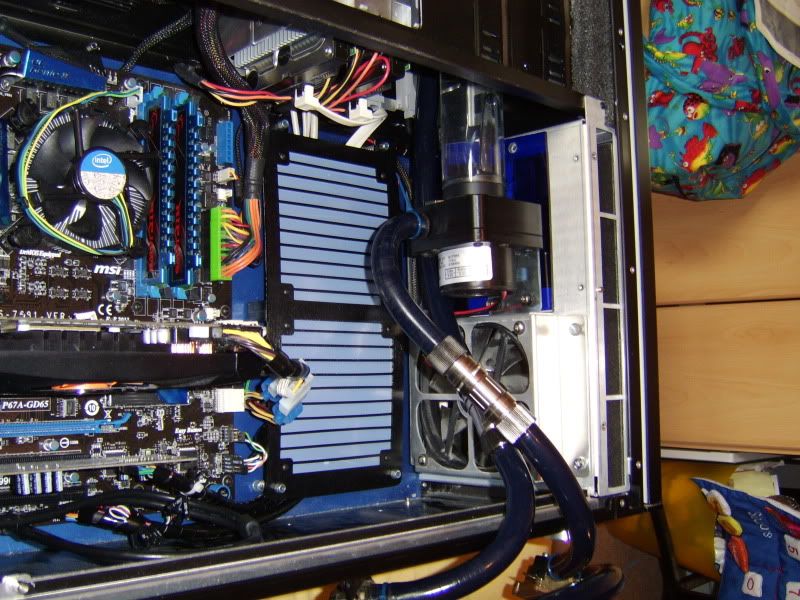
Here my D5 vario taking up the top fan bay.
But to stop and air cycling the hole needs to be filled
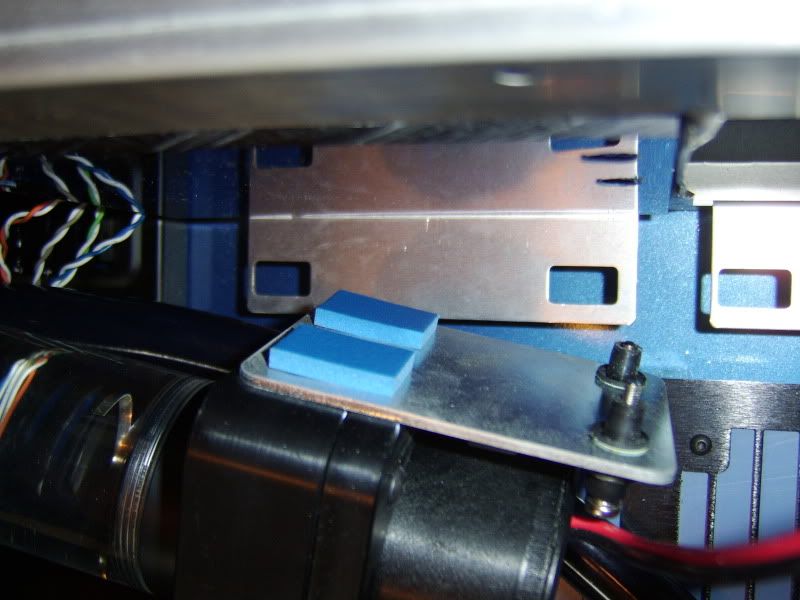
Glazing buds added to the fixing plate to stop vibration.
The fixing are from a server heatsink - rubber washers and springs over a machine screws
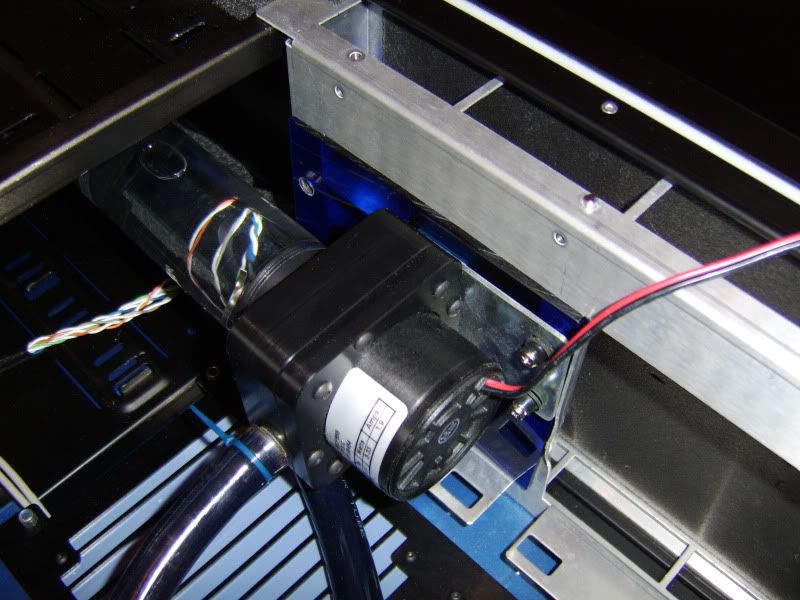
Re-assembled with the blue perspex in place

Next up some Hard drives:
My 3 samsung SLC SSD's (scale really well in raid and don't have trim anyway)
WD Black - for programs
WD Green - of data / backup image
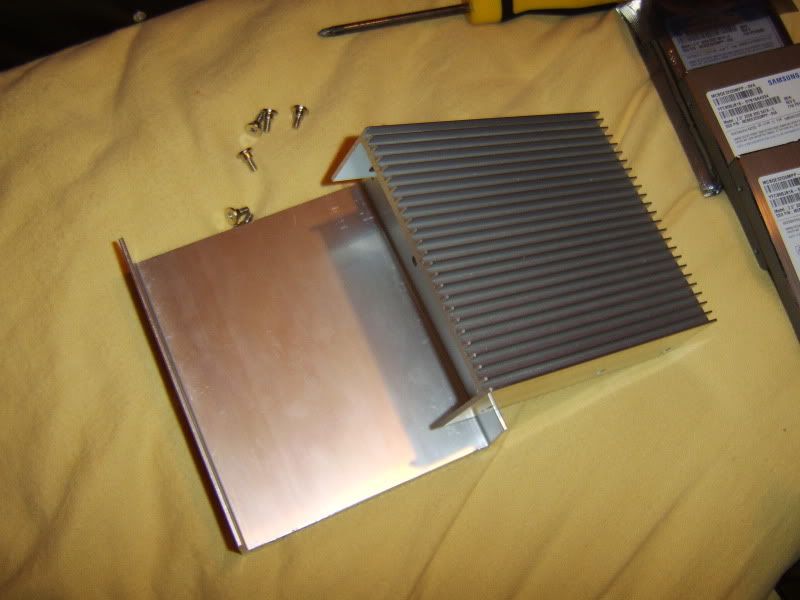
Finned Hard drive bays from the S80B - improved cooling as standard
Here my D5 vario taking up the top fan bay.
But to stop and air cycling the hole needs to be filled
Glazing buds added to the fixing plate to stop vibration.
The fixing are from a server heatsink - rubber washers and springs over a machine screws
Re-assembled with the blue perspex in place
Next up some Hard drives:
My 3 samsung SLC SSD's (scale really well in raid and don't have trim anyway)
WD Black - for programs
WD Green - of data / backup image
Finned Hard drive bays from the S80B - improved cooling as standard
- Joined
- 31 May 2006
- Posts
- 7,564
- Location
- West London
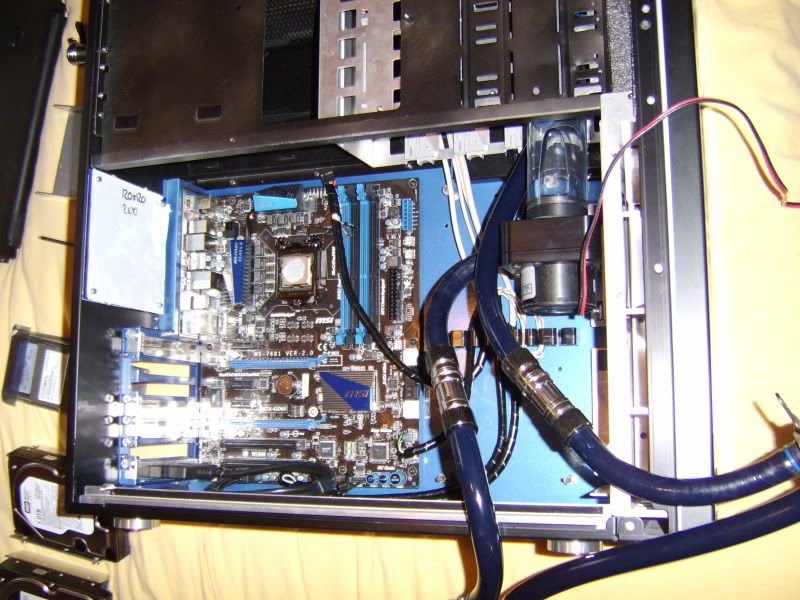
Feser 'black' tubing clearly looking dark blue - just as I wanted, but not so good for others
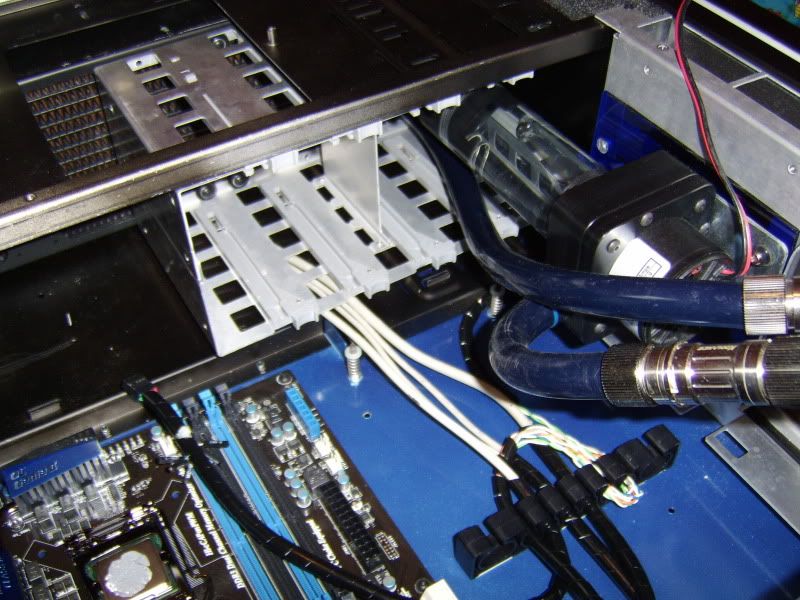
Starting to add the cables (usb, audio, power/reset) spiral wrap from the end to the cable bracket only
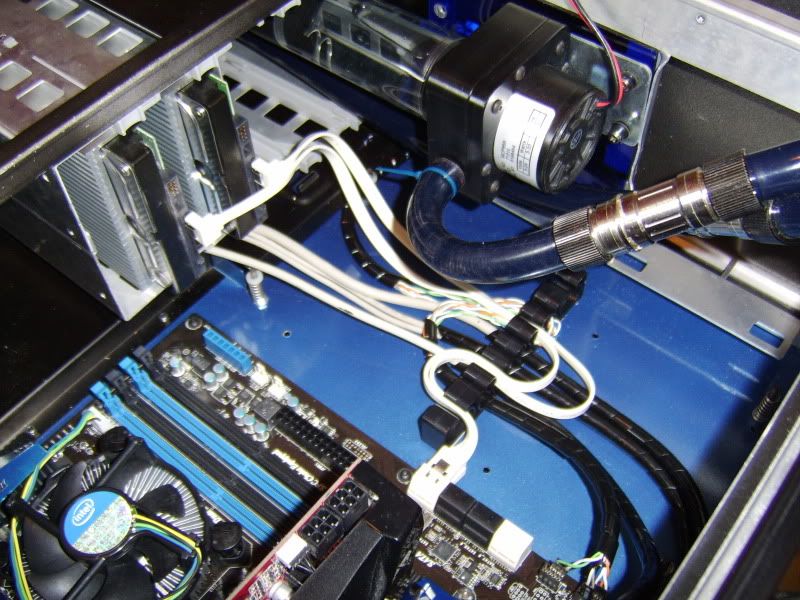
Adding the sata's
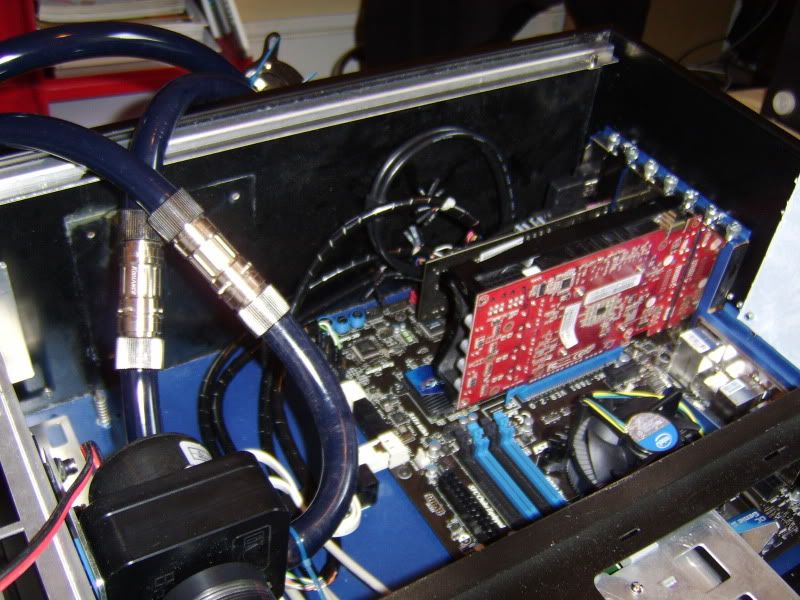
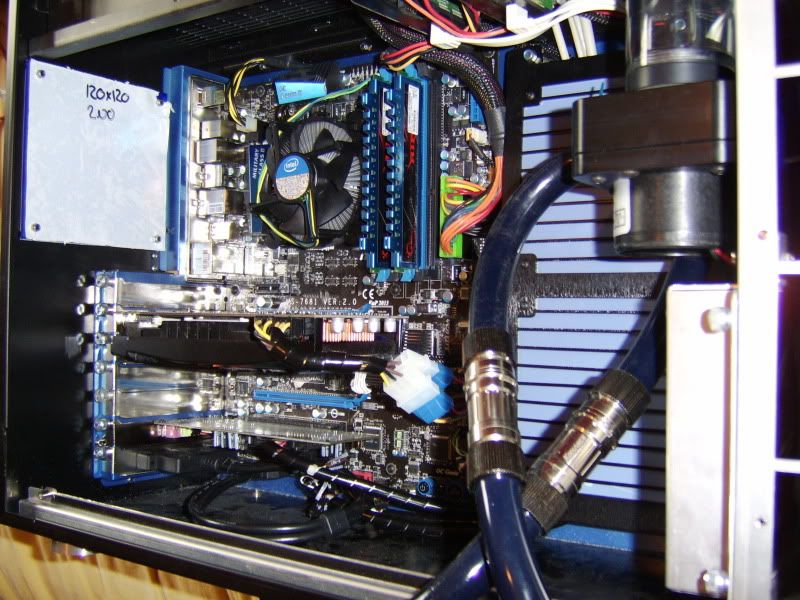
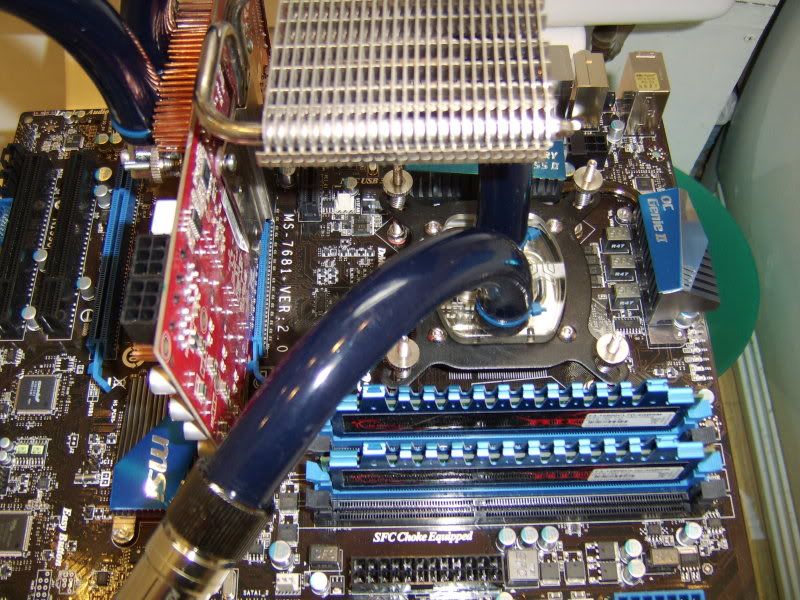
In go the cards - Palit 460gtx (with G82 hole spacing - more on that later) and Xonar DG
Last edited:
- Joined
- 31 May 2006
- Posts
- 7,564
- Location
- West London
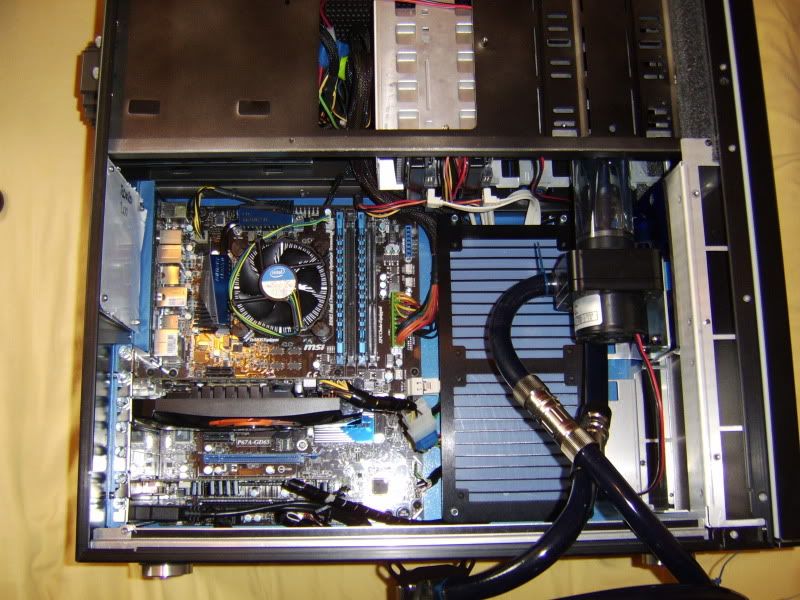
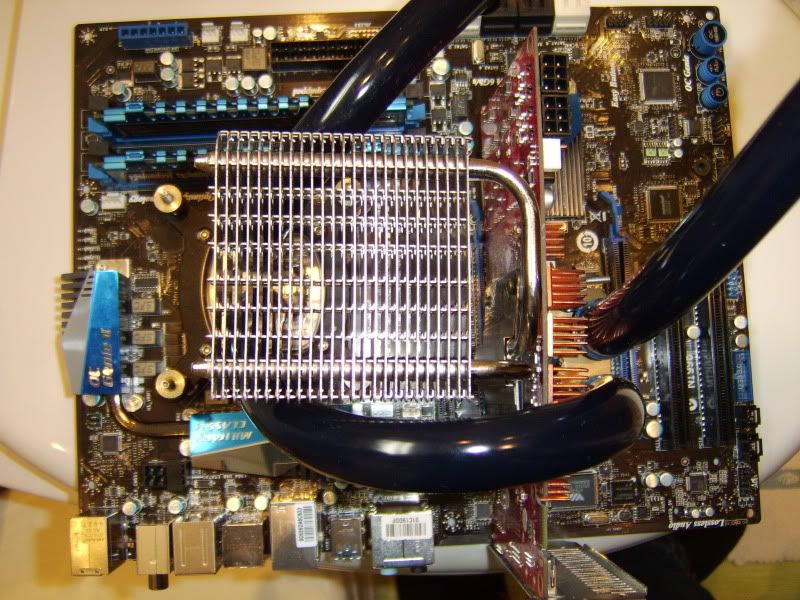
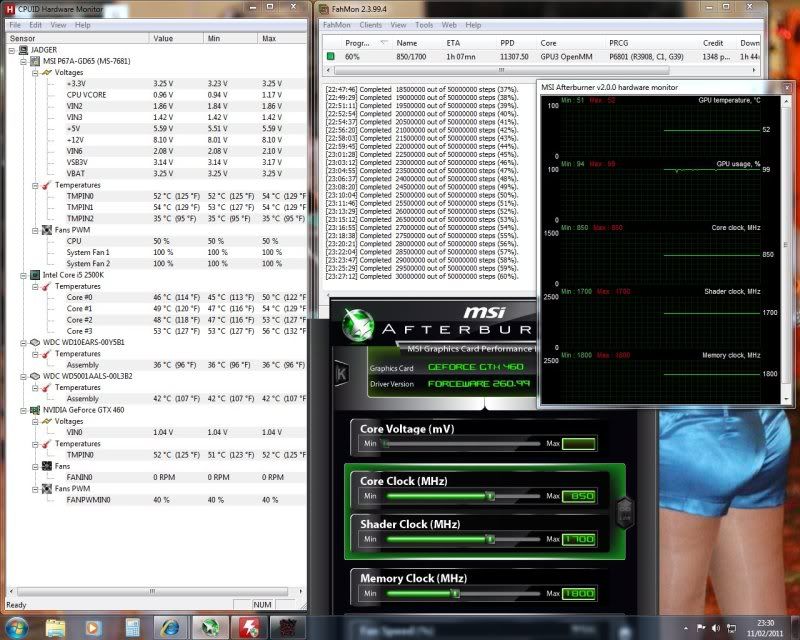
All wired up and ready to go.
Wanted to do some testing with the stock cooler before I used the blocks.
That way I'd have some before and after numbers.
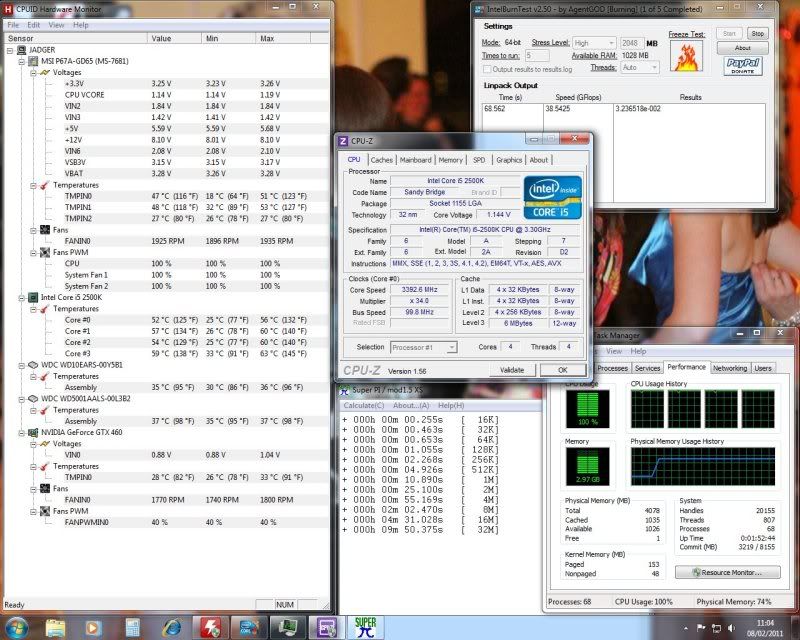
Here are some SuperPi times and IntelBurn temps (see max value in Hardware monitor)

And here are the improved times and lower idle volts (0.94) with the newer 1.8B11 bios
But more volts at load (1.21v)
Temps above are with the side panel off - with it on cpu is 68/74/73/74 with 15x burn
That about what I expected with only one fan taking heat out of the case
Also have some power usage number for those that are intrested, all timings at stock.
P67A-GD65/2500k/WD black/WD green/4gb ripjaws/460gtx/xonar DG/Yesico passive/1x 120mm fan/stock HSF
3w Off
80-115w Loading windows 7
69w Desktop
91-95w Super Pi (mod 1.5 XS)
131-133 Intel Burn (v2.50)
188-234 Furmark (1.8.2)
With my 460gtx at 850/1700
70-73w Desktop
242-257w Furmark
Last edited:
- Joined
- 31 May 2006
- Posts
- 7,564
- Location
- West London
Acheived a bit more today.
The joy of quick connects - dissasemble the loop without bleading.
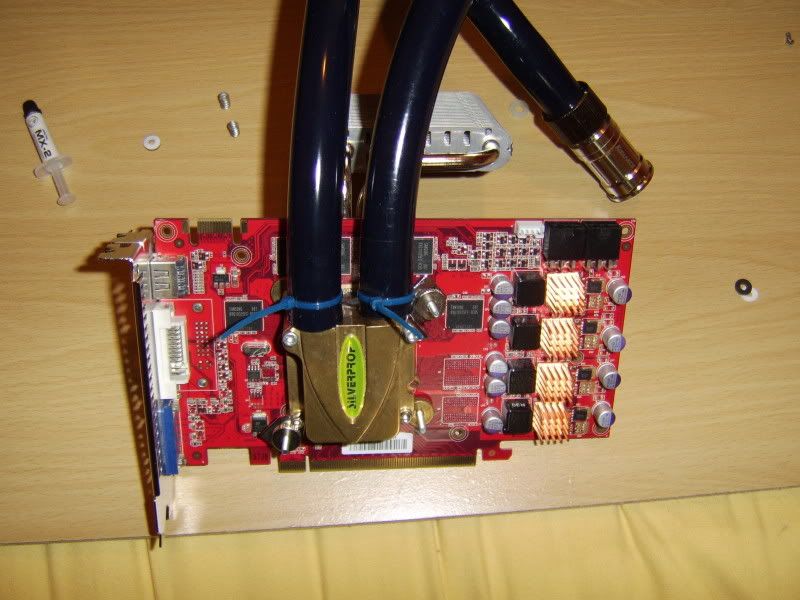
Motherboard, block, both interchangeable without major hassle - the newer koolance ones don't even drip.
I use VL4 - as I'm a low restriction, high flow loop builder
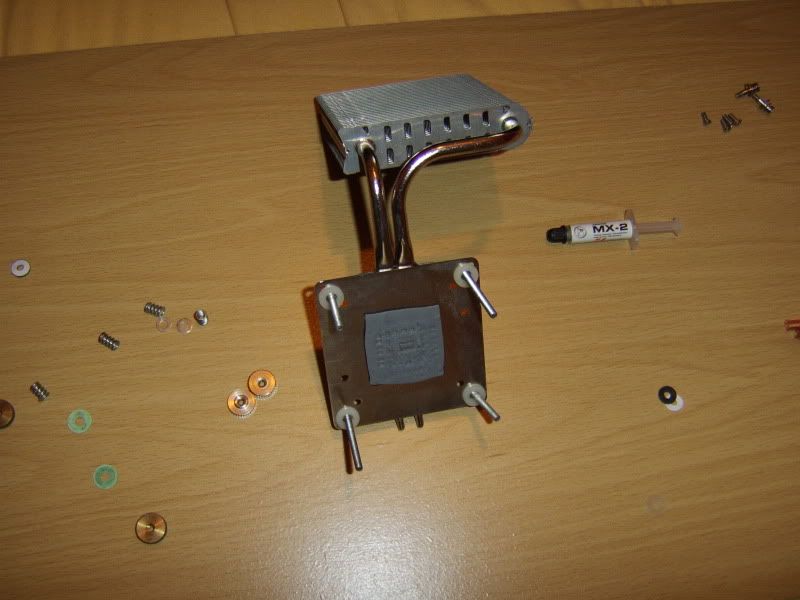
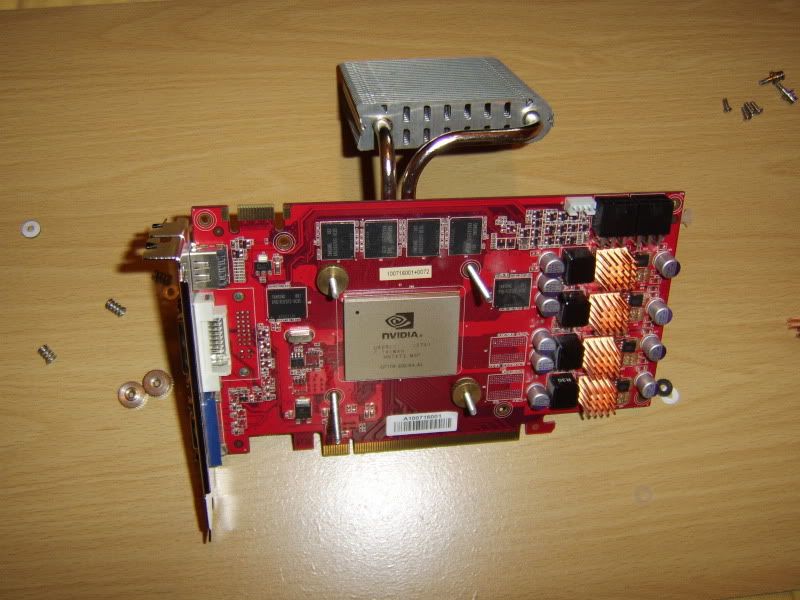
The reason I went with a Palid 460GTX was the hole spacings of the stock cooler.
As the G82 holes match with my High flow silverprop block - shame it doesn't match my build.
But they don't make GPU blocks like this anymore.
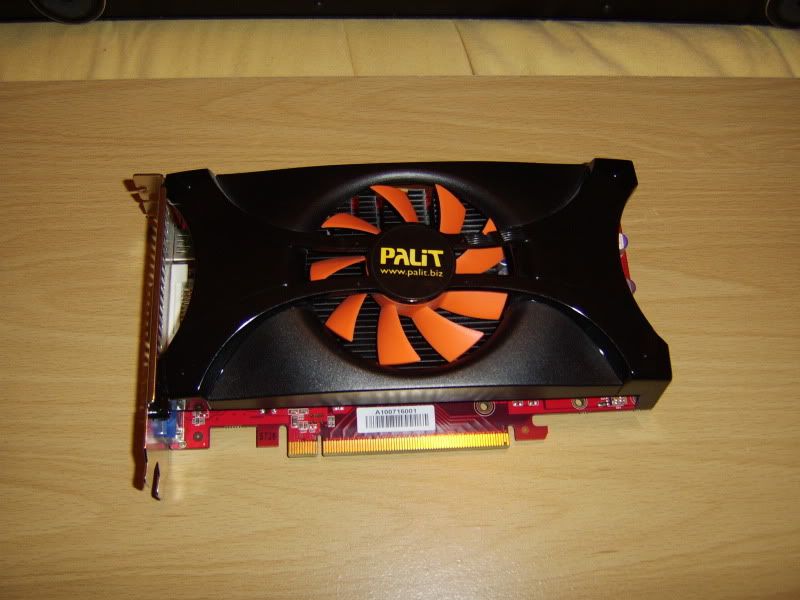
Stock card
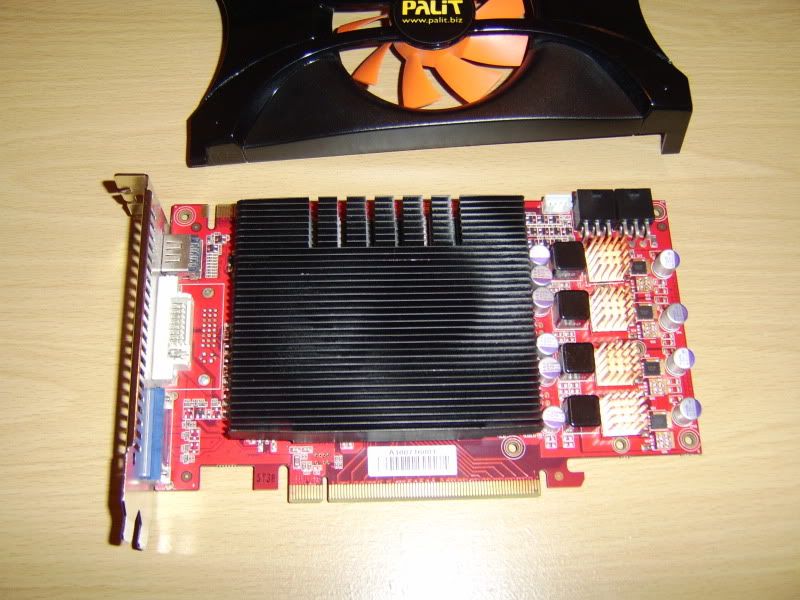
Off with the fan and shroud - note the enzotech upgrade I'd already done.
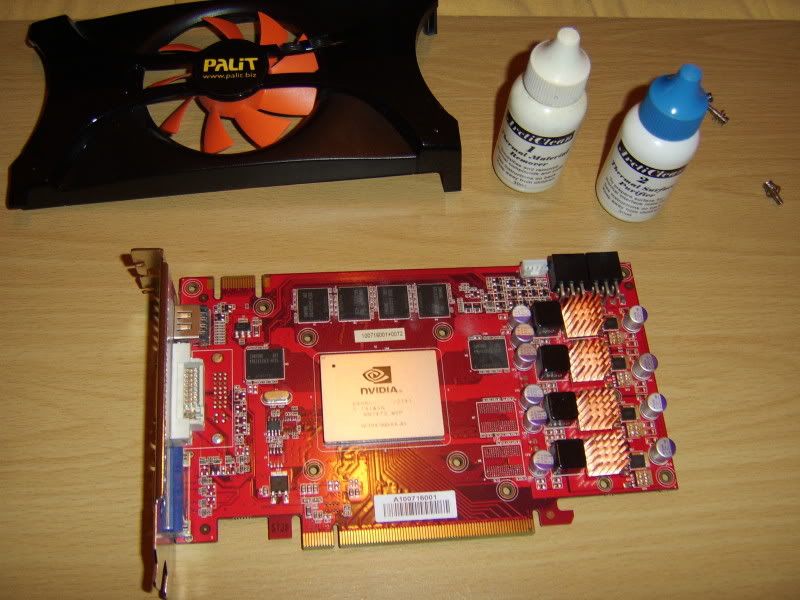
Off with the heatsink, and removed the AS7
The joy of quick connects - dissasemble the loop without bleading.
Motherboard, block, both interchangeable without major hassle - the newer koolance ones don't even drip.
I use VL4 - as I'm a low restriction, high flow loop builder
The reason I went with a Palid 460GTX was the hole spacings of the stock cooler.
As the G82 holes match with my High flow silverprop block - shame it doesn't match my build.
But they don't make GPU blocks like this anymore.
Stock card
Off with the fan and shroud - note the enzotech upgrade I'd already done.
Off with the heatsink, and removed the AS7
Last edited:
- Joined
- 31 May 2006
- Posts
- 7,564
- Location
- West London
Another old friend - the thermalright HR-11, makes a great backplate for a gpu waterblock
nylon washer as spacers are a must
opposite fixing bolted on place - using EK chipset block mounting hardware
Add the silverprop fusion HL - full metal goodness
Some more enzotech heatsinks for ram and MosFet
Last edited:
- Joined
- 31 May 2006
- Posts
- 7,564
- Location
- West London
Mobo next
s1155 bracket on the MSI P67A-GD65. It's metal with a back plate
Bracket removed, to make way for the EK backplate.
Note to self: the cpu will fall out if you turn the mobo over

And here it is - heavy rubber isolation layer, and thick metal plate
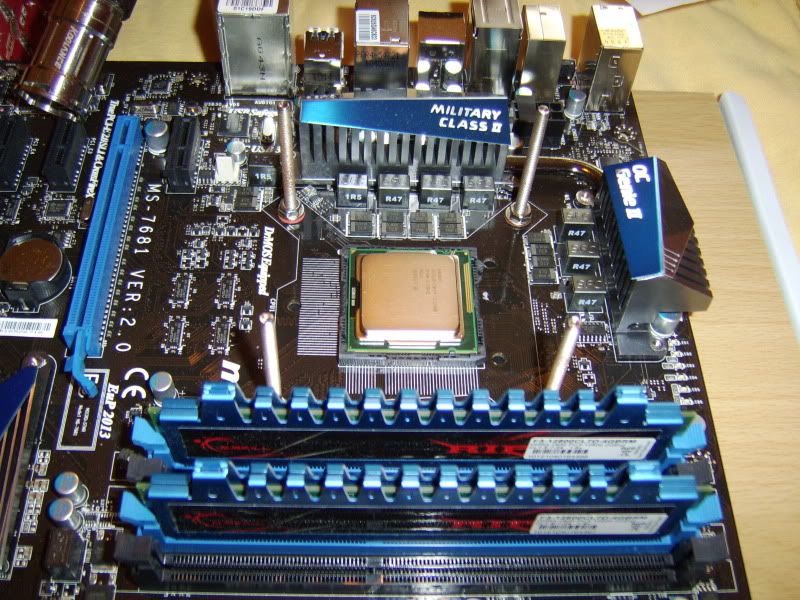
You don't need a cut out in your mobo tray if you mount the backplate to the board.
Any new block / bolt through cooler can be instill without issue
Shiny shot of the EK supreme HF's nickel base
s1155 bracket on the MSI P67A-GD65. It's metal with a back plate
Bracket removed, to make way for the EK backplate.
Note to self: the cpu will fall out if you turn the mobo over
And here it is - heavy rubber isolation layer, and thick metal plate
You don't need a cut out in your mobo tray if you mount the backplate to the board.
Any new block / bolt through cooler can be instill without issue
Shiny shot of the EK supreme HF's nickel base
- Joined
- 31 May 2006
- Posts
- 7,564
- Location
- West London
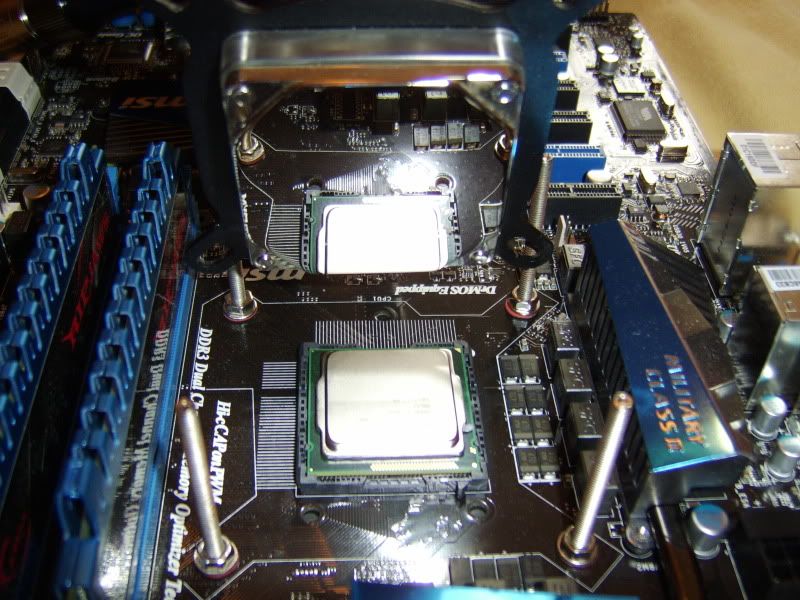
EK Supreme attached, and 460GTX installed
HR-11 looking like a cpu cooler
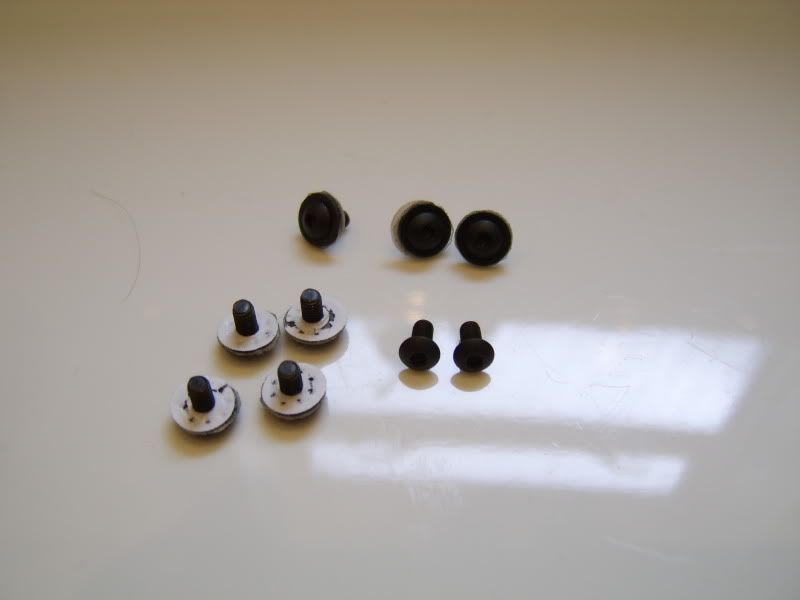
I used some Black button head allen machine screws to attached the mobo.
Matching black fiber (sticky backed) washers to - every little helps
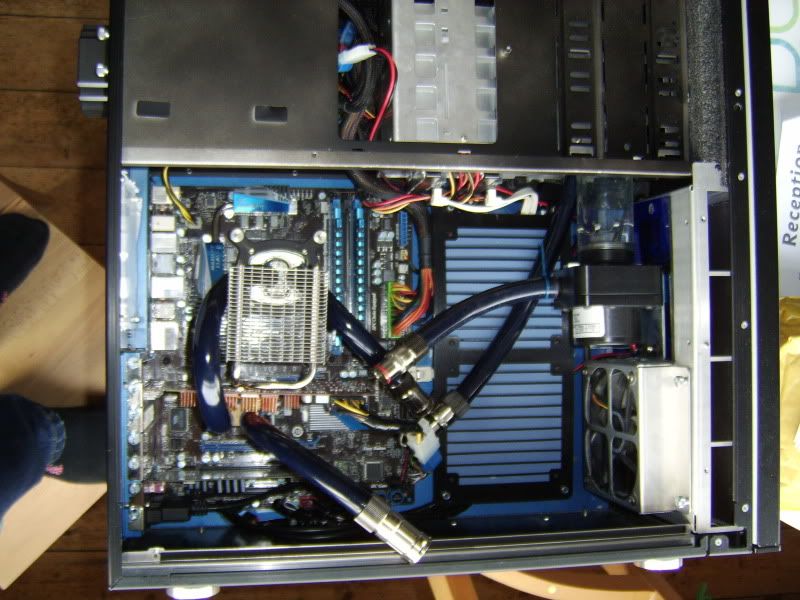
Installed and nearly ready to go.
Final working shot was too blury so you'll have to wait for my next post.
Currently running F@H gpu3 client 850/1700/1000 fully loaded @ low 50c
Not bad for a closed box with its only active cooling a Noiseblocker MF12-S2 (1250rpm)
Last edited:

- Joined
- 31 May 2006
- Posts
- 7,564
- Location
- West London
Thanks guy's, waiting for my MSI advance replacement before I finish the build.
But have a few other bits to update this week
My old LL case has quite small mobo standoffs.
Newer high end case has longer standoffs or mobo trays with cpu cut outs.
I could have cut the tray (but it would have caused a air flow short circuit)
Or used the backplate without the rubber layer (ek backplate directly on intel backplate)
But wanted too keep the rubber spacer, so the intel backplate needed to good.
Should have shown a picture of the intel backplate really, as that's why I removed the socket clamp
But have a few other bits to update this week
Nice work there, one thing I didn't realise is that the CPU retention part has to be removed to fit the EK block
My old LL case has quite small mobo standoffs.
Newer high end case has longer standoffs or mobo trays with cpu cut outs.
I could have cut the tray (but it would have caused a air flow short circuit)
Or used the backplate without the rubber layer (ek backplate directly on intel backplate)
But wanted too keep the rubber spacer, so the intel backplate needed to good.
Should have shown a picture of the intel backplate really, as that's why I removed the socket clamp
Last edited:
")
- Joined
- 31 May 2006
- Posts
- 7,564
- Location
- West London
Woefull lack of updates - so sorry for that.
Didn't really want to finish then strip it all down and swap out the mobo.
Thankfully MSI really pulled the stops out and my B3 arrived very quickly
Any way as my son is back full time at school again (so many days off with bank holidays, training days and the referendum) I've finally made some progress.
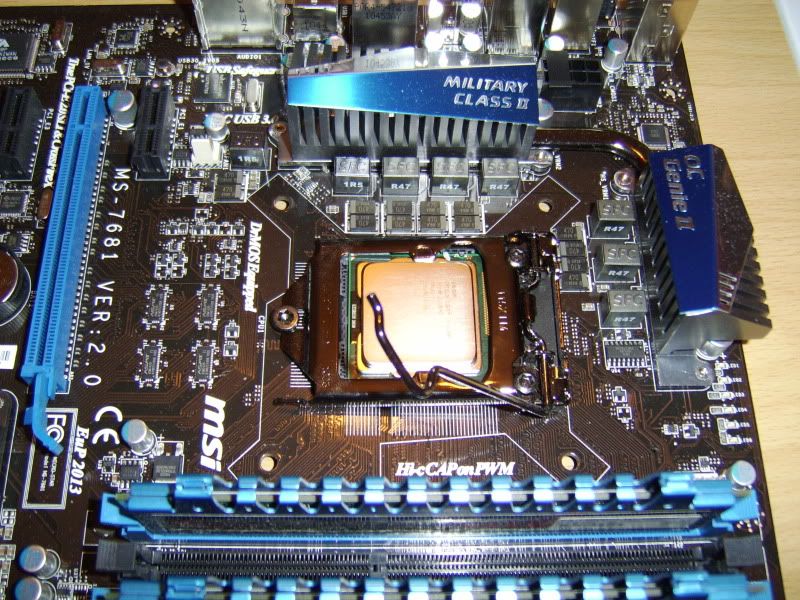
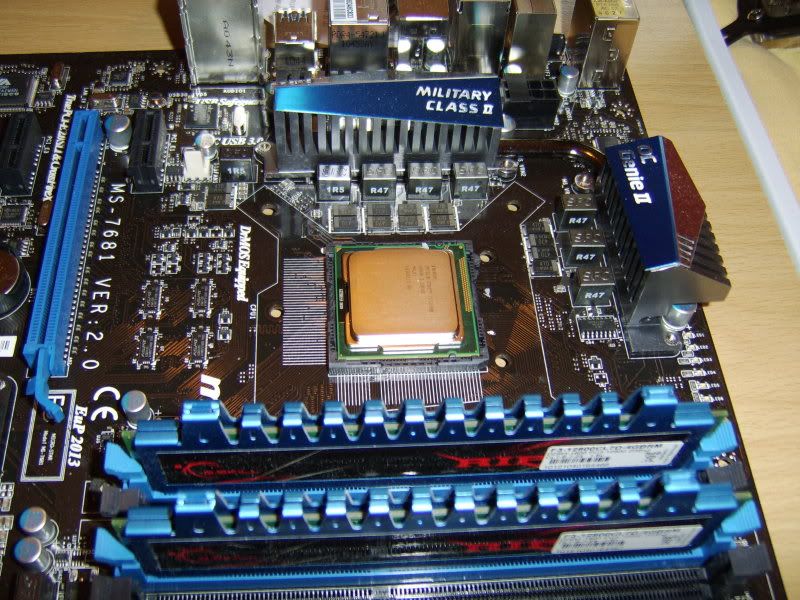
Here a close up of my MSI-P67A-GD65 B2
And here's the B3 - not many changes except this chip and some new 'orange' components (about 20 of them across the board)
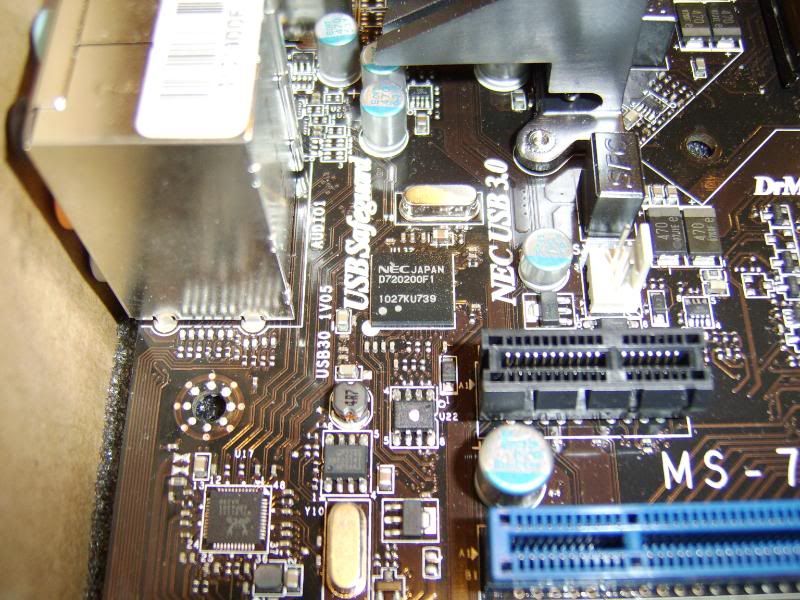
The B3 PCB is made by another firm, as are some of the usb/audio blocks

Didn't really want to finish then strip it all down and swap out the mobo.
Thankfully MSI really pulled the stops out and my B3 arrived very quickly
Any way as my son is back full time at school again (so many days off with bank holidays, training days and the referendum) I've finally made some progress.
Here a close up of my MSI-P67A-GD65 B2
And here's the B3 - not many changes except this chip and some new 'orange' components (about 20 of them across the board)
The B3 PCB is made by another firm, as are some of the usb/audio blocks
Last edited:
- Joined
- 31 May 2006
- Posts
- 7,564
- Location
- West London
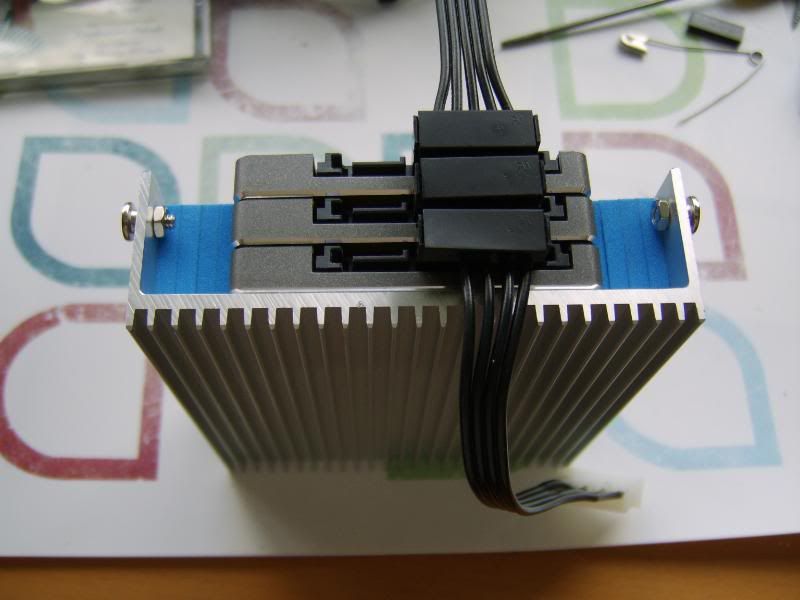
With access to a full set of working SATA ports it's about time I sorted out my data storage.
But that means more sata power leads - and further to my first extension effort (above)
I've got some old corsair modular cables of the MM to remove all the visable red and yellow wires.
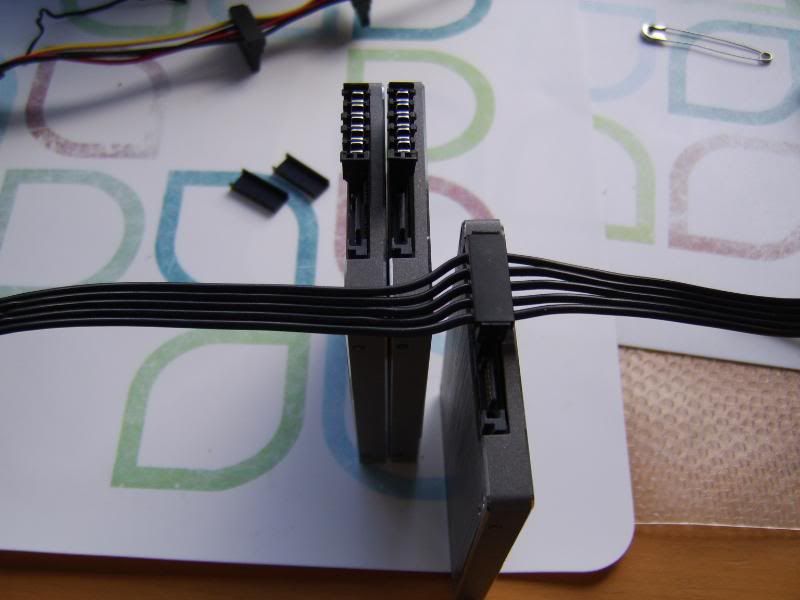
Drives with un-connected sockets awaiting fixing
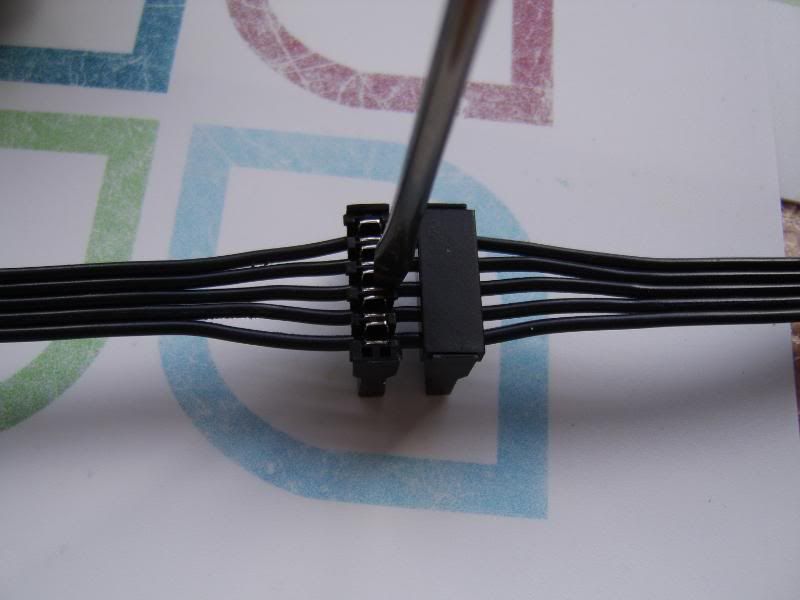
Wiring pushed into socket away from ssds - don't want to break them
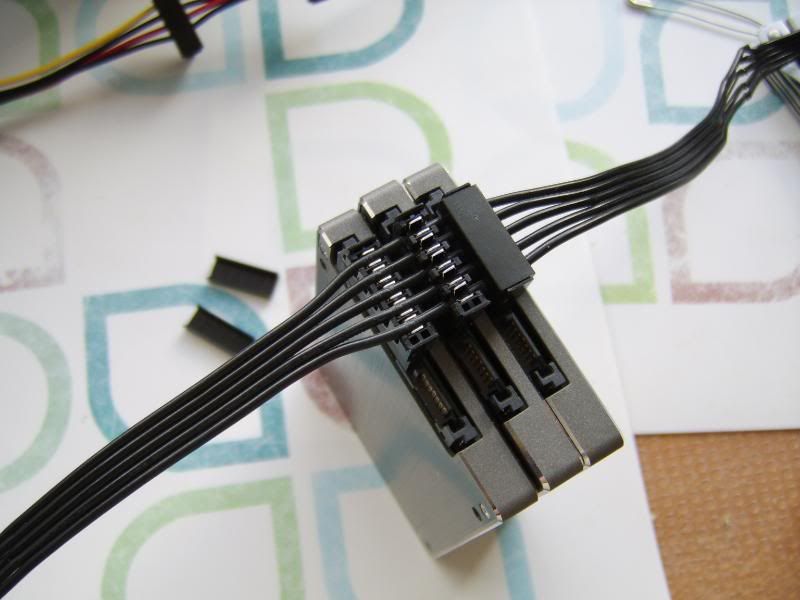
Alining third socket

Sata sockets - perfect fit
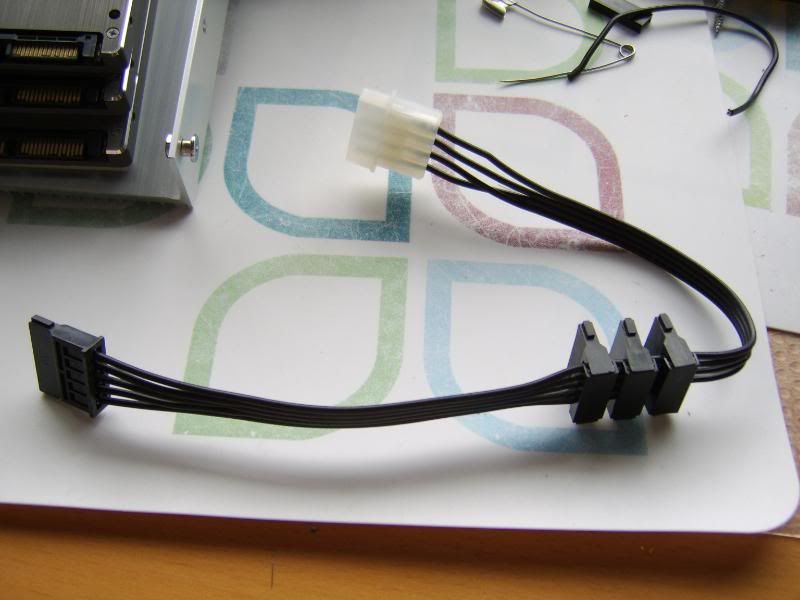
Finally attach the molex, which will be hidden
(note that the cable layout for molex and sata don't match, two wires cross if your doing this yourself)
But that means more sata power leads - and further to my first extension effort (above)
I've got some old corsair modular cables of the MM to remove all the visable red and yellow wires.
Drives with un-connected sockets awaiting fixing
Wiring pushed into socket away from ssds - don't want to break them
Alining third socket
Sata sockets - perfect fit
Finally attach the molex, which will be hidden
(note that the cable layout for molex and sata don't match, two wires cross if your doing this yourself)
- Joined
- 31 May 2006
- Posts
- 7,564
- Location
- West London
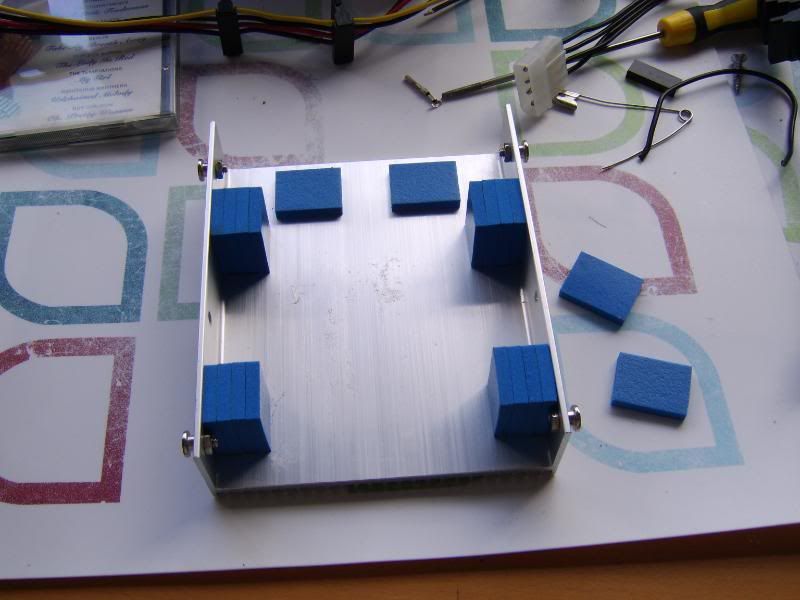
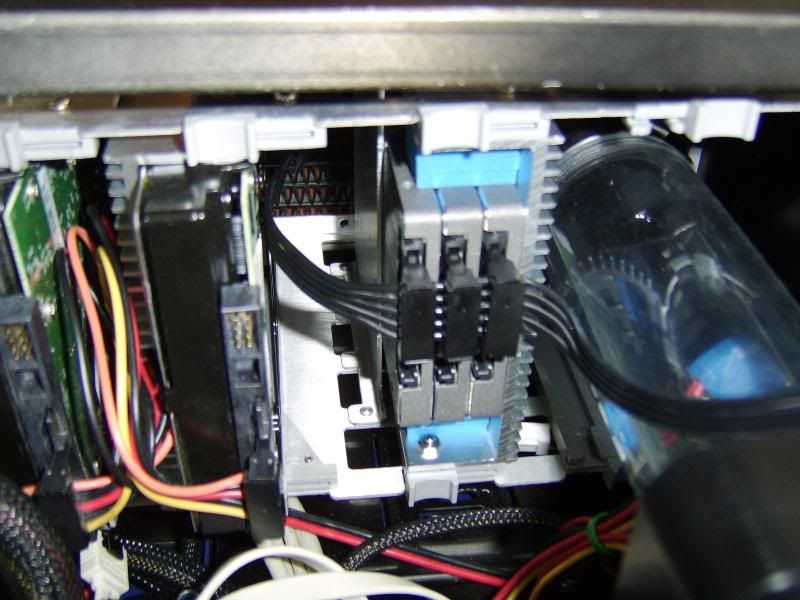
Using the sticky backed glazing buds again this time as soft fixings
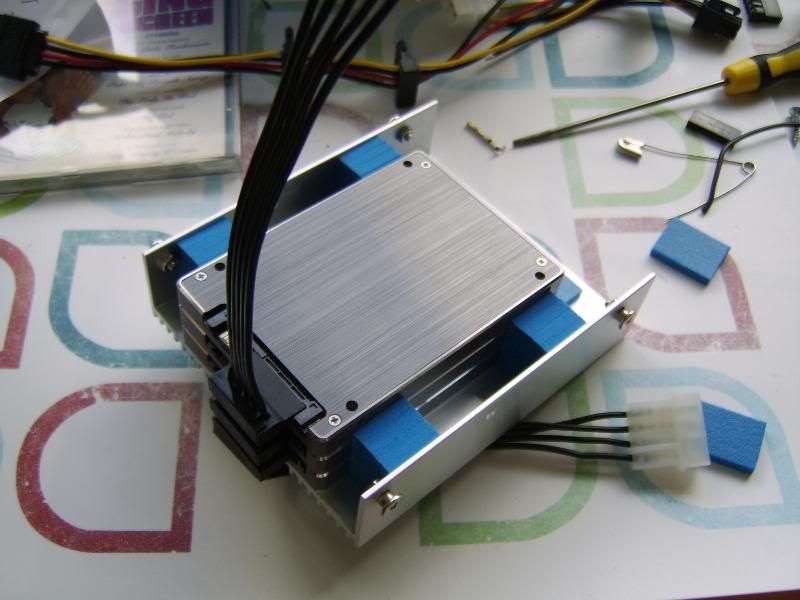

And in she goes - only need to unplug the HHDs, really pleased with how the drive cage works
- Joined
- 31 May 2006
- Posts
- 7,564
- Location
- West London
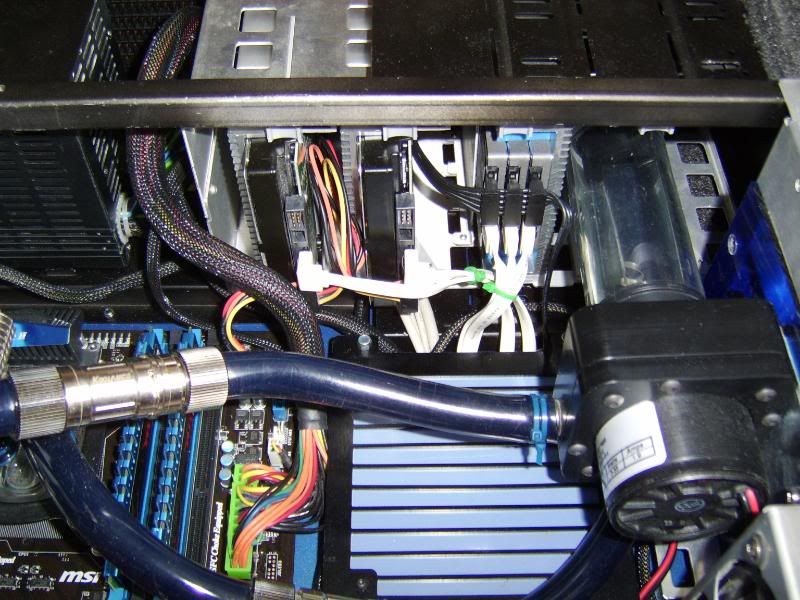
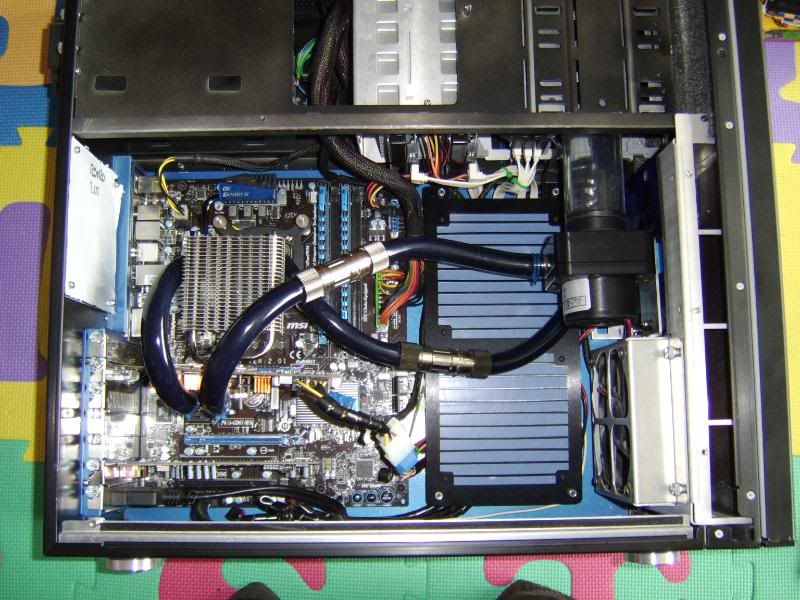
A spot of cable tidying and I'm back up and running.
Black sata data cables are on route, but I quite like the white ones.
Thinking of doing the gpu and molex power cables now
I've also a new top for my old shape supreme HF (wanted a black one, but no joy)
The plexi one has gained a few micro cracks

My ghost barbs don't even have a spanner hex - finger tight only with the knurling - pesky rubish plexi
Last edited: