

You are using an out of date browser. It may not display this or other websites correctly.
You should upgrade or use an alternative browser.
You should upgrade or use an alternative browser.
Project Money Pit
- Thread starter Dogbreath
- Start date
More options
Thread starter's postsSoldato
- Joined
- 8 Mar 2006
- Posts
- 13,311
- Location
- Telemark
Oops, perhaps the cuts should have been made after the welding?
I've found out why FIAT cut a massive amount of metal out, it's because a milling machine goes blunt slower than a saw blade.
I've found out why FIAT cut a massive amount of metal out, it's because a milling machine goes blunt slower than a saw blade.
Soldato
- Joined
- 19 Oct 2002
- Posts
- 18,354
- Location
- Shakespeare’s County
Oops, perhaps the cuts should have been made after the welding?
Thats exactly what was done.
Using a saw to make OEM car parts would suprise me.
This is a picture of the block with the new piston in

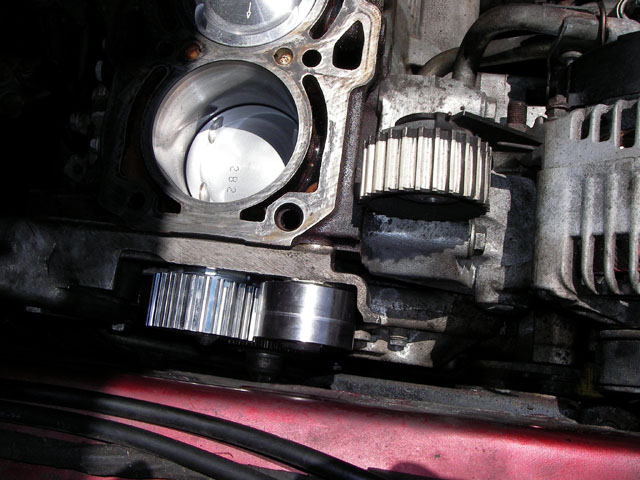
This shows the new metal cam belt tensioner and idler fitted, next the original plastic item (though a fairly new one).
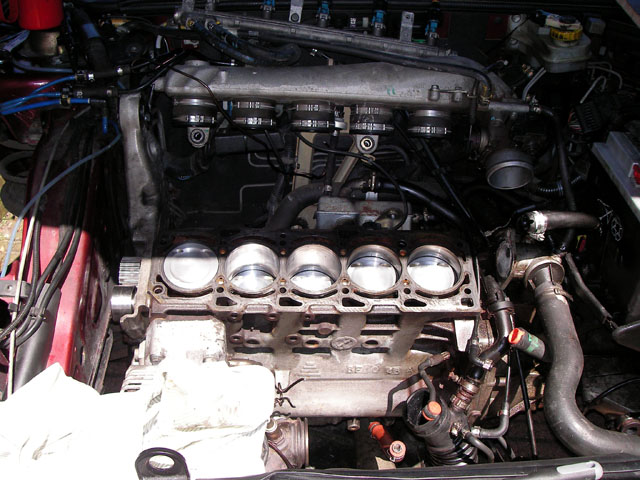
This was the state of the engine bay just prior to fitting the head.
Fitting the head fairly straight forward, though it's amazingly heavy. Really a two person job, but had to risk a hernia as no-one else was around at the time!
The head bolts have a fairly complex sequence of tightening and loosening plus several stages of angular torques to ensure they are correctly torqued to yield.
This shows the new metal cam belt tensioner and idler fitted, next the original plastic item (though a fairly new one).
This was the state of the engine bay just prior to fitting the head.
Fitting the head fairly straight forward, though it's amazingly heavy. Really a two person job, but had to risk a hernia as no-one else was around at the time!
The head bolts have a fairly complex sequence of tightening and loosening plus several stages of angular torques to ensure they are correctly torqued to yield.
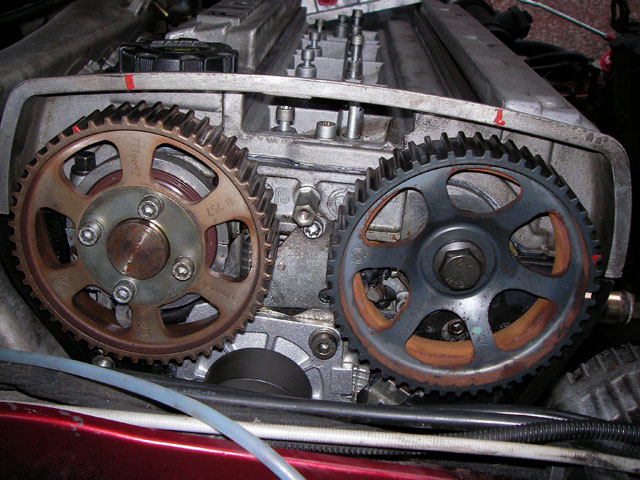
This shows the cam pulleys and the remains of some timing marks painted on by whoever did the previous belt change.
They were useless for me, since the pulleys had been removed. Though you can't see in this picture, the pulleys are free to turn on the ends of the cams by about 45 degrees on the inlet (left hand) and about 15 degrees on the exhaust(right hand). To get the cams in the right place you have no choice but to purchase a set of cam locking tools.
The center of the inlet cam looks a different to the exhaust becaise the 'variator' sits behind it. This device gives the engine a crude form of variable valve timing, allowing the ECU to advance or retard the inlet cam. You can also just see the new water pump in this picture.
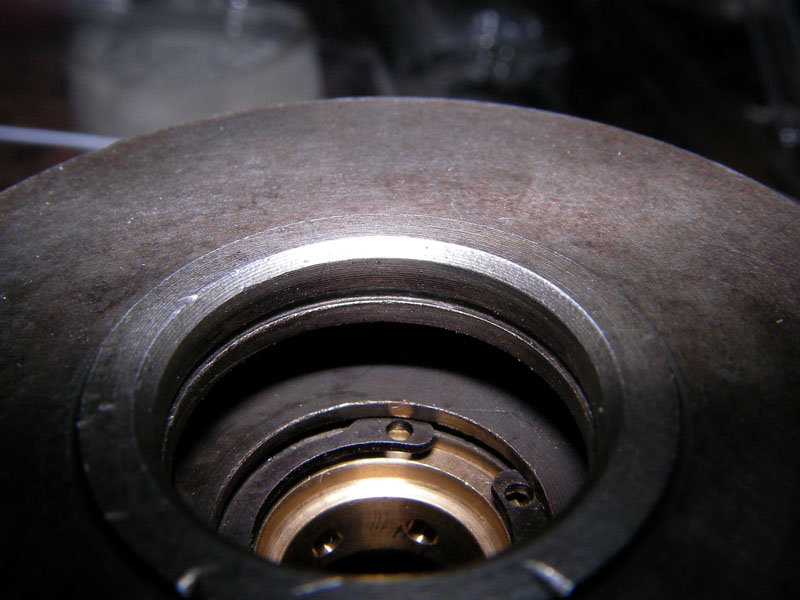
At this stage I had another look at the turbo, I knew it was pretty worn but the original intention was to leave it and see if it smoked or not. However the play I could feel in the shaft was nagging away so I got the DTI out and measured it properly, only to discover it was way outside the normal tolerance (maximum of 0.56mm). In fact if I pushed the compressor to one side with only fairly gentle pressure it would touch the compressors housing, not good!
After checking out the price of a rebuilt/reconditioned turbo and the tattered reamins of my rebuild budget, I cheated and gave the turbo a quick freshen up myself. This is not ideal as obvioulsy I don't have facilities to rebalance the assembely, but by carefully marking everything prior to dismantling, balance should remain reasonable when assembeled. This probably isn't going to last as long as a properly reconditioned turbo, but for the price of the rebuild kit (~£50) if it extended it's life by 12 months I'll be happy.
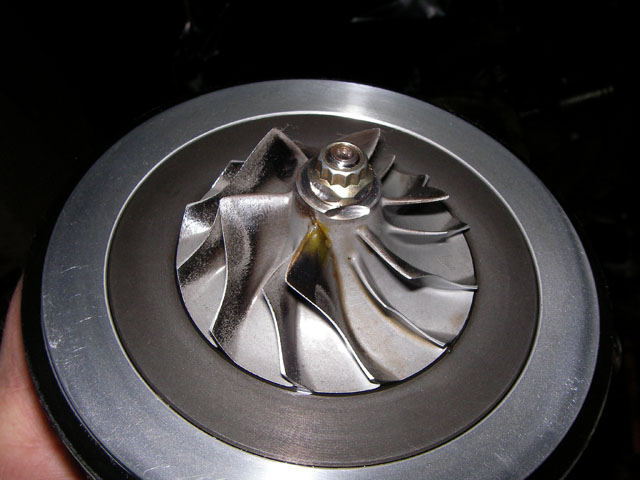
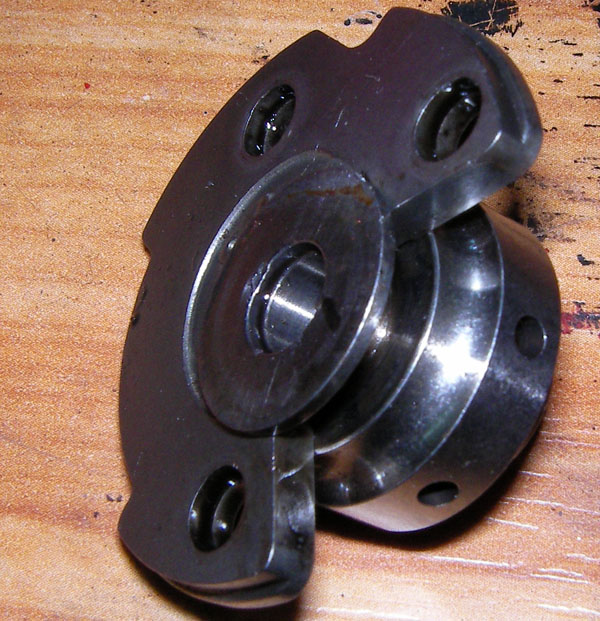
This is the picture of the compressor wheel just after removing the housing. This involves a very large and strong circlip that was a PITA to remove as none of my circlip pliers were large enough.
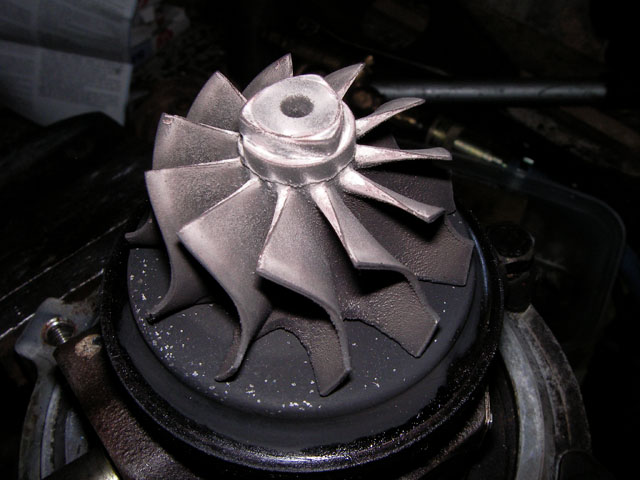
A picture of the hot end. The black area behind the blades is a pressed steel shield and behind this was a mass of baked oil deposits.
They were useless for me, since the pulleys had been removed. Though you can't see in this picture, the pulleys are free to turn on the ends of the cams by about 45 degrees on the inlet (left hand) and about 15 degrees on the exhaust(right hand). To get the cams in the right place you have no choice but to purchase a set of cam locking tools.
The center of the inlet cam looks a different to the exhaust becaise the 'variator' sits behind it. This device gives the engine a crude form of variable valve timing, allowing the ECU to advance or retard the inlet cam. You can also just see the new water pump in this picture.
At this stage I had another look at the turbo, I knew it was pretty worn but the original intention was to leave it and see if it smoked or not. However the play I could feel in the shaft was nagging away so I got the DTI out and measured it properly, only to discover it was way outside the normal tolerance (maximum of 0.56mm). In fact if I pushed the compressor to one side with only fairly gentle pressure it would touch the compressors housing, not good!
After checking out the price of a rebuilt/reconditioned turbo and the tattered reamins of my rebuild budget, I cheated and gave the turbo a quick freshen up myself. This is not ideal as obvioulsy I don't have facilities to rebalance the assembely, but by carefully marking everything prior to dismantling, balance should remain reasonable when assembeled. This probably isn't going to last as long as a properly reconditioned turbo, but for the price of the rebuild kit (~£50) if it extended it's life by 12 months I'll be happy.
This is the picture of the compressor wheel just after removing the housing. This involves a very large and strong circlip that was a PITA to remove as none of my circlip pliers were large enough.
A picture of the hot end. The black area behind the blades is a pressed steel shield and behind this was a mass of baked oil deposits.
Last edited:
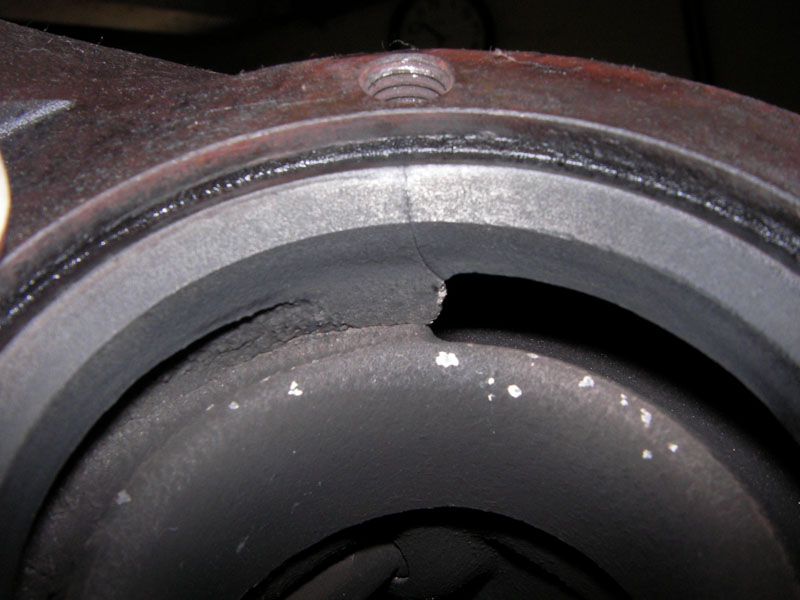
After dismantling I was a bit upset to find this crack, but seems like it's very common on these turbos, and does not really pose a problem.
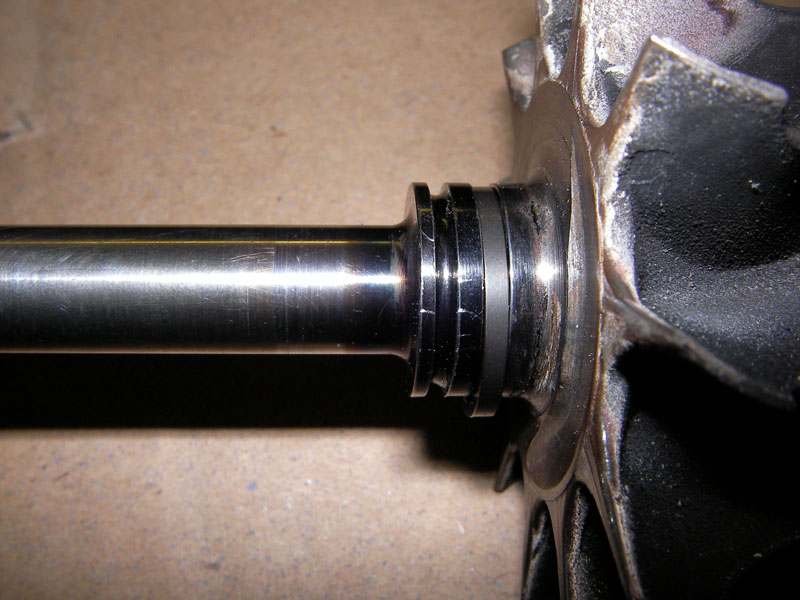
The turbine shaft after dismantling, showing the oil seal (the loose clip sitting in the groove). Notice how the back of the turbine has a chunk ground out of it from where it was balanced at the factory.
This is the phosphor bronze bearings which support the turbine shaft. This was the main wear point in my turbo.
And this is the old thrust bearing, a standard 270 degree type.
Unfortunately, you will have to use your imaginations here as the few pics I took of the engine bay during completion were taken on another camera, and the SD card seems to have gone walkies, probably due to my 2 year old daughter. Will update when it's found!
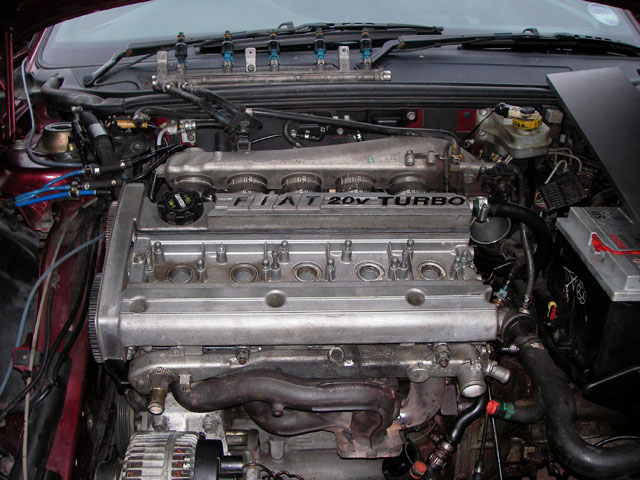
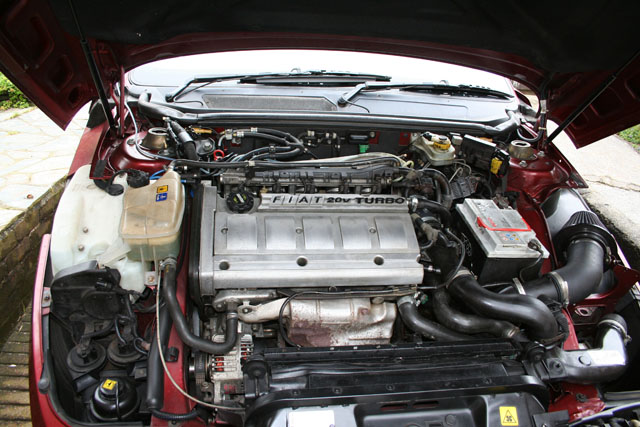
But this is what the engine bay now looks like.
Unfortunately, you will have to use your imaginations here as the few pics I took of the engine bay during completion were taken on another camera, and the SD card seems to have gone walkies, probably due to my 2 year old daughter. Will update when it's found!
But this is what the engine bay now looks like.
I've never clayed a car before but thought I'd give the Coupes paint a bit of a clean up so bought a Meguirs kit with the wax and speed detailer. Expensive, but I am very impressed. The wax just glides on and off after claying, and the paint is like glass (apart from the numerous stone chips!)
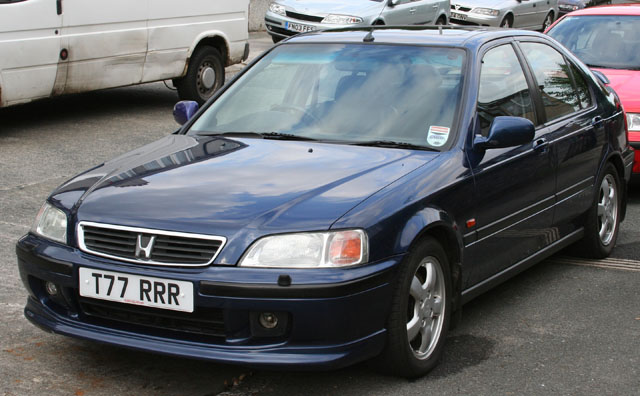
I then felt the need to treat the poor old civic, which hadn't been washed for several months and was filthy.
Anyone want to buy it?
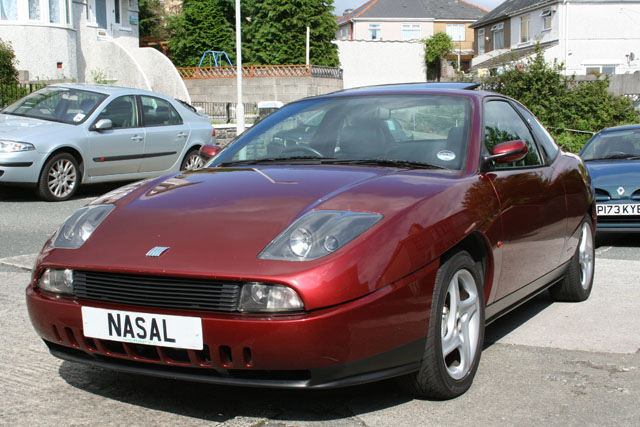
The Fiat has been on the road for a week and a half, and I've commuted 60 miles a day in it so far with no problems. I'm taking it pretty easy at the moment, but performance so far is impressive, a veritable torque monster compared to the Civic and so far at least the economy is not too bad. I reckon I'm getting around 30mpg, which is hardly any worse than the civic. The difference is that the Civic begs you thrash it everywhere, driving steadily is not in it's nature, whereas the coupe is pleasant to drive in a more sedate fashion, knowing you have a decent amount of acceleration available without dropping two gears every time.
There are a few jobs that need doing, the engine mounts for starters which are a bit tired and are allowing the engine to move around a little too much. However, I am really pleased with the car so far, and I'm intending to keep it and sell the Civic which is getting on a bit these days.
I then felt the need to treat the poor old civic, which hadn't been washed for several months and was filthy.
Anyone want to buy it?
The Fiat has been on the road for a week and a half, and I've commuted 60 miles a day in it so far with no problems. I'm taking it pretty easy at the moment, but performance so far is impressive, a veritable torque monster compared to the Civic and so far at least the economy is not too bad. I reckon I'm getting around 30mpg, which is hardly any worse than the civic. The difference is that the Civic begs you thrash it everywhere, driving steadily is not in it's nature, whereas the coupe is pleasant to drive in a more sedate fashion, knowing you have a decent amount of acceleration available without dropping two gears every time.
There are a few jobs that need doing, the engine mounts for starters which are a bit tired and are allowing the engine to move around a little too much. However, I am really pleased with the car so far, and I'm intending to keep it and sell the Civic which is getting on a bit these days.
Soldato
- Joined
- 8 Mar 2006
- Posts
- 13,311
- Location
- Telemark
Very nice, any more modifications planned?
I'd always wondered what they would be like with a few 155 parts in the suspension, it's the same floor pan.
I'd always wondered what they would be like with a few 155 parts in the suspension, it's the same floor pan.
Very nice, any more modifications planned?
I'd always wondered what they would be like with a few 155 parts in the suspension, it's the same floor pan.
If you want the perfect setup in a coupe, you need Biltsen B6 dampers, eibach lowering springs and uprated front and back anti roll bars.
Not cheap, but has been tried and tested as the ultimate combo.
The rear suspension is quite different on the coupe AFAIK, which is the main reason they managed to provide a rear seats with a suprising amount of room in the back of a coupe, but none at all in a GTV. The GTV rear suspension is a better design (Coupe has simple trailng arm) but in practice I'm very pleased with the handling considering it's a very nose heavy car. New shocks, wishbones, ARB bushes etc. will probably be on the 'todo' list at some stage, but everything is fine for now.
I put it up on a ramp to check the underside and could find no problems, though the supersprint exhaust is living up (down) to it's reputation for rusting quickly.
As for mods, I'm considering a better intercooler, but I'm going to get some thermocouples into the current setup to see if it's worthwhile. I was going to fit a proper airbox and get shot of the K&N cone filter, but the induction noise of the 5 cylinder lump is addictive to say the least. Only thing is it makes the recirculating blow off valve very noisy, sounds like a chavved impreza.
The stock boost control totaly sucks as Bug One mentioned, though I think my boost control solenoid valve must be sticky or something as it's all over the place. I've just received a ACDelco solenoid valve to replace it which is supposed to give much more stable boost. I don't really like the manual boost controllers as it overides the ECU safety systems.
Last edited:
Soldato
- Joined
- 8 Mar 2006
- Posts
- 13,311
- Location
- Telemark
As for exhausts I like the Powerflow stainless jobbies, so long as you take the free checkup once a year they have a lifetime warranty.
Maybe you could mount a windscreen washer to aim at the intercooler, then you can have a boost button.
I quite like hearing a little of the wastegate/dump valve, so long as it isn't venting to open air. Good way to foul up exhaust valves.
Maybe you could mount a windscreen washer to aim at the intercooler, then you can have a boost button.
I quite like hearing a little of the wastegate/dump valve, so long as it isn't venting to open air. Good way to foul up exhaust valves.
To bring a bit of closure to the thread, it's nearly 5 years later and it's time to let the Fiat go. I've put around 50k miles on it in that time, and the engine and turbo are still running perfectly with negligible oil consumption. It's never broken down or suffered a major fault in that time, the worst thing was the handbrake cables freezing up in Winter which meant I had to get underneath with the hair dryer to get to work!
The Supersprint exhaust is (amazingly) still in one piece and doesn't seem to have corroded any further. The welded manifold was fine for about 30k miles, then I replaced it with a nearly new item simply because I found one cheap, but there was no further sign of cracking on the welded on.
I have spent a bit in parts for preventative maintenance; the front suspension lower wishbones have been replaced twice (genuine items), new top mounts and spring platforms, two rear wheel bearings, one front wheel bearing, couple of sets of auxiliary belts, two sets of discs and pads, three sets of tyres (and fronts need doing again), new handbrake cables, reconditioned steering rack, numerous oil and filter changes, spark plugs, set of coil packs, uprated engine stabiliser bushes etc. However nothing particularly expensive, though I did all the work myself.
I reckon I have averaged around 28-29mpg, with 30+mpg quite possible on a gentle run (recently managed 33mpg) which I'm quite pleased with for the performance offered. I reckon that is probably £10k+ just on petrol during my ownership which is a little thought provoking!
The bodywork is looking a bit rough these days, it's very prone to stone chips and the clear coat tends to lift off around the chips. However, it still polished up and looks respectable from a distance.

I think it does prove that you can run one of these on a very sensible budget, provided you are prepared to get your hands dirty.
The Supersprint exhaust is (amazingly) still in one piece and doesn't seem to have corroded any further. The welded manifold was fine for about 30k miles, then I replaced it with a nearly new item simply because I found one cheap, but there was no further sign of cracking on the welded on.
I have spent a bit in parts for preventative maintenance; the front suspension lower wishbones have been replaced twice (genuine items), new top mounts and spring platforms, two rear wheel bearings, one front wheel bearing, couple of sets of auxiliary belts, two sets of discs and pads, three sets of tyres (and fronts need doing again), new handbrake cables, reconditioned steering rack, numerous oil and filter changes, spark plugs, set of coil packs, uprated engine stabiliser bushes etc. However nothing particularly expensive, though I did all the work myself.
I reckon I have averaged around 28-29mpg, with 30+mpg quite possible on a gentle run (recently managed 33mpg) which I'm quite pleased with for the performance offered. I reckon that is probably £10k+ just on petrol during my ownership which is a little thought provoking!
The bodywork is looking a bit rough these days, it's very prone to stone chips and the clear coat tends to lift off around the chips. However, it still polished up and looks respectable from a distance.
I think it does prove that you can run one of these on a very sensible budget, provided you are prepared to get your hands dirty.
Congrats and well done - what a nice end to the story ")
I remember reading about this when you started and thinking what an undertaking it was.
Do you have any mechanical background? Or are you a hardcore bedroom mechanic?
I remember reading about this when you started and thinking what an undertaking it was.
Do you have any mechanical background? Or are you a hardcore bedroom mechanic?
My father taught me and my brother a great deal of mechanical engineering background and we both had field bikes at about 10 YO that we used to repair and service ourselves. We used to take all sorts of stuff apart as kids as well, just to see how it worked
My first three cars were (old, tired) classic minis, and my brother and a couple of friends also had minis. A reasonable amount of mechanical skill and a decent set of tools are mandatory to keep these on the road.
I briefly worked for my grandfathers agricultural engineering company in my late teens (replacing the bearings in a muck spreader when it's half full of poo is not pleasant!), but it was never something I wanted to pursue as a career as I was much more interested in electronics engineering. I still do all my own work these days, though it has to be said that paying someone to do it is becoming more attractive as I get older!
Last edited: