You are using an out of date browser. It may not display this or other websites correctly.
You should upgrade or use an alternative browser.
You should upgrade or use an alternative browser.
[Project] Out of Reach
- Thread starter shadowscotland
- Start date
More options
Thread starter's posts- Joined
- 31 May 2006
- Posts
- 7,564
- Location
- West London
Absolutely fascinating build there, definitely one of the most innovative ideas in recent months.
Thanks schumi - very kind of you to say so.
as they say Necessity is the mother of all invention.
Edit:
Phase 4: Desk conc.

Here the underside of the desk. The oversized bolts were the best that homebase could
provide and I need to work at the weekend for a major Tuesday morning deadline so I left it
unfinished by usable.
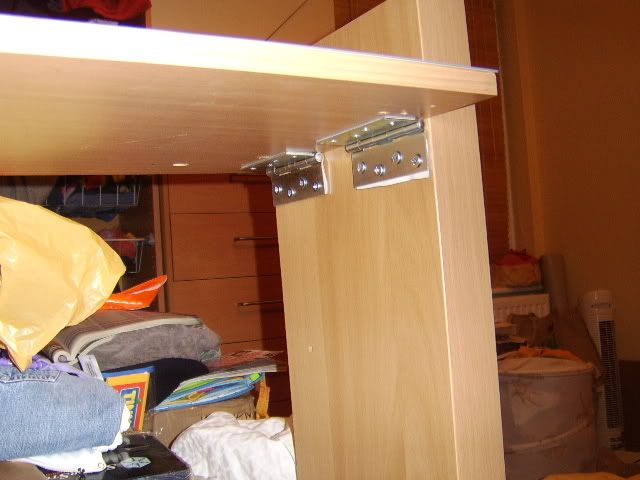
That SOOOOOOOOO much better - hardware store to the rescue - they are still slightly
to big but I'll re-countersink the hinges with a larger drill bit some time soon (maybe)

With the bolts now coming from the hinge side - the bare ends needed a child friendly finish.
Again the hardware store had nuts aplenty inc these nice dome ended hex's

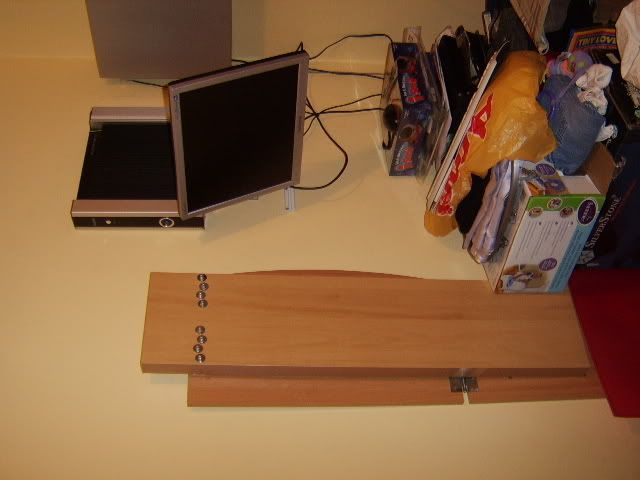
Here she is, folded flat agained the wall.
I got home to late to drill the wall full of holes for the fixing pegs (two maybe four of them)
but might have time for that tonight.
Last edited:
- Joined
- 31 May 2006
- Posts
- 7,564
- Location
- West London
hurry hurry
Hold your horses, stelly – good things come to thoses who wait

Have fun getting up to put discs in.
It’s actually quite easy – the case’s height was set out based on my wife’s arm reach.
No tip toes required

awesome tbh mate
Thanks.
I’ve added the images of last nights alterations with still a bit more to do. Them I’ll be installing
the water loop – can’t wait to get rid of that fan noise, and very temped to treat myself to one
of the GUP Japan Smart Drive for my raptor

Last edited:
Wow, they look nice!

Let us know how they supress the noise of your raptor. My mate with the Skulltrail would really like his quitened down a little.

gt
- Joined
- 31 May 2006
- Posts
- 7,564
- Location
- West London
SPCR rates them very highly for cooling and quiet. And my silversone is somewhat limited with spare 5.75" drive bays for a normal bungee mods... problem is it would completely blow my budget.
I'll try the mod first (in a stack of 3x 3.5 bays) and if still too noisy, I'll get one. That way you guys get to see my 'curved stitching' appoach to suspension
I'll try the mod first (in a stack of 3x 3.5 bays) and if still too noisy, I'll get one. That way you guys get to see my 'curved stitching' appoach to suspension

Associate
- Joined
- 7 Jan 2008
- Posts
- 279
have not seen anything like this before, looks very good. Nice one1
- Joined
- 31 May 2006
- Posts
- 7,564
- Location
- West London
Looks like the room could do with a bit of a tidy though!
It’s taken far too long but each separate job wasn’t that hard really. Time consuming,
and at times frustrating but I’m not that skilled, just persistent. I’d say that if you can wire
a plug, you could do something similar. And yes the room needs a tidy
have not seen anything like this before, looks very good. Nice one
Neither had I – that’s one of the reasons for the log – and thanks for the comments
you two.
Phase 4.1: Desk lock.
Drill – plug – and screw in coat hook – job done.
It rotates 180 degrees from open / closed, and 5 min’s well spent
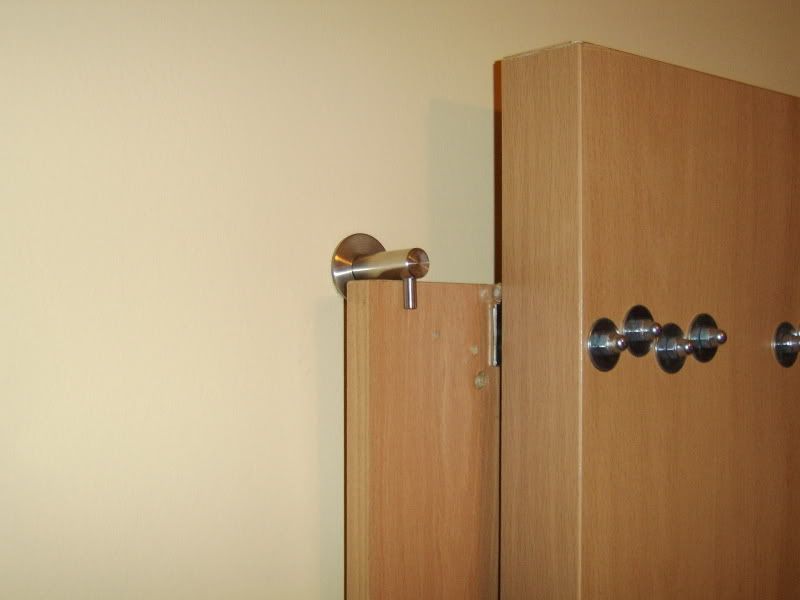
Locked
Phase 5: Water loop
Also been busy with the water cooling loop, as I’m trying out an idea.
Many folks use 7/16" Masterkleer over ½ inch barbs, so I thought I’d try my thin walled
3/8 over ½ barbs. Well it works (cup of hot water trick) will report on temps when I know
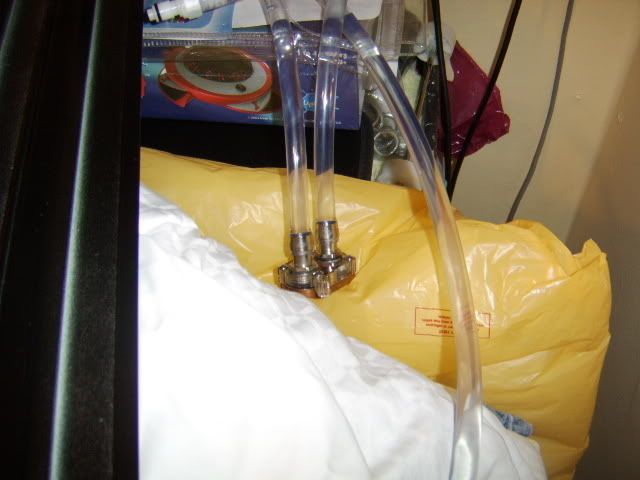
Very tight fit, no clips needed
I’ve also decided that I’ll not include the graphics card in the loop – may change my mind
when I’ve some temp data, but for now its just cpu and chipset.
It’s already filled with Feser 1, mavity doing most of the work, giving the blocks a good
shake to remove any small air bubbles. With the Zalman quick release couplings removed
this as actually very easy. I filled the tube fully and inserting the coupling (in ‘open’ position)
on the end. Bubble free and hopefully hassle free when I hook it up.

Filled loop awaiting install
Now the annoying bit.
Some of you may have noticed that there are two yellow strings across the Res2.
These are now anchored into the wall top and bottom, why you ask – well the sticky
side of industrial Velcro isn’t that good on cold gloss painted aluminum. Lets just say
I’m lucky that (1) no one was in the room, (2) I found it first, and (3) the screen was
parked below the Res2 – so that as it fell it flipped and landed on the corner of the bed.
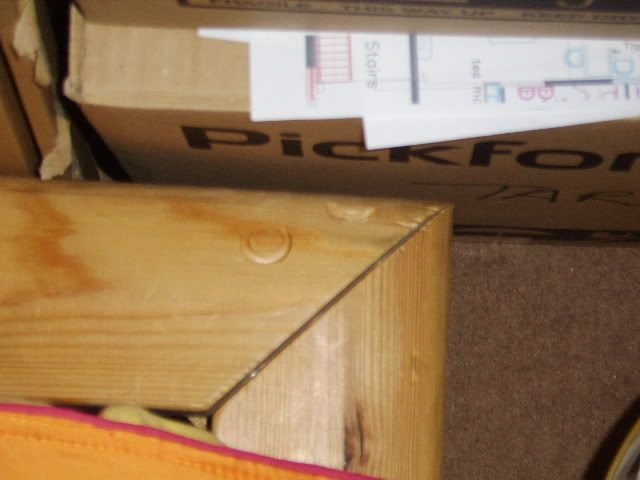
2cm deep scar in solid wood bedframe
Permanent use of belt and braces for me from now on, thankfully the only visible damage
to the Res is one of the female coupling has been smashed (yet didn’t leak) and my
lovely wife just found the ‘save place’ I kept my spares.
Should have the loop in soon and finally some quiet
Last edited:
Soldato
- Joined
- 16 Jun 2007
- Posts
- 5,239
- Location
- London
stpehan, get us somemore pics 

- Joined
- 31 May 2006
- Posts
- 7,564
- Location
- West London
Thanks guys and sorry for the lack of updates.
Was waiting two weeks for some bits to arrive only to have the wrong end plates included
Still not got them, but could modify what I’ve got so that not really a very good excuse.
It is a build log afterall so mod's are a must
The main problem been work (PC downtime is not a option recently) that and the build
up to my son second birthday has taken all my time - and he’ll always come first with
what little spare time I have.
But your comments are well timed
As I’ve the house to myself tonight.
I’ve already tested and installed my preferred graphic card – see below
Phase 5: Graphics - Passive or loop
Been thinking about this for some time and the two cards I currently have just didn’t fit the
bill any more.
My passive 7300LE is great – uses less power than a fan for 2d stuff and has next to no
effect on my CPU temp when in the loop (+2c) but it’s has no oomph in games and not
that great with video.
My 7800GT is also great – great power usage to performance ratio, and still below 60w
at load. It however adds 12 degree to my CPU temps if on the same loop at idle! It also
has 2x DVI ports and I’ve not enough room behind my case to use an adaptor.
So what to do – get another card (or two)
Was looking for a card somewhere between my current two, and selling the 7800 got me
a noisy 7600GS and a passive 8500GT. Both OC nicely if needed, both come in passive
flavours (always a good sign) and both use well under 50w at load.
Interestingly – the 3D mark scores where of only partial helpful (see below) but new tech
wins especially as it’s got a passive cooler fitted.
7300gs : 3Dmark03 - 2078 3Dmark05 - 1101
7600gs : 3Dmark03 – 8622 3Dmark05 – 3793
8500gt : 3Dmark03 – 8186 3Dmark05 – 4883
score above (I’ll update the actual ones later tonight)
edit: done
So I’ve some choices to make – leave as stock passive, upgrade to aftermarket passive
or add to loop…
I’ll let you know how I get on.
Was waiting two weeks for some bits to arrive only to have the wrong end plates included

Still not got them, but could modify what I’ve got so that not really a very good excuse.
It is a build log afterall so mod's are a must

The main problem been work (PC downtime is not a option recently) that and the build
up to my son second birthday has taken all my time - and he’ll always come first with
what little spare time I have.
But your comments are well timed

As I’ve the house to myself tonight.
I’ve already tested and installed my preferred graphic card – see below
Phase 5: Graphics - Passive or loop
Been thinking about this for some time and the two cards I currently have just didn’t fit the
bill any more.
My passive 7300LE is great – uses less power than a fan for 2d stuff and has next to no
effect on my CPU temp when in the loop (+2c) but it’s has no oomph in games and not
that great with video.
My 7800GT is also great – great power usage to performance ratio, and still below 60w
at load. It however adds 12 degree to my CPU temps if on the same loop at idle! It also
has 2x DVI ports and I’ve not enough room behind my case to use an adaptor.
So what to do – get another card (or two)
Was looking for a card somewhere between my current two, and selling the 7800 got me
a noisy 7600GS and a passive 8500GT. Both OC nicely if needed, both come in passive
flavours (always a good sign) and both use well under 50w at load.
Interestingly – the 3D mark scores where of only partial helpful (see below) but new tech
wins especially as it’s got a passive cooler fitted.
7300gs : 3Dmark03 - 2078 3Dmark05 - 1101
7600gs : 3Dmark03 – 8622 3Dmark05 – 3793
8500gt : 3Dmark03 – 8186 3Dmark05 – 4883
score above (I’ll update the actual ones later tonight)
edit: done

So I’ve some choices to make – leave as stock passive, upgrade to aftermarket passive
or add to loop…
I’ll let you know how I get on.
Last edited:
Associate
- Joined
- 14 Sep 2006
- Posts
- 243
try an iron on steam setting and a teatowel to get the dent out of the wood 
Oh and Realy nice setup there.

Oh and Realy nice setup there.
- Joined
- 31 May 2006
- Posts
- 7,564
- Location
- West London
Phase 5: Water loop
Before I go any further I’ll like to say silence is truly golden and thanks for all the comments,
it mostly due to them that I’m now back in the water cooling club
But back to the log…
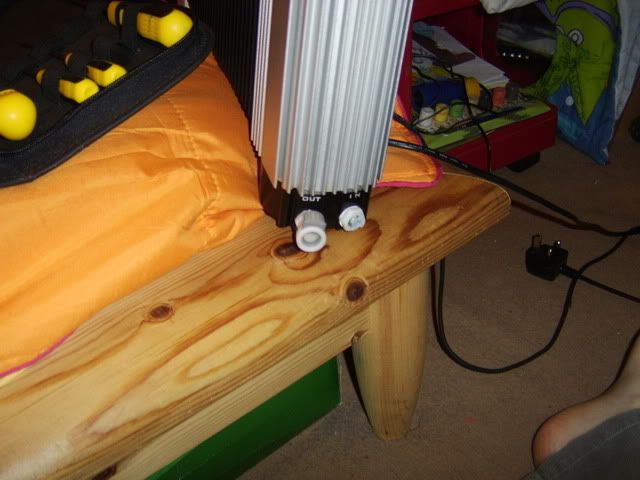
Damage to the quick couplings
As I said earlier the res2 fell off the wall a few months back and left two holes in the bed frame,
well that’s wasn’t all Luckily Zalman included two spare female couplings in the kit, and
I’m blessed with a wife that can find things, after I put them somewhere safe.
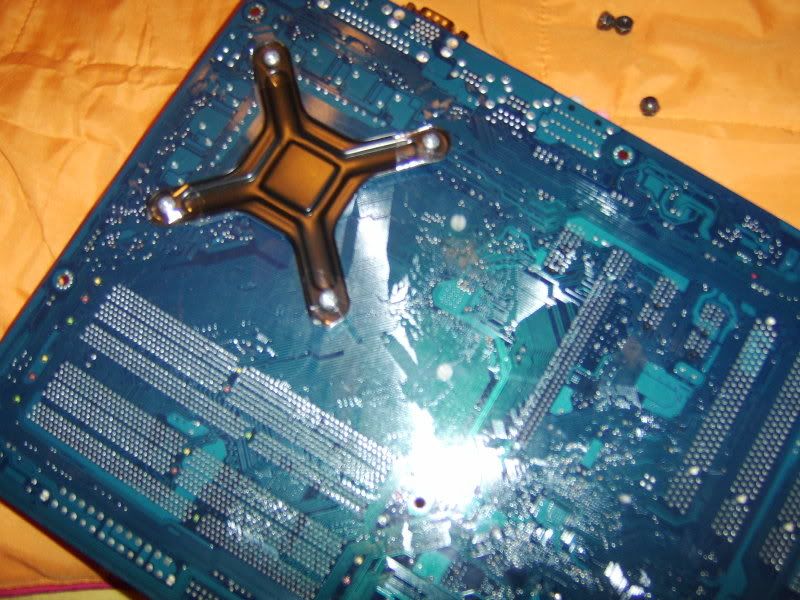
Rear of mother board
A few quick squeezes with a pair of long nose pliers and the northbridge was off and tucked
away in my bit box. And a quick application with the two bottles ArtiClean remover and my
cpu and chipset were ready for their new blocks.
I was lucky enough to have a spare backplate – A Thermalright LGA775 RM that I used with
a XP120 a year or so ago. So with a spot of sticky tape (to stop the machine screws falling out)
and it was slotted in place.
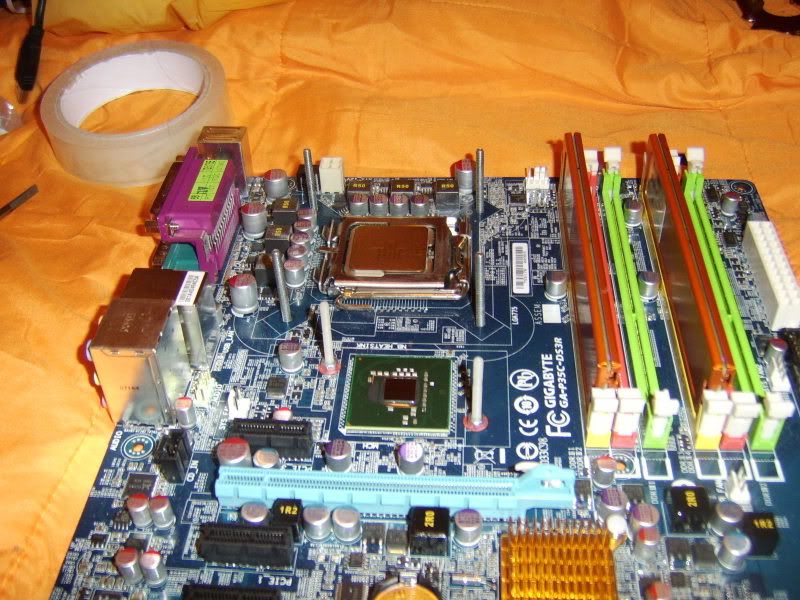
Six machine screws standing proud (aka bolts)
I also installed the two plastic machine screws for he DD chipset block, these came with locking
nuts so no need for sticky So all was ready for the fiddly bit.
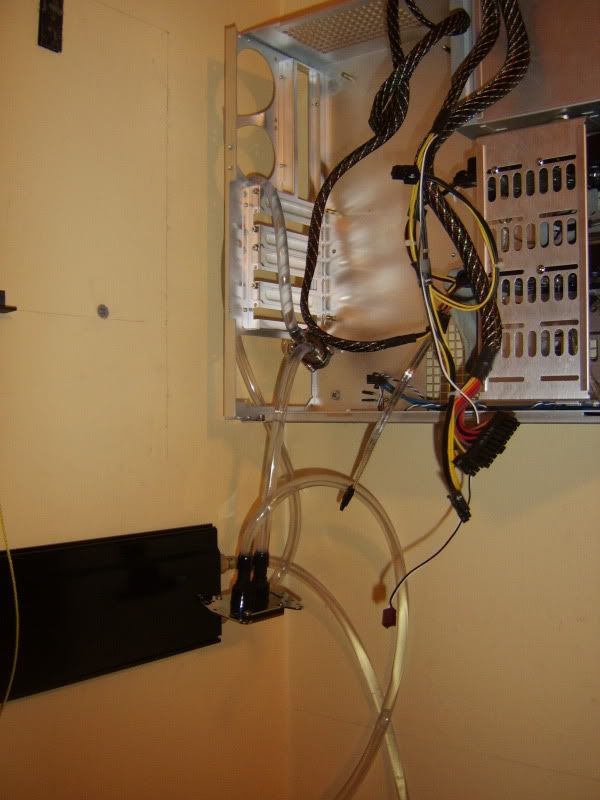
Loop hung in place.
To those with a Reservator you’ll know that de-bubbling your system with a 3w pump can be
some what time consuming and involves man handling your case and res. Well I don’t have
this option as mines now screwed to the wall so with my loop already filled and the rear fan
holes joined I inserted the loop and blocks into the case.
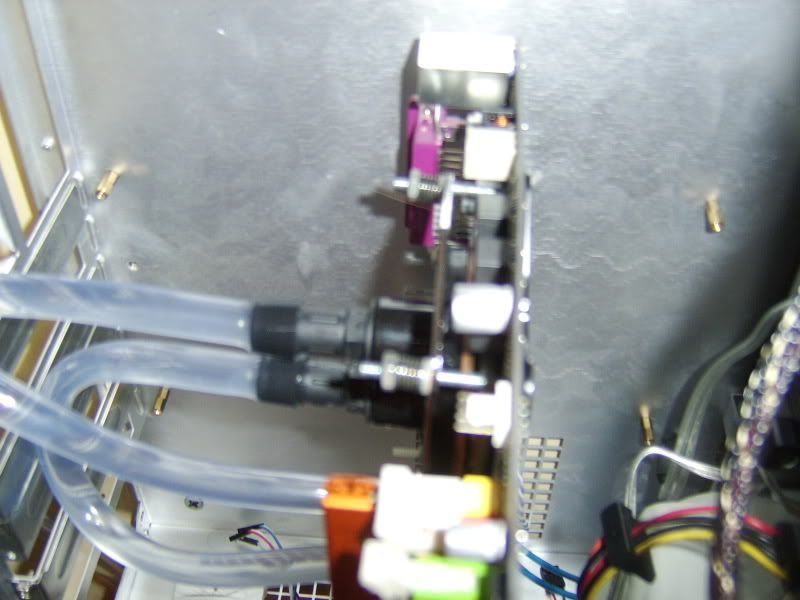
Blur is due to frustration at last two swifttech nuts.
Ok so I’m on a chair with a mother board balanced on my chest / the case edge. A small
spring/washer/nut assembly in left hand, and a screwdriver in my right pushing the machine
screw into the nut. A third hand would have been useful, but it’s not the first time I’ve installed
these blocks so 15 minutes and two dropped nuts later both blocks are installed. I’m ashamed
to say I used AS5, knowing full well that MX-2 is better but it’s all I had so that what I used.
I spread with it with a variation on the finger in a plastic bag trick, this time I used a corner
of bubble wrap. Don’t ask, but it worked really well, a ‘cushioned’ even pressure was easy
to exert and in a few seconds both surfaces on the mobo were thinly covered.
Before I go any further I’ll like to say silence is truly golden and thanks for all the comments,
it mostly due to them that I’m now back in the water cooling club

But back to the log…

Damage to the quick couplings
As I said earlier the res2 fell off the wall a few months back and left two holes in the bed frame,
well that’s wasn’t all
 Luckily Zalman included two spare female couplings in the kit, and
 I’m blessed with a wife that can find things, after I put them somewhere safe.

Rear of mother board
A few quick squeezes with a pair of long nose pliers and the northbridge was off and tucked
away in my bit box. And a quick application with the two bottles ArtiClean remover and my
cpu and chipset were ready for their new blocks.
I was lucky enough to have a spare backplate – A Thermalright LGA775 RM that I used with
a XP120 a year or so ago. So with a spot of sticky tape (to stop the machine screws falling out)
and it was slotted in place.

Six machine screws standing proud (aka bolts)
I also installed the two plastic machine screws for he DD chipset block, these came with locking
nuts so no need for sticky
 So all was ready for the fiddly bit.
Loop hung in place.
To those with a Reservator you’ll know that de-bubbling your system with a 3w pump can be
some what time consuming and involves man handling your case and res. Well I don’t have
this option as mines now screwed to the wall so with my loop already filled and the rear fan
holes joined I inserted the loop and blocks into the case.

Blur is due to frustration at last two swifttech nuts.
Ok so I’m on a chair with a mother board balanced on my chest / the case edge. A small
spring/washer/nut assembly in left hand, and a screwdriver in my right pushing the machine
screw into the nut. A third hand would have been useful, but it’s not the first time I’ve installed
these blocks so 15 minutes and two dropped nuts later both blocks are installed. I’m ashamed
to say I used AS5, knowing full well that MX-2 is better but it’s all I had so that what I used.
I spread with it with a variation on the finger in a plastic bag trick, this time I used a corner
of bubble wrap. Don’t ask, but it worked really well, a ‘cushioned’ even pressure was easy
to exert and in a few seconds both surfaces on the mobo were thinly covered.
- Joined
- 31 May 2006
- Posts
- 7,564
- Location
- West London
Phase 5: Water loop cont
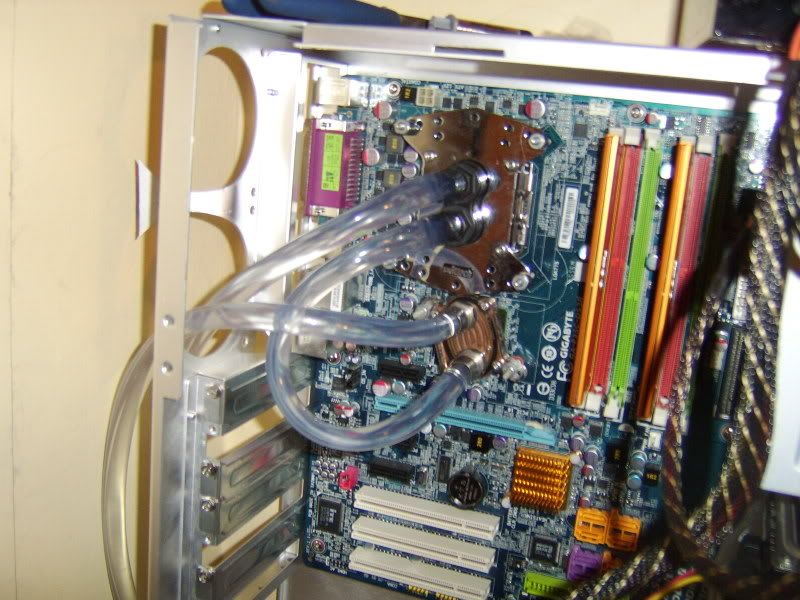
Loop installed
Yes I know the chipset block is round the wrong way, but that suited the imprinted bends that
the tubing had gained due to ‘storage’ for a few weeks. And in the end it helped move the single
air bubble out of the loop (thumb nail sized bubble due to attaching loop to Res btw) Unfortunately
life was inside my Res – should has given it a good flush at the same time I did my blocks
and tubing, but I didn’t due to time. So took a good few restarts to get the flow meter spinning –
off to buy / borrow some nuke.
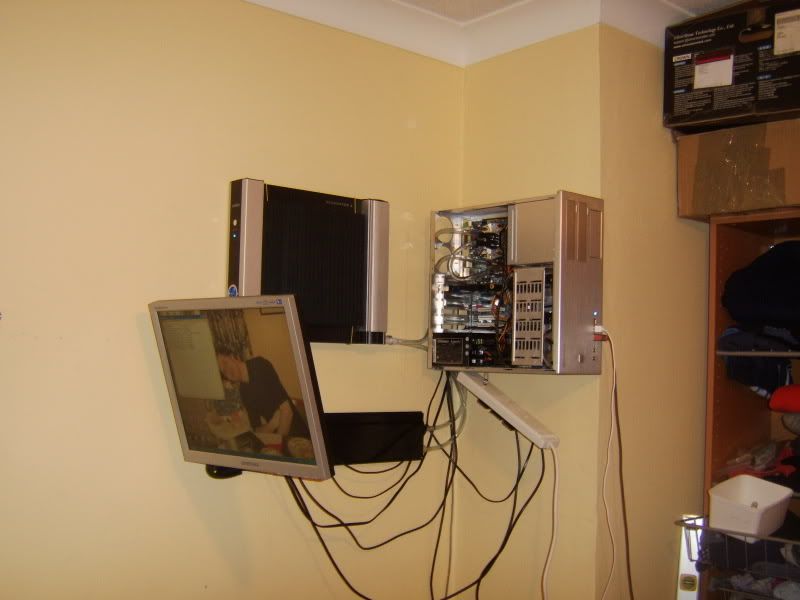
The finished article – well not quite.
All needs a good tidy and I need to bring the last missing element home from work tomorrow.
SHOULD be sorted and finished over weekend. I’ll see what I can do, as it past time the glamour
shots were posted on the Gallery threads.
Edit: you might be able to guess what my next phase will be, buy the cable tidy suspended 4way,
more on this in the next update
After a quick zip round the bios, I re-set the 3.0ghz OC (9x333) I previously had with the
stock cooler. I’ve Had orthos running for 1h and 30mins and it at 53c, no errors and very quite

Loop installed
Yes I know the chipset block is round the wrong way, but that suited the imprinted bends that
the tubing had gained due to ‘storage’ for a few weeks. And in the end it helped move the single
air bubble out of the loop (thumb nail sized bubble due to attaching loop to Res btw) Unfortunately
life was inside my Res – should has given it a good flush at the same time I did my blocks
and tubing, but I didn’t due to time. So took a good few restarts to get the flow meter spinning –
off to buy / borrow some nuke.

The finished article – well not quite.
All needs a good tidy and I need to bring the last missing element home from work tomorrow.
SHOULD be sorted and finished over weekend. I’ll see what I can do, as it past time the glamour
shots were posted on the Gallery threads.
Edit: you might be able to guess what my next phase will be, buy the cable tidy suspended 4way,
more on this in the next update
After a quick zip round the bios, I re-set the 3.0ghz OC (9x333) I previously had with the
stock cooler. I’ve Had orthos running for 1h and 30mins and it at 53c, no errors and very quite

Last edited:
- Joined
- 31 May 2006
- Posts
- 7,564
- Location
- West London
Phase 6: Cable tidy
Well the anti plant life solution is in and circulating but the cable tidying device that I've been waiting for - arrived - and was then bined by my boss
I should have left better instructions when I left on time on Friday, and just a tad anoyed that no one in the office said it was mine and I needed it when the office spring clean happened.
Hey hoe - another one's been posted to be today.
Note to self: take home same day it arrives
Well the anti plant life solution is in and circulating but the cable tidying device that I've been waiting for - arrived - and was then bined by my boss

I should have left better instructions when I left on time on Friday, and just a tad anoyed that no one in the office said it was mine and I needed it when the office spring clean happened.

Hey hoe - another one's been posted to be today.
Note to self: take home same day it arrives

