Project: Self-Inflicted

Right, I think we're done! (well mostly, but I'll get to that!)

Last tube run was a delight. Not a massively complex compound bend but something always seemed to trash each attempt. Got it done, in and pressure tested. Dual motherboard USB header to Aquaero and Farbwerk made up and sleeved. Sleeved a temp sensor and (kapton) taped it to the right angle fitting immediately behind the pump outlet. Should do the job. Well, that's what I thought but it turned out that I'd managed to pick the only one that one of the traces had fractured....so it did nothing and I had to make another. Not the end of the world - the fans just ran full speed due to lack of input (and I'd set the curve for 100% at 0°C for just that reason) - but irritating none the less.


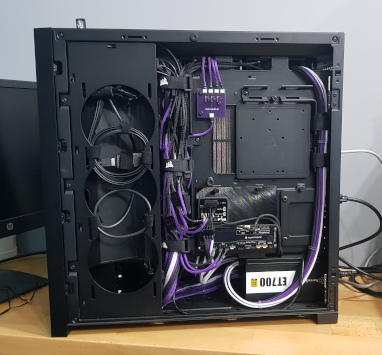
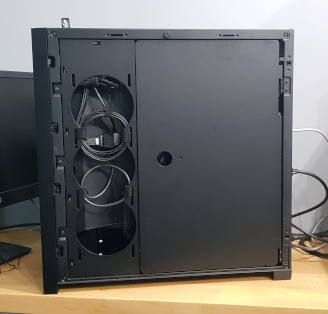
Inner door on - to hide all that I've made look tidy :rolleyes: Had some fun with the power plug for the Aquaero being just too high for the door to shut properly. Was massively overthinking how to fix it....until it dawned on me that it might just push slightly further into the socket! *facepalm*


There's an outer panel that goes on after that which I've neglected to take a picture of for some reason...but there's a mini gamer-in-training occupying the rig now!
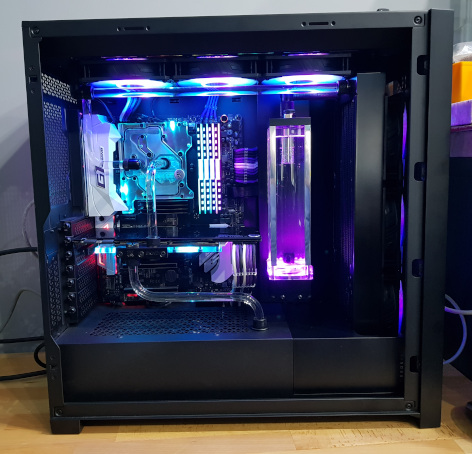
From the front showing the pump to GPU link and the GPU to CPU link in place.


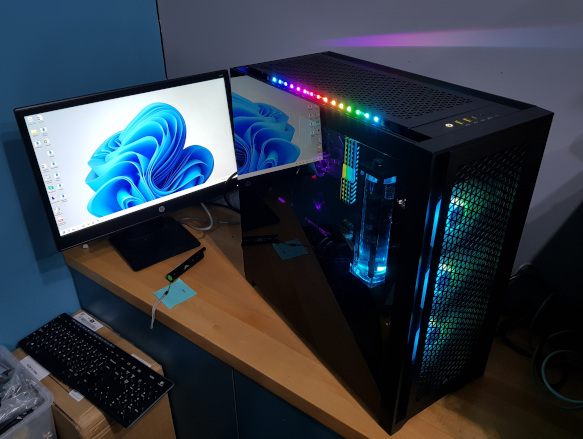
And with the outer door on.


Ran some 3D Mark and it came out "Good" and above average scores. The CPU is a 6700K (that's Sky Lake, 4 core, 4GHz) but the turbo is turned up from 4.2GHz to 4.4GHz on all cores simultaneously. Also delidded and liquid metal applied - that's all from its previous occupation as my computer. GPU is a 980Ti with an identity crisis - the backplate claims it's a Titan X....but that's all I could get when I originally blocked it.

So what's left if it's not totally complete? Well, when it came to letting my son press the button to turn it on for the first time, it lit up and LIVED....and then the PSU went *CLACK* and everything died....and stayed dead :eek: Took me some stripping down and some swearing to work out what the problem was. Turns out that if the sense wires are plugged into the PSU, it has kittens and dies. With it unplugged and some recovery time or full power cycle, it runs nicely. I think that I've simply got the order flipped but it's not listed anywhere and Silverstone don't seem to have any support (that I could find on their website) so I've posted up in the PSU forum to see if anyone can confirm the pinout rather than risk guessing and letting out the magic smoke! :D That, would be the last bit and then it can go in its final place.....or at least it can once I can make it stop raining through the roof right above it :(
Looks really clean - very nice! :cool:
 
The thing I'm most impressed with is how much of a bad influence I've been and you went the custom PCB route for your RGB splitter :D

Love everything you've done, especially the unsupported reservoir aesthetic.
 
Well two years later and I'm back :D Why could that be? Well over on Project Silent Overkill, a 4080 magically appeared along with a 9800X3D...so it seemed rude not to swap out the 980 Ti in this build for the Titan Xp.... especially since it's just a drain and swap over the cards, right? Right?! Yeah, well things could never be that simple and I only spotted the problem once I'd waved at the point of no return on my way whizzing past. Deadline too for son's homework on Monday. So, no pressure then.....aaaand see project name!

So first up it, it drained fairly well once I'd worked out where I'd hidden the drain port :rolleyes:
Once again I proved why colourless coolant is the most carpet-friendly! You couldn't have been that clumsy yet again, surely?! Well, with assistance, yes. My son wanted to turn off the drain tap once the container we were draining into was full. No problem, shouted when we were nearly there and he turned it off, and it stopped....and he continued turning it off until it was no longer stopped and overflowed over the carpet. Turns out I should have mentioned it was a 1/4 turn tap and not a turn until it won't go no-more! *Facepalm*

First problem, the power to the GPU was two 6-pin custom made cables and the Titan was 6+8 so I was going to have to make up a couple of extra wires.... until I realised that, it turns out I just can't count and they were both 6+8 *facepalm*

So feeling smug about how simple it was going to be, it then dawned on me that despite both GPU blocks being EK, the same model and only one Nvidia generation apart.....the terminals don't even nearly line up :mad: Tried seeing if I could cheat using a snake connector but the offset was too much...so I've ended up have to remake both hardline tubes for the GPU. One not so bad as it's two 90° bends in-plane but the other was a 90° in one plane and the an unknown angle at an unknown angle to that. Had to make up a jig to get the offset. I've got pics that'll make sense of this...but until that PC has finished pressure testing and been filled, I haven't got space to edit the pics to post them.
 
This is why I still cba with hardline (my colleague was pushing me that way last week, but pointed out that I've never had a leak - he killed a 3090 HOF when a tube popped off!). I actually still really like the look of soft tubes if the lines flow naturally! - I did have a drain but still need to properly break up the loop to get everything out (got most out through to CPU block once removed)

Have you considered hard/lino flooring?! :cry:
 
Have you considered hard/lino flooring?! :cry:
Actually I was considering tanking to skirting board level like a swimming pool! :cry:

Whilst I totally agree with you, for me I think I associate soft tubing with some of the earlier builds I did which were somewhere after the era of car heater matrixes as radiators but before it was really mainstream. Nothing was tidy, there weren't really good mounting options for things, I'd not really developed the skills where I've since got into metalwork and 3D printing and it looked....well, let's call it "functional".
I'll be honest, when I unexpectedly had to bend up some tubes, I was sorely tempted to cheat with some soft tubing. Had I not needed what I've got for Overkill (there's some soft at the back as it needs to flex to open the door for maintenance - and it needs to be replaced) I might have succumbed to laziness :D

There's more disasters to come but I'll save those for when I can get some pics together. Strap on your schadenfreude! :rolleyes:
 
@Soul.Survivor Cheers!

Ok, some pics now I've got my own PC running....and by "running", I mean there's a motherboard on a cardboard box, with a GPU and a 10 gig ethernet card sticking out of it and a fan pointed at it....but it games very nicely :D

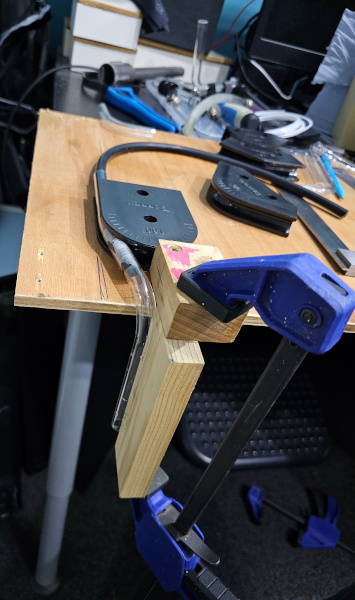
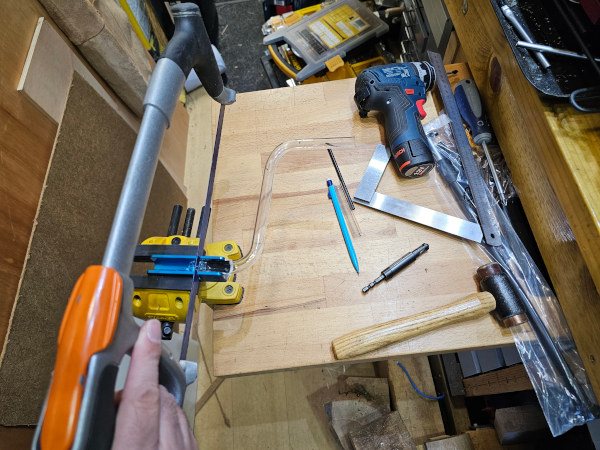
So, cutting the shroud to GPU tube to length after I'd bent it.


Why am I using a tiny vise clamped onto a pull-out worktop? Well, the pull-out worktop is because I have something like 8 feet of bench....but filled it with a lathe and a mill so I have to literally make more space. And the proper bench-vise is currently home to some of my day-job work. It's living in here while I work on it because it's hard to concentrate over the fan noise.


GPU to CPU needed a 90° bend but then also a 21.5mm offset in another plane. I came up with this to make sure it came out right. Just got away with it, almost didn't have enough straight on the end to connect it once I'd cut it to length.


Before I get to the finished pics, I put the pressure tester on the system to make sure the joints didn't leak...especially the new joint to the CPU as it was a bit fiddly to get it in. The system is mostly drained but the front rad would stil have been full and there's some coolant hanging about. Pressurised it to half a bar and went off for dinner. Came back and it had blown a tube and spat coolant...all over my wife's chair :eek: It wasn't one of the tubes I made either, it was the tube to the pressure tester where I'd failed to put a compression ring on the fitting *DOH!* Cleaned up and reset it all and it looked fine. My son asks if we can fill it but I say it has to sit for a bit to make sure it doesn't leak over ti....KABOOM! With perfect comic-timing It explosively decompressed from the bottom of the res, spraying coolant all round the inside. It's friction-fit on o-rings to reduce vibration so obviously it must just have been loosened by the first attempt. Cleaned up again, dried the res fittings and refilled with less pressure....KASPLURGE! It seems that the res fittings are basically acting like pistons and the pressure is pushing them apart until they explosivly decompress and aerosolise the coolant. Fun!
The logical thing to do here is call a stop...which, of course, is why I instead, filled 'er up. I mean, the res didn't leak before even during carrying it (full) from the house to the office (bottom of garden) so the pressure relief membrane that's normally on the top of the res must be doing its job well enough to stop this from happening. I've always put one of those on the top of a res since I had issues with my first build cracking flow indicators because of the pressure that built up due to the heat-expansion. Turns out they work quite well :D
We carefully watched the res joints to make sure they didn't spread while we filled and bled it (rocked it back and forth fairly vigerously). Nothing, all good.
Spotted the next day, when I pressure-tested a block, that the gauge didn't move for the first pump or two and had trouble with the tubing blowing off again. Put a gauge on my gauge....and found that when it read 0.5bar, the other gauge read a full 1 bar....and other gauges agreed with it. This gauge on the tester is glycerin-filled because it eliminates the stiction - where the needle doesn't move until it has more force behind it and then jumps. You're supposed to make a hole in the bung so that pressure can equalise....but most of the time my gauge is going to be laying flat in storage so I'd not done that so it didn't leak everywhere. Open the bung to equalise the pressure and it's all fine. I'll have to remember that for next time! *facepalm*

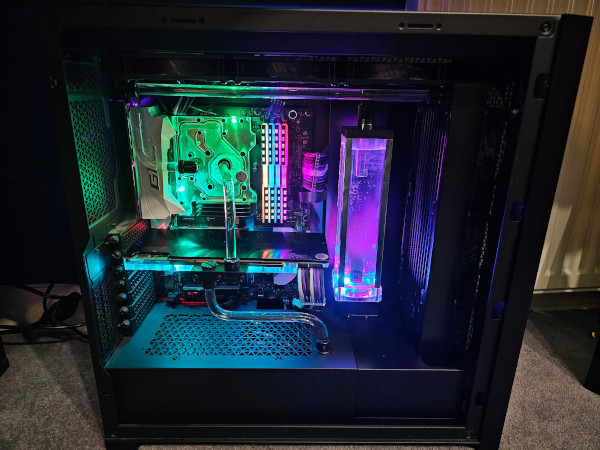
And finally, completed tubing in disco-mode! (click for larger version - like almost all of the pics in my threads)


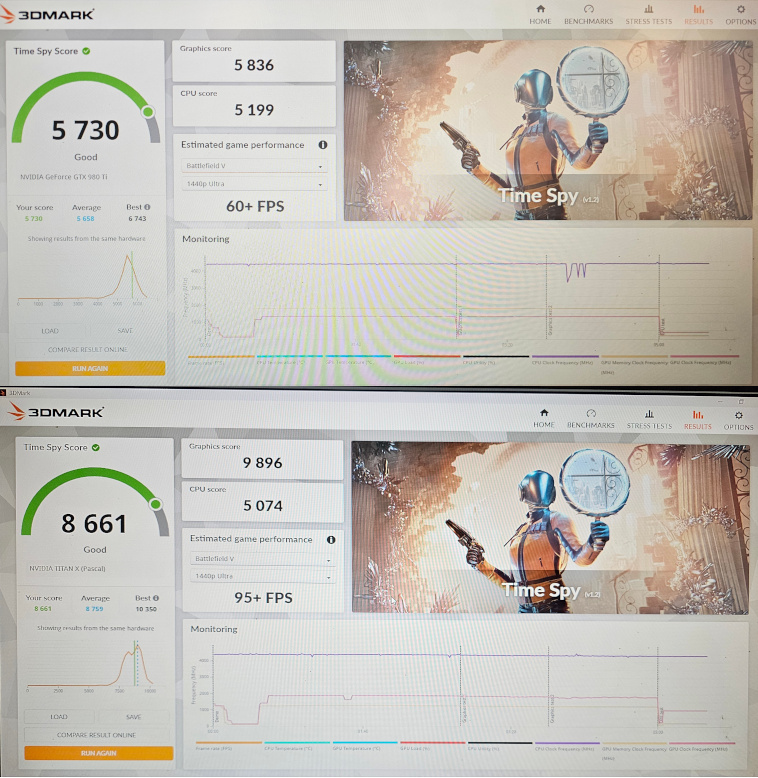
Before and after runs of TimeSpy to pretend to myself it was worth the loss of sanity! :D

TimeSpyBeforeAfter.jpg
 
Back
Top Bottom