Redoing the En Suite

Soldato
OP
Joined
25 Nov 2009
Posts
5,278
Do I need to prime the cementitious shower tray? I've primed all of the plywood floors ready for levelling, I won't be putting levelling compound on the shower tray but wondering if it'd help with tile adhesion.
 
Soldato
OP
Joined
25 Nov 2009
Posts
5,278
I primed everything...
Levelling went well using Ultra Tile Fix latex stuff and I had the perfect amount to bring the ply wood to flush with the tray.
I then primed the levelling compound and then tanked everything around the shower. Used the Jackoboard tanking kit that wetrooms online supplied.

I think I'm gonna start with the floor for a couple of reasons...
1, I'm away this weekend so if I can get the floor down it'll be solid when I return
2, it's easier doing floors than walls
3, it's been a few years since I tiled, so I can get used to the levelling clips, and working with the adhesive etc


That said, I am tempted to tile the small wall with the door in, A it's smaller and B it'll be behind the vanity unit/mirror etc.

Think I'll be spending the rest of today planning out either way :)
 
Soldato
OP
Joined
25 Nov 2009
Posts
5,278
Laid the floor out as a dry run, then marked out how I wanted the walls. It's giving me an aneurysm just thinking about the cuts for the shower tray... But that's a problem for another day.
Had the Mrs point out loads of surprisingly relevant reasons why I should start with the wall, the left one particularly and the green tiles- she was probably right.
Anyway, started about 7pm, mixed up 7kg of adhesive which was about bang on for how long I had to work with it. Yeah it is rapid set :D
Today I'm going to get the last couple of green tiles up in that far corner, then continue towards the camera with the other tiles.


cpGfsgEh.jpg
 
Soldato
Joined
4 Nov 2004
Posts
14,370
Location
Beds
Looking good.

No waterproofing membrane for the walls and floor, I wouldn't just trust a bit of painty stuff. Even with just the painty stuff, I would have painted out further on both the walls.
 
Soldato
OP
Joined
25 Nov 2009
Posts
5,278
Cheers :)

They're moisture resistant boards, tanked to 1300mm along the left wall and just beyond the glass shower screen on the back wall.
Didn't consider this not being enough?
Guess it's a bit late now anyway!
 
Joined
4 Aug 2007
Posts
21,411
Location
Wilds of suffolk
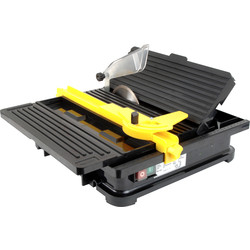
If you dont have one buy yourself a cheap powered tile cutter
I have one like this which I bought to do my kitchen diner, it hammered through loads of porcelain tiles.


Its done many hundreds of cuts now and still going strong, even on the original disc although will probably change for next refurb (which happens to be ensuite for me as well)

The main issue of the smaller cheaper ones is that the fine particles build up in the water tray and you need to clean it all out every so often.
I just kept a 2 litre bottle of water by mine when cutting and added some water to overflow the water slightly each cut.
Oh and you will get a bit wet, they spray a bit of water about so ideally do cuts outside.
 
Soldato
Joined
14 Jan 2018
Posts
14,708
Location
Hampshire
Nothing, once the tiles butt up I'll dress the edge up (sand and paint if needs be)
Should it be caulked or grouted?

That light over the loo that's dangling. I think that's going.
You could consider some ceiling panels, no faff with sanding or painting ever again and they would complement the look you are going for nicely IMO. But yeah whatever all edges should be silicone not grouted. You can get matching silicones to most grouts.

The reflective surface really brightens most small bathrooms, they're very popular now.
1C2ARPph.jpg

lmXiiCih.jpg
 
Back
Top Bottom