Riff Tamson (here we go again !)

Ok, clearer from 2:40 into that. If it would clear CPU, block and RAM when hung from the bracket, would there be room to widen out the bracket by 15mm by bending the rear bit towards the motherboard plate?

You can't bend anything sadly. I have the vents off now and there are not any bolt holes in the roof :( I forgot I had the carrier in, what a *****.

Right now there is no way it is going to work. I am going to need to seriously think it over and try and find a way of getting it in. There is a piece of metal I can possibly anchor into, but I don't have any counter sunk bolts (the side of it needs to remain flat and smooth as the vents go in along side it) and nor do I have much in the way of a mount. I have that triple 360 rad stand I can possibly mod? not sure yet.

Sucks though, but I should have known it wouldn't be easy lol.
 
Checked the spec and on paper it's 10mm wider than standard. Most are 120mm but the Watercool is 130mm.
I doubt it's desirable if it means a Dremel but could you take off the parts of the bracket that hold the rad? Then you could screw through the top of the bracket, through the fans and into the rad's threads. Would need 30mm countersunk screws but it may have come with some...?
 
The problem is that without the carrier there is no way to anchor anything in. If I start bolting things to the top of the case the roof won't fit. It's down to the active venting. Anything in the way of that (like a bolt head or a nut) and that simply won't go back on. Now I know why it has a carrier haha. I can't mod the carrier either because if I do (and cut it to open it up) it will no longer work. IE - I will either trash the pole that holds it in at the back or destroy the mech which clips it in at the front.

Right now I really just don't know what to do tbh. I'm waiting for inspiration, but all I feel is tired haha. If I could weld it? yes, I could make it work (not weld the rad like weld in brackets) but without welding you are facing nuts and bolts, one of which will stop the top slotting over the case.

I need more time to ponder it really.

I am off out to mum's in a bit (fireworks night at the local pub) so will leave it for now. I'll get some pics of it probably tomorrow now, but you'll see it's all very complex and not something I've managed to get my head around yet..

Technically the rad does fit in a space in the case, but there's just no way I can think of to actually hold it in.

OK so here is the case without the vents/top fitted.

vkEkonC.jpg

I have marked the "Max height" line for a rad or fans to go up into the top in this pic.

aenyQV7.jpg

OK so here is the back side.

aiYVrCU.jpg

Now the completely obvious idea is to bolt some brackets onto that flat part that sticks up and screw the rad to that. The problem is the top itself.

aTWjIhG.jpg

As you can see it has an identical part that literally sits jammed up against the back of the upright bit that could hold a rad. So if you put so much as a fag paper through it that then no longer fits :(

You can't anchor at the back end because there are two mech levers that remove the side panels. Same goes for the front, there is a motor and wiring harness there.
 
Last edited:
I was thinking longer screws through the fans from the top - as it shows in the video. These go through the fan and into the rad. If it needs to be longer so that the rad hangs lower (and you have the space) you could space the rad from the fans with acrylic - or lower the fans onto the rad and have them spaced from the top of the carrier.
Just depends whether you can afford to lower the rad enough so it clears the bracket without hitting the CPU/RAM.
 
It hits the motherboard. I already thought of that. From my calculations you literally fit the rad and the fans and that's it. That is when it literally sits against the motherboard. Another MM? it doesn't fit any more..

I think the answer here lies in the rad carrier itself. I need to do some calculations, mod that. Remove the motherboard, fit it back with the rad and fans in situ and then bolt it in on the angled part That angled part has space behind it for about 7mm of bolt. So instead of using the catches on the carrier I would basically remove the mech (as it fouls the rad) and then use two bolts, if I can get my fingers in there at the end lol.

Just looked. I really won't be able to put any bolts in at the end. The roof is notched ffs. I am going to have to cut the entire rad holder, *and* the mech for it to open it up and then put it all back together again. It will take hours of cutting :(

Yeah that's affirmative. I need to mod the rad carrier. At the back side where it meets the back wall it's flat. It is slanted on the front side though. So here is what I need to do. I have fitted it and marked the entry point into the case.

3ltiGX6.jpg

I need to lower the line by about 2mm to take tolerances into account and thickness of the metal etc. Then on the inside? I am going to have to cut the entire way along the bar.

sJq0bTW.jpg

I reckon I need to take around 5mm off of the retention bar, but won't know for sure until I have stripped it all, cut the main box and then put it back together to see how much it impedes the rad. Then and only then I can cut it.

So much for just a simple loop, eh?
 
Last edited:
BZZP *swear swear* BZZZZZZZZZZZZZZZZZZZZZZZZZZZZZZZZZZP.

gr3mCfk.jpg

Only problem? the retention mech is toast. It's never going to fit back in no matter how much I hack it, so I am going to need to find a way to lock it in place.

Edit. So I took a look at it. None of the bolt holes for the rad line up obs so I will need some washers. I can also drill two small holes and use small M3 bolts and nuts at either end on the sloped face part.

Board will have to come out next, will probably do that tomorrow. I will probably make some acrylic plates that go above the rad (outside the cage) to bolt through into the rad to make it nice and secure.
 
Last edited:
Looks like this idea is a little too late to stop the chop but might help anyway. How about a piece of acrylic sheet - I have a suspicion you may have some in stock :D
Ditch the rad carrier completely. Sandwich the acrylic sheet between the fans and the rad - cutting out two square (-ish) holes for airflow. You screw through the fans, through the acrylic and into the rad's threads. The acrylic sheet then provides a flange on three sides with cut-outs for the sticky-up bits of case. That sits on top of the case such that the fans don't jut up too high and the rad doesn't go too low. All depends on the dimensions but that's really difficult to judge without being there to offer things up and see if it works.

You can't put anything in the top of the case unless it conforms with the rad carrier. When it goes in it goes right in, sits snug and there is hardly anywhere to move. Now that I have cut a gap across it though? I can put some small bolts in.

I'm not sure adding acrylic will work either, there is literally 3mm above where the rad carrier stops. I will probably have to make something from alu sheet *curses*. All I need are two plates that bolt into the center of the rad from through the cage. Hopefully 2mm alu sheet will be low enough to clear the vent panel when it goes back.

Rad placement is the issue now, and having access to the ports. It can only go in in order. IE - carrier, then rad etc. You can't bolt the rad into the carrier and then fit it in one go as that doesn't work either. So I am going to need to bolt the rad carrier in, then fit the rad with the fans already on. That's fine, but now I am having trouble getting the rad to go where I want it to go so Ic an access the fittings. It's going to be a knuckle bleeder, that is for sure.

Once I have cut the alu plates (*gob spit*) I can then start working on getting it mounted where I need it to be :)

Edit, here before I leave.. This is me holding the rad in the space it will eventually occupy. Though note, the fans will be on the other side of the rad sucking air up and out.

C9J4qTg.jpg

Note the two arrows? well that is where I can put two m3 bolts through into the other side. That is where the cage joins the case and fits it snug, and because I cut the "slit" all the way across I can access both sides with the cage in.

That's that issue solved, or is it? if I mount the rad where I am holding it then stuff inside the case fouls the fittings. So I move the rad either way, then I can't put the bolts in. I am going to have to remove the mobo and try and move the wiring some.

It will all be solved tomorrow no doubt :) All I need to do then is make some thin alu parts to bolt through the top of the cage into the rad holding it in.
 
Last edited:
Victory is mine. I fitted the carrier and put two bolts in that can be fitted with the rad in (though it doesn't matter they can actually go in first).

KoF5RVl.jpg

Then fitted the rad using small washers on top of tap washers (dampening and security).

yLDVgo6.jpg

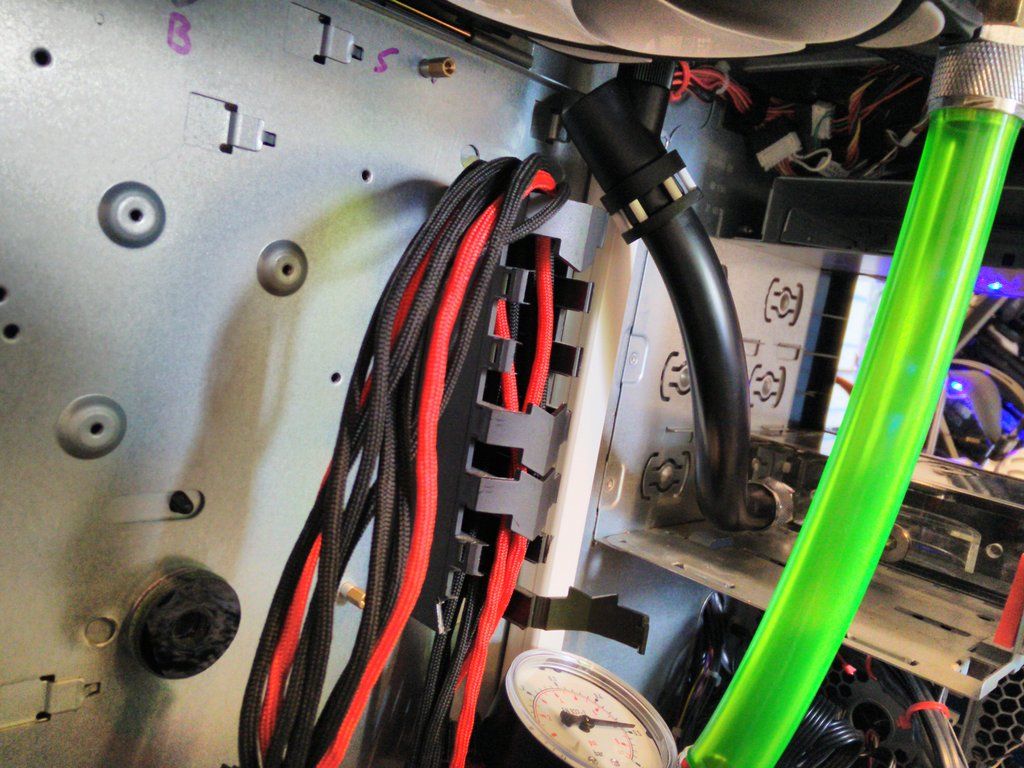
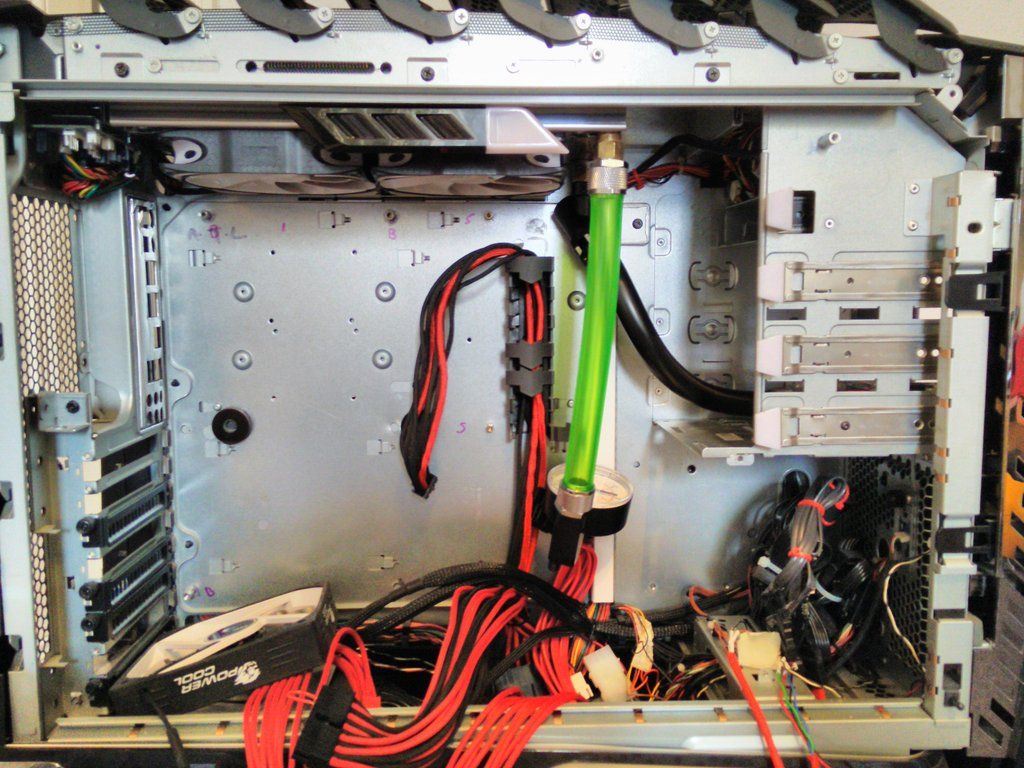
And inside. The outlet came out just about good enough. I think I am going to fit a 45' to send back to the pump which will be quite close. I will use the outlet nearest the outside of the rig for the CPU block. I will paint those copper parts black, after I clean the rad out tomorrow so I can final fit it. You will notice the floor has gone too. That was cracked but I have plastic welded it. Going to change out the white vinyl for something else so won't have that until next week.

g92sK54.jpg

Happy though. I really thought it was going to beat me.
 
OK so now that the plastic weld has done its job I've removed the white vinyl from the floor pan. I will order in some more vinyl soon to recover it :)

bC8FYBR.jpg
 
The rad is in.

8U47ZC1.jpg

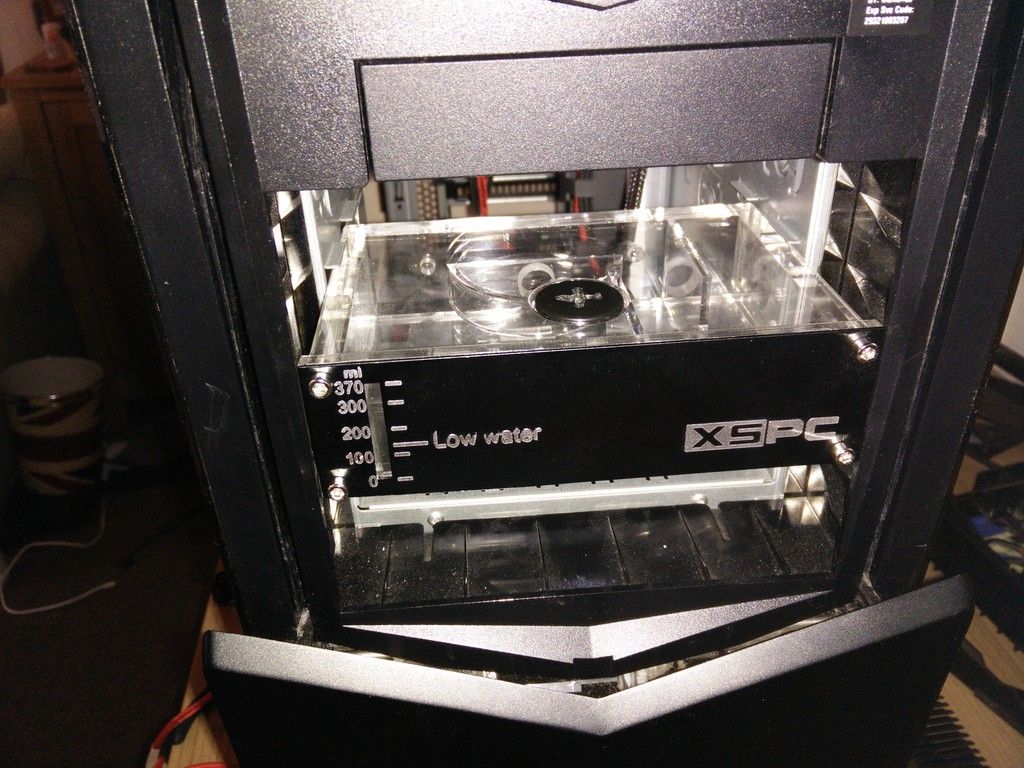
Took a bit of doing but glad I got it to fit :) I have fitted a 45' and chaingun to the outlet, this will feed into the res which I will fit in the bottom of the 5.25 bays which are now empty.

The mech from the carrier is missing though. It was a black stationary part and a moving white part. What I did was plastic weld them together and I just need to put it back on.
 
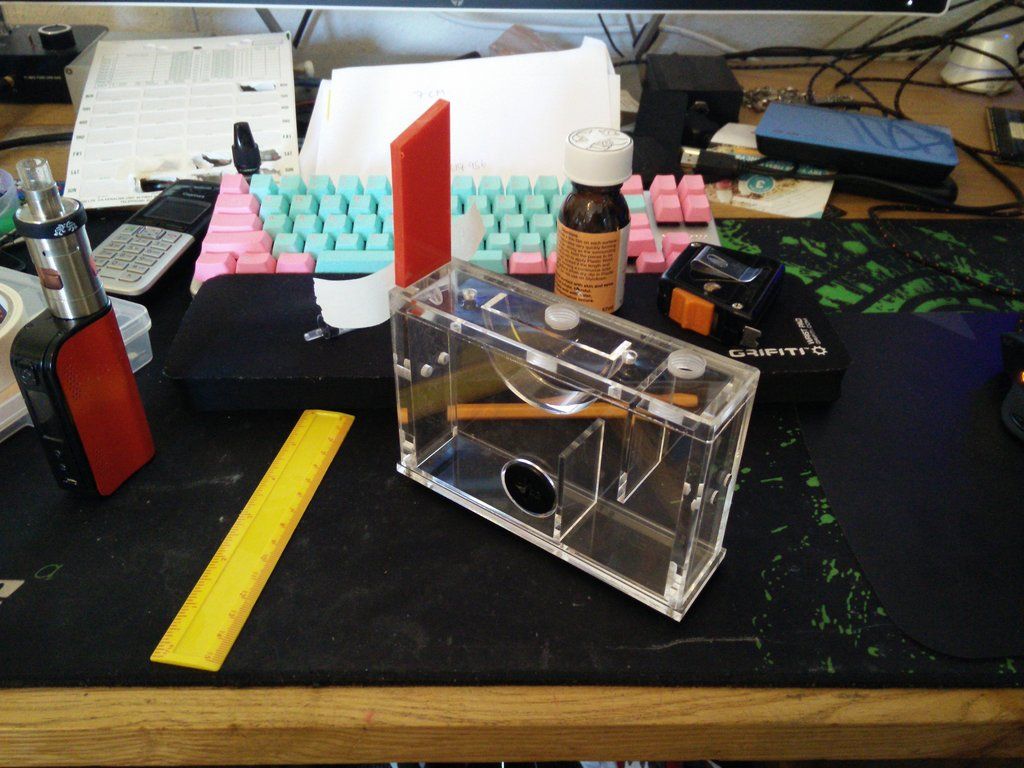
So today I offered up the res. Unfortunately it too does not fit this case. There is about 50mm between the actual face of the case and the steel carrier. Due to this the res does not go into the case enough to be able to be screwed in. I can't have it tipping around though.


Apologies for the flash on the photo. It's actually dark in here today :(

The solution was simple, extend the res. As you can see here I have plastic welded on a piece of 5mm red acrylic. I can then drill through this and bolt the res in once the cure has completed.

 
Why is it never simple?!

Have you thought about a scratch build where you build the entire case to fit the bits you want, where you want?
 
Why is it never simple?!

Have you thought about a scratch build where you build the entire case to fit the bits you want, where you want?

I have mate yes. That will be my final build and would be titled "Fake Plastic Trees" and will be made entirely from acrylic. It would incorporate parts of the song (so a green plastic watering can, fake chinese rubber plant etc). However, I need lazer cutting for that and would not want to rely on any one else.

So for now it's just an idea :)

I've got the res in and have made the first connection between the res and the rad. Got Dr Drop on it now, though the rad cap is mashed (I stole the new one for Dianoga, so now I gotta put up with this crap).
 
I think so mate yeah. Replace nice shiny with mangled plastic philips head and you have a deal lol.

I was getting a drop. I took off the 45' and tightened up the chaingun properly (note to self, don't screw in fittings until they are fitted properly as you can't get any purchase on them) and then noticed the Oring on the XSPC plug was FUBAR. Crusty, hard and had bits of limescale stuck on it.

So for now I stretched a nasty coloured fitting Oring over it and it seems to be holding pressure, though I will replace the whole thing on Friday :)

Edit. Just did the ten minute check and no drop at all. So I think that's solved :) Am loving the black hose it looks gorgeous.

I swear to god dude water cooling is therapy. It hurts like hell and rips your hands to bits but there's just this feeling I get every time I add a fitting/piece of hose etc.
 
Last edited:
First join is made :)


Apols for the cabbage pics, British winter sucks.


If you look at the part where the res fits you can just about make out a very small allen hex button nut. This goes through the res extension which has now cured and holds it all in place :)

Oh also, good news. I consulted the manual for the board last night (X79 UD3) and it seems you can put two sticks anywhere you like for dual channel. Massive relief, as it means I can put them in the left side banks so they won't foul the hoses. Think Corsair Dominator, then add about another 10mm lol. I just love them though.
 
OK so tonight I ordered the last parts :) Firstly I ordered some more chainguns (god damn you OCUK and your prices !)

uAMMs69.jpg

Four obs.

8dQpFNI.jpg

Hands down these are easily the best fittings I have used yet. The chaingun design is also handy, because you can get your fingers into the poles in order to tighten them meaning they need no tools and because they are so huge they are also easy to tighten up fully without removing your skin.

I got a new res cap (it's a brand new res but I stole the cap from it to put on my dual bay res)

NpF5PYb.png

Thanks for finding that G !

OK now for the block it will either be like this.

s1xg6MI.jpg

Or like this.

07PffpJ.jpg

Basically I bought it used from the bay of fleas. I paid £25. Apparently the guy has loads and is selling them off cheap. It may have a couple of marks on it but nothing that I don't think I can polish out etc. Not sure why I went for a high end block tbh? maybe because it will be here sooner etc. Either way whether I get the clear one I requested or a black one it doesn't really matter too much :)

I got one of these.

EhHCawf.jpg

Which I was worrying about at first because this res has no spare ports (unlike my dual bay res) but then I remembered I bought these.

I4r69zH.png

The first of which goes near the pump, so instead of capping it with a cap to turn 90' I will just put the temp probe in :)

I ordered an A3 sheet of black 3mm.

oxXYHw0.jpg

Because Gareth was wrong, I don't have a stash, honestly*

I also ordered plenty of silver brushed alu vinyl (for the floor and inside) and some brushed black alu vinyl (for the two bays I need to fill in the front of the rig). Of course I will be custom making a front panel cover that will hold the temp sensor etc.

* I'm lying really and he was right. But it's all pukey colours like yellow and orange and purple etc. I cba painting it so I ordered some in black, which seems to go faster.
 
Back
Top Bottom