Riff Tamson (here we go again !)

Morning all. So here is what I did yesterday. Firstly I removed the small trunk that was hiding all sorts of nastiness.

7jZ8GOe.jpg

And then took it to the kitchen and painted it last night. Whilst I was at it I removed the broken wire holder (the Alienware one to the left of it, black thing) and made a trunk for the 24 pin and 8 pin. If you look at it you will see where the 24 pin will come out and the comb I made for the top. That is welded in and acts as a cap also.

lmR8zC8.jpg
 
What a frightfully good piece of fortune :D

I was digging around in my spares box earlier and forgot I had a nice dual res bay cover. The window is in the absolute perfect place to make my single res look like a dual res :D

Sqlvpy4.jpg

2WdFVqb.jpg

So you will see loads of liquid now, instead of just a tiny bar. When I put it back I also got away with removing the 45' as the hose was the perfect length to just curl in.

xdt8pwN.jpg

It will be a little bit harder to fill and cap now, but it's well worth it. It also makes it far, far easier for me to mount and plumb the pump :D

Oh yeah. Obviously the top bolts fitted the res beautifully. The lower ones however? I just dug out some M3 allen bolts and put them in and put nuts on the back. So now it looks bone stock like a dual bay res :D
 
Last edited:
So you will see loads of liquid now, instead of just a tiny bar.

*cough* Backlight *cough* :D


It will be a little bit harder to fill and cap now, but it's well worth it.

Ah, well there's a solution to that: M20 to G1/4 adaptor. It's cheaper than elsewhere AND it's in stock. Nice one OCUK. Always good to be able to post links to OCUK stock rather than dancing about the houses with obscure references and prefer to point the business their way anyway :D
 
*cough* Backlight *cough* :D

Oh hells to the yeah dude, definitely being lit. It's going to be the only place you can actually see what is going on :)

Ah, well there's a solution to that: M20 to G1/4 adaptor. It's cheaper than elsewhere AND it's in stock. Nice one OCUK. Always good to be able to post links to OCUK stock rather than dancing about the houses with obscure references and prefer to point the business their way anyway :D

You evil temptress, thou should be slapped on the wrist !

As much as I would love to do that mate it would no doubt cost cash. I am now completely flat broke (I had to pay a £200 excess on my bike and it's wiped me out again) so yeah, skint now.

The 3.5 "cover" is actually a metal container type thing. So if I take that out it should be easy to get a hose in there. I fitted a hose to my funnel mate, so yeah should be OK.

Putting that res cover in has saved me loads of grief though man. Basically otherwise I was going to make a full three bay cover with the temp gauge and the volt meter all incorporated.

Instead all I need to do now is make a single bay unit. I saw this and went to order but OCUK had ran out and I didn't want to pay more.

https://www.overclockers.co.uk/xspc-5.25-bay-temperature-sensor-frame-wc-072-xs.html

Thing is the voltage display is slightly smaller, so it would have needed modding. Then I remembered I had ordered an A3 gloss black sheet of acrylic and have Plastic Weld, so could probably knock up my own for nothing.

I love Plastic Weld. It's incredible really. A very very thin liquid that basically evaporates and literally alters the two chemical structures to make them one. When it goes off that's it. If you tried to snap it off it would break elsewhere (yeah I know that 'cause I have tried lmao).
 
Like you've said on other people's logs, spending other's money is much less painful! :D

Might have to get some plastic weld in for my son's toys then!

It's incredible stuff. Just don't spill it anywhere with printed stuff on it (like screen printed or what not) as it will just eat it.

You will need some syringes to apply it with too. Just put the surfaces together, tape around them to stop it running and melting things and then inject it into the join and then press.

It takes about twenty minutes to be fully done, but once it is there's no getting it apart. Thankfully I get to have fun with it soon as I need to make a meter holder thingermejig !
 
Morning all. Got a busy day ahead so figured I would do some work on the PC last night.

TUkDsiZ.jpg

The trunking is now fitted with the combs etc. I like it, I think it looks much cleaner. Ignore the fact that the Fury X is in there. I just fitted that to make sure it all fitted after I modded the rad duct. I decided to set it up push/pull. I will probably put the GPUs on a fan controller of some sort because I will be running the CPU fans at 7v, so I want the option to drop them a little when I am not gaming.
 
You said you were waiting for a bit of sun to take pictures....what country do you think you're in eh? I dunno, we'll have OJ46 waiting for a dry day next! ;)

From what I can see the ducting looks really good. Can't see it on a larger screen than my phone though...for some reason :rolleyes:
 
She's coming along nicely mate, always like following your builds even if some of the more technical stuff does give me a headache :D

I'm waiting for some snow for mine, want it to look authentic not like it was shot while on a Spanish holiday :D
 
You said you were waiting for a bit of sun to take pictures....what country do you think you're in eh? I dunno, we'll have OJ46 waiting for a dry day next! ;)

From what I can see the ducting looks really good. Can't see it on a larger screen than my phone though...for some reason :rolleyes:

It might not be the first town you think about when choosing a summer holiday, but if you want guaranteed sunshine, Bognor Regis could be the place to pick. West Sussex is officially the sunniest spot in the UK, according to the Met Office, enjoying 1,902 hours of sunshine every year.23 Jun 2011

I don't live *in* Bognor Regis but I'm only a couple of miles away. I demand more sunlight dammit !

She's coming along nicely mate, always like following your builds even if some of the more technical stuff does give me a headache :D

I'm waiting for some snow for mine, want it to look authentic not like it was shot while on a Spanish holiday :D

Thanks man. I'm really rooting for you here dude. I really hope you get your case soon :)
 
Last edited:
I am with block. Was a bit of a nightmare though ! when it arrived it was filthy inside. So I took it apart and it was full of orange dust that looked like rust lol. God knows what the last user was using for fittings and a rad ! Any way after being completely taken apart, cleaned, vinegared, etc it now looks like this.

bKFcOBK.jpg

There are a couple of small chips on the EK badge but I can live with that.

The back side was plain awful. Absolutely black. So I hit that with T-cut metallic and polished it to a shine :)

P2llhvb.jpg

I will get it mounted later. Thank goodness it came with the correct mounting stuff for X79.

Ninja before Gareth spends more of my money lmao.

U0meXTW.jpg

Found those for £3.95 on OCUK and have ordered them. Seriously, the best thing they ever did was introduce free second class shipping for their small items.
 
Last edited:
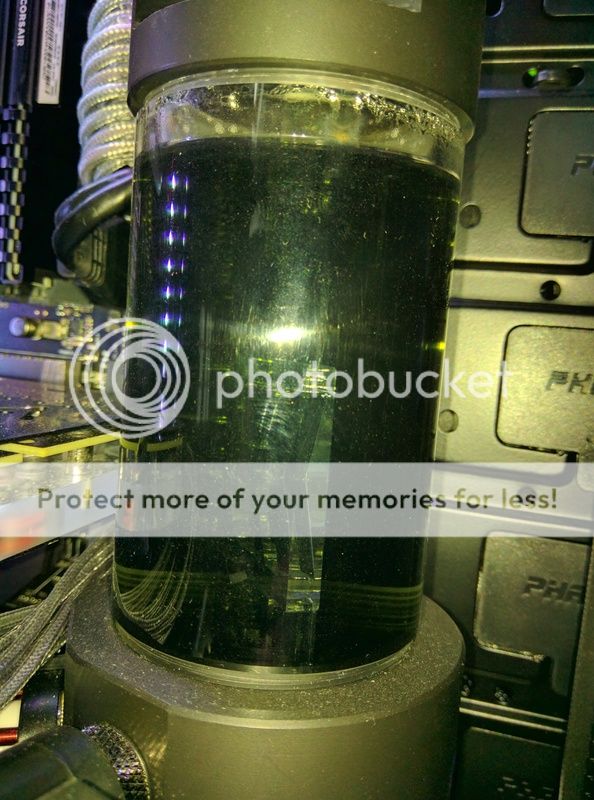
Some people really need to learn how to look after their loop...
...He says, after letting his own water turn green :D

IMG_20161031_154529.jpg
Thought you'd be knocking up a different colour EK badge on the plotter mate, or possibly one with a little alien head on it... Making work for other people is fun! :p

Have you linked your OcUK account to the forum? You should be getting free postage on everything
 
Yeah I linked my accounts ages ago man :) but it's only recently that low price items have free second class isn't it? I think before I used to have to spend £20 or something? dunno man, maybe it was like that for ages and I just didn't notice.

The badge on the block is too small for my plotter. I still haven't figured out why when I cut small things it goes to crap. I think I threw out the cutting mat too, which I think may be what causes it to spaz when I cut small things?

I chose green coolant for my last rig so if it goes green then all power to it :D
 
OK so I wrapped the repaired floor panel (twice, thin vinyl)

W4iaR2Y.jpg

And rebuilt it.

PhizNhj.jpg

That is now back in the rig and I wrapped the front part of the cable trunks with black brushed vinyl. Looks really clean, will get some pics of that tomorrow :)
 
So my Chinese SC600 pump came in today. The first thing I did (obs) was take it all apart.

QcXcmV4.jpg

I was very pleased to find that it does actually have a ceramic bearing and shaft. Pretty neat for less than £10 !

Next step was a ghetto loop.

k11tCYB.jpg

At first I thought the pump was broken, because nothing was happening. So I primed it by myself (I always was a bit of a sucker :D ) and it started pumping water but the flow rate was tragic. So I tipped the pump around a bit and it made some gurgling sounds and then wham !


We're in business :)

So today I will make the mount for it.

Oh yeah, in other news I can not fit the block because he has sent me the fixings for the newer model. I might be able to mod some M4 bolts though and make it work, so will do that later also :)
 
Have you or can you get any rubber in the mount so that the pump is decoupled? Would make it quieter. alternatively, you can run it slower but quieter is always good in my book!
 
Have you or can you get any rubber in the mount so that the pump is decoupled? Would make it quieter. alternatively, you can run it slower but quieter is always good in my book!

From what I have seen the pump does not vibrate or anything, so I will see how it goes :) but yeah, there should be room in there if I have to. The acrylic is quite flexible though, so could well dampen any vibration. I will only intervene if it rattles against the holder.

Edit. If you listen to the vid with headphones on you can hear a faint whirr. However, listen carefully, the clock on the wall about ten feet away is louder. Also, the pops toward the end are my concrete fire proof door skipping on the rubber wedge. I really must get a new one, it just slowly closes...
 
Last edited:
Organised chaos...

03XlORd.jpg

DCq9fOI.jpg

OK so what's been done..

Fitted repaired/recovered floor.
Fitting 80% of water kit, then realised I had the sodding pump on the wrong hole of the res bay. So I had to strip it all back down to nothing and sodding start again.
Refitted water cooling to 95%. All of the major plumbing is done now.
Fitted pump holder Rev 3 (Rev 1 was as it was in the last pic, Rev 2 was gusseted and covered, Rev 3 was it modded so I could move it over.
Re-shrunk one of the USB cables as the braid pulled out of the shrink.
Fitted block.
Fitted motherboard.
Cut plans for front bay holder that will hold the temp gauge.

i3X8f6q.jpg

And the volt meter (hasn't arrived yet)

wzzkdVf.gif

OK so left to do.

Fit internal fan controller (not here yet) But will be one of these.

c6k6Ybt.jpg

A T Balancer. This is just to control the GPU fans. The rad fans are 600 RPM and silent but I need to be able to ramp up the fans on the Fury X when I game on it (I will be using it for Vulkan games, where it beheads my Titan X).

Once that is done I can fill it up and get it all up and running :)

Actually no, I still need to make an IO cover and a SATA port/cable cover :)
 
Looks like that's a T-Balancer mining and is supposed to support up to 100W. You could always connect your pump to one channel and the VGA fans to the other channel.
 
Back
Top Bottom