What "man jobs" have you done today?

Two of the weirdest bathrooms I've seen:
  • One in a house with a his-and-hers bathroom like a long corridor with sinks and toilets and mirrors on each wall facing each other, presumably so they could be used at the same time. Literally two toilets facing each other ("pass the puzzle page when you're done will you darling"). At the end of the "corridor" to the right (no door or anything) was a square shower room the size of most people's box rooms with multiple shower heads like an old sports changing room clearly so multiple people could shower at once.
  • The other was a schloss in Bavaria where the toilets were floating in the middle of the (Very large) cubicles and not mounted to any wall. You could literally walk all around the thing. Really disconcerting. polished stainless steel like you see in police cells (on TV, not had that pleasure in person). You could fit a lot of luggage in those cubicles. Far more generous than the average airport disabled loo. Lots of tiles and drain points. We think it might be one of those kinds of schloss where they have a certain kind of party. It had a multilevel basement dungeon you could rent out with hooks on the walls etc etc. (We were there for a very normal wedding before you ask - nothing sordid.)

Wow, weird or what :p

Perhaps people who use these are poop fettishists or something :eek:

I remember we were told that the door was off for painting when we viewed the house. Well no sign of a door anywhere when we moved in, so a blatant lie from the estate agent there.

On closer inspection, the frame was all set up for an outward opening door. It turns out the bathroom was extended out through the airing cupboard when the boiler was replaced with a combi. So that explains a lot. Will eventually rejig it to open inwards.
 
Last edited:
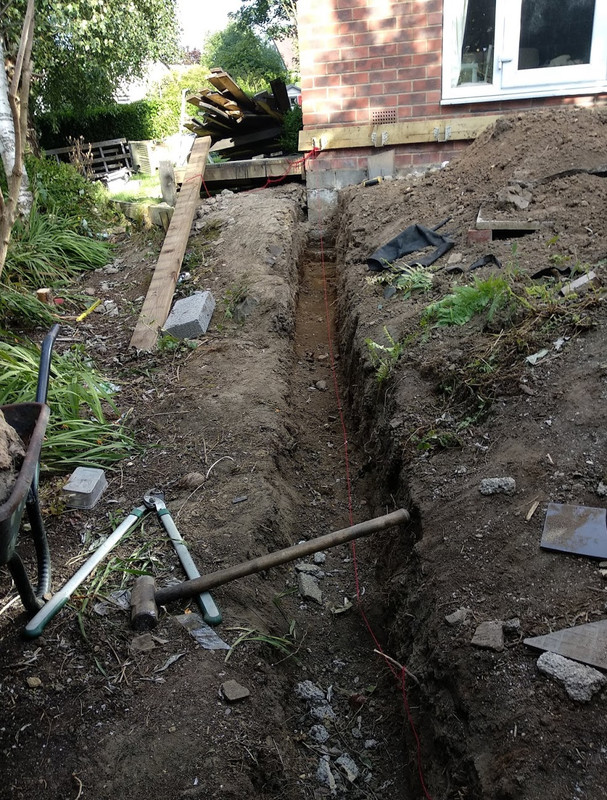
Trying to level out the garden a bit, so after removing the decking, dug footings for retaining wall.

IMG-20200801-180815.jpg


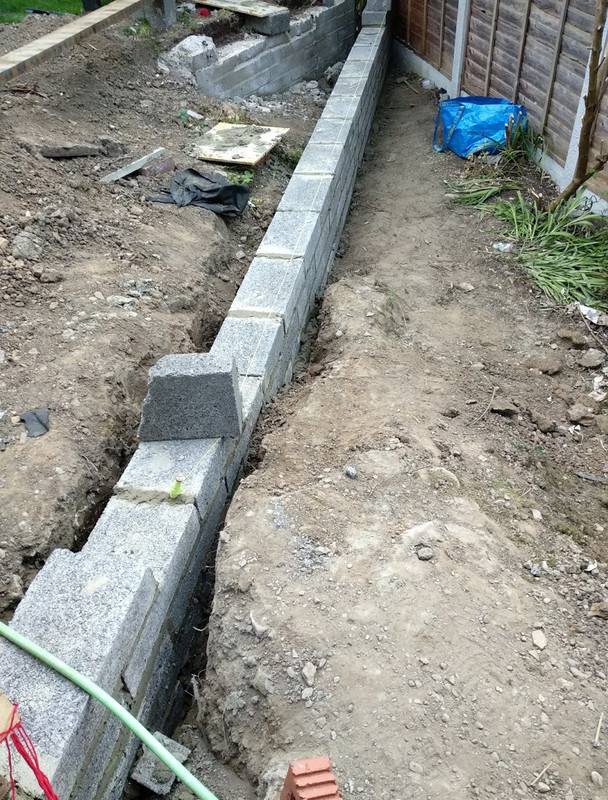
built (or at least started to build) retaining wall.

IMG-20200802-200541.jpg

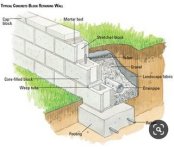
Interesting I need to build similar in my garden. Have you made any allowance for drainage behind the wall? I think the normal arrangement is a filter fabric with gravel and possibly drain pipe.

ATUFe80m.jpg
 
you don't necessarily need to have drainpipe, nor rebar in the footing or pocketed into the wall. It all depends on the height of the wall and the level difference either side. Also the kind of ground it is founded onto. Make sure the footing bears at least 500mm below the lowest ground level to avoid the frost zone.
 
The hall to kitchen door was off when we bought this bungalow - probably because last owner had put a radiator on the end of the kitchen unit and the door wouldn't have opened enough - His wife was wheelchair bound.

Found a few big concrete roof tiles in the loft as well.
 
Changed all the rubber door seals front & back of house. Nice easy job which earned me a few brownie points with the wife.
Now to enjoy a beer & watch the F1 qualifying
 
Removed old integrated washing machine which went kaput and installed new one. As usual all sorts of unexpected problems cropped up. Water poured out of the old one and the cupboard door mounts didn't line up on the new one. Then painted the newly fitted bathroom door and some skirting boards.
 
I put the last heavy fire door back on this morning. That is all my 5 doors and frames in my hall way painted now (well, only undercoated on the hall side for now). Next job is to finish the hall - banisters, hand rails and a bit of skirting.

Picture really shows up how yellow the old paint looked. Will do the rest of this room another time.

6xPp3e6h.jpg
 
@fobose you're a dab hand at repainting all that wood work, I've a bunch to do myself. Can you give a brief run down of your method/tools/paints?

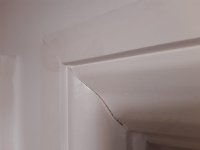
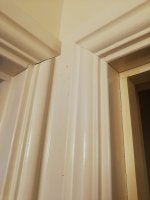
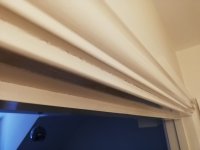
For instance in my house I don't think the carpenter was any good or it was a friday afternoon job because a lot of the mitres on the architrave around the doors are really rubbish, so much so I'm considering ripping it off and replacing with new, it's not something sanding/filler can really fix.
 
Last edited:
Sure thing @norm. Bit of a long read, apologies!

I will start by saying I use the dulux trade water based paints which some people either love or hate. The gloss can be a real pain to use in the warmer weather as it dries very fast. However, so far (11 months on) and my living room has not yellowed at all as far as I can tell. Chose your painting times wisely if using this paint - early mornings at the moment! The colder it is the easier it will be. I have used the dulux oil based many times in my last house but everything went yellow so I was not happy using it again for that to happen again.

Door frames:
It depends on how bad the paint work is already. My house is about 7 years old so luckily there isn't many layers of paint on paint. As such mine wasn't too bad so I gave it all a light sand with 120 grit paper to key it and remove any high spots. I had lots of gaps where the architrave meets the actual door frame so they needed digging out, I carefully use a stanley blade to do this (the idea is to make the gap bigger/neater so the filler can go in to it). You can use a filling knife to drag down the gap, but sometimes it cause more damage to the surrounding paint so not advised.

Once everything is sanded and the gaps are dug out, I fill with a 'decorators caulk'. I leave it for at least 12 hours to dry sometimes a full day depending on if I am going to work the next day (the tube recommends 24 hours for best results). I then undercoat 1 or 2 times depending on if I went down to bare timber in places. My thinking is it needs to be 'perfect' before the gloss goes on. Once undercoat has dried I will gloss it using a 2 inch brush (smaller one to hand for areas closer to carpet or around the sides/top.

With regards to keeping the paint off the carpets, I use masking tape and tuck it in as best I can with a filling knife.

Doors
I love painting doors. I would rather do this than the door frames.

I actually take the door off completely, it makes decorating both the door and frames easier. I remove all the door furniture and put the door on to some heavy duty sawhorses that I have. My doors have a wood grain effect so to avoid sanding this flat I give the door a VERY light sand with 120 grit paper. Any of the indents where the 6 'panels' are I use scotchbrite to make sure everything is keyed. I then vacuum/wipe with damp cloth and undercoat one side of the door (+tops, edges and bottom) with two coats of undercoat, flip the door over and paint two coats on the other side then gloss that side (+tops, edges and bottom). With my fire doors (very heavy) I will then leave the door for at least 18 hours to dry (it only takes about 2 hours to feel touch dry, but it feels 'sticky' for at least 16-18 hours from my experience. I then flip it over and glossing the final side.

P.S I place some old vinyl coasters under the doors to stop the rough material of the sawhorse from damaging/sticking to the door.

I also clean all the hinges, door catch and catch plate with metal polish as mine all had paint all over them.

Another key point for doing any glossing. Make sure you thoroughly vacuum the areas beforehand. If your painting in the same room you were sanding in, just remember all those fine particles still in the air. Let the dust settle for a few hours first and vacuum the floor.

Products:
Caulk: SX siroflex trade strength caulk acrylic in white (I used it last September and no cracks have appeared so happy with this product so far).
Undercoat: Dulux trade quick dry
Gloss: Dulux trade quick dry

Note - B&Q often have buy 2 get 1 free on the paint so look out for that deal if you have a lot to do. Buy more undercoat than gloss if you follow my prep work.

Could you send some pictures of your bad mitres? I would be tempted to fill those gaps with wood glue mixed with fine sawdust and then sand once fully dry! If the gaps are not too big, caulk can work wonders, especially if you use a flat blade filling knife to scrap over. Once they are painted with the rest of the door, you would probably find yourself hard pressed to tell if they are not right.

---
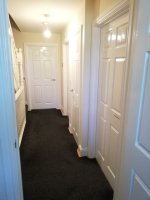
Here is my current progress. The hall sides of the door frames have only been undercoated. I will gloss them all together when I have decorated the skirting boards. I've cut the carpet away from the skirting and door frames as it's getting replaced. Awfully dark horrible stuff!
zjbOq9Ch.jpg
 
Last edited:
Thanks for the thorough write up there fobose, do you have a particular preference on brush?

Here's an idea of one of the mitres the angle isn't too bad although not perfect, but the top piece is sitting to far in against the wall causing a ridge. I've a feeling filler on top is just going to make it more prominent.

hmbOTHnl.jpg
 
I have the old version of this set. in fact, I bought 2 sets because they were flogging them for £2, assuming as they were receiving stock of the newer ones). I've had them about 3 years and they have lasted very well. Only one has failed (metal part detached from handle) but I think that was my bad as I left it with teak oil on it for a bit too long (a week).

I used to only buy Harris brushes but I actually prefer these ones. Wrap them in clingfilm if you plan to paint more on the same day and keep somewhere cool if keeping for long periods. I've left water based gloss on them for 3 days with no issues.

That gap doesn't look too bad, some of mine were worse! I would dig it out slightly with a knife (just the paint, not the wood) and then caulk and smooth with your finger. The reason to dig it out is so the caulk can be pushed further in and have more surface area to grab on to. The caulk is very easy to smooth and if you **** it up you can wipe it off easily with a damp cloth/tissue (totally not like mastic/sealant at all). With regards to the twist in the architrave, I personally would just sand it as flat as possible with a block and some sand paper. You wont get it perfect but it'll be enough to take your eye from it. Your eye is no doubt only drawn up there due to the gap on the curved section.

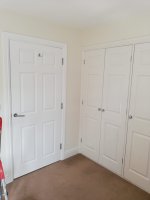
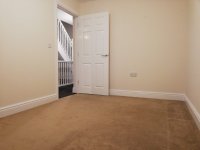
Here are some pics of my master bedroom and the cupboard outside which I am yet to decorate. These actually look in pretty good condition compared to some of the ones I've done.

CVUjZTQh.jpg

AMuztdoh.jpg
 
Not today, but Saturday ...

Trimmed the back hedge

IMG-20200808-104554.jpg


And then the ******* hawthorn which runs down the side of the property

IMG-20200808-111602.jpg


IMG-20200808-102359.jpg


IMG-20200808-114633.jpg


IMG-20200808-120124.jpg


IMG-20200808-114631.jpg
 
Nice tidy job there @{SAS}TB. A very straight hedge!

More decorating for me. I like to find more work for myself. The skirting board behind the door popped away about a month ago due to a leak from the bath. Long story short. Repaired the skirting board and glued back on, decorated all the walls and skirting. Door frame and door were already painted from the hall way project. Late finish tonight before work tomorrow.

It really helps having the AC in the room whilst working :D

ZvhLHeVh.jpg

9PChpp8h.jpg
 
Not a one day job, but I tore down a stud wall, removed a stupid, wobbly, impractical, noisy deathtrap of a spiral staircase, and installed a proper flight of pine stairs which were ordered through Stairbox. I had the new stairs delivered in kit form and built them myself before installing, the work involved taking out the ceiling, extending wiring that ran through that ceiling space to hide it behind the wall and installing a new joist (sistered to an existing joist, and sitting on an RSJ which runs down the centre line for the length of the property) - I'm very happy with the result! Still lots of work to do, such as building new stud wall, cupboards under the staircase etc.

https://imgur.com/a/IUNgT0Z

N.B. The wall was made with stupid metal stud work, absolute nightmare to get out as it was riveted and screwed, any screws are almost impossible to crowbar out as the metal flexes and the heads of the screw were full of plaster so couldn't be unscrewed. 1/10 would not recommend.
 
Last edited:
Back
Top Bottom