

can't beat a batten fixed to a wall with brown plugs. Belt and braces.Proper fixings will hold multiple times the weight of a rad with water in plasterboard. As always proper installation is the key here.
You are using an out of date browser. It may not display this or other websites correctly.
You should upgrade or use an alternative browser.
You should upgrade or use an alternative browser.
What "man jobs" have you done today?
- Thread starter jaybee
- Start date
More options
Thread starter's postsSoldato
- Joined
- 14 Nov 2002
- Posts
- 7,711
- Location
- Under the Hill
4 brown plugs can hold about 400kg when fixed into brick, not sure many rads with water will get much over 30kg.
There is no denying the above batten method is strong.
But you've added complexity, time and effort to add those battens, cut the plasterboard, cut the insulation, cut the wood to size, seal the back of the wood, mount it, refinish/paint base coat, wait to dry, come back and do top coat to match wall.
A plasterboard fixing requires a single hole to be made the correct size, using a drill bit in about 3 seconds.
I'm all for doing a job properly for sure, but I'm not sure I'd bother with a 30 minute method* over a 3 second one. There are youtube vids of plasterboard fixings taking over 100kg before failure. Many people doubt them over years old weak plasterboard fixings that were rubbish. Today there is no reason to be afraid of mounting rads on plasterboard when you buy fixings that will do it for very little from your local screwfix. It's a huge time saver.
*30 minutes if your lucky. Add paint drying time etc and it will be more.")
But you've added complexity, time and effort to add those battens, cut the plasterboard, cut the insulation, cut the wood to size, seal the back of the wood, mount it, refinish/paint base coat, wait to dry, come back and do top coat to match wall.
A plasterboard fixing requires a single hole to be made the correct size, using a drill bit in about 3 seconds.
I'm all for doing a job properly for sure, but I'm not sure I'd bother with a 30 minute method* over a 3 second one. There are youtube vids of plasterboard fixings taking over 100kg before failure. Many people doubt them over years old weak plasterboard fixings that were rubbish. Today there is no reason to be afraid of mounting rads on plasterboard when you buy fixings that will do it for very little from your local screwfix. It's a huge time saver.
*30 minutes if your lucky. Add paint drying time etc and it will be more.
Last edited:
Soldato
- Joined
- 28 Dec 2017
- Posts
- 9,232
- Location
- Beds
IMO it's not really the fixings that are the issue, but the amount of weight going on the board itself over time. Saying that as someone who happily hangs TVs on plasterboard.
4 brown plugs can hold about 400kg when fixed into brick, not sure many rads with water will get much over 30kg.
Column radiators can be 50kg, plus another 30kg of water, so whilst heavier than your average K1/K2 rad, still well within the weight some of the modern fixings will take, especially as the larger ones have six mounting brackets. If you are using decent plasterboard then it wont give way, unless you make a complete hash of installing it.
Cutting a hole for the batten does create another cold bridge as well, ideally you'd use the warm batten method as then everything is on the "warm" side of the insulation.
Spread over a wide area though, usually spanning at least 1 joist as well. If it's dot n dab then rigifix all the way.IMO it's not really the fixings that are the issue, but the amount of weight going on the board itself over time. Saying that as someone who happily hangs TVs on plasterboard.
RE: the batten, I'm not really bothered. I'd rather take 30 minutes (the time spent on painting is irrelevant because the entire room is being skimmed and decorated) to do something that I know for sure won't fail. You might be right, I could have used those PB fixings and never had an issue. I'm happy to spend that time.
I used 100mm concrete screws last time round (not good for thermal bridging). Tempted by the plastic insulation hammer in fixings but worried about plaster failing over them, most likely the best from a thermal perspective. And then there's the Ancon Insofast fixings, again though I think they won't be great from a thermal point of view.
This brochure is great for telling you how you can fix it: https://www.kingspan.com/content/da...nd/kingspan-kooltherm-k118-brochure-en-gb.pdf
Are you just using adhesive to the wall, or glue and screw?
Just a reminder you two, if you don't already know. Even though the PU adhesive is more than enough to hold it up on it's own. You have to put at least 2 mechanical fixings per board for fire regs. I think you're fine with your porch dlockers (don't really know tbh, maybe it's not ok). But indoors you're supposed to. I think there's been cases where in a fire, the insulation and adhesive melts, and the boards fall off the wall, still solid, and block exits.I just glued. I would have screwed but I couldn't find any I needed and was told the adhesive does most of the work. It wasn't being tiled either so no weight of any description to worry about.
I used 100mm concrete screws last time round (not good for thermal bridging). Tempted by the plastic insulation hammer in fixings but worried about plaster failing over them, most likely the best from a thermal perspective. And then there's the Ancon Insofast fixings, again though I think they won't be great from a thermal point of view.
This brochure is great for telling you how you can fix it: https://www.kingspan.com/content/da...nd/kingspan-kooltherm-k118-brochure-en-gb.pdf
Last edited:
1400mm x 600 is about 50kg with water.4 brown plugs can hold about 400kg when fixed into brick, not sure many rads with water will get much over 30kg.
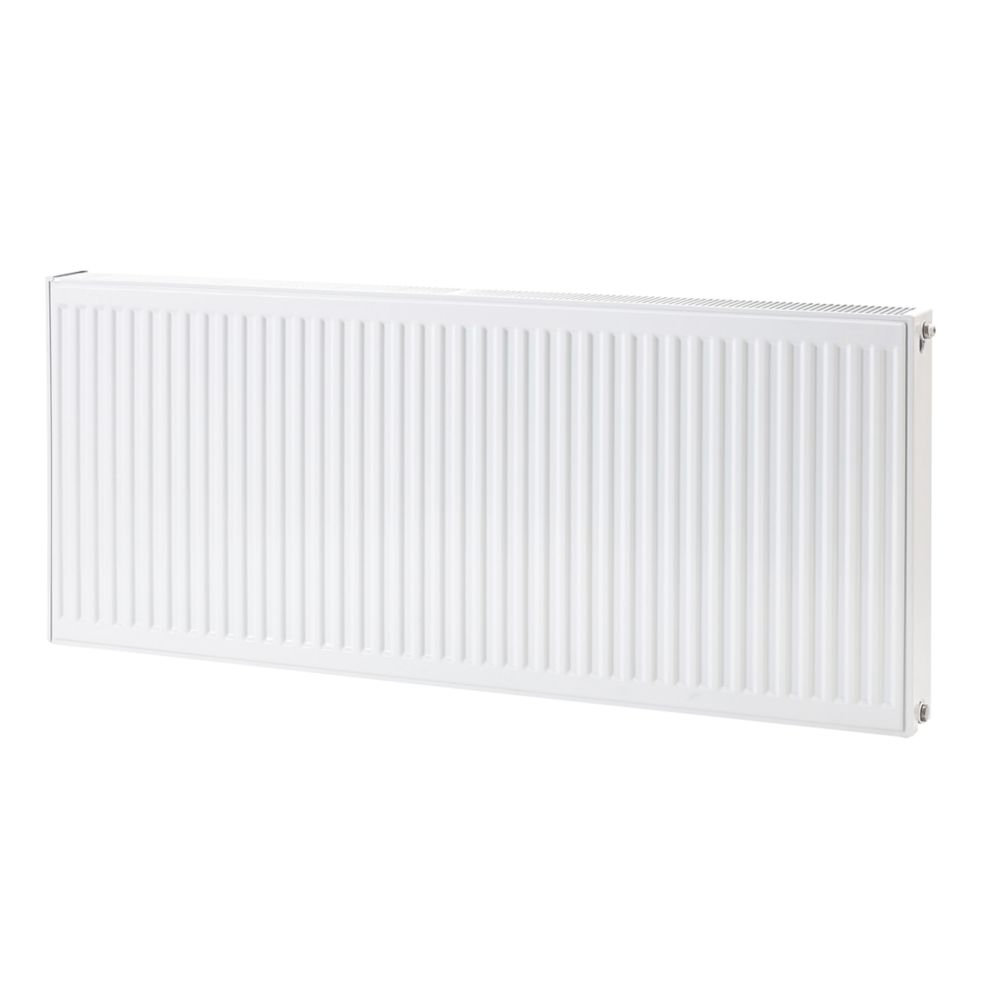
Flomasta Type 22 Double-Panel Double Convector Radiator 600mm x 1400mm White 8165BTU - Screwfix
Order online at Screwfix.com. Traffic white paint finish (RAL 9016). FREE next day delivery available, free collection in 1 minute.
Personal opinion only, the batten option here has only complicated the matter as they've been added after the plasterboard, 2 horizontal noggins between the upright timbers prior to insulation and boarding, simple.There is no denying the above batten method is strong.
But you've added complexity, time and effort to add those battens, cut the plasterboard, cut the insulation, cut the wood to size, seal the back of the wood, mount it, refinish/paint base coat, wait to dry, come back and do top coat to match wall.
A plasterboard fixing requires a single hole to be made the correct size, using a drill bit in about 3 seconds.
I'm all for doing a job properly for sure, but I'm not sure I'd bother with a 30 minute method* over a 3 second one. There are youtube vids of plasterboard fixings taking over 100kg before failure. Many people doubt them over years old weak plasterboard fixings that were rubbish. Today there is no reason to be afraid of mounting rads on plasterboard when you buy fixings that will do it for very little from your local screwfix. It's a huge time saver.
*30 minutes if your lucky. Add paint drying time etc and it will be more.
Plasterboard fixings have their place but when framing and boarding like @Mason- has done I'd much rather put noggins in and save the fixings for previously boarded walls where noggins aren't possible, it's surprising what weight a 6yr old child can throw around while swinging on a radiator

I didn’t batten the walls and board on to battens. They’re PU adhesived straight on to the wall. Adding a noggin before would have meant some very accurate measuring and cutting out, considering I want to minimise gaps in the insulation as much as possible, I added it after..Personal opinion only, the batten option here has only complicated the matter as they've been added after the plasterboard, 2 horizontal noggins between the upright timbers prior to insulation and boarding, simple.
Plasterboard fixings have their place but when framing and boarding like @Mason- has done I'd much rather put noggins in and save the fixings for previously boarded walls where noggins aren't possible, it's surprising what weight a 6yr old child can throw around while swinging on a radiator
Last edited:
Baby steps, discovered how crap cheap plastic wall anchors for shelves are - almost immediately started sagging. Got some metal ones instead and an inset tool - much better. Finally got myself a metal toolbox  . Home starting to feel a lot more homely, we painted the living room area at the weekend and got our sofas . A before (previous owners) and after.


We still need to wall mount the TV (possibly upgrading) and get a proper TV cabinet for my Switch/Sinden + HTPC.
. Home starting to feel a lot more homely, we painted the living room area at the weekend and got our sofas . A before (previous owners) and after. We still need to wall mount the TV (possibly upgrading) and get a proper TV cabinet for my Switch/Sinden + HTPC.
I did something similar with 18mm thick blocking between studs for a tiny-ish (40x60cm) type 22 radiator in a small toilet to screw into and allow tolerance between the height placement of the radiator in the future if it's to be changed. I'm sure there's a good way to mount it on plasterboard but I don't trust it.can't beat a batten fixed to a wall with brown plugs. Belt and braces.
Saying that, in our main bathroom a larger 80x60cm type 22 radiator is hanging on the plasterboard and has been fine for 10y+
It's just an irrational fear I guess
Last edited:
I've long suspected that the ducting to the soffit is partially blocked, too long, or the extra corner in at the soffit is the cause of the extractor being exceptionally poor in the en suite. The main bathroom is vented to the roof via a vented tile, so I wanted the same in our en suite. I rang a few roofers, those who answered said multiple weeks for a quote and wanted scaffolding, some didn't answer/ring back. One guy answered straight away, turned up 20 minutes later for a look and gave me a quote there and then. It was expensive IMO to replace a single tile, but I couldn't be bothered waiting any longer so agreed on the £200. He went away, got the vent, came back, fitted it as well as a few other small things I asked for. I know I could have probably got it for half that, or maybe it is a fair price, I dunno, lack of quotes elsewhere didn't really give me much to compare to. I just wanted it done.
I've just been in the loft and fitted ducting to the internal part of the new vented tile rather than the soffit. Before even with an inline extractor the toilet tissue trick failed miserably. And with not having any vents above our windows in the bedroom or a window in the ensuite I think it's been contributing to mould issues we're got around the blinds in our bedroom as well as in the grout of the ensuite tiles. With the new run, the tissue almost got sucked up into the vent so I'm confident it's helped massively. Will have a shower after taking the dog for a run later and get a feel for how the condensation is but I'm feeling confident.
I've just been in the loft and fitted ducting to the internal part of the new vented tile rather than the soffit. Before even with an inline extractor the toilet tissue trick failed miserably. And with not having any vents above our windows in the bedroom or a window in the ensuite I think it's been contributing to mould issues we're got around the blinds in our bedroom as well as in the grout of the ensuite tiles. With the new run, the tissue almost got sucked up into the vent so I'm confident it's helped massively. Will have a shower after taking the dog for a run later and get a feel for how the condensation is but I'm feeling confident.
with the time off over xmas and NY, decided to make a start on some of the jobs i been putting off. Filled and sanded the hallway, as well as the office ceiling due to some unplanned roofing work that was needed. cleared through the living room (which still has about 400 blocks in it for the garden for when the weather breaks) which allowed me to sand down some of the skirtings and measure up the ones that are missing. longest task of the day was trying to work out if i can live with the 1/5-2 inch step up in to the kitchen or whether its worth dropping the kitchen floor to the level of the living room, sounds good in theory but need to check if it causes any issues with the patio area outsidee the kitchen door.
Still need to do a load of painting to get through but hopefully will be able to start looking at the flooring shortly
Still need to do a load of painting to get through but hopefully will be able to start looking at the flooring shortly
£200 sounds reasonable to me these days. Small jobs are generally less cost efficient because it's not worth people's time otherwise.I've long suspected that the ducting to the soffit is partially blocked, too long, or the extra corner in at the soffit is the cause of the extractor being exceptionally poor in the en suite. The main bathroom is vented to the roof via a vented tile, so I wanted the same in our en suite. I rang a few roofers, those who answered said multiple weeks for a quote and wanted scaffolding, some didn't answer/ring back. One guy answered straight away, turned up 20 minutes later for a look and gave me a quote there and then. It was expensive IMO to replace a single tile, but I couldn't be bothered waiting any longer so agreed on the £200. He went away, got the vent, came back, fitted it as well as a few other small things I asked for. I know I could have probably got it for half that, or maybe it is a fair price, I dunno, lack of quotes elsewhere didn't really give me much to compare to. I just wanted it done.
I've just been in the loft and fitted ducting to the internal part of the new vented tile rather than the soffit. Before even with an inline extractor the toilet tissue trick failed miserably. And with not having any vents above our windows in the bedroom or a window in the ensuite I think it's been contributing to mould issues we're got around the blinds in our bedroom as well as in the grout of the ensuite tiles. With the new run, the tissue almost got sucked up into the vent so I'm confident it's helped massively. Will have a shower after taking the dog for a run later and get a feel for how the condensation is but I'm feeling confident.
It sounds like a good improvement, so it would go down as a win in my book, and may even save you money in the long run had you needed to deal with more mould damage.
Last edited:
dlockers
D
dlockers
I literally text my plumber yesterday to see if he could put a new roof vent on. 200 is a bargain I'd say.I've long suspected that the ducting to the soffit is partially blocked, too long, or the extra corner in at the soffit is the cause of the extractor being exceptionally poor in the en suite. The main bathroom is vented to the roof via a vented tile, so I wanted the same in our en suite. I rang a few roofers, those who answered said multiple weeks for a quote and wanted scaffolding, some didn't answer/ring back. One guy answered straight away, turned up 20 minutes later for a look and gave me a quote there and then. It was expensive IMO to replace a single tile, but I couldn't be bothered waiting any longer so agreed on the £200. He went away, got the vent, came back, fitted it as well as a few other small things I asked for. I know I could have probably got it for half that, or maybe it is a fair price, I dunno, lack of quotes elsewhere didn't really give me much to compare to. I just wanted it done.
I've just been in the loft and fitted ducting to the internal part of the new vented tile rather than the soffit. Before even with an inline extractor the toilet tissue trick failed miserably. And with not having any vents above our windows in the bedroom or a window in the ensuite I think it's been contributing to mould issues we're got around the blinds in our bedroom as well as in the grout of the ensuite tiles. With the new run, the tissue almost got sucked up into the vent so I'm confident it's helped massively. Will have a shower after taking the dog for a run later and get a feel for how the condensation is but I'm feeling confident.
That was a big part of my reasoning. We have a dehumidifier now but its purpose was for drying clothes indoors, not running in the shower due to poor ventilation. It's done now, which means I can concentrate on cutting the flooring in the loft to allow easy access to the ducting for maintenance, and carry on with raising the flooring and extra insulation.may even save you money in the long run had you needed to deal with more mould damage.
I closed the en suite door and had a shower, relative humidity at the start was mid 50's, after the shower it was 82, then it dropped to 60 after 15 minutes with the door closed, so the new roof vent is definitely doing its job. Together with sorting out the durgo, I now have a happy wife. Next job is to sort the loft insulation and flooring out, plus clearing up the mould by the window.