

You are using an out of date browser. It may not display this or other websites correctly.
You should upgrade or use an alternative browser.
You should upgrade or use an alternative browser.
Project: Hush! - updated 26/12/23
- Thread starter Monkey Puzzle
- Start date
More options
Thread starter's postsSoldato
- Joined
- 13 Aug 2004
- Posts
- 8,526
- Location
- England
Wow, that cooling is insane *subscribes*
- Joined
- 13 Mar 2006
- Posts
- 6,713
small text-based update: Didn't get as much done over christmas as I'd hoped, and can't post photos yet due to pc problems atm. My friend who's cutting the aluminium plates for the frame got the lurgy over xmas so was unable to cut the pieces before I returned back to work...
But I did manage to get it watertight after a lot of effort (and araldite!) and do some quick flow testing using a 5 gallon wine making barrel to fill;
using a 10w ddc pro (with alphacool top) in an open flow system into the barrel with an xspc edge and 2 metres of 1/2" tubing in total in the loop, the flowrate is 1.87gallons/minute, which I'm very happy with.") if anyone has access to martins flowrate calculator I'd be really interested to see how that compares to the restriction of something like a pa120.3.
if anyone has access to martins flowrate calculator I'd be really interested to see how that compares to the restriction of something like a pa120.3.
But I did manage to get it watertight after a lot of effort (and araldite!) and do some quick flow testing using a 5 gallon wine making barrel to fill;
using a 10w ddc pro (with alphacool top) in an open flow system into the barrel with an xspc edge and 2 metres of 1/2" tubing in total in the loop, the flowrate is 1.87gallons/minute, which I'm very happy with.
if anyone has access to martins flowrate calculator I'd be really interested to see how that compares to the restriction of something like a pa120.3.XSPC edge acrylic prototype, 6 or 7 feet 1/2" tubing, pa120.3, one reservoir of unspecified size, 9W ddc w/ alphacool = 2.1gpm
This has Error! untested written beside it, but the other ddcs don't specify wattage. What I assume is an 18W one, called Laing DDC-3.2 w/ alphacool top gives 2.8gpm
I'd say you're doing excellently. Which parts were leaking out of interest?
edit: from Martin's, obv

This has Error! untested written beside it, but the other ddcs don't specify wattage. What I assume is an 18W one, called Laing DDC-3.2 w/ alphacool top gives 2.8gpm
I'd say you're doing excellently. Which parts were leaking out of interest?
edit: from Martin's, obv
Last edited:
- Joined
- 13 Mar 2006
- Posts
- 6,713
Cheers jon!:thumbs:
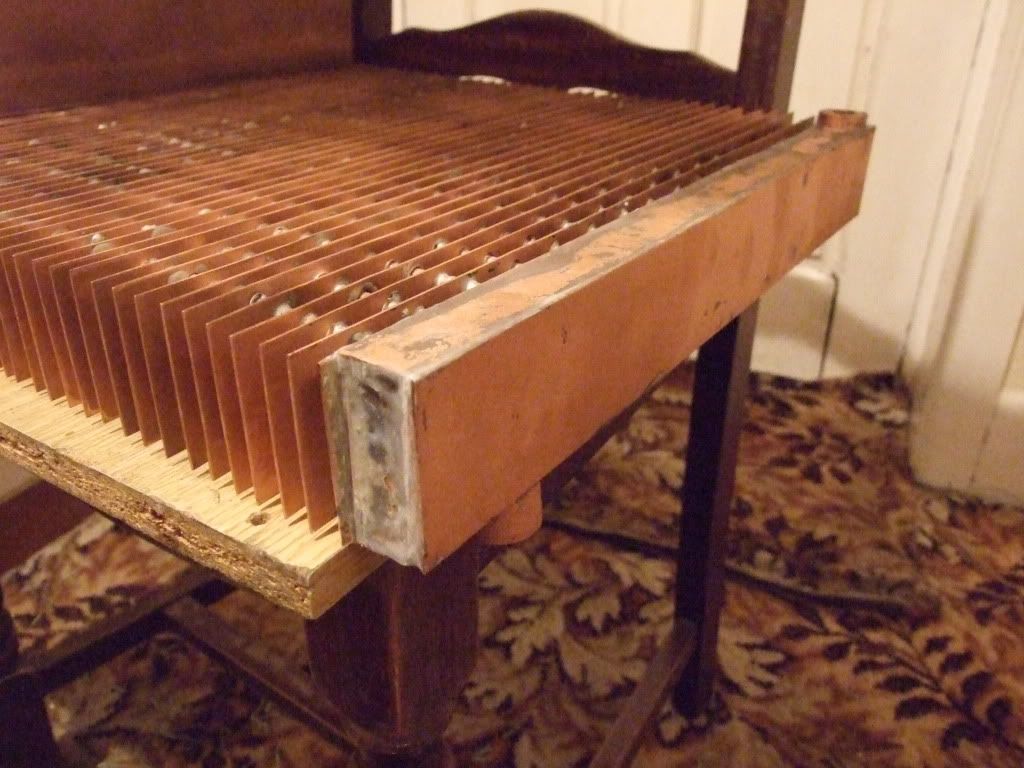
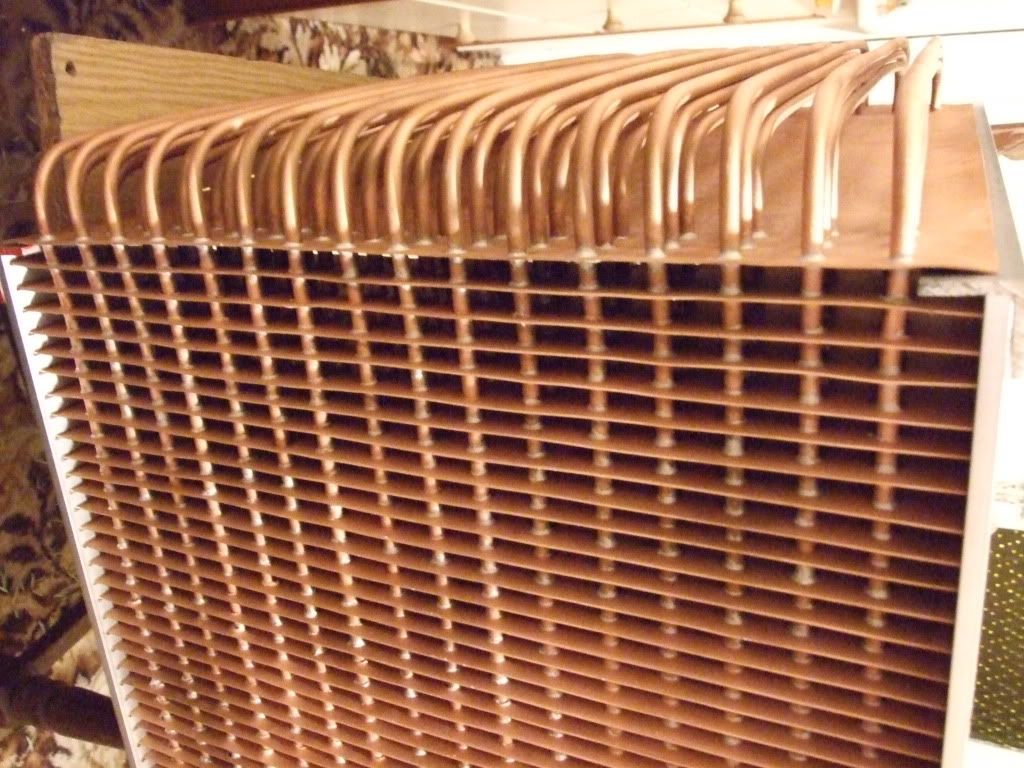
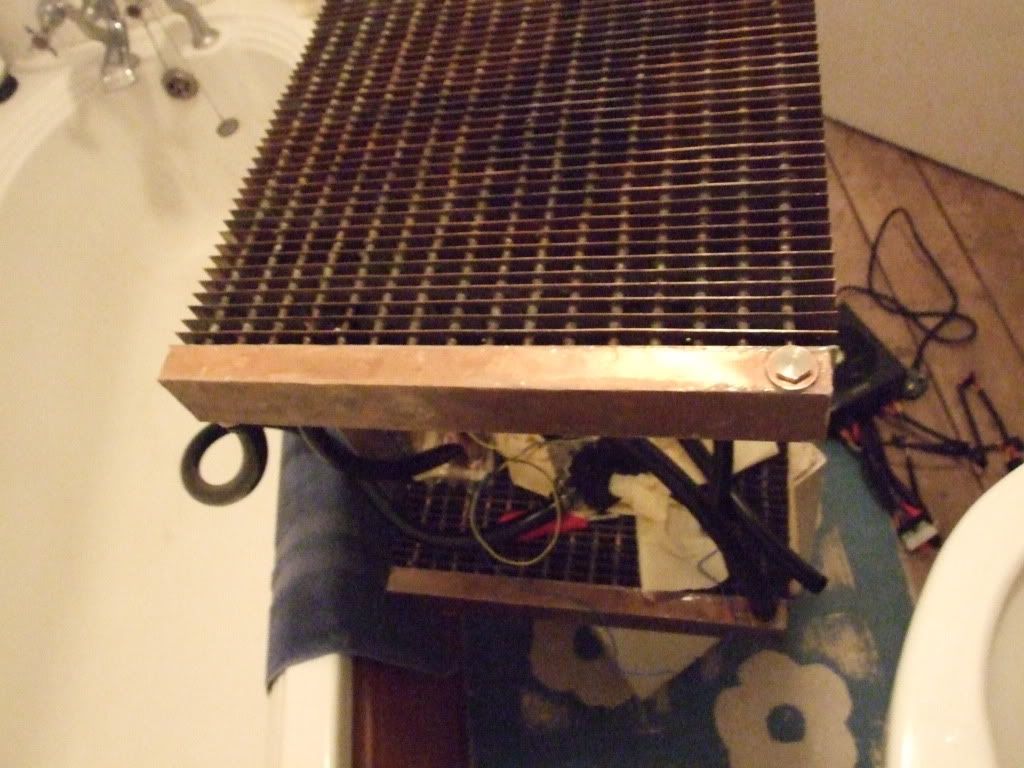
The leak problems were due to the araldite being too viscous when gluing the outer copper sides of the end boxes on... The inner end boxes made from the thin copper sheet seen in my last picture update were soldered the end heat fin where the 48 tubes just poke through. For the first end box I soldered the .9mm thick outer copper sides on, but as I needed to press them on firmly for the solder to work the sides ended up bent and crappy looking. So I then had to unsolder them and i dsoing so the inner box got bent slightly out of shape, and being a closed box was very tricky to get back into shape, with the sides of the inner box ending upvery slightly concave in parts or very slightly uneven and getting a few stress cracks from working the thin copper. So when applying the araldite if it didn't fill all of the concave bits around the holes for the ports the water could escape through the gaps and find its way to where the outer .9mm copper sides meet. So in the end i had to apply araldite along the edges on the outside of the box, which isn't really ideal, especially as the araldite is is a kind of slightly translucent creamy colour that looks like something else! I may use a needle file down where the outer copper strips meet and solder in there - the solders definitely better at sealing, as strong as the araldite is...
I think I've borked my board- hence the updates without pics for now - so looking at upgrading to i7 or maybe even i5 750. But I'd like to keep using the xspc edge as it's low restriction and would then be limited to boards with 775 holes, so either the p6t for i7 or the evga p55 *** from the looks of things. Could you do me a favour and see if the heatkiller 3.0 lt is on martins flow estimator yet anywhere (is it being updated by others at xs these days?) and stick it in the same set-up you did for the xspc edge? Would make upgrading easier and it looks better!
Associate
- Joined
- 28 Nov 2009
- Posts
- 881
- Location
- Manchester
Brilliant.
Great post, I must admit I was thinking at the first page OMG, how much money has this guy wasted on copper  but then stuck with it and must say you are a very skilled engineer
 ")
Can't wait to see some more pics when you get your PC up and running
All the best
but then stuck with it and must say you are a very skilled engineer Can't wait to see some more pics when you get your PC up and running
All the best
- Joined
- 13 Mar 2006
- Posts
- 6,713
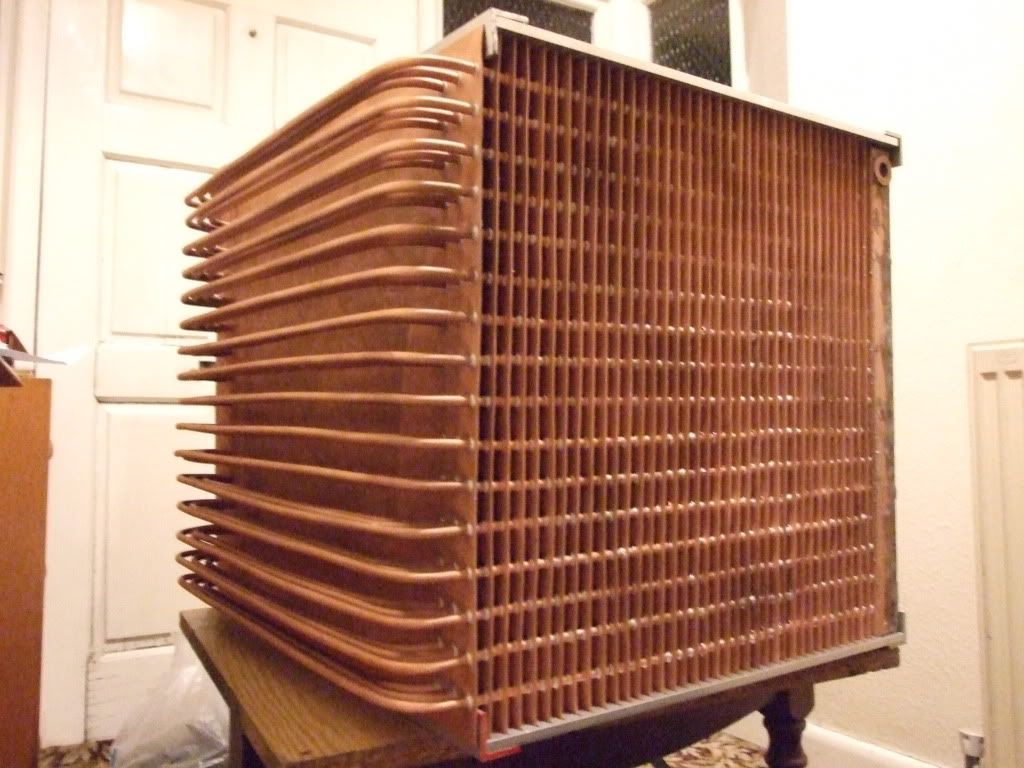
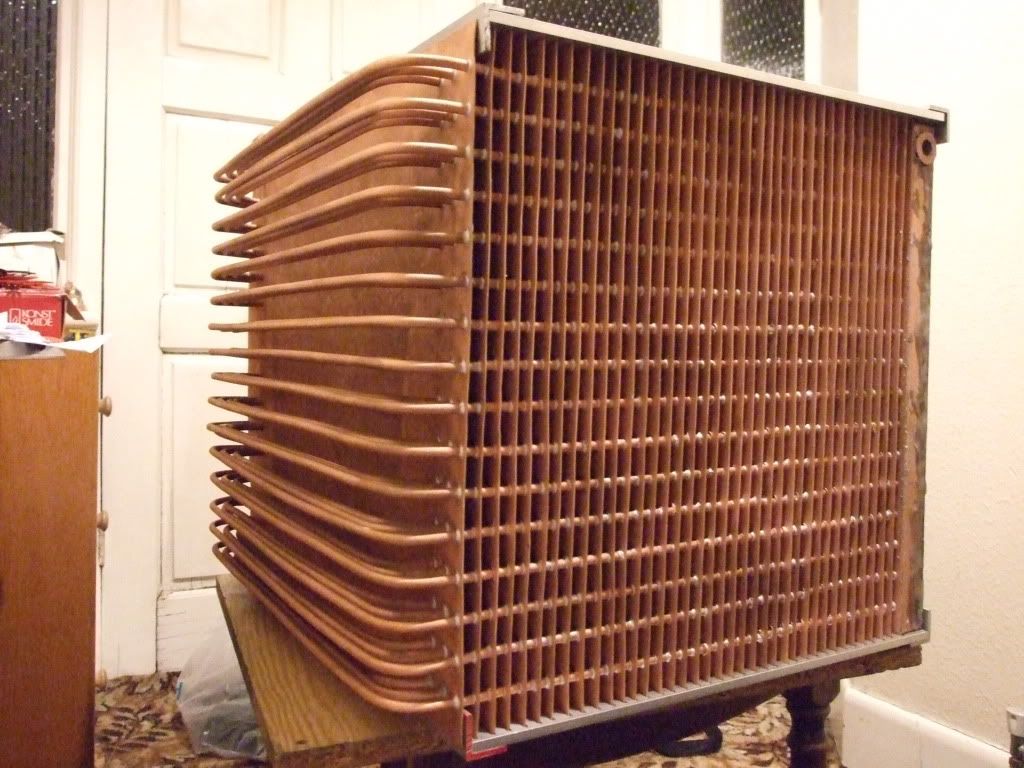
UPDATE (!)
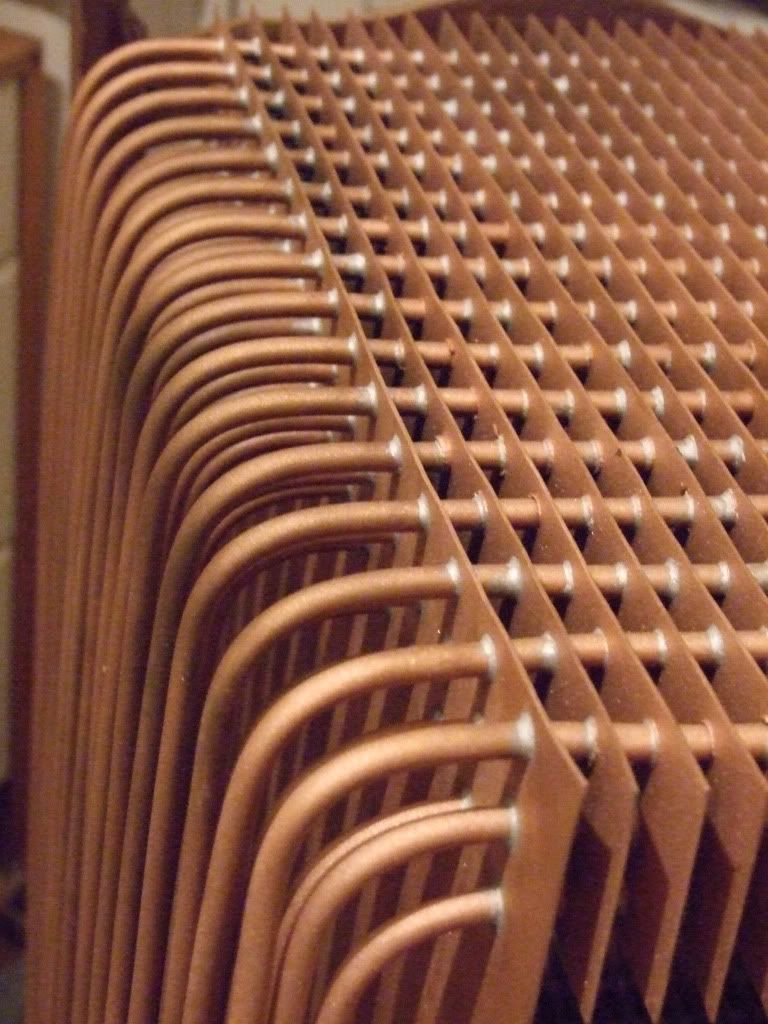
Time fopr a proper picture update - now has end-boxes and leak-tested.
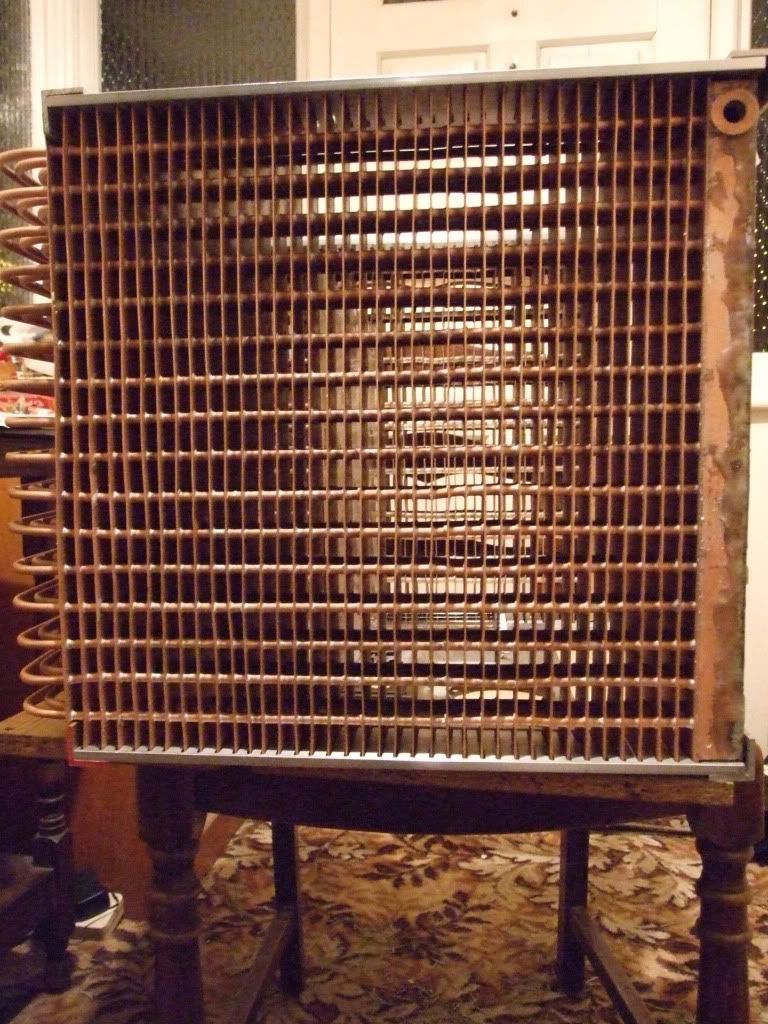
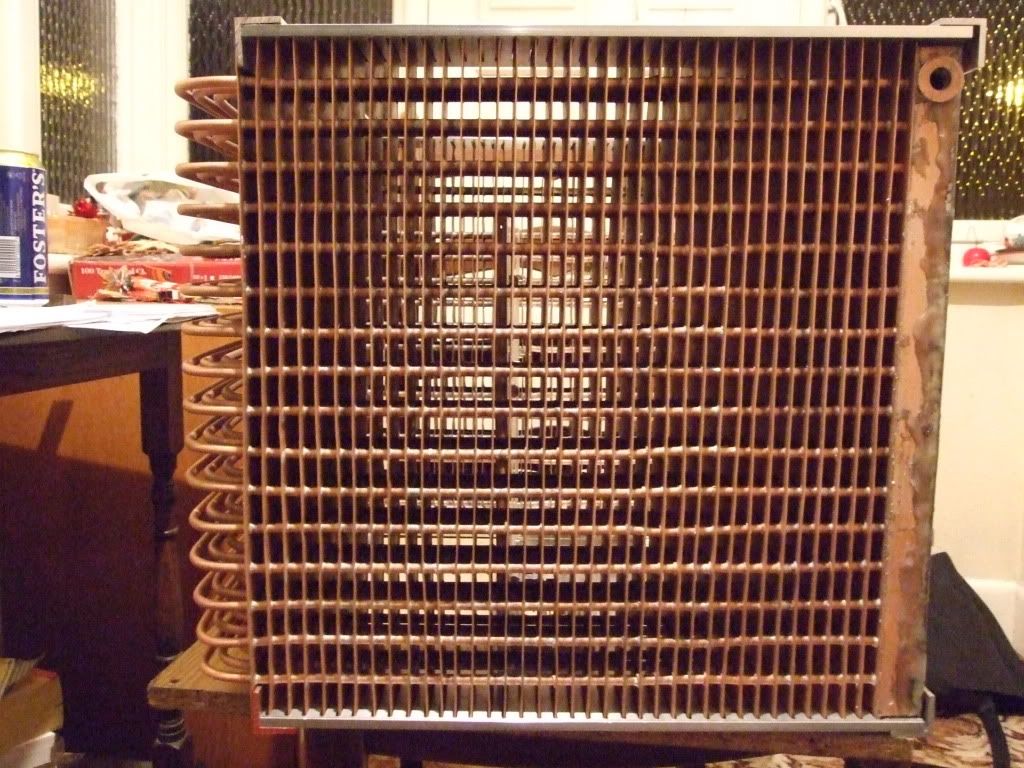
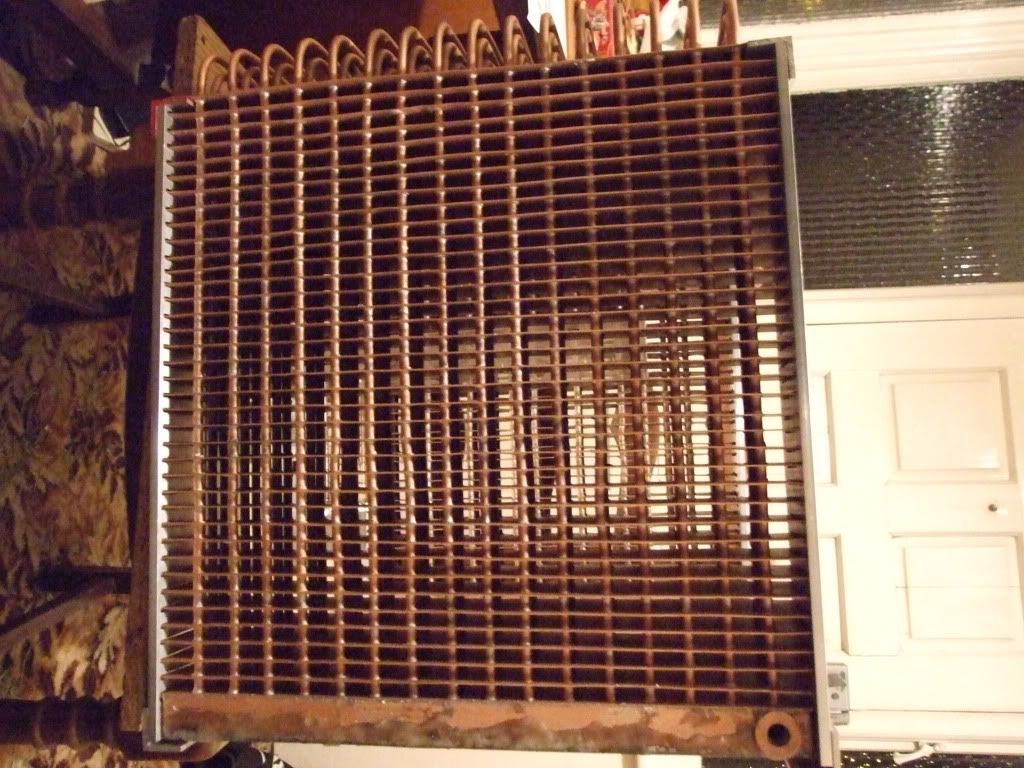
Taken to be bead-blasted yesterday - not perfect, and not shiny due to being blasted with tiny beads, but instead now a matt pink. Still, gives itmore surface area I guess. Still needs some tidying up.
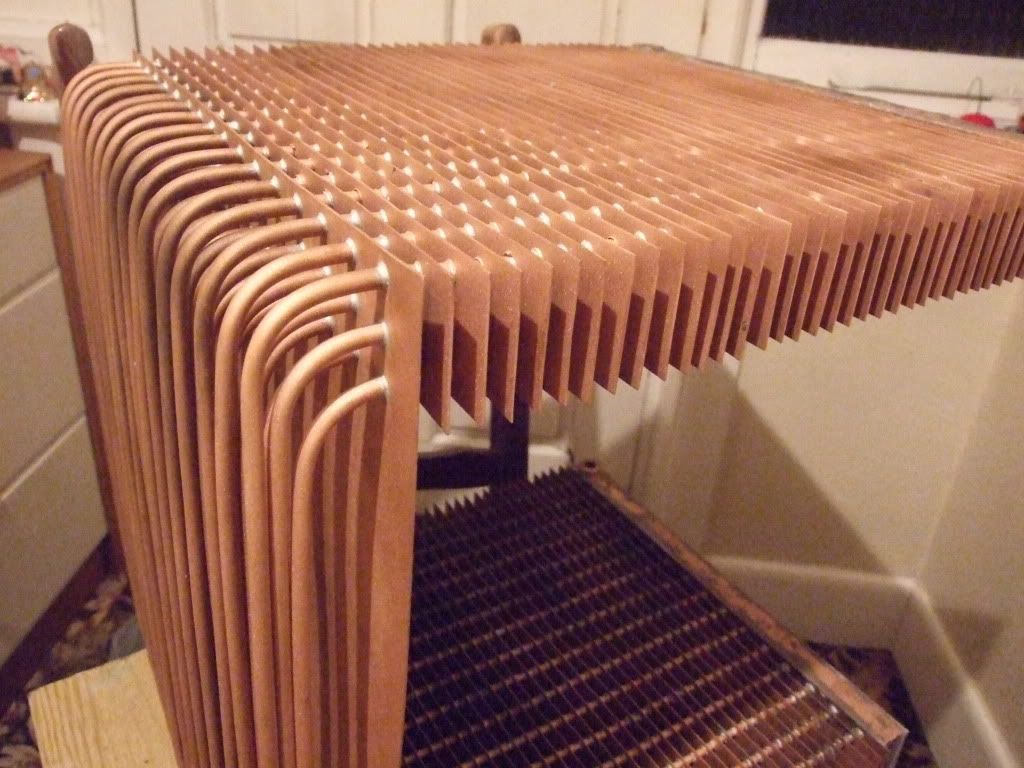
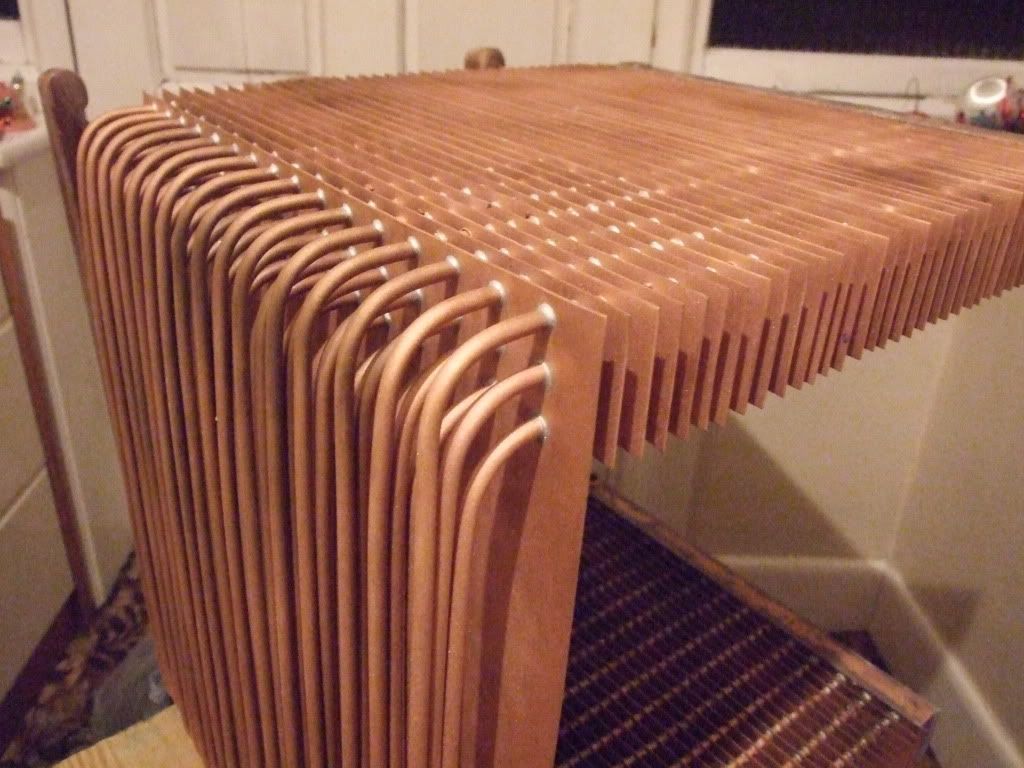
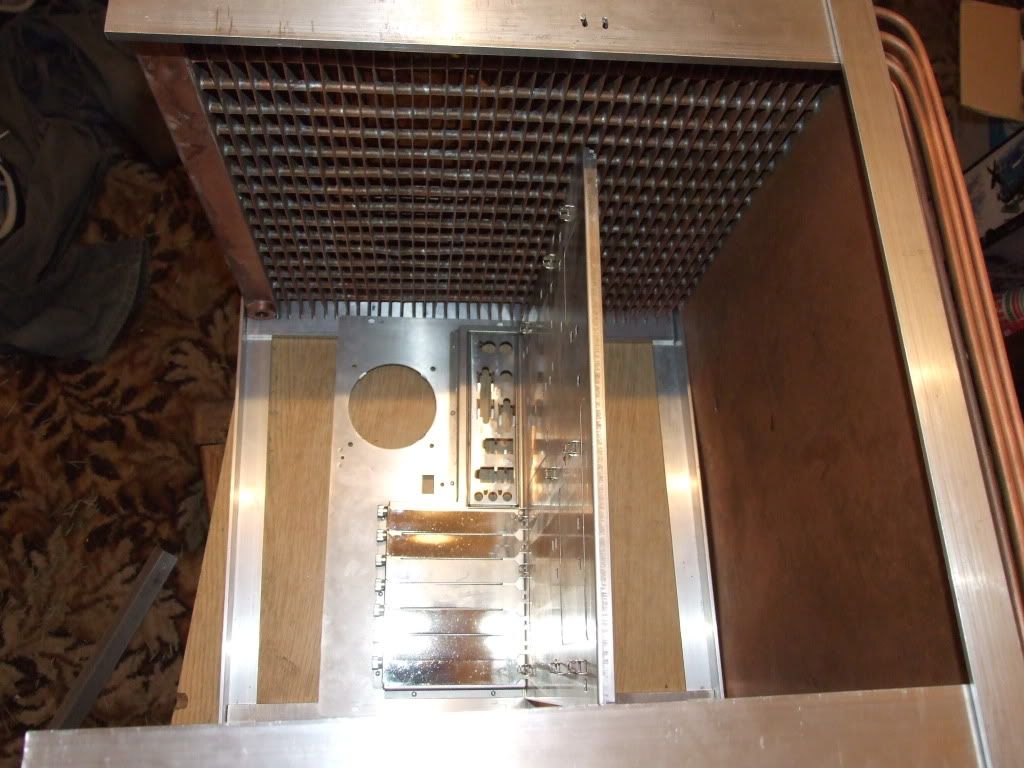
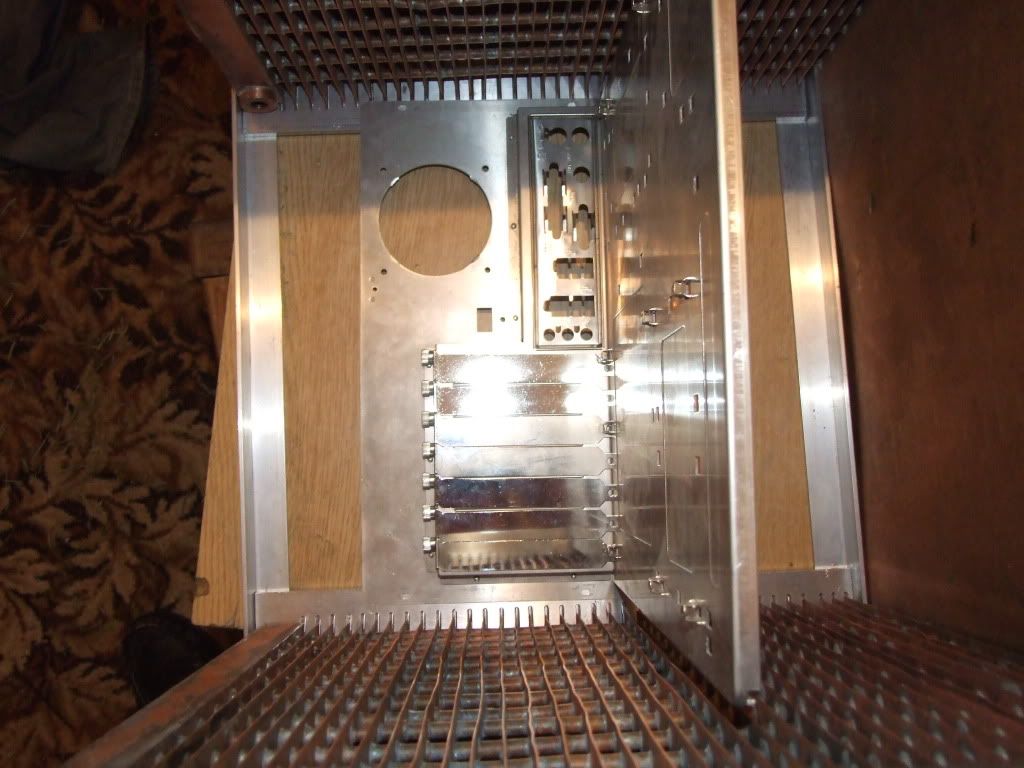
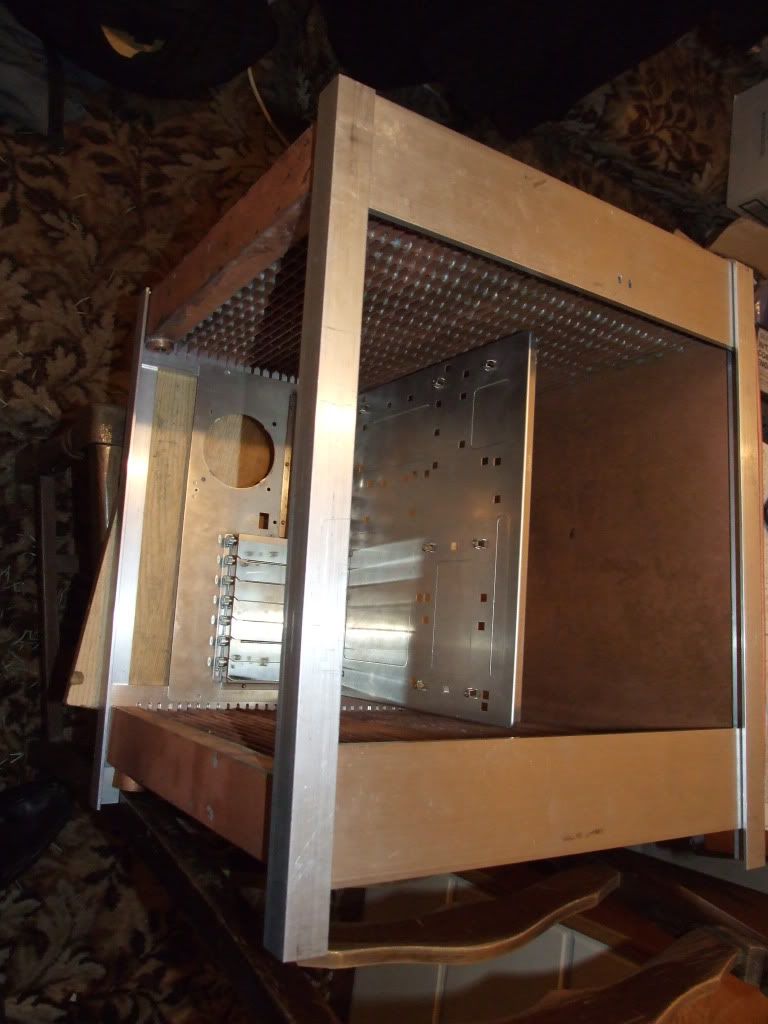
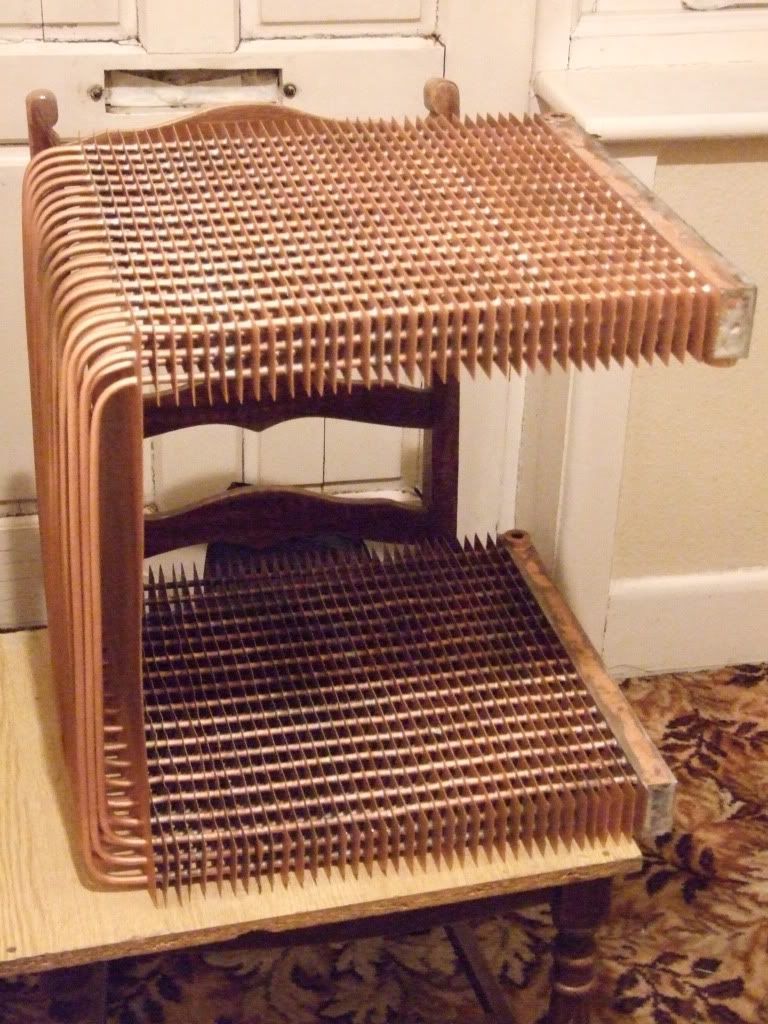
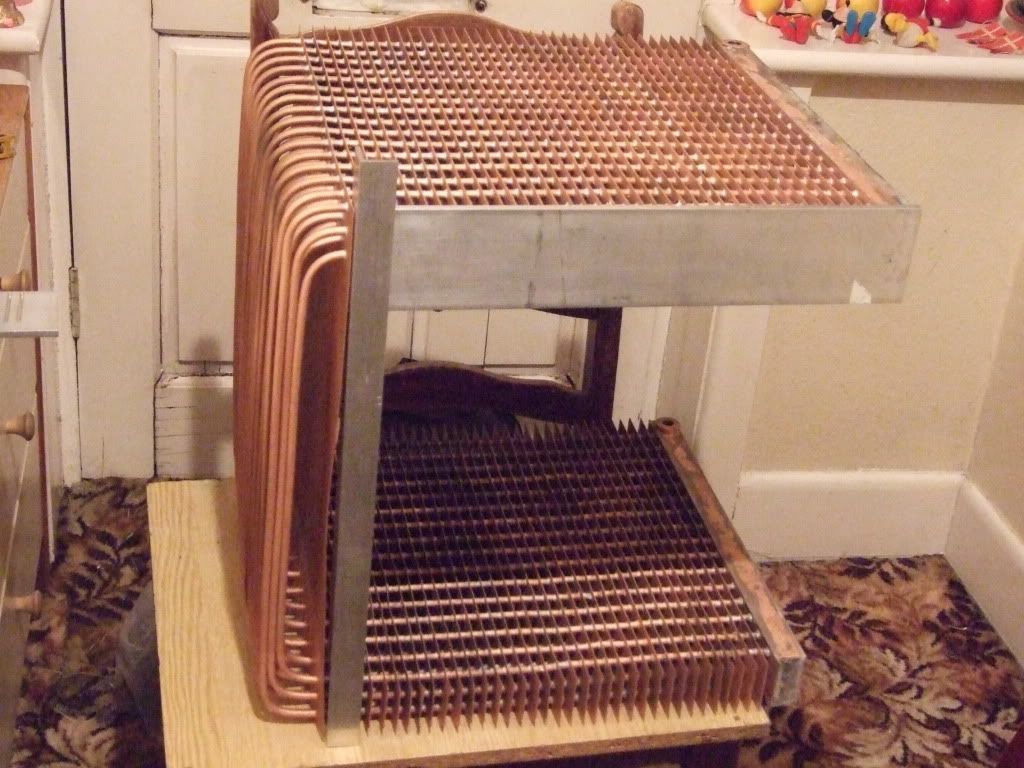
The aluminium plates have been cut and the ends of the copper fins slotted into place. They'll be glued into place with araldite 2011 epoxy. The plates will have steps cut to sit flush with the upright aluminium angle.
Here's lots of pics - they're a bit muddled up atm, soi'll probably clean up this post a bit later....
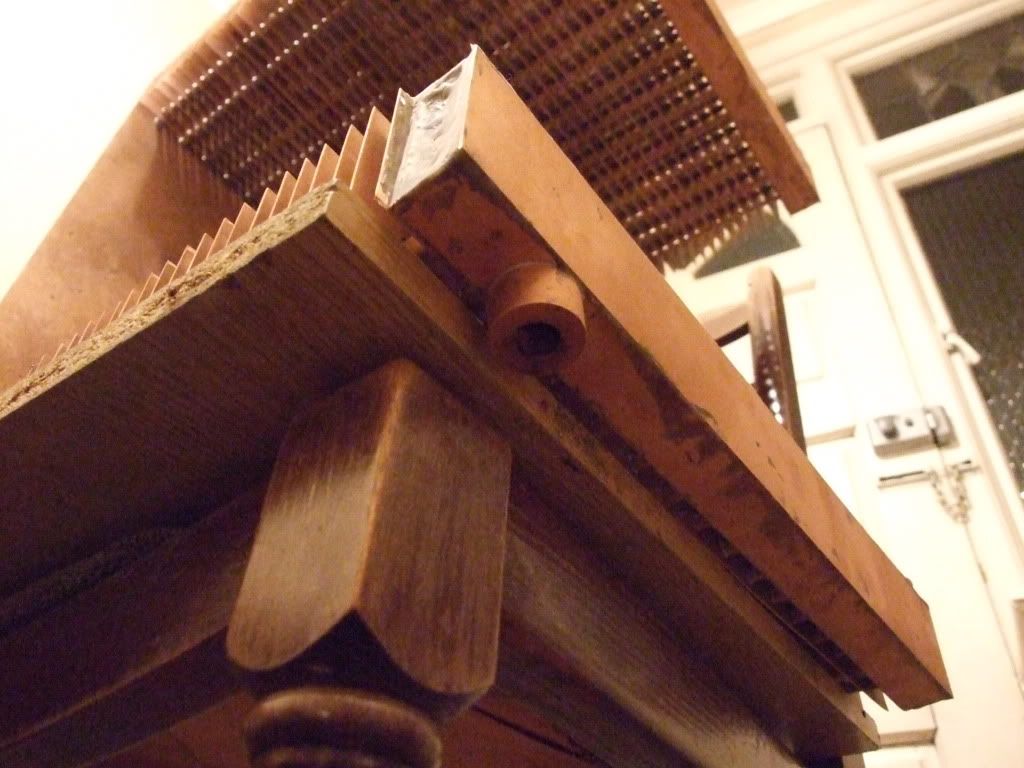
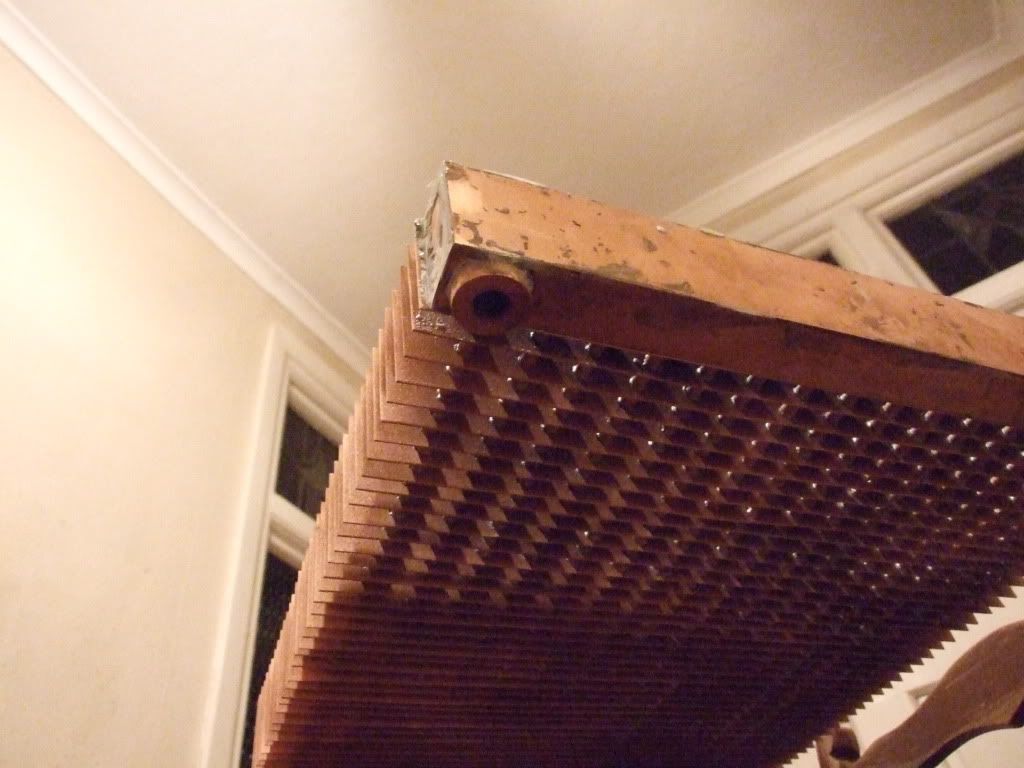
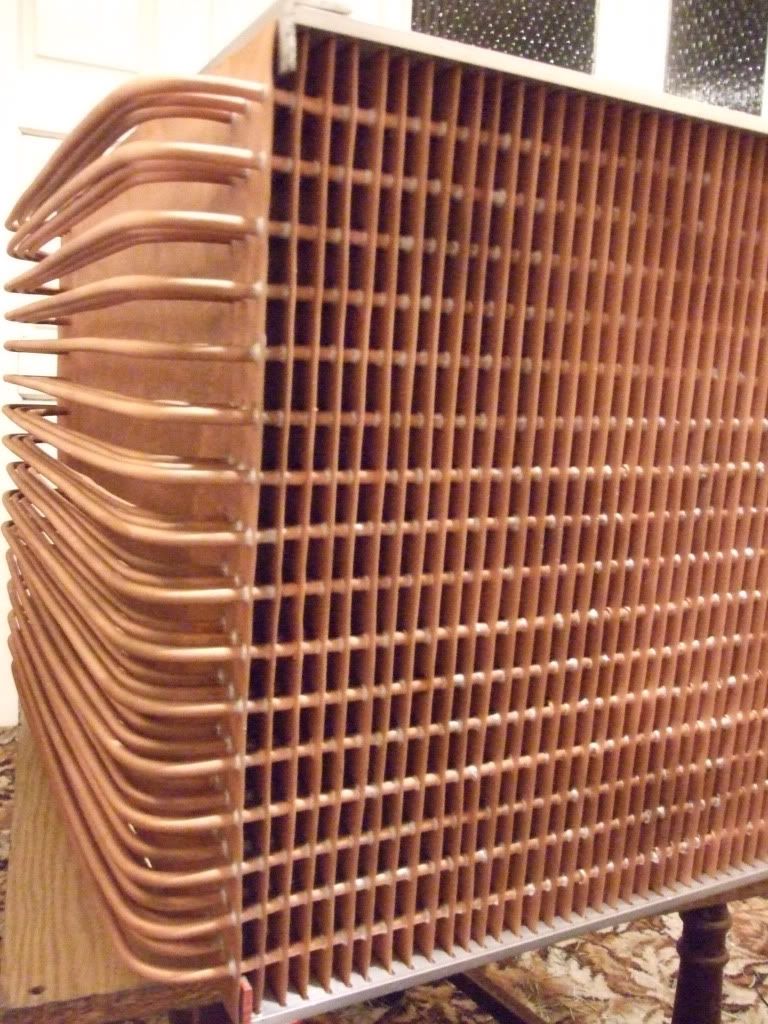
Time fopr a proper picture update - now has end-boxes and leak-tested.
Taken to be bead-blasted yesterday - not perfect, and not shiny due to being blasted with tiny beads, but instead now a matt pink. Still, gives itmore surface area I guess. Still needs some tidying up.
The aluminium plates have been cut and the ends of the copper fins slotted into place. They'll be glued into place with araldite 2011 epoxy. The plates will have steps cut to sit flush with the upright aluminium angle.
Here's lots of pics - they're a bit muddled up atm, soi'll probably clean up this post a bit later....
Last edited:
- Joined
- 13 Mar 2006
- Posts
- 6,713
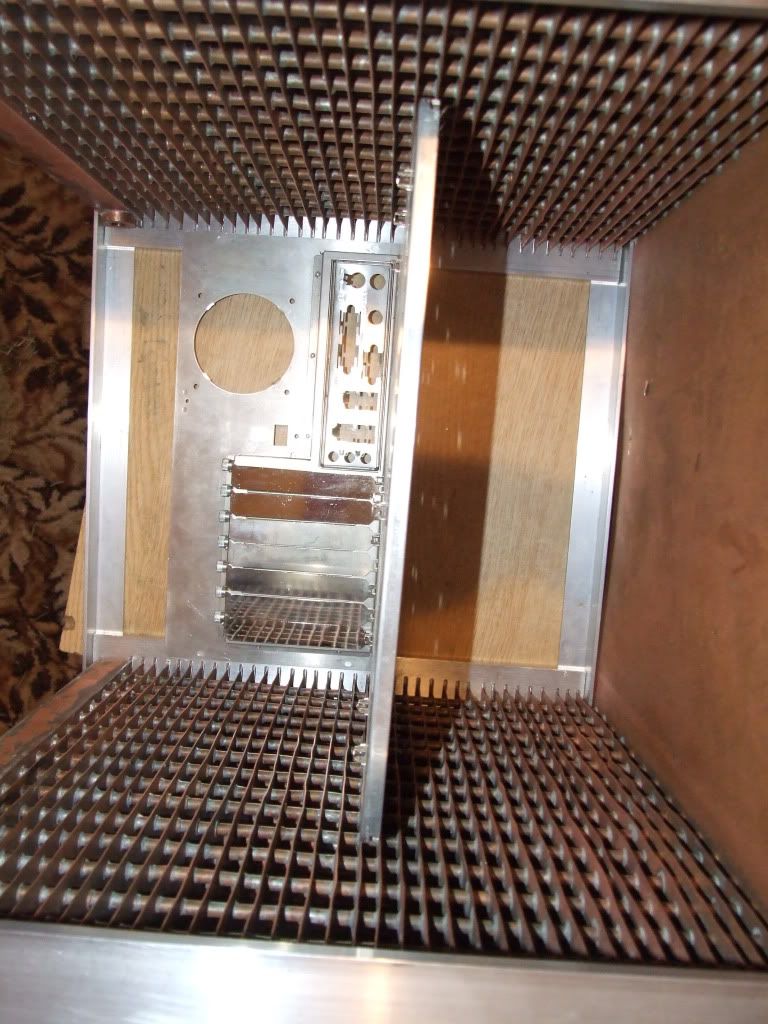
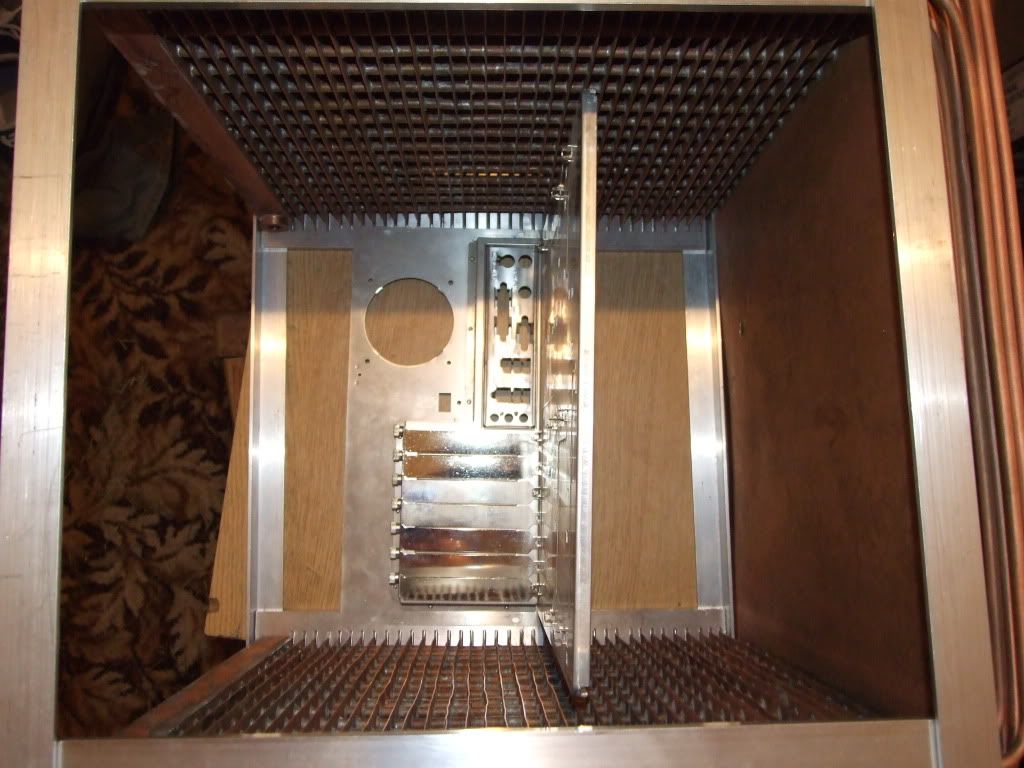
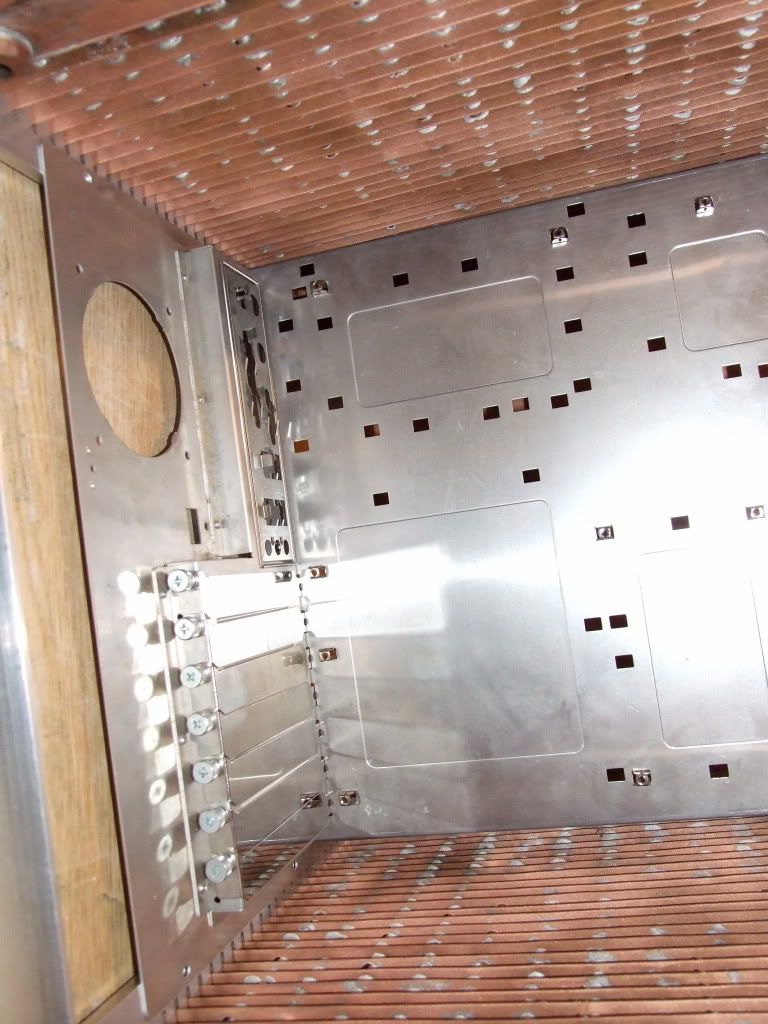
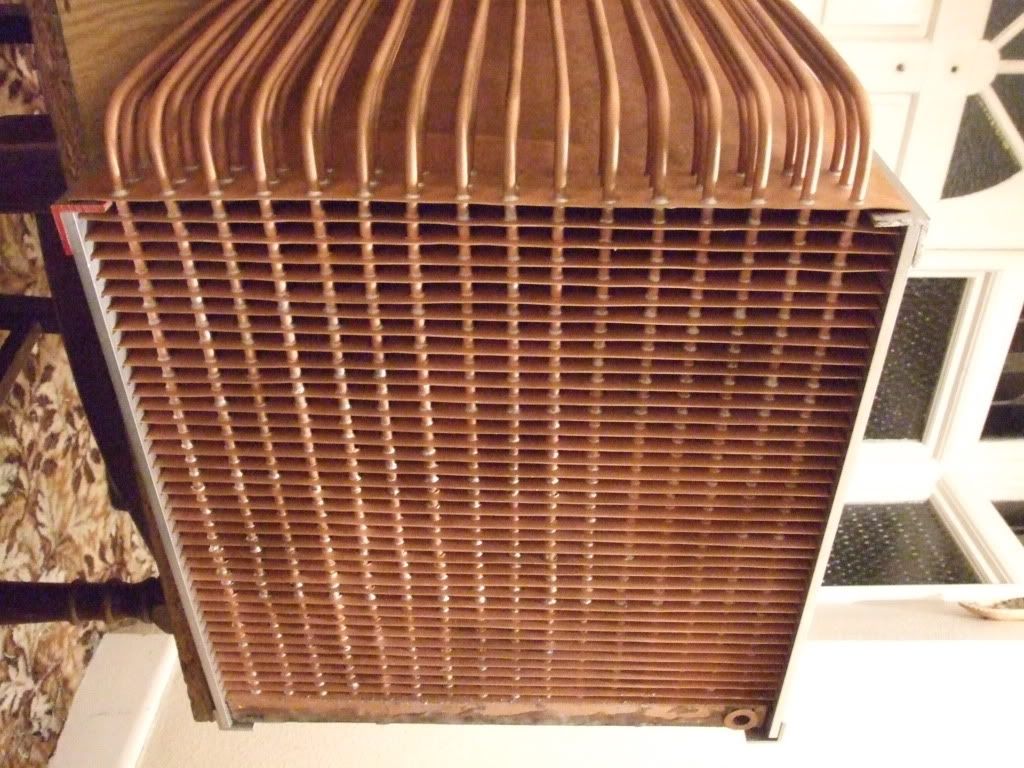
before bead-blasting; leak-and flow-testing:
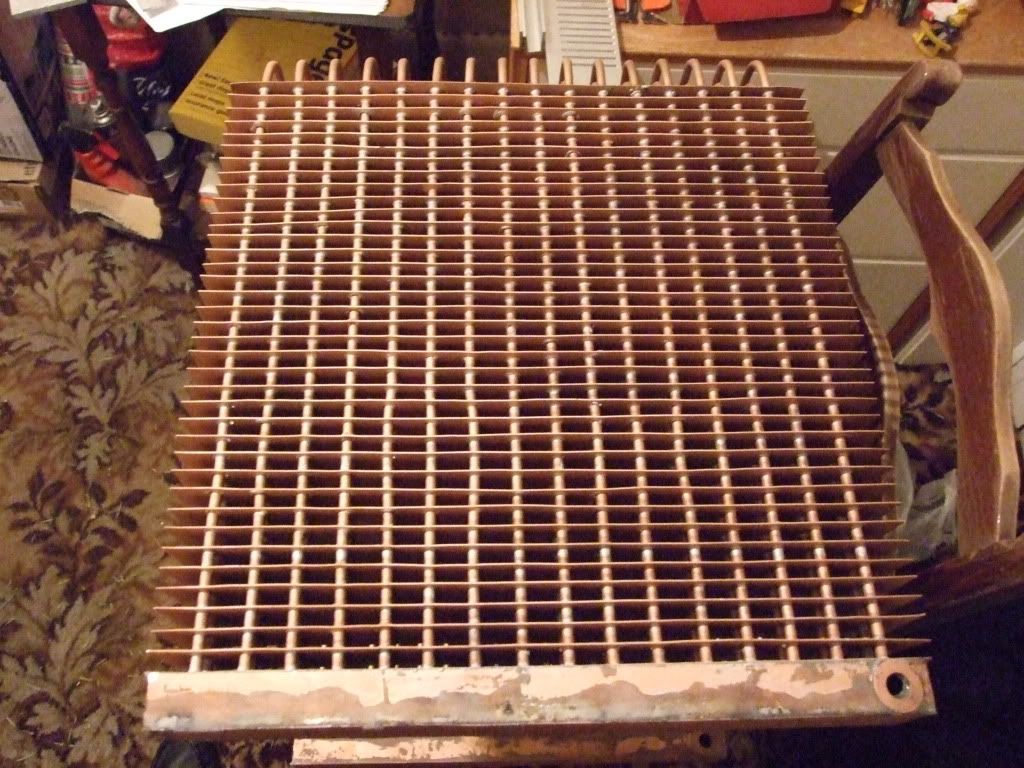
Pic showing aluminium plate with slots cut and copper heatfins sat in slots:
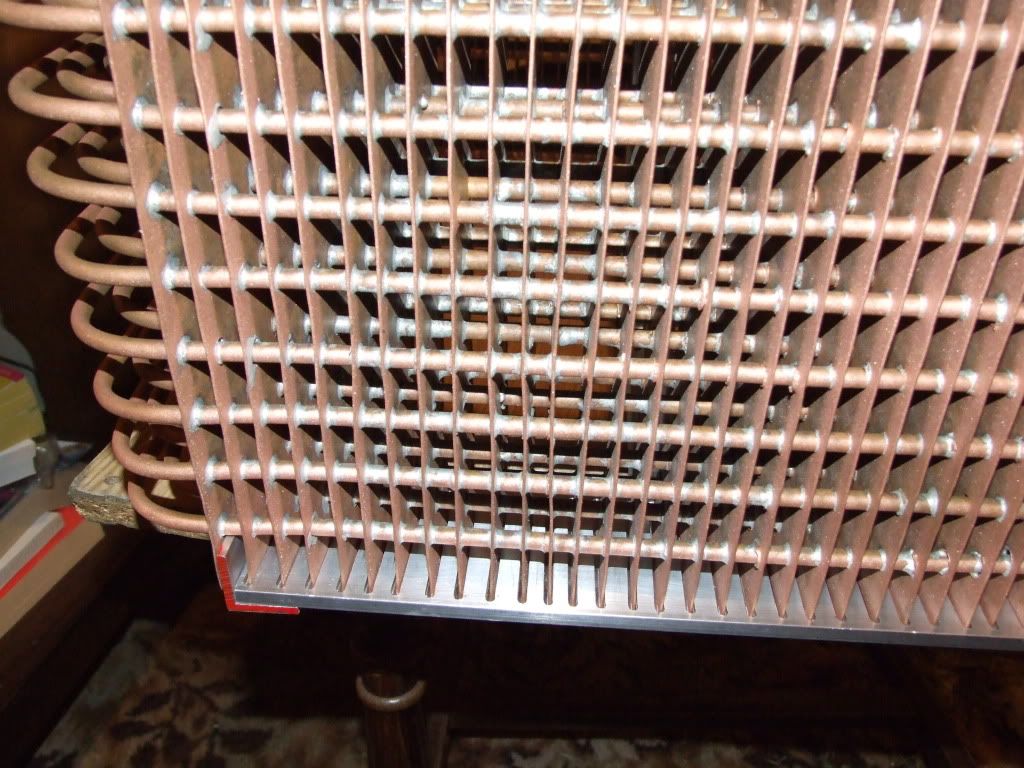
Pic showing aluminium plate with slots cut and copper heatfins sat in slots:
Last edited:
The aluminium plates have been cut and the ends of the copper fins slotted into place.
Thank god for that
Looks immense mate.
- Joined
- 13 Mar 2006
- Posts
- 6,713
Heh, cheers Ben!
- Joined
- 13 Mar 2006
- Posts
- 6,713
UPDATE (!)
...
...
is this dead?
???
Im glad its all coming together for you Tom, was starting to worry the lack of updates was cause my parts hadnt worked out.
Soldato
- Joined
- 25 Sep 2008
- Posts
- 6,767
- Location
- Orsett, Essex
This is mental I completely forgot about it 
Do you need a forklift to move it yet
I completely forgot about it Do you need a forklift to move it yet
- Joined
- 13 Mar 2006
- Posts
- 6,713
is this dead?
Work on this project's been delayed as I need tools etc to make progress and I live and work away from it, so only get a chance to work on it when I come back to my folks place. An update from a few hours ago would probably suggest it's not dead!
???
Im glad its all coming together for you Tom, was starting to worry the lack of updates was cause my parts hadnt worked out.
Nah, just that my friend was ill over xmas so couldn't cut them until after the new year, and I'm back fora week to try and get it finished. Thanks again for making the cutting plans Ben.
Just got back from Robin's - took everyhting over to hiis to tidy up the plates with the slits in and cut the steps on the back of them for the 1/8" thick 1.5" x 1.5" aluminium angle upright legs to sit flush prior to putting countersunk allen-head screws in.
Sadly in trying to cut one of the steps in the back of the plate on his lathe it mangled the step, so he's going to remill a new plate, and cutting the steps took longer than expected; so they didn't get finished this evening. So I've left the plates and a blank one with him to do. Sadly it's probably not going o get done before I go back on Sunday.

When that's done I'll need to countersink, drill and tap a LOT of 6mm long m4 screws and bolts, cut a slit for a slot-loading optical drive, a PSU and a laptop optical drive bracket/holder, a few small cuts for the motherboard tray and also a USB/esata/firewire panel and a hole for a bulgin vandal power switch.
Very frustrating not to be able to do the drilling etc tonight- had hoped to get it completed or damn near by this Sunday.
Last edited:
- Joined
- 13 Mar 2006
- Posts
- 6,713
How much does the thing weigh by the way?
This is mental
Do you need a forklift to move it yet
It weighs around 22-23kg I think without the aluminium. With it the weight it probably 26-27 kg I think.
It holds just under 2 litres of water when full, and the pc components probably weigh 7kg ish, so all in all it'll weigh something like 35kg. Still haven't found any nice small casters to put on the bottom of it.... Lower back pain ahoy!
In the absence of bits to drill I think I'll leak test and connect up my new p55 i5 750 rig to it and see how it does... Not had a chance to properly overclock yet but it seems fairly happy booting and running standard desktop things at a smidge over 4.3GHz on 1.41VCore with a pa120.2 watercooling loop, so fingers crossed can get around that stable.
Last edited: