

You are using an out of date browser. It may not display this or other websites correctly.
You should upgrade or use an alternative browser.
You should upgrade or use an alternative browser.
What "man jobs" have you done today?
- Thread starter jaybee
- Start date
More options
Thread starter's postsMrs TB decided that today I would
Think you've earned yourself a Pathia after all that
Either works. Im with @Buffman though and prefer to fit the bath first and tile from it.
Bath first, fill, silicone etc. Also can use a classiseal this way.
Isn't that a pain in terms of having to stand in the bath to tile? Also potentially risky if you drop tile on to bath.
Why can't you use classiseal the other way?
I can see why bath first is good though, a solid/known base to tile from.
Fitted the basin waste that I ingeniously managed to lengthen several weeks ago.
Completely guessed where to leave the basin waste in the wall before plastering and you can see it was about 3 inches too low. So cut up the spare U bend and made a collar to sit inside the two pieces where the basin and U connect.
An awful lot of silicone holding this together first fit about a month ago seemed to want to leak a lot.

Completely guessed where to leave the basin waste in the wall before plastering and you can see it was about 3 inches too low. So cut up the spare U bend and made a collar to sit inside the two pieces where the basin and U connect.
An awful lot of silicone holding this together
first fit about a month ago seemed to want to leak a lot.
You can't use it the other way, it creates a tileable lip and has be installed behind the tiles. It's really neat, same with shower trays.Isn't that a pain in terms of having to stand in the bath to tile? Also potentially risky if you drop tile on to bath.
Why can't you use classiseal the other way?
I can see why bath first is good though, a solid/known base to tile from.
Last edited:
I'd assumed when installing bath afterwards the idea is to start tiling from the 2nd row onwards then installing bath before putting the final/first row of tiles on.You can't use it the other way, it creates a tileable lip and has be installed behind the tiles. It's really neat, same with shower trays.
Last edited:
Fitted the basin waste that I ingeniously managed to lengthen several weeks ago.
Completely guessed where to leave the basin waste in the wall before plastering and you can see it was about 3 inches too low. So cut up the spare U bend and made a collar to sit inside the two pieces where the basin and U connect.
An awful lot of silicone holding this together
Is that going to be fiddly to maintain? Not that there's much maintenance required.
Deleted User 298457
Deleted User 298457
How come you didn't put the bath in before the tiles? Normally you would do that then put a seal /tape from the waterproof wall boards to the bath then tile on top?
I don't think it will matter 100% as you can pump it full of silicone when you tie the bath to the wall (make sure to sit the bath on battons!) then put silicone on the bath/tile interface.
Looks like you might be struggling on that niche to get a trim up to it but I'll wait and be proved wrong! Speedy work
As I also thought and the way I've always done it.
Do You Fit A Bathroom Suite Before Tiling?
Planning to renovate your bathroom and wondering if it's best to fit a bathroom suite before tiling or vice versa. Read our blog to learn about the ideal sequence for a quality finish and water damage prevention.www.bathroomtakeaway.com
Either works. Im with @Buffman though and prefer to fit the bath first and tile from it.
Bath first, fill, silicone etc. Also can use a classiseal this way.
Definitely prefer to put bath in first, but I was up against it and knew it'd be "significantly" more annoying to have the bath in place (I was doing floor and walls simultaneously), so I did throw the dice on the marble being bang on for the bath to "butt up" against. I've left the green so I can cut into the bath/tile down, and the final piece of marble will lock it all together. So I'll probably Classiseal just those bits; so at least the corner/"wettest" bit is belt and braces.Isn't that a pain in terms of having to stand in the bath to tile? Also potentially risky if you drop tile on to bath.
Why can't you use classiseal the other way?
I can see why bath first is good though, a solid/known base to tile from.
Full shift again today, but still a way off completion...

^ turns out niche is too small for everyone of our common products
 . I cut the marble for the rear but debating putting green in there, given have 5 boxes left over
Went one extra on the floor tile as I had 10 spare
I've also ran out of adhesive, again
Plan is to...
Final fix bath (is it worth putting a plank on the floor to distribute the load from the marble/hardibacker?)
Finish tiling green/marble (bath/niche/fiddly little bits)
Grout
Toilet
Vanity
"Switch day" / turn off old bathroom.
Switch day will be a pain as I need to second fix the soil stack and it's difficult on one man lift...
Also need to finalise my plans for the extractor fan...its all ready I just haven't decided how to switch it without it becoming a pain.
Deleted User 298457
Deleted User 298457
Hah, thanks man - however I started Jan 16th@dlockers you work quicker than the pros!
and my original plan "1930s refurb" thread was 18th August 2022Is that going to be fiddly to maintain? Not that there's much maintenance required.
Shouldn't be as there is a coupling either side of the U which can be dropped easily enough. The two places absent of any silicone
Definitely prefer to put bath in first, but I was up against it and knew it'd be "significantly" more annoying to have the bath in place (I was doing floor and walls simultaneously), so I did throw the dice on the marble being bang on for the bath to "butt up" against. I've left the green so I can cut into the bath/tile down, and the final piece of marble will lock it all together. So I'll probably Classiseal just those bits; so at least the corner/"wettest" bit is belt and braces.
Ah that's a good point I reckon if you do that leftover corner with some tape it should be reet. Tiling is going in quick!
Isn't that a pain in terms of having to stand in the bath to tile? Also potentially risky if you drop tile on to bath.
Why can't you use classiseal the other way?
I can see why bath first is good though, a solid/known base to tile from.
The builders that did my bathroom tiled into my bath so you get two good seals. They started tiling from a bit of stripwood after working out the layout and the hight of the bath so they only needed to do a single row of tiles with the bath in place. I was unsure about it but after seeing it for myself it made sense and you're not just relying on that single bead of silicone.
Today was tarting up the garden and protecting the back of the shed that gets hit with the most sun (lol) and rain. It was so dry I could go left to right three times without stopping to let it dry. I hate the colour but I never actually see that side.


I want to replace the decking but i've got enough on atm so we'll have to go with home bargains grey for now.
Last edited:
I like it. What did you use as I need to redo our picnic bench and thats the exact colour I'm after?I hate the colour but I never actually see that side.
Not really, it'll already have 4 legs to do that... But I've always battened the wall out and supported with timbers at the front as well. I actually pity the person who tries to rip out one of those.Final fix bath (is it worth putting a plank on the floor to distribute the load from the marble/hardibacker?)
Good progress, why didnt you remove the architrave and tile underneath it. Also looks like you avoided that horrible slither on the niche... good stuff. Green tiles on the back of niche will look good.
Last edited:
Deleted User 298457
Deleted User 298457
Thanks -- I'll batten the wall and I did buy some CLS to batten the front out too but used it for the tile batten. A trip to Wickes is in order anyway as I ran out of adhesive again lol.Not really, it'll already have 4 legs to do that... But I've always battened the wall out and supported with timbers at the front as well. I actually pity the person who tries to rip out one of those.
Good progress, why didnt you remove the architrave and tile underneath it. Also looks like you avoided that horrible slither on the niche... good stuff. Green tiles on the back of niche will look good.

^^ this is marble dry fitted which has confused me about doing the back in green a bit. It is a bit of a pointless niche as it isn't tall enough, so I am thinking to "hide it" versus make it a feature...
----
For those bothered/following/interested, this is the tile cutter I am using. I bought it in August 2019 and it has worked a treat on the marble and the ceramics.
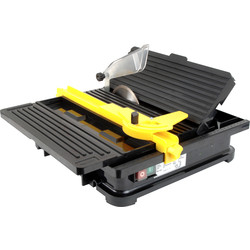
QEP Diamond Wheel Wet Tile Cutter
Need a simple and affordable way to cut tiles? With this electric tile cutter from QEP, you’ll have an easily portable option combining a lightweight design with excellent value for money.Supplied with a general purpose 110mm diamond blade included, it offers cutting depths of up to 23mm – this...