1973 - MGB - Long term project :)

Fairly easy job for the rear suspension! Although I did get new U bolts, nuts and bump stop bracket things. I also fitted some nylon seat belt style axle straps as the cheapy modern rubber ones drop to bits now.
 
Fairly easy job for the rear suspension! Although I did get new U bolts, nuts and bump stop bracket things. I also fitted some nylon seat belt style axle straps as the cheapy modern rubber ones drop to bits now.

Yer, I would get a fitting kit. Always nice to work with clean, new un-stuck stuff :)

Great tip about the straps! Thanks.
 
Top vid, I like the earlier rev counters. I'll have to do a quick vid of mine at some point, I started it this morning and it did a huge backfire uncle buck style :D
 
Thanks :)
I did a quick drive after that video, and it was great at low revs, but was sounding a bit funny under heavy acceleration and labouring a bit. So I returned and tilted the dizzy back about 7-10 degrees and went for another run, and it was much better!
My timing gun arrives today (hopefully), so I will video the timing as it is, and see how well I set it up with the butt/ear dyno :p
Might be able to some more fine tuning with the correct equipment.
Its an interesting thing, but no one seems to do a video explaining the simple way of adjusting timing /changing Distrubutor on the MGB, they all seem to skip the simple parts that are not actually clear. So I had to figure it out myself. I think the problem is that people assume a certain level of knowledge when they create such videos, and forget that not everyone has that knowledge!
I even have a couple of manuals specific for MGB, but they are also quite vague. For example "Remove distributor" is part of the instructions, but it fails to explain the how to do this. Which is actually not clear if you are not already familiar with the hardware.
I found that simply undoing the clamp was not sufficient to allow removal. Also, its FAR easier to remove if you twist it first, rather than just try to pull it!

I drove it 22 miles to work today as the weather looks like it will hold.It drove very well, got up to 70mph on the motorway with overdrive working well. The overdrive is a bit noisier than I would like, but it seem to work well.
It even seems to run a lot cooler in the cabin, and on the dial, even though the weather was quite warm this morning.
I think the timing was quite out before causing it to run hotter than it should!
 
Last edited:
So, went to do some work on the car and wanted to see if I could isolate a starter motor problem. Sometimes it seems to stick and just clicks and will eventually kick in. Anyway, I went to go take a look and the connections on the starter motor seemed loose, so I decided to tighten it up.
Foolishly I failed to isolate the battery, a few turns later on both contacts and I bridged the contacts by accident. Sparks fly and now when I try to start, the starter motor does spin, but that is all. The engine does not seem to engage. Even a freshly recharged battery made no difference.
So now I need to drop the starter motor, and see what's going on.. hmmph...
It's not a major job, but just a pain to get it up onto on axle stands and means I can't drive till I get it sorted.
I will take a good look at the cables too whilst I am down there. I suspect being 40 years old and in such a harsh location may have left them in a slightly sorry state.
 
Last edited:
That does sound strange, I wonder if it has damaged a wire or something? I'm a bit lazy like that with batteries(awkward on the B) so I fitted one of those battery isolater tops where you just unscrew the top to disconnect it.

Might be a good time for a lightweight high-torque starter :D
 
Well, maybe not...
I think I worked it out... It was turning over every time when I finished tinkering, will need to check it over, and do some further testing to be sure though.
I took some video whilst i was working on it, so will get that edited and uploaded later on to show what I was doing!
 
Finally getting around to getting some pics up.

doorpull1.jpg

doorpull2.jpg


Alloy door pulls to replace the brown plasic/vinyl ones :)

More to come! The brown door trims should have been gone already, but they never arrived from the seller, and he has agreed to re-send with a trackable postage this time.
 
Last edited:
Seat belt replacements. The old belts were not matching, and the newer one was dubiously mounted, so I ordered some new ones, and got aroud to fitting them.
Here are the old belts
oldbelt1.jpg

oldbelt2.jpg

New Belt Kit:
Beltkit1.jpg

Then, stuck them in. Kit was very simple!
newbelt1.jpg

newbelt2.jpg

They work well, look a lot neater, and match, so I am happy! Also, feel quite a bit safer :D


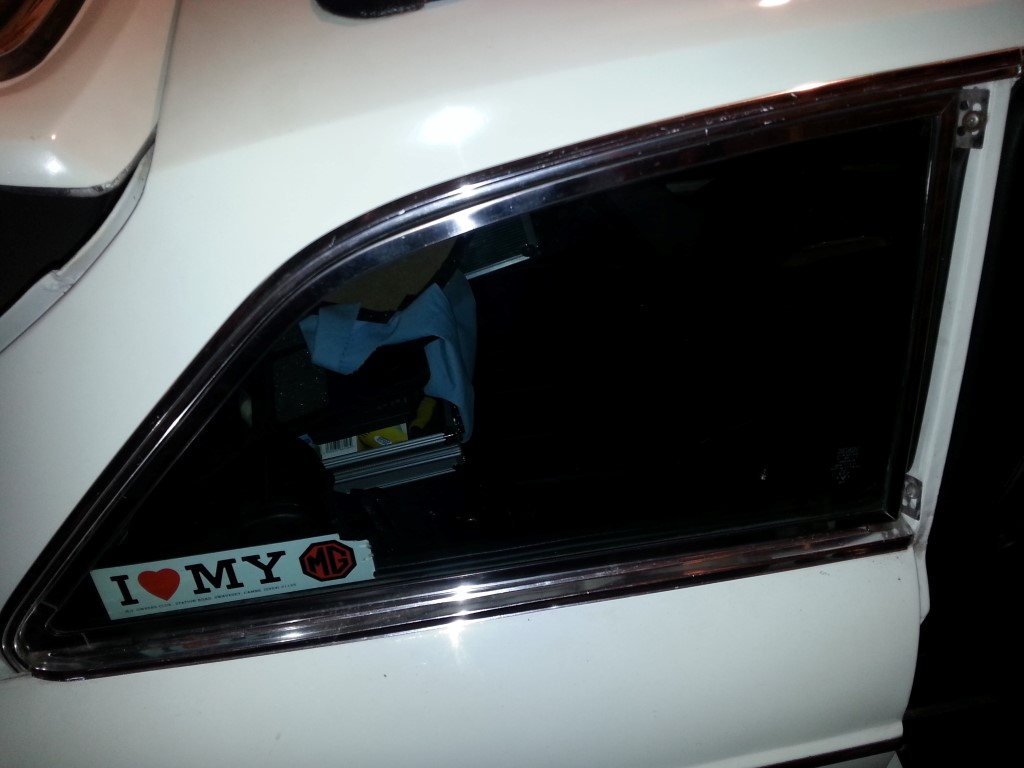
So, new door trims arrived today, and when I was fitting the driver side, I accidentaly figured out how to remove the chrome trim on the pillar, this meant I found the screws for the quarterlight hinges. This meant i could get at the last bits of brown trim vinyl! So I got a bit side-tracked..
You can see here:
pillarchrome.jpg

All the bits that came out:
windowparts.jpg

This is the hole that was left, and i gave the chrome a quick clean seeing as it would be hard to get to when the window was re-fitted:
windowremoved.jpg

This is the old brown trim that was uncovered:
oldpillar.jpg

So, I cut out some templates from the black vinyl i had from earlier, and started re-fitting:
peggedpillar.jpg

Borrowed some pegs from the clothes line to help me get it set!

Thats where it stands tonight, drying and with the new door seal in. I ordered some new black window seals to cut to fit and replace the old brown seals. So drivers side is basically completed, just need to wait for the new seals, and re-fit the window. Will get the passenger side done tomorrow, so its all ready for the new seals :)

Oh, and I also ordered some black finished interior screws to help me remove all the older screws, which ruin the look of the new trim. Just a little touch, but I think it might help with the final look.
 
Last edited:
I was going to add, I did a couple of longer journeys this week in it, and few small niggles presented themselves that I had not noticed before. There seems to be a rubbing going on when turning at any sort of speed, but it does not sound like tyre on arch, more like brake disc on something else metal. So I will have to strip down the front brakes anyway. Not a major concern, as I have new pads/discs/calipers and lines ready to go on anyway, will do the wheel bearings at the same time, just got to work out the correct way to fit them. There seems to be a lot of argument about the correct method of tightening up the new bearing, so further reading required, I feel.
I also want to re-adjust the handbrake, its raising a little too high before it is effective. So lots more small jobs to do :)
 
Last edited:
Managed to get the garage cleaned up and some new (and softer) flooring down, so much more inclined to get down and get the front brakes/wheel bearings done! So going to get cracking today and start on the last of the upholstery on the passenger side.
 
Looking good man, I really need to crack on with mine, been a bit side tracked the last few months!
 
Thanks :)

Pics of the sorted out garage!
floorsort1.jpg

floorsort2.jpg


Much nicer to work in there now, although, after doing the following stuff, its a bit messy again :p The flooring i used to have in my last place, but it went missing in the move to here, and I am very glad to have it again, makes cleaning up and crawling about much nicer :D

Old brakes, with original wheel bearings,caliper, lines, etc..
oldbrakes.jpg


New Brakes all fitted..
newbrakes.jpg


Terrible pics, but light was going.

New Caliper, brakeline, wheel bearing, disc and pads.

Just got to do the other side in a few days when I get the time, and will hopefully get better pics too :P

I also have yet to do the passenger side trim, but waiting on some new window seal to allow me to do it all in one go :)
 
Thanks :)
They lock the wheels easy enough, so more than adequate. I expect lots of hard work in a short period of time and they would fade badly though.
Will be interested to see how they perform once I have new wheels and tyres though :D
 
Finished off the drivers side interior trim and rear quarter this evening :)

Starting to fit the new seals,bought a long length from ebay, was a lot cheaper than buying bespoke cut ones!
windowseal1.jpg


Almost done, just need to trim it to shape
windowseal2.jpg


All done, corner was not perfect, but it still makes a great seal, better than the original for sure!
windowseal3.jpg


From the inside, excuse the missing trim panel, i removed it when I was using spray glue to keep it safe.
windowseal4.jpg


You can see the newer black trim here, looks pretty factory i think :D
windowseal5.jpg


Window back in, just the centre pillar trim to go back on.
windowseal6.jpg


All done. The window is much better adjusted too now, before it was wedged at the very back, but i adjusted the "hinges" if you can call them that, and it fits much more easily.
windowseal7.jpg


Will be interesting to hear if it is any quieter, the seals are much springier, and slightly larger than the originals :)
 
Last edited:
I did the rear brakes a while ago, but failed to put up the pics....

So, here you can see the old rears were not wearing evenly, so i think the shoes were poorly centre, which gave some poorer rear stopping performance.
oldrears1.jpg


Otherside much more worn...
oldrears2.jpg


more even this side, as you can see.
oldrears3.jpg


Cyclinders seemed ok, even though i managed to pump the brakes without the drums on, and forced some fluid past the seals!
oldrears4.jpg


New shoes, old ones on floor..
newrears1.jpg


Yup, still new!
newrears2.jpg


Brand spanking new drum to cover it all over :D
newrears3.jpg


Hmm, this looks a bit knackered... Someone has been here before and killed this drum bolt!
newrears4.jpg


Mid way through attack with a file
newrears5.jpg


Not pretty, but much better. If i can find some new ones, i will change them in the future.
newrears6.jpg


Dirty old rostlye back in place. Once I get new wheels, i think i will give the drums a going over in black paint to make them look a bit nicer :)
newrears7.jpg
 
Back
Top Bottom