1973 - MGB - Long term project :)

Good stuff, must be nice to work inside :)

I need to change the stub axles on mine, I also bought some new front brakes. MGOC had a deal of drilled and grooved discs plus green stuff pads for £80 in total. Thought it would be rude not too since I was buying the stub axles at the same time.
 
Found some pictures of when I pulled out the interior and carpet, will get that up here asap :)

Let me know what the brakes are like when you try them out!
 
Ok, so an update on the passenger side, some better pics this time :)

So, here is the old passenger side front. Interestingly enough, the caliper looks to be much newer than the original one, so has been replaced at some point.
oldaxle1.jpg


New caliper with new line, ready to go on
newcaliper1.jpg


New caliper plumbed in, it just 2 bolts to remove the old one, and undo the line and refit, its a bit messy as some of the brake fluid comes out, but a quick change and the mess is minimal. I bleed them later on so any air in the system is not a problem at this stage.
newcaliper2.jpg


Since the car has to be jacked up to get to the brakes, undoing the hub bolts is a pain, so i use my breaker bar to jam it against the floor, and break the bolts. I think you can see what i mean here
removehub1.jpg


Hub off, and all the parts in the hub removed.
hubremoved.jpg


All that is the left on the car, which is the pin that sits inside the bearing, you can see the rear shell of the bearing still on the pin.
allgone1.jpg


The old grease inside the bearing I clean all this out, and put in new grease before rebuilding the bearing:
insidebearing.jpg


Now you can see all the old bearing internals on the right, some parts are cleaned and re-used, but the rest is all changed. The bearing shells were looking great, so they styed in. I don't have a press, so that was quite lucky. Otherwise I would have had to wait and get them changed somewhere else.
oldandnew.jpg


The MGB bearing is a bit different to modern and most others, the parts are built up, and then you use the small washer shims to adjust the fit. You use a torque wrench to adjust the crown bolt to 60Nm. If its too tight, remove a shim washer, too loose, add one.
Often people over torque the bolt to get the right fit, and this is not right :P
So, here it is partially re-constructed, with new seals and cleaned internals, some grease wedged in too.
newdiskonhub.jpg


Bearing re-constructed and refitted. Jammed a load of new grease in. Bolt torqued up, and split pin re-fitted.
refittedhub.jpg


Grease cap on, re-fit caliper, fit pads as per usual, and you are basically done!
refitcaliper.jpg


Awesome :D
 
Top work, it's made me wonder if I should do my bearings at the same time as doing the brakes :)

The fuel pump has gone on mine, just a cheap plastic one and one of the plastic welds has split.
 
Top work, it's made me wonder if I should do my bearings at the same time as doing the brakes :)

The fuel pump has gone on mine, just a cheap plastic one and one of the plastic welds has split.

If you are doing them, already, it's silly not to. You will just be repeating a lot of the work if you have to do it later! Its really not complicated, and very satisfying when you see the wheel spin 10 times better than the old bearing :D

I was toying with taking off the backing plates too, and grinding/sanding them back and giving them a few coats of black to make it look like new, but time was a bit short, and I wanted to be able get it back on the wheels that evening, so left it for next time, like the rear drums, which will get the same treatment.

I think the fuel pump on mine is original! Still seems to be going along well enough. I think it will get a refurb/replacement when I eventually do the full re-build in a few years.


This is my current plan -Most of the stuff I am putting in now, will stay after the distant scheduled full rebuild. Nothing will have worn enough to warrant replacement, and if any parts are duff, or not to my liking, then I can swap them out at that stage. Also, taking apart recently added parts is much easier than old ones, so my feeling is that whatever I can do now without taking it off the road for ages if only going to make the rebuild easier.

The suspension is in need an over-haul really, the rear leaf springs are almost flat and the bushes/etc are somewhat worn, so currently I am in two minds about tackling that pre or during the full rebuild. I like the idea of upgrading the suspension to some more modern stuff from Moss ( http://www.moss-europe.co.uk/Browse...CatalogID=37&PlateTypeID=1&SubcomponentID=523 ), the Frontline Five Link Rear Suspension System looks awesome but the costs might be challenging to swallow, depending on what I can re-use from the original setups. If they are totally shot, and nothing is sensible to be re-used, the costs might become more palatable!
 
Yeah that's what I was thinking :) Ordered the bits, timken ones :) I had to buy some stainless back plates for mine as the ones on are totally knackered.

When I got the car I saw it had a cheapy plastic pump on so I've done well to get two years from it. I've ordered the proper SU one to go on.

I upgraded my rear suspension to composite leafs and bilsteins but it gets very bouncy with under half a tank of petrol. I'm hoping it's still settling in a bit. The fronts are still lever arm though.
 
Does it handle much better, minus the bouncy part?

I didnt realise the back plates were so cheap! I think I will just get a couple in ready for when I next have the hubs off :D (£7.45!)
 
Last edited:
I think so, it rarely breaks traction and I've had no issues during the winter either. With MGB parts its often cheaper to buy new than faff about with the old bits :D
 
Latest news.....

The car is now even, the passenger side and drivers side are matched again. I have finished all the pillar trims, and fitted the new window and door seals. The windows are back in, and I decided to try something a bit different for the door seal cappings.

capping1.jpg


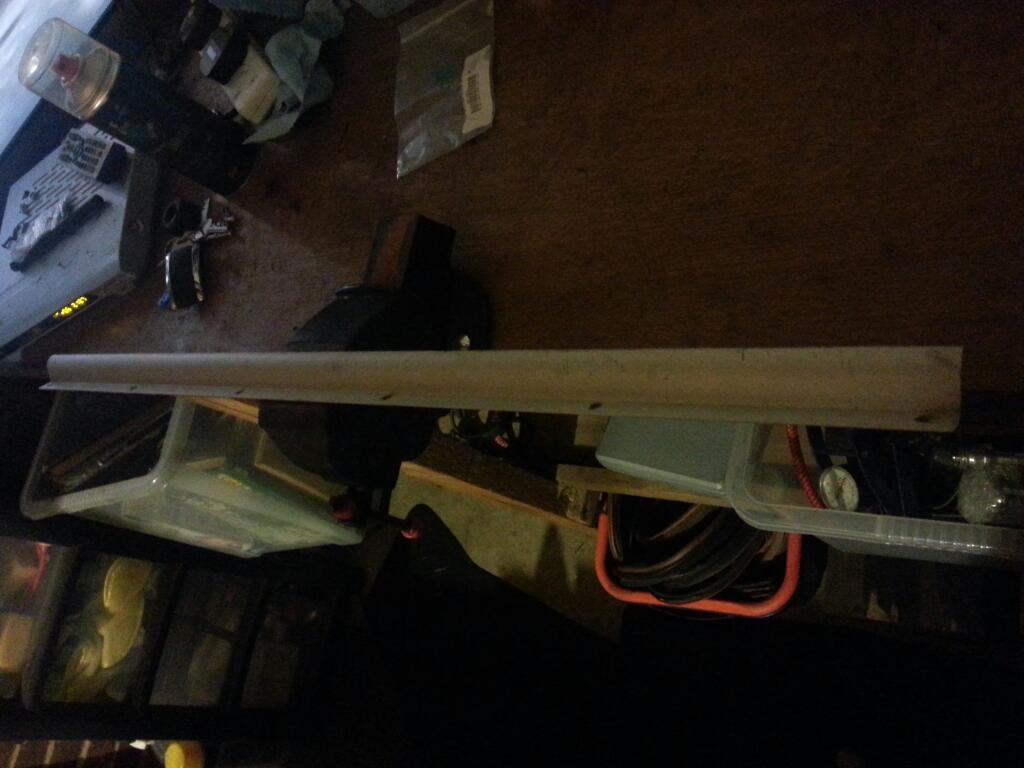
These are the small alloy pieces that hold down the door seal at the bottom and protect the seal and some of the sill. I wanted to make them look a bit nicer, and polishing did not work too well, Hammerite black paint scratched too easily, so I thought about powder coating them, when I remembered I had seen some videos of Plastidip online ages ago.

So, ordered a couple of cans, and went to it :D Here they are with 3 coats on. Looks like this might work ok :)

capping2.jpg
 
If you think hammerite will scratch, you've got a whole new world of fun with plastidip. :D It'll scratch and peel over time, although it is durable and is cheap and easy enough to redo so isn't too bad (peel off and respray).
 
If you think hammerite will scratch, you've got a whole new world of fun with plastidip. :D It'll scratch and peel over time, although it is durable and is cheap and easy enough to redo so isn't too bad (peel off and respray).

Will see how it stands up..

I am now also having ideas of preparing and then spraying the whole car with this stuff as the existing white paintjob is really showing its age right now :(. However, I would use a proper spraying kit, not rattle cans. I suspect its a bit more resilient when done that way.

I have been watching some dipyourcar videos on youtube and the process looks pretty neat!
 
A good scour then some acid etch before the next coat should have worked well on the shiny metal bits.

I had to change my fuel pump, it had a cheapy plastic one fitted which had gone internally. Got a proper SU one back on now :)
 
A good scour then some acid etch before the next coat should have worked well on the shiny metal bits.

I had to change my fuel pump, it had a cheapy plastic one fitted which had gone internally. Got a proper SU one back on now :)

I know, but I decided to take a look at this plastidip stuff, as I might have more plans for it later...

The sound of it priming when I turn the ignition reminds me so much of when I was little and getting ready to go out in the car with my Dad :D

Do you get the same clicking now?
 
Took this out of hibernation on Sunday Morning, had to jump it though (after usual checks). Took a few turns to kick it in, but the replacement electronic ignition really seems to have helped with cold starting. Took out my toddler with me for his first go in the car too. He loved it!!
All feels good, but I am going to have to get new tyres soon. These are just too old now, and lacking in grip compared to more modern examples. This means it seems silly to replace them on the old wheels, so new alloys are on the cards now.

I am looking at something like this:
http://www.ebay.co.uk/itm/311292260234?_trksid=p2060778.m1438.l2649&ssPageName=STRK:MEBIDX:IT

As an-homage to the rostyles with the colour, but looking much nicer, but overall still in keeping with the exterior look and feel. Also, anyone have any tyre recommendations for the 185/65/15 for the MG?

With the new interior, seat belts and seats the car really feels great, especially now it is all clean inside. I also seem to have a lot less in the way of rattling and road noise too.
 
New wheels :D
Tyres incoming.
Failed the MOT on the tyres, so decided it was a good time to upgrade.
minilite1.jpg

minilite3.jpg

Probably re-MOT by next weekend :) Everything else was just some advisories that I was planning to address soon anyway.
 
Back
Top Bottom