A Window To Wales

Exactly mate, said in my response that had the original ETA been 6 months it wouldn't have bothered me, it was the fact I was getting excited for it to finally be despatched only to be told it then hadn't... Repeatedly.

Certainly renewed my confidence in them though so long as it does go smoothly this time. Maybe MiniW2W is go after all! :D
 
Nice, good news then mate... Agree with the above its clearly some problems so hopefully on the road to improvement. If you happen to chat to them again would you mind asking for rough lead times on standard and custom work currently? I'm sure a lot of people would be interested (myself included) for reference in case we want to order.
 
Definitely mate, after a few weeks of absolutely nothing going right it seems things are looking up today. First had the good news on the case then the GF found out that she can get a Visa to live in NZ that would also cover me... Changes are coming (hopefully!) :D

No worries, will probably be in contact again when it arrives Monday or Tuesday so will remember to ask then :) unless of course Mads can answer here?
 
Sounds like it should be a MiniW2NZ then!
Lovely place NZ. Nice people. Not very keen on central heating...or much heating in general...which is fine in the summer...but in the winter you REALLY have to need the loo before you'll get out of bed!
 
Been out there 3 times already mate, absolutely love the place! Be nice to have the cash to stay up north in the winter where it's hot all year round then go down south for summer, but as we'll probably be slumming it on awful wages just finding somewhere to sleep will be a start!

Now that's not a bad plan... Parvum MATX black on black, fern inlay in the front... FFS it's sounding expensive already :D
 
Definitely mate, after a few weeks of absolutely nothing going right it seems things are looking up today. First had the good news on the case then the GF found out that she can get a Visa to live in NZ that would also cover me... Changes are coming (hopefully!) :D

No worries, will probably be in contact again when it arrives Monday or Tuesday so will remember to ask then :) unless of course Mads can answer here?

Apparently NZ is the hardest place to get into VISA wise. It's also supposed to be one of the most beautiful places to live in the world, so I would be jumping in feet first with both feet mate.
 
Luckily the missus works in a BUPA care home and has enough qualifications + experience that she'd be allowed in. Now just need to start saving (after the PC is finished obviously!) then get job hunting :)

Definitely head out there if you ever get he chance though mate, even if it's just for a couple of months. Truly stunning place to travel around :)

I've seen quite a lot of the world for an Aspie but yeah, I would love to go to NZ. Sadly in my adulthood I have stopped flying.

It looks (NZ) like the absolute best parts of Britain (the scenery and views etc) but with much better weather and a better way of life.
 
The scenery out there is on a different level, it's like they've taken all the best parts of the UK, photocopied them on a x5 magnification and then added in a few massive fault lines & volcanoes just for a giggle. Even manages to make Wales look boring :p

Their whole way of life is just how it should be really, kids outdoors messing about and playing sports, not sat at home all day playing on the Playstation. Guess that could also explain why they keep smashing us on the rugby field... :D

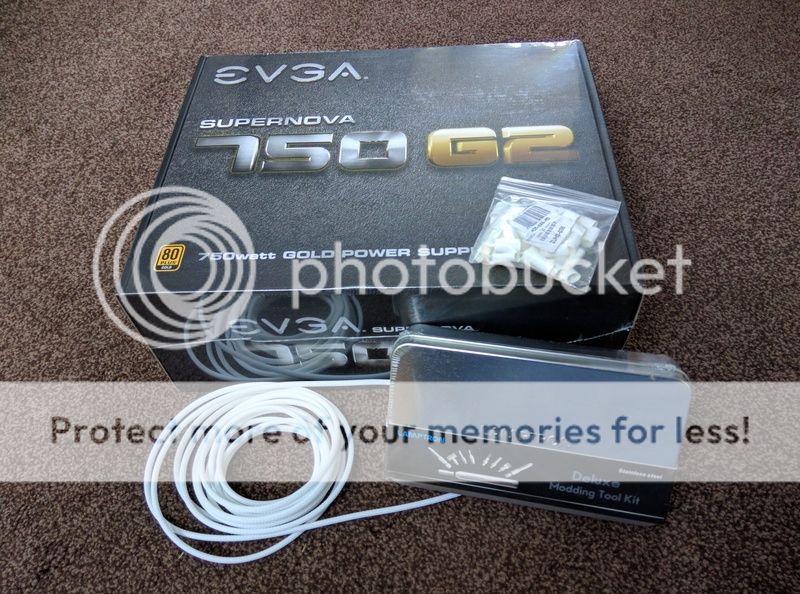
Oh yes, and before I get too side tracked thinking about my favourite place in the world again, a couple new toys just arrived via DPD :)

IMG_20161111_133938.jpg


Have gone for the shinier, plastic finish in the end as I decided with dull pastel coolant it might add just a tiny bit more of a 'pop' to the overall finish.

Now for a quite possibly very stupid question: What's the best way of removing the old heatshrink / braiding from the standard cables? Is it just a case of being very careful with a sharp blade? Cheers :D
 
If it's just heatshrinked at the end, if you can nick the end, you can sometimes then tear all the way down the tube. The sleeving itself should slide off...for a given definition of slide. Depending how tight not is, you may have to inch it down in waves sort of like a caterpillar - if that makes any sense. As it gets compressed lengthwise, it expands widthwise so you can get it moving a bit.
De-pin'ing ATX pins is a bit of an art and a pain in the backside. Be careful you don't bend the spikes of the tool, some of them (ie my cheap one) can bend fairly easily. If you need to get sleeving over a pin (which is a bit spikey) you can put a bit of heatshrink over it. Shrink one end so it acts like a needle and shrink the end that's on the pin just enough that it grips it but you can get it off and reuse it for the next.
 
Some top tips right there, cheers mate :)

Won't be about for a day or 2 but will have a shot at it early next week and see how it goes. If it all goes to plan then brilliant, but if I did end up screwing it up it doesn't really matter as the original plan was to get some ready made anyway, so all it would have cost extra is a couple of quid for the sleeving and a bit of my time. Only bought a short length of white for this very reason :D
 
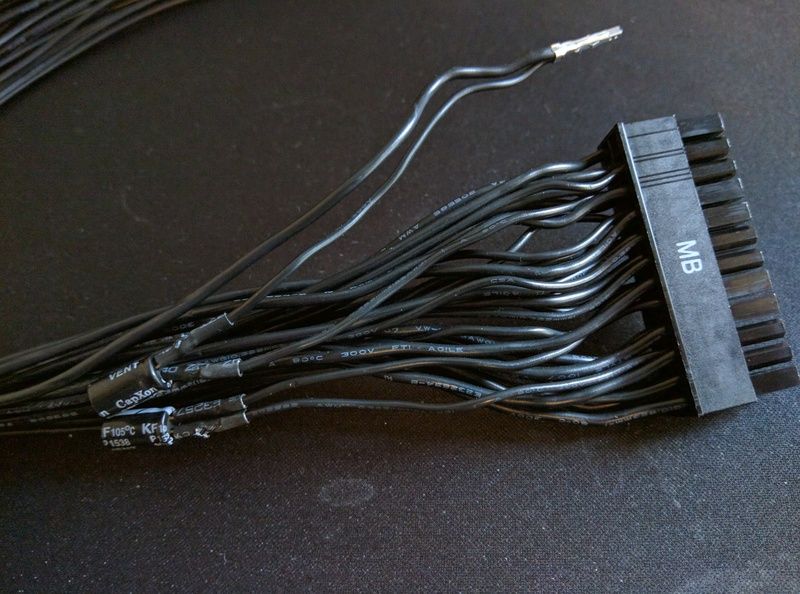
Thought I'd just remove the heatshrink & braiding from the MoBo cable to see how the white looked and... Yeah, not exactly what I was expecting! Why, with a cable that long, do they have to put the awkward **** right on the end that shows?! Come on EVGA, I'm bad enough at things like this without you making life even more difficult :mad:

IMG_20161111_154453.jpg
 
I'm far from an expert here - you're probably better asking the likes of JR23, Davido Labido etc. From the little that I do know, some PSU cabling has splits whereby one wire connects to two pins or two wires join to one pin. In some cases it may be safe to re-wire these straight through...but you need to be looking at diagrams of the pinouts and asking people that have done this before.

The little black canisters that you can see are capacitors and they look like they're wired across two of the other pins that have their own wires. These are likely to be there to smooth out any voltage ripples that might occur. I have no idea whether it is safe/advisable to remove these but research it, you might find that it's something that makes no difference unless you're pushing the PSU to the max....or you might find it'll release the magic smoke. *shrug* Check with someone who knows what they're talking about first though! :D
 
I was a bit confused as to why there were capacitors across certain pins like that, but smoothing out any ripples seems like a decent enough explanation :)

Just don't understand why they feel the need to put them right on the end that's visible. Could they not have put them the other end where nobody would ever see them?! Proper PITA unless I can safely remove them. Will ask in the PSU forum and if there's no response... Erm... Yeah, could be worth a punt anyway :D
 
I think the idea is something like to be as near the load as possible so that the response time is as short as possible or the losses from wire resistance are as low as possible. Otherwise they'd put them in the PSU itself. I don't know how much difference it makes though.
 
Ah that makes sense. Not convinced it would make any difference at all in real world conditions but guess the guys in white coats tested it in lab conditions and managed to convince the pen pushers it was a good idea! Might just solder in longer pieces of wire so the capacitors are hidden out of sight behind the motherboard :)

Oh yes, and I am now beyond happy. IT'S ON ITS WAY! :D

Screenshot%20from%202016-11-11%20191422.png


Cheers for finally sorting it guys, can't wait to see it in the flesh and start playing about with some new ideas :)
 
If you're going to make the wires longer, you'll still have issues getting multiple wires down one sleeve (depending on thickest of wires, solder joint, heatshrink and sleeve diameter). Might not be far off having the caps at the other end which would he easier to sleeve. Worth checking up the consequences though.
 
I'm really not sure why all you guys think my builds don't get delayed and I don't have to wait for things too, customers come first, just look at how long it's been since Justin played with his own build HOF. As mads1 says though I do all drawing in my own time, all the little secondary ops and sometimes source materials too. Glad that the case is on it's way to you now anyway, I would have replied on here yesterday (I tried) but ran out of time to trying to step around the political ****storm.

The capacitors in long PSU cables are to help achieve even tighter ripple suppression, obviously there are way more capacitors in the PSU and on the board itself. So really all the extra intermediate capacitors are doing is helping it to look great in PSU reviews (well unless you enjoy excessively consistent power). Putting them at the PSU end or on longer wires would partly defeat the point in them being on the wires in the first place.

The only PSU i've sleeved with caps is an EVGA 1200P2. I made all new wires and left off the caps completely and made the double wires split half way along by soldering 3 wires together and sleeving that from all three ends. Personally and especially as your using white sleeve I would go down the route of making up new wires, if you use 16 or 18AWG white PVC insulated wire the sleeved cables will hold their shape much better and also look a lot more vibrant. But you are then getting into the territory of buying crimps, blocks and of course all the tools on the first time around. However then you can hone things exactly as you wish, getting the perfect length, perfect curve and learning lots of skills along the way.

The sleeved EVGA kits for the G2/P2 don't have any caps by the way.

JR
 
See, I said JR23 would know! Can I have a gold star now? :D ;)
I can recommend the E22 crimps for ATX pins - in so far as they're the best of the two I've tested so far! Work nicely for ATX. Not so hot for DuPont or fan pins - they tend to squish them a bit too much but if you release the ratchet a bit early they're quite reasonable.
Knippex strippers are also a joy. The depth stop on the recommended ones doesn't go short enough but you can - so JR23 tells me - do it reliably by eye. Otherwise, the 12 40 200's are your friend.

JR: What's your recommended way of getting a nice curve on the last bit of an ATX connection? I'm talking cable coming up the back of the motherboard plate, through the grommet and then a smooth 180 arc to the connector. Do you keep the wires the same length and try to lose it elsewhere, snip off a set amount on the inside wires each time or have to measure each time? When stuff stops springing leaks I'm going to be sleeving the last few inches of an existing cable - I want to keep the initial part as small as possible in a single sleeve. Cheers.
 
If you get heavy PVC wire it always wants to stay curved like it was on the spool so by putting the crimps on facing the right direction it pre-trains itself into a curve and then nice tight fitting sleeve helps it out even more. Some people use silicony insulated wire and that bends far easier and doesn't try and resume it's original shape so that can be an advantage. Using different lengths, unless it's really short won't help to make it curve but it will help to make it not all cross over and turn into a giant mess. Getting the style you want is just a combination of everything.

I started to use the Molex USA crimps from MDPC and they are ace, flawless with 18 AWG 2.9mm OD wire. < this is way my favorite wire, it's big but it stays parallel rather than bunching together and insulation interacts with the sleeve just right.

JR
 
Back
Top Bottom