A Window To Wales

Soldato
Joined
26 Sep 2010
Posts
7,157
Location
Stoke-on-Trent
Are you stripping the anodizing off the backplate before you paint it? Don't do what I did and get the water temperature too hot or you'll scare yourself :D

They do come up rather nice in raw aluminium, but you could probably do a better job of finishing the surface than me because you're painting, I wanted to keep the alu.
 
Associate
OP
Joined
22 Nov 2015
Posts
997
Location
Wales
Not sure if this'll come under "Cool!", "Don't care" or "Why the $%#! didn't you tell me this before?!" but assuming that Aquaero 6 LT's are like 5 LT's, you can - if you have room to mount it - mount one with the screen and have the other one as a slave connected by Aquabus. Just did a quick Google and it looks like although it's possible, you lose features on one. Discussion here if it's of interest.

Always planned on keeping them completely separate to be honest mate, got the one in the roof for the top loop and will mount the other between the bottom radiators to control that loop.

Original plan was to use a smaller top reservoir then mount the 2 Aquaero's below with screens on, but decided it looked better with a longer res & pump housing attached so hid the Aquaero's instead :)

Are you stripping the anodizing off the backplate before you paint it? Don't do what I did and get the water temperature too hot or you'll scare yourself :D

They do come up rather nice in raw aluminium, but you could probably do a better job of finishing the surface than me because you're painting, I wanted to keep the alu.

Was hoping to get away with just sanding to a decent surface then spraying it, so will try that first and see how it goes! If it all goes **** up then guess I'll be stripping it properly :D
 
Associate
OP
Joined
22 Nov 2015
Posts
997
Location
Wales
That's what I was hoping to do so we'll see, if you hear loud swearing in a Welsh accent its gone horribly wrong :D

Cheers, will hopefully have a finished piece by early next week :)
 
Associate
OP
Joined
22 Nov 2015
Posts
997
Location
Wales
Sooooooo MOAR ISSUES! The EL Panel for the floor arrived today, which put a smile on my face right up until the moment I connected it to the PSU and turned it on. It works, but only for about ½ a second before going off again for 2½ seconds, flashing like this constantly but not staying on... If anyone has any ideas WTF could be wrong that would be brilliant because I'm stumped! Should add I connected it to a Molex which I also tried with a different, smaller panel and all was good with that one, which baffled me more.

In slightly better news I owe a massive thanks to Cenedd, that £2.50 spacer you suggested worked a treat cheers mate :)
 
Soldato
Joined
4 Jun 2007
Posts
2,618
Location
Watford, UK
No problem. Glad it worked - bit of a long-shot but *shrug* :D

Flashing: Have you tried putting a bit more load on the PSU just in case it doesn't have enough with just the panel's driver? Some unmounted fans are usually good for taking your fingers off while you're not paying attention to them (Delta, I'm looking at you....with your hover-fans of doom!)
 
Associate
OP
Joined
22 Nov 2015
Posts
997
Location
Wales
I didn't try that mate, but as the smaller panel worked fine I'm leaning towards inverter issues. Have emailed them explaining the issue so will see what their response is before swearing at it and kicking it a bit harder.
 
Associate
OP
Joined
22 Nov 2015
Posts
997
Location
Wales
First up I've not heard back re the EL Panel yet so that is still on hold...

Anyway, you know when you have one of those days where your head really isn't right, and you know everything's going to go wrong? And then it does, but you keep ploughing on anyway? Yep, today was one of those days :(

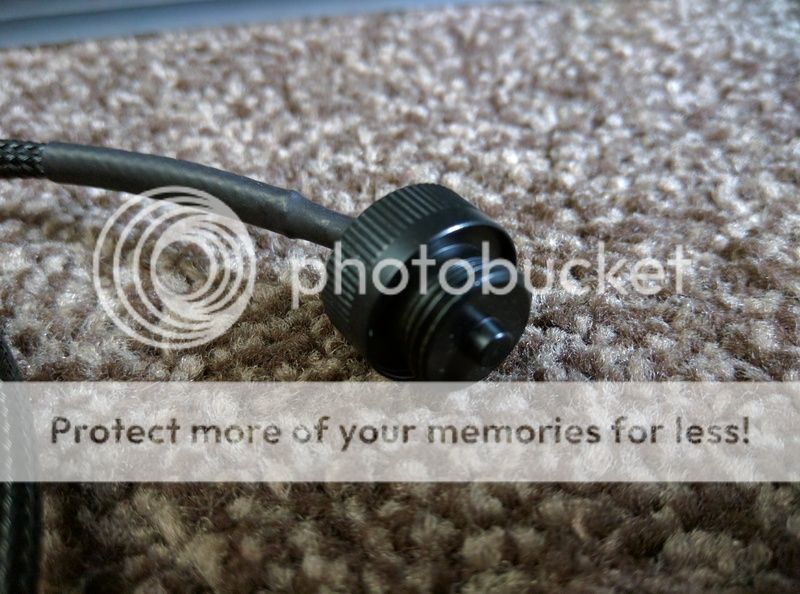
Lets start with a moan! Ordered 2 of these Monsoon temperature sensors and both came without rubber o-rings. Not just they weren't pre fitted, they were non existent. Good job I had some spares!

Then screwed one in and the thread is that tight I actually had to use pliers to remove it. Hardly screaming 'quality product' so lets just hope it actually works once fitted.

IMG_20170201_095627.jpg


Better news: It points in the right direction!

IMG_20170201_095754.jpg


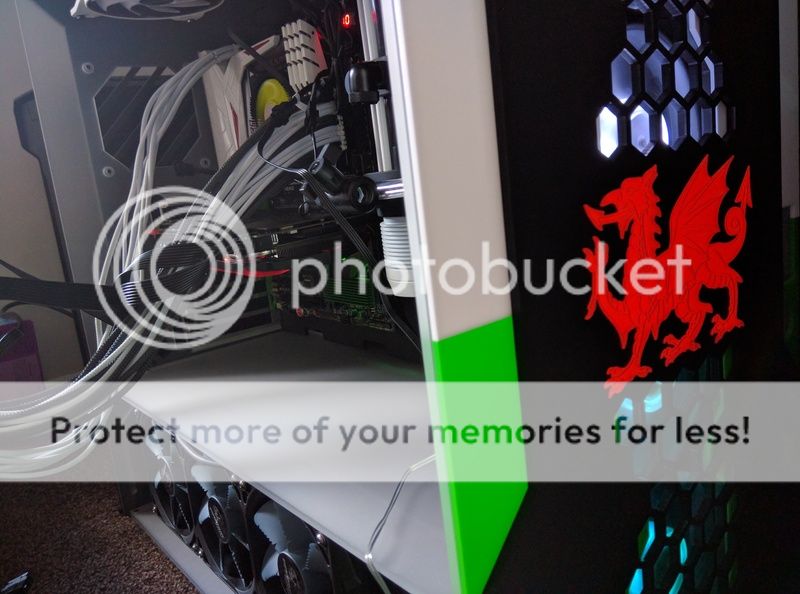
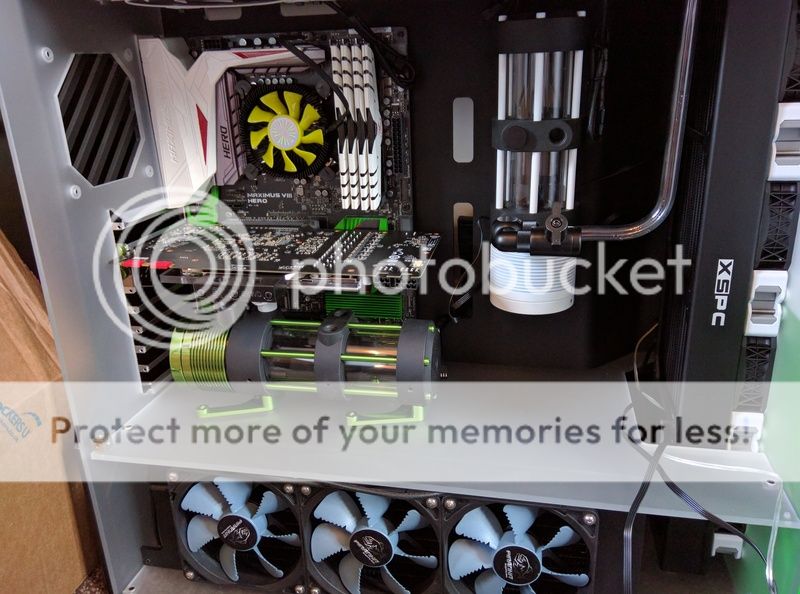
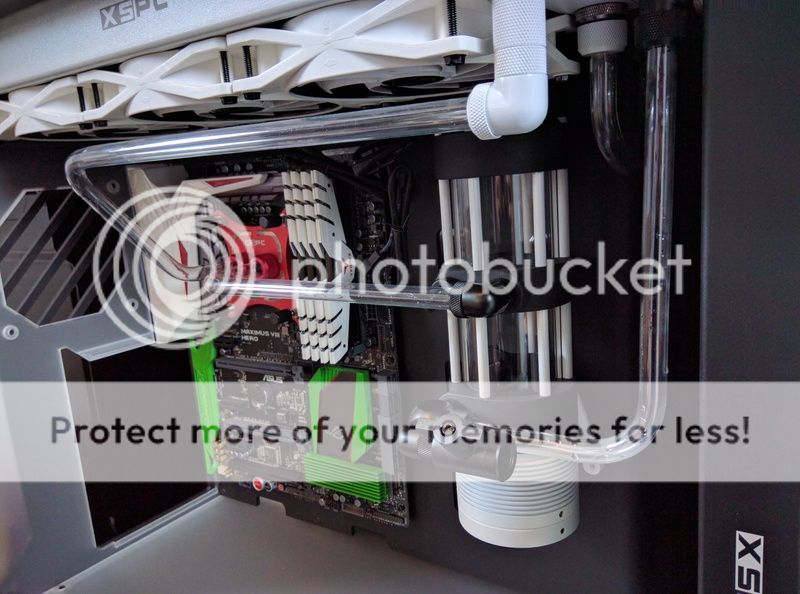
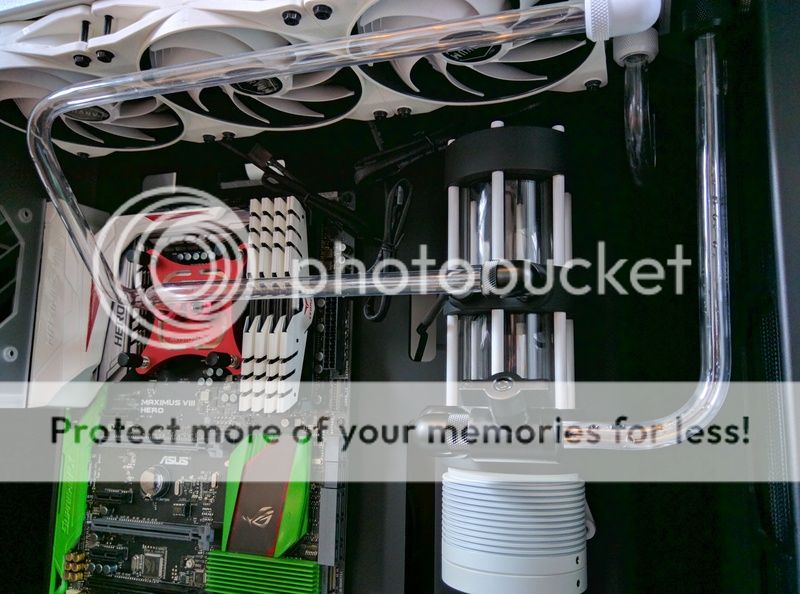
So onto the loop. Firstly I re did the small piece joining the 2 radiators so it (in my eyes at least) looks better. Then changed the CPU > reservoir so it A) looked straight and B) went into the other port on the res. Reasoning? To hide the temperature sensor and cable :)

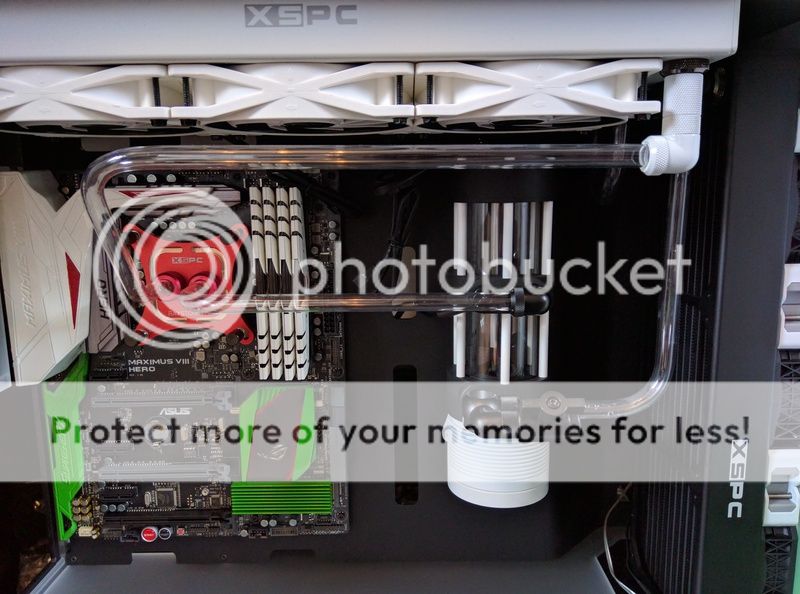
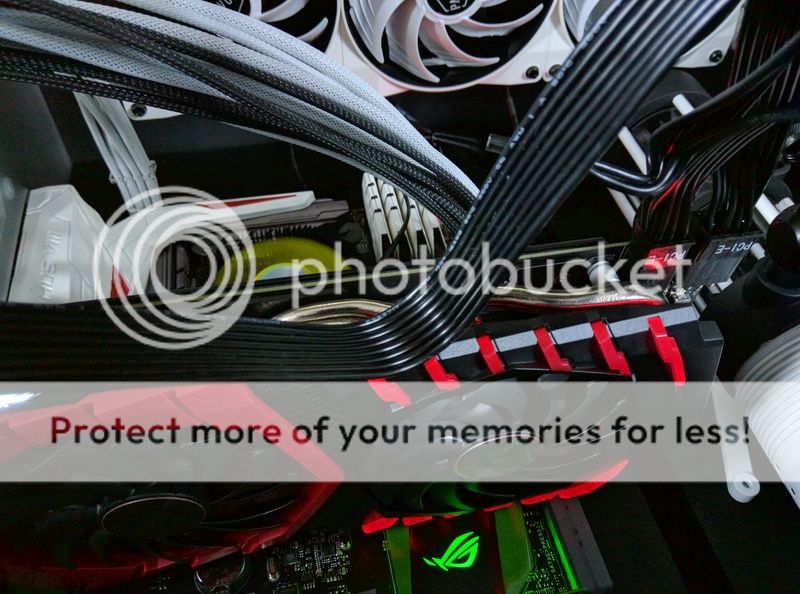
Finally I got the last section done, but unfortunately it's not perfect by a long way as I was getting massively frustrated by then :mad:

IMG_20170202_141346.jpg


Not too bad, and as you may have noticed I also added a draining valve. Looks fugly but worth spoiling the looks a little for the hassle it removes later on :)

IMG_20170202_141410.jpg


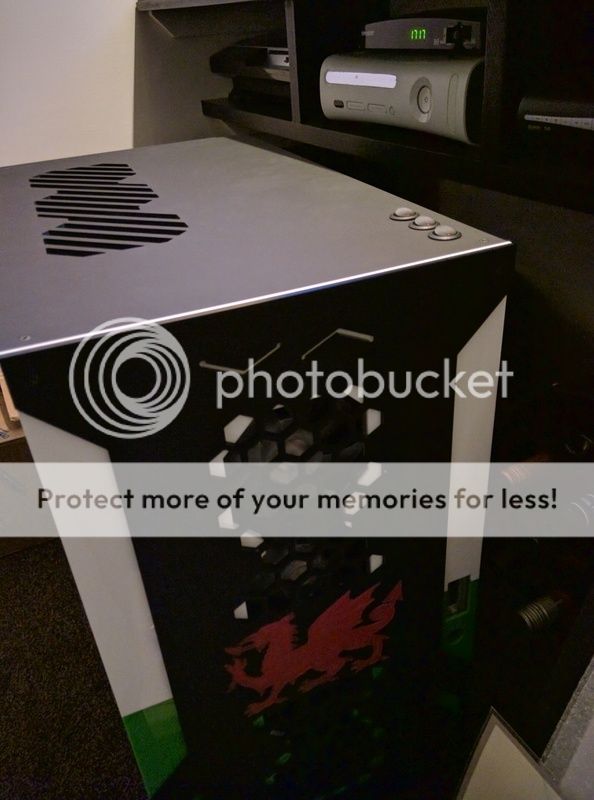
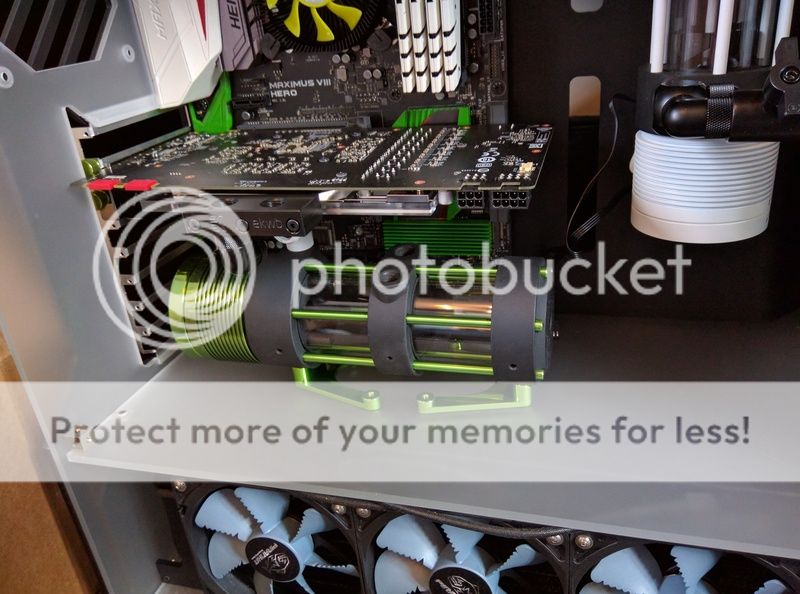
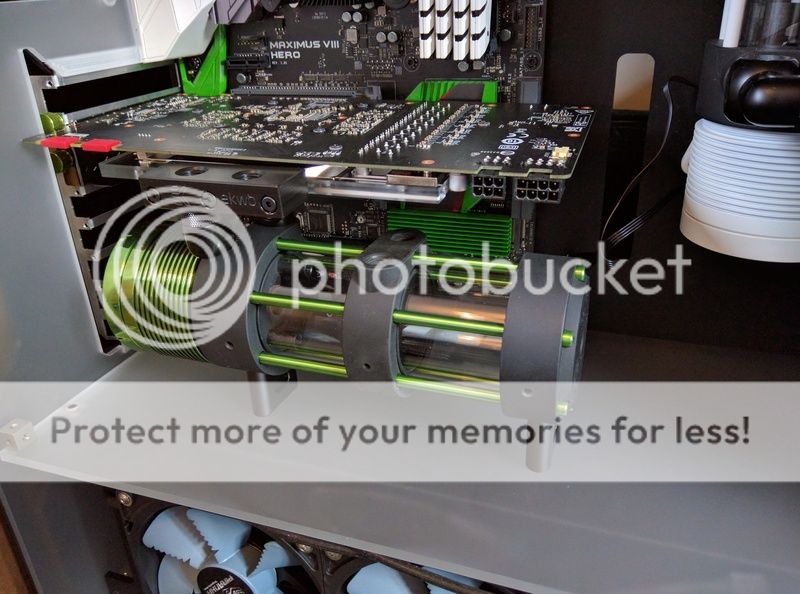
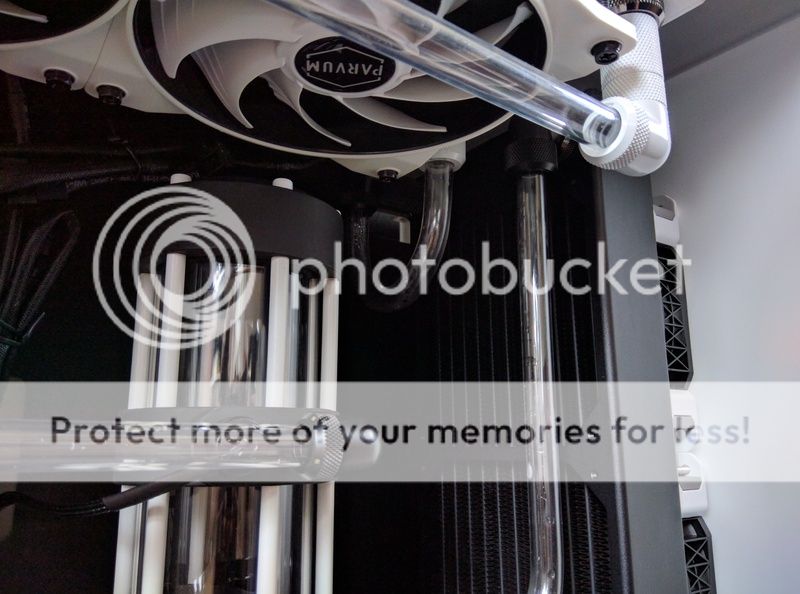
The new, smoother, loop. May shorten it a bit so it doesn't drop down quite so low.

IMG_20170202_141421.jpg


Sensor hidden, tap added :)

IMG_20170202_141452.jpg


Fairly happy with how it looks but might still change a few things...

IMG_20170202_141551.jpg


And that's when I should have called it a day as my head really wasn't good by then... But I didn't. I wanted to refit the old CPU cooler and install the GPU to test.

So what exactly did my extremely sleep deprived and ****
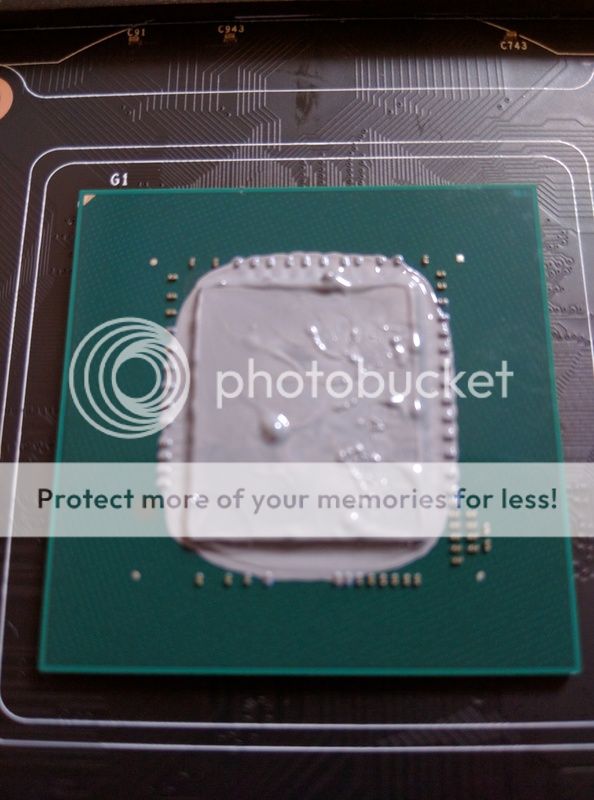
ed off mood end up doing to the build I hear you ask? Well it damn near cost me a £200+ motherboard. How? Well, after removing the CPU cooler I cleaned the CPU up, chucked a pea of paste on and attempted to install the crap cooler, but the pile of junk wouldn't 'click' into the motherboard. So I removed it again... Dripping a nice glob of thermal paste over both the motherboard and RAM.

But wait, that's not so bad! It got worse. Removed the CPU so I could clean it up properly and in a ****ed off mood I was rushing about a bit and yep, snagged a couple of the motherboard CPU pins with some kitchen roll, bending them up and to one side... :mad:

So that was fun! After shouting '****' so many times the neighbours probably thought the entire series of Father Ted was on TV I bent them back as straight as I could, installed the CPU & cooler and held my breath... THANK **** FOR THAT, IT LIVES!! :D

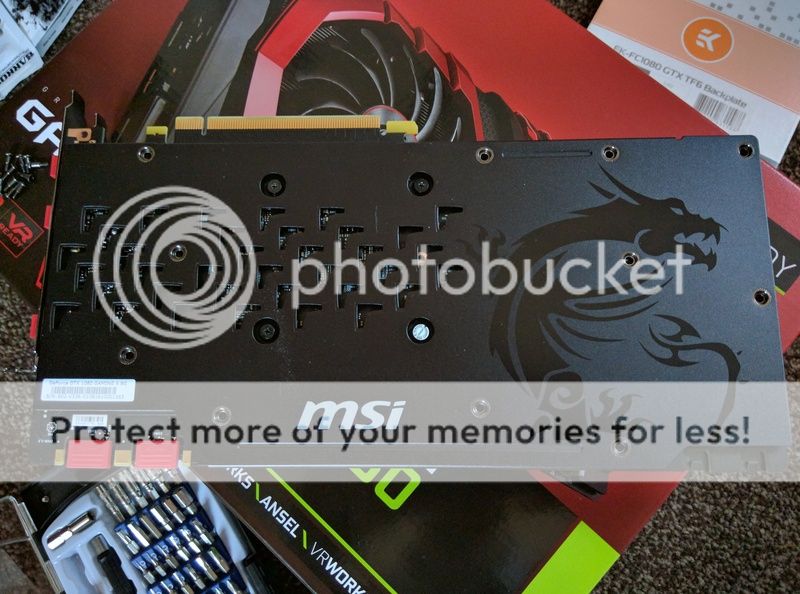
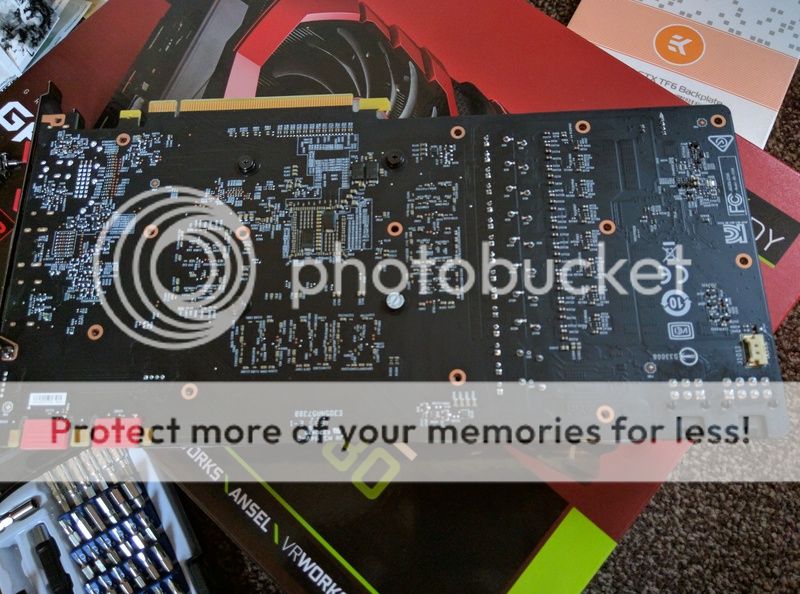
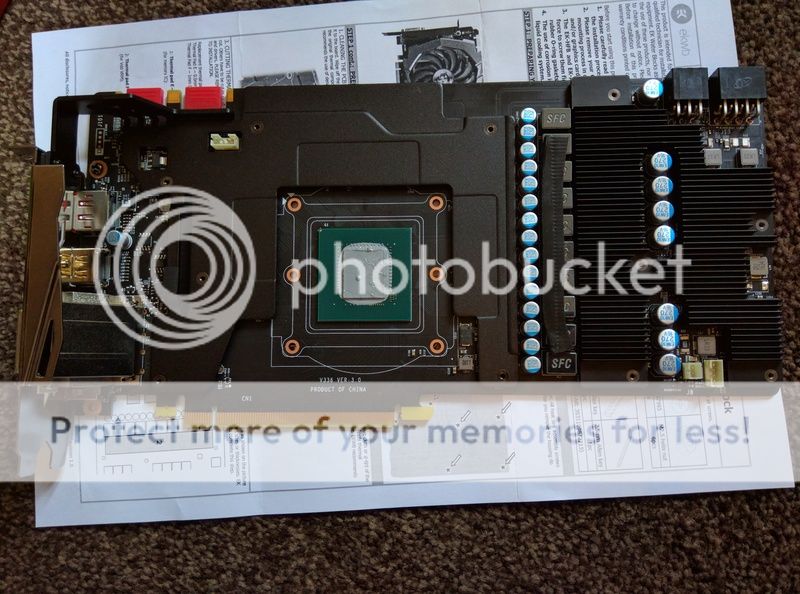
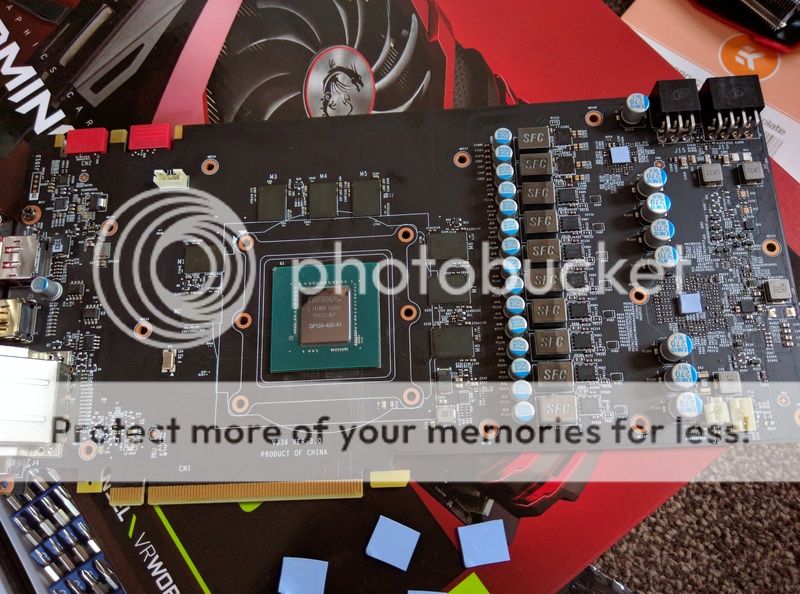
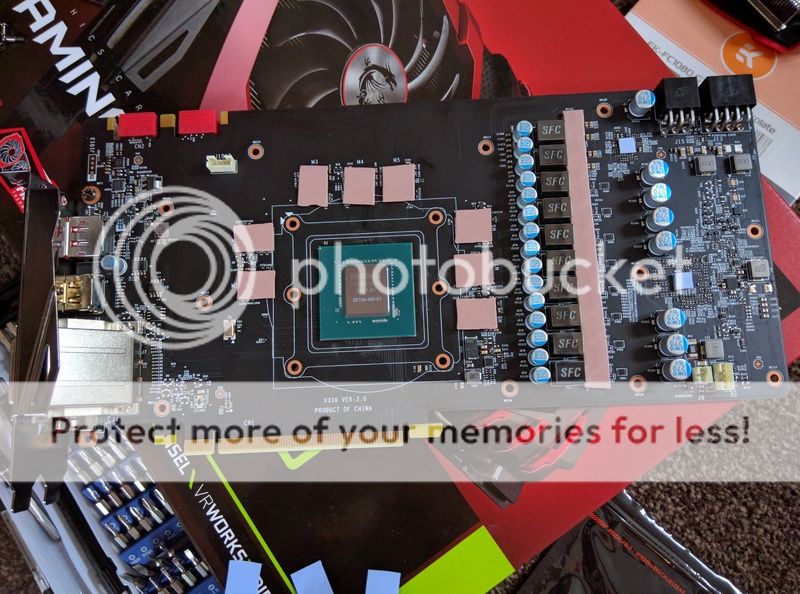
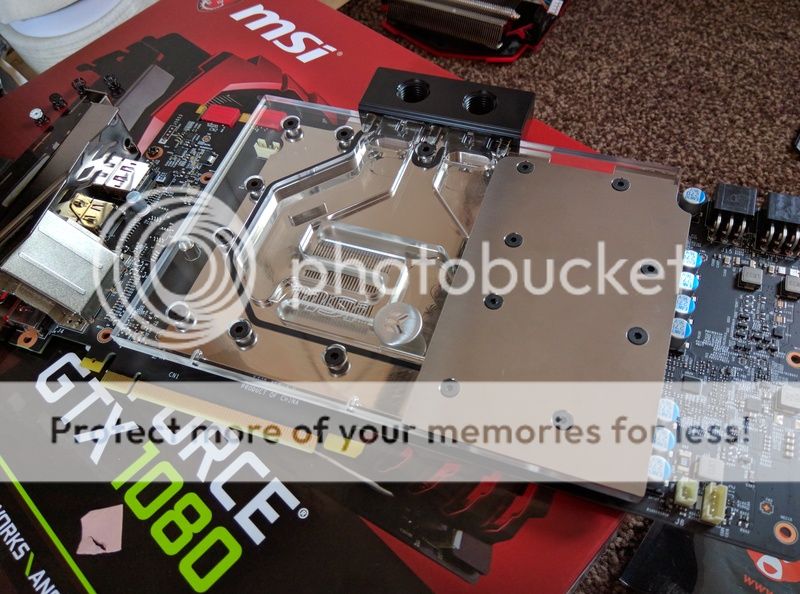
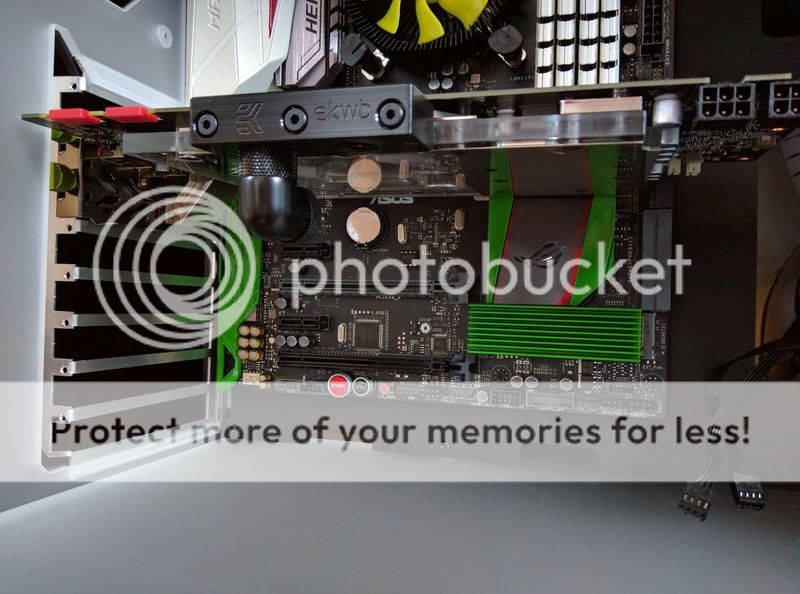
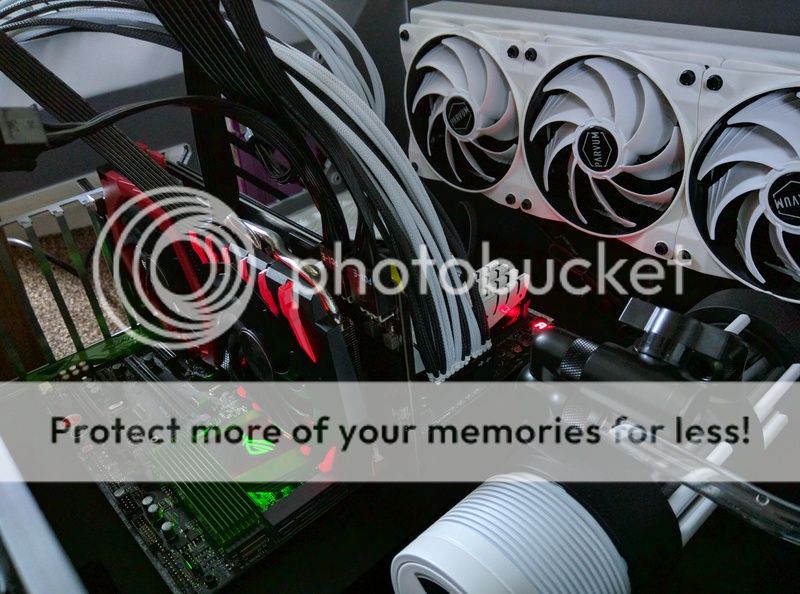
Finally got around to trying out the GPU and happy to say it worked like a charm. Not pretty, but I'll take 'working' for now...

IMG_20170202_154909.jpg


IMG_20170202_154919.jpg


Installed the drivers and 3Dmark etc to stress it and all appears OK, so will give it one more thrashing when I get 10 minutes just to double check and then it will be put under water. That's it for now folks, I'm off to chill with a bucket full of our home made wine and some crap TV :D
 
Soldato
Joined
4 Jun 2007
Posts
2,618
Location
Watford, UK
Anyway, you know when you have one of those days where your head really isn't right, and you know everything's going to go wrong? And then it does, but you keep ploughing on anyway? Yep, today was one of those days :(

Oh yes, those days are more than familiar!

Sounds like the monsoon sensor fitting are a bit dodgy. Expect that from Phobya but Monsoon are supposed to be better.

Better news: It points in the right direction!

Yay! That's better.

Not too bad, and as you may have noticed I also added a draining valve. Looks fugly but worth spoiling the looks a little for the hassle it removes later on :)

It seems far too hard to add a neat drain valve. I really want an all-in-one T-piece and tap so you can just have it inline but screw a fitting into the side to drain. By the time you get a T-piece, connector, tap etc it's so big and unwieldy there's not much you can do with it. I could do with another drain in my loop as my loop goes up at each side and then back down....so there are two entirely separate low points. Currently I'm relying on the Vax to drain one side!
And that's when I should have called it a day as my head really wasn't good by then... But I didn't.
Hindsight is a wonderful thing....but innately useless in advance!

So it's not just me that finds thermal paste has an annoying habit of getting everywhere even when you're being careful :D Comforting to know!
 
Associate
OP
Joined
22 Nov 2015
Posts
997
Location
Wales
To be fair to Monsoon I have used quite a lot of their parts in the past and this is the first issue I've had, so hopefully this is a one off and normal service will be resumed.

Never used anything made by Phobya yet, mainly because of things I've read on here... Are they really THAT bad? Always good to know who to avoid! :D

A small drain built into a T-piece would look far better mate, the current design is pretty much the worst of all worlds IMO. Even being male on one end would help as at least then it could be screwed into spare radiator ports without sticking out quite so far. Took me ages to decide where to put the hideous thing in the loop, plan A was to put a fill port for the res through the top of the case & then tip the case over to empty... :D

That was honestly the first time I've ever made a complete mess with thermal paste, but trust me to go from a blob of harmless mess to damaged pins in 10 seconds flat! It has helped me decide one thing though: When the CPU is de-lidded I'll definitely be using Kryonaut rather than liquid metal! I know it doesn't perform as well but sounds a lot safer idea when being done by a sleep deprived idiot, and will still be far better than the rubbish Intel use :D
 
Soldato
Joined
4 Dec 2015
Posts
3,221
Location
London
I ordered like 40 of the Monsoon stops, they all came with a black O Ring fitted and colour matching white to install... which doesn't make a lot of sense but I do have tons of spares. The metal seems quite soft so potentially why it got stuck in but this is life with slightly cheaper kit.

Looks like you might beat me to the finish since I just got about 60m of MDPC delivered ready to sleeve the world. Crack on ;)
 
Associate
OP
Joined
22 Nov 2015
Posts
997
Location
Wales
That's what confused me most mate, everything else I've bought off them came with an o-ring fitted plus a spare one, so to have both missing seemed double odd. So long as it doesn't leak once it's fitted though it's all good, just hope I never need to remove it again!

Haha very much doubt that! The amount of work I've got left combined with the minuscule amounts of time I get to actually crack on and do something, I'd be very surprised if this is finished before the end of March. A week or 2 off work and it'd be finished, but being self employed that's not really an option so unfortunately I'm stuck with the odd 30 minutes here and there. Never mind, knew it would be a slow one :D
 
Soldato
Joined
4 Jun 2007
Posts
2,618
Location
Watford, UK
Never used anything made by Phobya yet, mainly because of things I've read on here... Are they really THAT bad? Always good to know who to avoid! :D

Yes and no. They're a budget option. If that's what you're in the market for, fantastic...but the build quality isn't that premium quality you get from the more expensive brands. Functional more than stylish shall we say. Definitely a place in the market for them though.

A small drain built into a T-piece would look far better mate, the current design is pretty much the worst of all worlds IMO. Even being male on one end would help as at least then it could be screwed into spare radiator ports without sticking out quite so far. Took me ages to decide where to put the hideous thing in the loop, plan A was to put a fill port for the res through the top of the case & then tip the case over to empty... :D

Still don't know why nobody does a tap with a male thread one end. Only saves 5mm length but it's almost always what you want, no?
Got any res ports on the back of the res (out of sight)? Wouldn't get you the last bit of the res or pump drained but would do most. You're not going to get the rad drained without tipping anyway.
Another option would be to make more of the drain. You could slap a 90 on the T and angle it down. Then run PETG downwards and have the tap (and safety stop on the end) out the way at the bottom somewhere where it doesn't disturb your clean lines.

That was honestly the first time I've ever made a complete mess with thermal paste, but trust me to go from a blob of harmless mess to damaged pins in 10 seconds flat! It has helped me decide one thing though: When the CPU is de-lidded I'll definitely be using Kryonaut rather than liquid metal! I know it doesn't perform as well but sounds a lot safer idea when being done by a sleep deprived idiot, and will still be far better than the rubbish Intel use :D

I can confidently say it won't be the last time! :p
Apparently the best combo is Kryonaut in the normal place (between Integrated Heat Spreader [IHS] and water block) and CLU between IHS and CPU die. It is possible to remove the IHS completely but then you need special mounting kits and maybe some shims to stop the block crumbling the edge of the die...and the temperatures people have reported are higher anyway - assuming you're not using silly stuff like phase change and LN2.
The CLU is actually quite easy to apply. You just squeeze a tiny blob out of the syringe and it sits there as a ball on the CPU. Then you spread it with the little brush supplied. Tricky bit is that you have to put the IHS back on the top the right way round and then hold it in place while you drop the lever on the CPU socket - it slides otherwise.
I used some clear nail varnish to insulate the gold dot contacts on the top of the CPU. Might have been paranoid but a certain level is healthy, right?! :D
I'd say CLU is probably the cleanest of all the TIMs I've used....and I can always manage to get some on me/board/table/case!
 
Soldato
Joined
4 Jun 2007
Posts
2,618
Location
Watford, UK

Wasn't aware of it....but I suspect I may have ruled it out after sorting by price! :eek: It does look like they've just screwed a 5mm male to male extender into it too. I know, I know, it's almost exactly what I said I wanted but I'm still not happy. Isn't that always the story?! At least they have the sense to realise there is a need for it. Cheers for pointing it out.
 
Associate
OP
Joined
22 Nov 2015
Posts
997
Location
Wales
Yes and no. They're a budget option. If that's what you're in the market for, fantastic...but the build quality isn't that premium quality you get from the more expensive brands. Functional more than stylish shall we say. Definitely a place in the market for them though.

With some components I'd be happy taking the chance but not sure it's worth the risk when there's water involved. For the sake of a couple quid extra wouldn't want to risk £1k of components... Says the lad who bought Monsoon fittings cos they're cheap :D

Still don't know why nobody does a tap with a male thread one end. Only saves 5mm length but it's almost always what you want, no?
Got any res ports on the back of the res (out of sight)? Wouldn't get you the last bit of the res or pump drained but would do most. You're not going to get the rad drained without tipping anyway.
Another option would be to make more of the drain. You could slap a 90 on the T and angle it down. Then run PETG downwards and have the tap (and safety stop on the end) out the way at the bottom somewhere where it doesn't disturb your clean lines.

Nothing on the back unfortunately, otherwise could just run it out the back out of sight and jobs a good'un.

That's not a bad idea to run a piece of PETG into the lower compartment mate but unfortunately it has just one problem: It would go straight through the middle of the dragon :(

I can confidently say it won't be the last time! :p
Apparently the best combo is Kryonaut in the normal place (between Integrated Heat Spreader [IHS] and water block) and CLU between IHS and CPU die. It is possible to remove the IHS completely but then you need special mounting kits and maybe some shims to stop the block crumbling the edge of the die...and the temperatures people have reported are higher anyway - assuming you're not using silly stuff like phase change and LN2.
The CLU is actually quite easy to apply. You just squeeze a tiny blob out of the syringe and it sits there as a ball on the CPU. Then you spread it with the little brush supplied. Tricky bit is that you have to put the IHS back on the top the right way round and then hold it in place while you drop the lever on the CPU socket - it slides otherwise.
I used some clear nail varnish to insulate the gold dot contacts on the top of the CPU. Might have been paranoid but a certain level is healthy, right?! :D
I'd say CLU is probably the cleanest of all the TIMs I've used....and I can always manage to get some on me/board/table/case!

Ah, that's not sounding anywhere near as bad as I thought. The whole 'liquid metal' thing just screamed "PITA ass to apply and blows **** up if not done perfectly", but if it's quite good to use I'll definitely have to look into it a bit more :)

Guessing if it slides there's a chance the liquid will also slide, dripping down onto a contact... You're losing me again!! Haha good shout on the nail varnish though, wouldn't have thought of that.

If you're THAT bad with normal paste but did the liquid metal tidily then it must be worth a look though right? :D

I bought a monsoon temp sensor too and it also arrived with no o ring! But mine threaded in fine.

Have you seen this guys?

https://www.overclockers.co.uk/bits...nd-1x-g1-4-rotatory-matt-black-wc-661-bp.html

Hmm, seems like mine wasn't a two-off then! Not looking good for quality control at Monsoon, who do they think they are? EK? :D

That's a good looking tap mate and one I'd somehow missed, definitely a bonus having a rotary connector rather than using a non rotary extension. Only problem is it also comes with Bitspower prices... If I hadn't already got 2 cheaper ones that would have quite possibly won my money though :)
 
Associate
OP
Joined
22 Nov 2015
Posts
997
Location
Wales
Had another spare few minutes today (sorry for another tiny update!) so the case grew some lumps :)

IMG_20170203_171542.jpg


IMG_20170203_171612.jpg


Unfortunately that is all for now. I was going to wire em up and also run some benchmarks on the GPU, but then remembered the U20's 6 Nations was on so got a bit distracted :D
 
Soldato
Joined
4 Jun 2007
Posts
2,618
Location
Watford, UK
Those aren't lumps, they're fins for improved aerodynamics! :D

And now back to the most delayed post in history - paused midway through it 8 hours ago!

That's not a bad idea to run a piece of PETG into the lower compartment mate but unfortunately it has just one problem: It would go straight through the middle of the dragon :(

Makes more sense with pictures (sitting in front of proper screens instead of mobile now). How about either:
1. straight down, bend tube 90°, passthrough fitting through motherboard tray and deal with it on the other side. Or
2. spin your t-piece so that it goes right to the rad and for the drain, left, bend 90° and through the opening in the motherboard tray to be dealt with at the back. Would match up with the direction of the other tubes better but both options require you to have space behind the tray.


Guessing if it slides there's a chance the liquid will also slide, dripping down onto a contact... You're losing me again!!

Apparently not. It's quite a thin layer so between surface tension (it forms a ball if you leave it alone!) and the pressure of the block pressing the IHS against the die, it seems to stay put. Mine hasn't gone bang yet! :D
Incidentally, the best thing I found so far to clean the remains of the black gunk that glues the IHS down is....a fingernail. Technical huh. Tried other things but they were either too soft (didn't touch it) or too hard (risked scratching the surface).

Haha good shout on the nail varnish though, wouldn't have thought of that.

You can also use thin electrical insulating tape....if you don't have your own supply of nail varnish for the weekends ;)
 
Associate
OP
Joined
22 Nov 2015
Posts
997
Location
Wales
Having it go through the motherboard tray under the reservoir ain't a bad idea mate, may have to give that one a try :D

Still not liking the sound of metal being that close to extremely expensive components though, think I need a big dose of 'man the **** up' lol although even Thermal Grizzly Kryonaut has got to be better than the rubbish Intel use as standard if I do wuss out :p

To the updates! Ran a quick GPU benchmark / stress test to make sure everything was working properly, with CPU @ stock, GPU @ stock and RAM @ XMP. The scores? Time Spy 7189 with a GPU score of 7649. Chucked the Temp & Power limits up to max and added a quick +46MHz onto the core for a quick test and it improved to 7237 (GPU 7717 / CPU 5353) without breaking a sweat, hitting 1987MHz. Fire Strike at the same clock scored 17956 (graphics 22873 / physics 13203 / combined 8666). Under water 2GHz+ should be fairly easy without causing any instability, so quite impressed so far :)

Only running a quick bench but couldn't resist a quick play to see what she's gonna look like lit up...

IMG_20170204_121337.jpg


Not sure why the green fans have such an awful blue tinge in pics (look far better in reality) but damn, Parvum did one mighty fine job of that dragon. Looks awesome lit up cheers guys :D #OneHappyCustomer

IMG_20170204_115254.jpg


IMG_20170204_115246.jpg


Back to work: Testing done, time to strip the card and fit the block. Backplate will have to wait until a later date.

IMG_20170205_090300.jpg


IMG_20170205_090331.jpg


Pfft, warranties are for pansies :cool:

IMG_20170205_090358.jpg


That's one fair sized blob of thermal paste...

IMG_20170205_090703.jpg


IMG_20170205_090740.jpg


That's better... :)

IMG_20170205_091633.jpg


The EK stuff might be adequate, but adequate wont do, so Thermal Grizzly it is :D

IMG_20170205_092100.jpg


Naked board. Why do they always look so good without the fugly plastic covers?

IMG_20170205_092421.jpg


IMG_20170205_093500.jpg


Mmmmmmmm, sexy block is sexy :cool:

IMG_20170205_095252.jpg


That's it for today, now need to figure out how I'm going to route the bottom loop... Almost be a shame to hide the motherboard after time spent painting it but gotta be done!

IMG_20170205_103802.jpg


Going to mount the bottom reservoir underneath the GPU. I know some people are going to hate the look of this, but hey, I said from the beginning this was going to have some 'different' design ideas :D

Just need to decide which way the legs should face now... First one looks more balanced, so going with that :p

IMG_20170205_101357.jpg


IMG_20170205_101526.jpg


Quick 1½mm spacer under each 90° and jobs a good'un :)

IMG_20170205_101422.jpg


Other option was the taller, simpler mounts, but not sure I'm really liking that so much, stands far too high off the floor.

IMG_20170205_101844.jpg


Plan is to run a straight tube from pump to GPU, then have a 90° off the right hand port with a pipe running parallel > 90° bend through into lower compartment, mirrored again from one of the centre ports of the reservoir. Thoughts? Nice idea or fugly bodge job?
 
Soldato
Joined
4 Jun 2007
Posts
2,618
Location
Watford, UK
Still not liking the sound of metal being that close to extremely expensive components though, think I need a big dose of 'man the **** up' lol although even Thermal Grizzly Kryonaut has got to be better than the rubbish Intel use as standard if I do wuss out :p

It probably would be...but you won't do it for the same reason that didn't go for the '[more than] good enough' 1070 or the 'good enough' 3.5mW/K EK thermal pads. Once you mask off the contacts on the top of the cpu (green board part) there's nothing else to short out for quite some distance. It would have to escape the confines of the IHS, travel across the cpu, find its way out of the socket, onto the motherboard and then be enough of it to bridge some traces...which are probably insulated by the top-coat on the board anyway. If you've put that much too much paste on the top of the die, you're gonna have problems getting the IHS back on the top!


Not sure why the green fans have such an awful blue tinge in pics (look far better in reality) but damn, Parvum did one mighty fine job of that dragon. Looks awesome lit up cheers guys :D #OneHappyCustomer

Think you had trouble with the fans looking the wrong colour in pics before. As long as they look good in the flesh fin, it's all good. Dragon looks really nice.

Pfft, warranties are for pansies :cool:
Most of them will honour the warranty if you block up a card. As long as you've not obviously done something stupid, that is. They'll probably want the original heatsink and fan back on it - whether that's for completeness, their testing or a knowing plausible deniability I'm not sure.


That's better... :)

They ditched the metal frame around the GPU? :eek: I'll admit that it was a pain to clean the goop out from the edges and the corners...but it looked sort of cool. Different from just another CPU/GPU/APU/FPU.

The EK stuff might be adequate, but adequate wont do, so Thermal Grizzly it is :D

Cool. Hadn't spotted those existed. There are 'better' ones available but the price gets ridiculous. Looks like those are a good balance between cost and performance. Two different thicknesses presumably....unless the block for the 1080 only requires one - it was 0.5mm and 1mm for the 980Ti.

Naked board. Why do they always look so good without the fugly plastic covers?

Because the heatsinks and fans are so big....and we've all been conditioned by Apple (and others) to see slim and clean as beautiful.

Going to mount the bottom reservoir underneath the GPU. I know some people are going to hate the look of this, but hey, I said from the beginning this was going to have some 'different' design ideas :D

Just need to decide which way the legs should face now... First one looks more balanced, so going with that :p

Did you try the third way which would be to have the legs spread (no innuendo intended)? Like this > <
Otherwise, the first one.

Other option was the taller, simpler mounts, but not sure I'm really liking that so much, stands far too high off the floor.

Nope. Not unless you were going for a more industrial look....and then the green pump cover would need to be black or chrome. Look at me talking colours like I've got a Scooby!


Plan is to run a straight tube from pump to GPU, then have a 90° off the right hand port with a pipe running parallel > 90° bend through into lower compartment, mirrored again from one of the centre ports of the reservoir. Thoughts? Nice idea or fugly bodge job?

I think I understand what you mean. You might want to consider soft tube from pump to gpu - with the same 90's as you've got. It'd just give the pump some vibration isolation and you wouldn't see it anyway - or if you do it'll be straight and clear and you won't notice the difference. You'd need some rubber under the feet or between the feet and pump/res too. Depends how much the noise irritates you - me, it's a fairly personal vendetta.

If you have the exit pipe from the gpu running horizontally across the case, it will match up with the other horizontal pipes that are parallel. When it then bends 90° downwards, it'll be parallel (bends willing!) to the drain tube's downward section.
The tube from lower compartment to res will presumably follow this in parallel. Looks like there will be pass-throughs and step-drills on your shopping list!
 
Back
Top Bottom