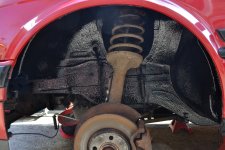
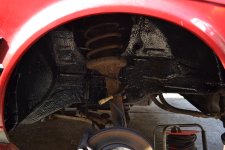
** Acme [Akagi] bought a pink estate car - E30 325i project log! **

Slow progress really, welding commences next weekend, two day welding extravaganza... Hoping to get most of it finished off!

Car has two new wings fitted, sadly the wrong shade of red but they are solid and will be fine until the car gets sprayed at some point in the future.

Collected the exhaust mentioned above, at the same time collected an IS front lip, a new passenger side scuttle trim, a new fuel filler neck (mine is probably rotten, not sure yet), new coolant cap, and a new boot spoiler.

Also ordered new AP shocks, new AP lowering springs, new Meyle HD top mounts, new rear drop links, and new poly rear subframe bushes. Front links etc have already been done and arms and other bushes seem OK for the time being.

Did a quick photoshop of what I'm aiming for the car to look like this show season:

T9j68Yi.jpg

(IS lip, wings will be the wrong colour during the shows so I thought I'd stick some yellow film on the inner lamps to try and draw attention away from it, will re-fit my clear indicators so it doesn't look like a fruit salad with the yellow orange and red, and lowered it to the approximate height I think it will be with the new suspension fitted.)

Don't worry, in time the panels will all be the same colour again, the yellow tints will be binned, and the OEM indicators will go back on... Just something I want to try. :p

Next update will hopefully be more rot and gape and welding. :eek:

Oh and in case you wondered what it sounds like with no exhaust...

 
Last edited:
Rot chopping in the rain again... Didn't take pics of the finished welds before slapping loads of seam sealer and paint on top... Which is a shame cos they were pretty. :p

NW8rYor.jpg

mETZH7p.jpg

ztJyqZU.jpg

HfYrTJk.jpg

plRTPiq.jpg

plbiEhs.jpg

0Me56ZV.jpg

The before pic corrupted sadly but here's a #chop from under the fuel filler neck.

fq4M3L5.jpg

YVj4wcR.jpg

And done...

4z3tBUe.jpg

LerBngP.jpg

S9ZOHX7.jpg

HYNUofg.jpg

HJxPJ7F.jpg

XBOGUSo.jpg
 
Jammy. :p

Also a fire started behind the rear strut tower and we couldnt get to it to pat it out, it quickly escalated, and there was a frantic scrabble for the hosepipe. Now the interior is a little wet. :o
 
Last edited:
£60 of paints and shizzle ordered... 2 litres of underguard which should be enough to do all the arches and the inner sills off of a gun, some chassis black, and a bit more zinc primer...

Recommendations for easy to work with body filler anyone? c:
 
Great I'll look into it. Thanks!

While we are at it, any decent companies for colour matched cans which don't suck? I know the paintwork is old and faded so even a perfect match won't look quite right, but the eBay cans and the Halfrauds cans I've tried before were both far too orange even for how the paint would originally have looked...

Need to do one rear quarter and a bit of both sills at the very least. Possibly then the front wings and a couple of other bits if I can get a decent finish!
 
Yes - Rage Gold, Rage Ultra or anything else really from the Evercoat range is genuinely good and absolutely worth the money compared to generic cheap filler.

https://m.youtube.com/watch?v=Fj8H340g5Xk

Blimey £100+ quid for a tin! :eek:

How far will 3 litres of it go? What is its shelf life? :)

Any UK suppliers to avoid the £40 postage, who don't charge over £130 a tin? :p
 
If you're trying to save but still get a good product, EZ Ultra Lite is readily available over here. I've used it myself, it's very nice filler.

If its worth it I'll buy it, I just didn't realise decent body filler was so much! Appreciate the advice. :)

Its £20 a tub vs £100 a tub. Is the difference at all justified? Bearing in mind it will be my first time using filler so I doubt I'd notice the difference when working with it? :p

In other news, my suspension arrived!

Excited to get it fitted, but I feel like I should wait until the welding is done..... :p
 
Last edited:
zsdiLt0.jpg

Cleaned out the other arch, seam sealed and primered, stone chip and chassis paint to go on top still...

XpfjqGI.jpg

c2ZXEBn.jpg

8sFsx5p.jpg

Found more rot (surprise surprise!)

bD4uHFQ.jpg

YVgyPeS.jpg

zSBmalQ.jpg

Oooh shiny! Also featuring Hovis. :cool:

rKHQZrQ.jpg
 
There is that much variation because the front wings are not the same paint code! :p

They were until recently. The original wings got binned because they were rotten. And the photoshopped image above included an edit to change the tone of the front wings. (in the original pic they matched!) :)

Good to hear the Meyle HD stuff is supposed to be good! I just bought them cos they were a good price and I recognised the brand.

The rust replacement procedure wasn't planned, I keep finding more... Finding it all is my job, I just pay him to melt metal! Every now and then I find another bit that the screwdriver goes through, then out comes the rot pick and I turn it into a nice big hole... :eek:
 
Last edited:
Seam sealing is now nearly complete... Next step, stone chip and chassis black paint... Then bodywork. My dear Nan has kindly given me some money to get it finished, despite my protestations that I can afford it etc :p

So I think I may put that to use by taking it to a bodyshop to do the skimming and sanding... :)
 
New radiator now on the way, brand new Nissens one. I think the water pump and thermostat should be OK because they were done along with the timing belt about 6000 miles ago.

Intend to flush the system out and fit the new radiator. Might be beneficial to replace some hoses too!
 
Cavity waxed the inside of the sills with some fancy nancy Ditrinol stuff thats too expensive for its own good.

Also stone chipped the inner arches and painted with chassis black, as well as stone chipping the sill lips and spraying them with chassis black as well.

Front end of the car is now attached properly, and I've done the panel gaps etc.

[pic removed]

PEPVfmZ.jpg

i0y4tTm.jpg
 
Last edited:
Oh and I fixed my wobbly headlight and filled a hole in the scuttle with some seam sealer to stop water from getting into the cabin. That bit can stay there til re-spray time cos the screen will need to come out.

MOT time is getting ever closer... Bit more welding, bit of filling and sanding, bit of painting, put the exhaust on, put the interior back together, done. :)
 
Back
Top Bottom